
ITD
Festiva Roll Cage Installation
Pictures are from ITD Festiva racer Tim DeRonne and show his latest roll cage design. One important element of the roll cage design was to keep weight to a minimum and to maximize effectiveness of the tubes.
|
|
|
|
|
|
|
|
|
|
|
|
|
|
|
|
|
|
|
|
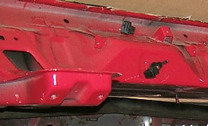
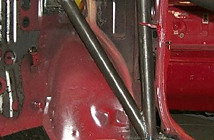

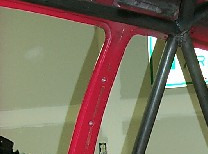
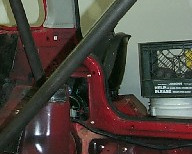
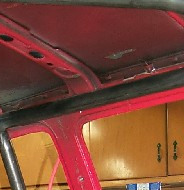
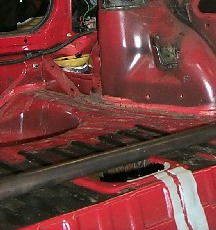
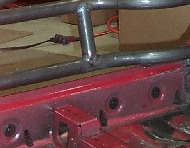
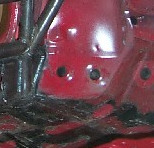
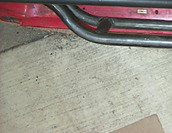
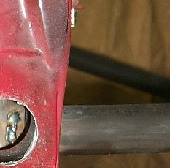
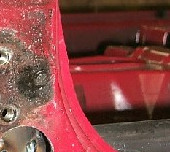
The forward brace follows close to the A-pillar and is welded to the strong rocker box section. Rules (SCCA Improved Touring) allow only 8 mounting points, if this wasn't the case, the cage would be fully welded, to the A-pillar for example. Stiffening of the rocker box is achieved this way, rather than a floor mounted cage. Also much safer, since in reduces the chances of the brace leg punching through the floorpan in a severe event. Notice the flat plates, which is used to spread the load along the box section and floorpan. The door diagonal meets the forward place at the same location as the short forward brace. The dash brace running across is tucked forward to the firewall.
|
|
|
|
|
|
|
|
|
|
|
|
|
|
|
|
|
|
|
|
|
|
|
|
|
|
|
|
|
|
|
|
|
|
|
|
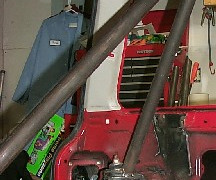
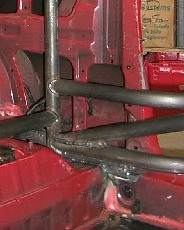
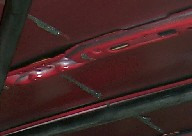
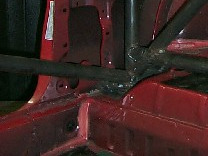
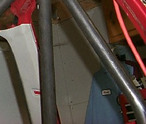
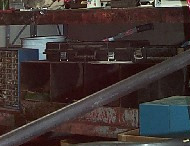
Pictures of main hoop shows several braces that converge at the lower mounting point. The "set-back" of the main hoop accomplishes two things. One, the mounting point is located right above the rear axle trailing arm pivot. And two, allows some extra head room. One interesting feature of Tim's design is the lower crossbar which enhances rigidity and side impact load distribution. It also lowers the center of gravity by some degree (important for racing). Rear braces tie in to the top of the shock towers. The rear braces are not triangulated, a comprimise for weight savings. A harness bar and seat support will be added when the seat in mounted.
|
|
|
|
|
|
|
|
|
|
|
|
|
|
|
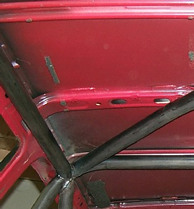
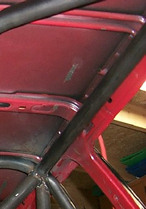
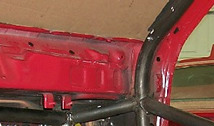
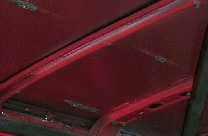
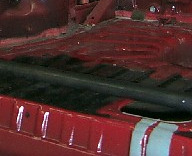
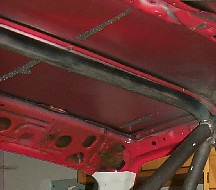
The top roof diagonal orientation is also worthy of note. This is the safest way (especially for those who may be inclined to run a full cage on the street). Note how all bars are very tight to the roof. Good for both safety and structure (recall cage can't be welded to the roof per the IT rules).
|
|
|
|
|
|
|
|
|
|
|
|
|
|
|
|

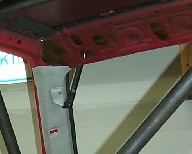
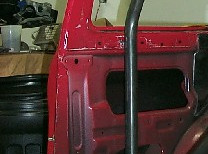
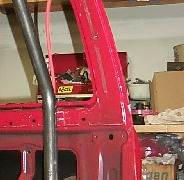
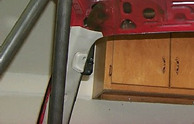
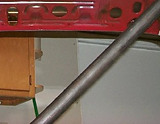
Driver side door protection bars for Tim are clearly evident. The position offers extra protection where most likely where a car would hit in a side collision. Again, this also keeps the center of gravity lower than using the traditional NASCAR style bars which almost go up to the bottom of the door window opening.
|
|
|
|
|
|
|
|
|
|
|
|
|
|
|
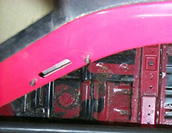
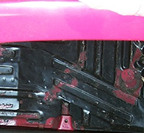
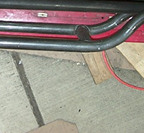
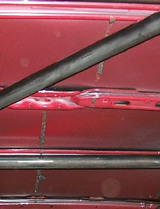
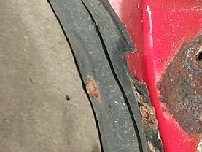
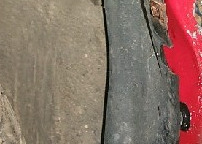
Notice that the side protection bars protrude out. all the way to the door skin. Not shown in these photos is that the stock side intrusion beam (in the inner door cavity), which is left intact. It is just above these added bars.
|
|
|
|
|
|
|
|
|
|
|
|
|
|
|
|
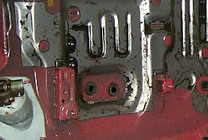
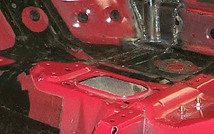
Close fitting roll cages are professional in my opinion. One of the issues you encounter though is finding room around particular joints in order to have a complete 360 degree weld. To accomplish this sometimes means making a new access hole like Tim did using a holesaw.
Article Author: Tim DeRonne
Copyright © 2004 Ford Festiva Com -All Rights Reserved
*Except:
Article text courtesy of Tim DeRonne. Images courtesy of Tim
DeRonne.