Instrument Panel
Removal
1. Disconnect the negative battery cable.
2. Remove the steering wheel. Refer to «Section
11-04».
3. Remove the combination switch assembly. Refer to «Section
11-05».
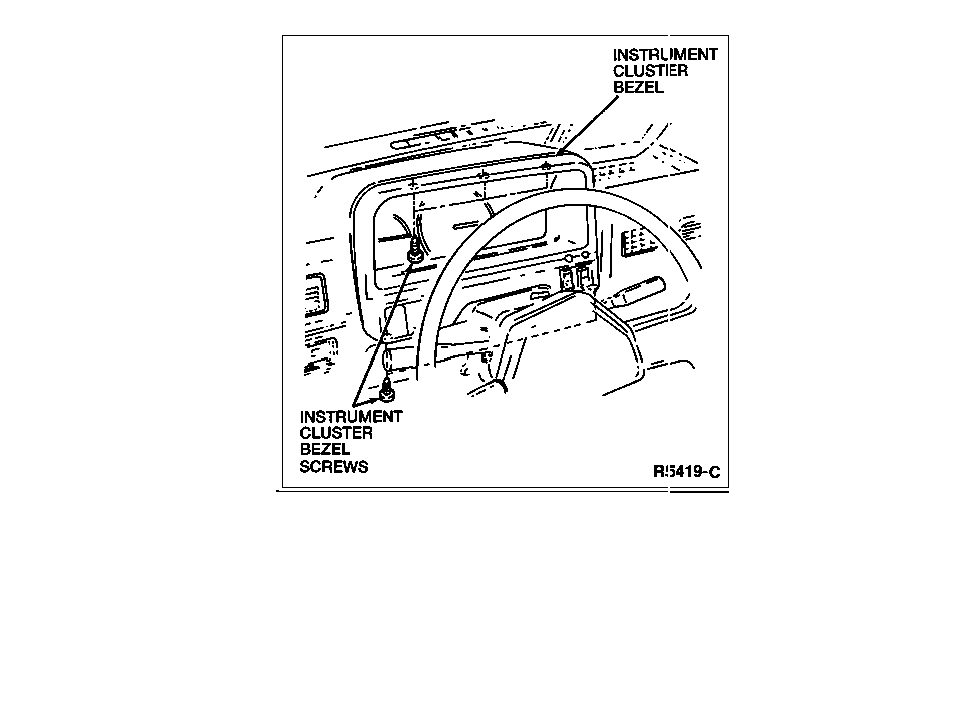
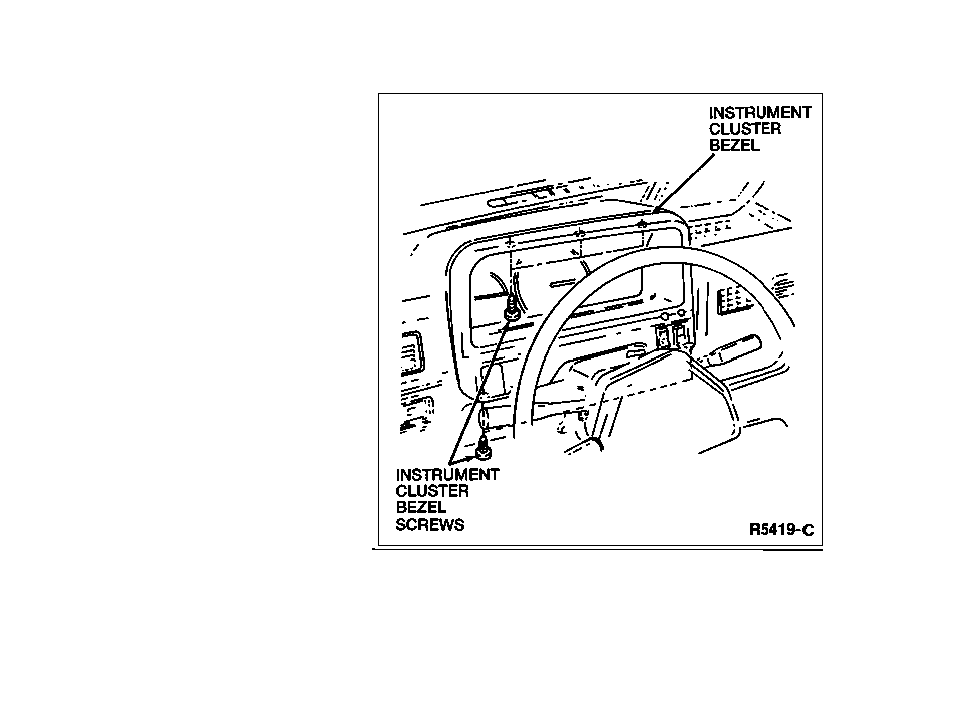
4. Remove the five screws securing the instrument cluster bezel and pull the
bezel out of the instrument panel.
5. Disconnect the electrical connectors from the switches on the instrument
cluster bezel.
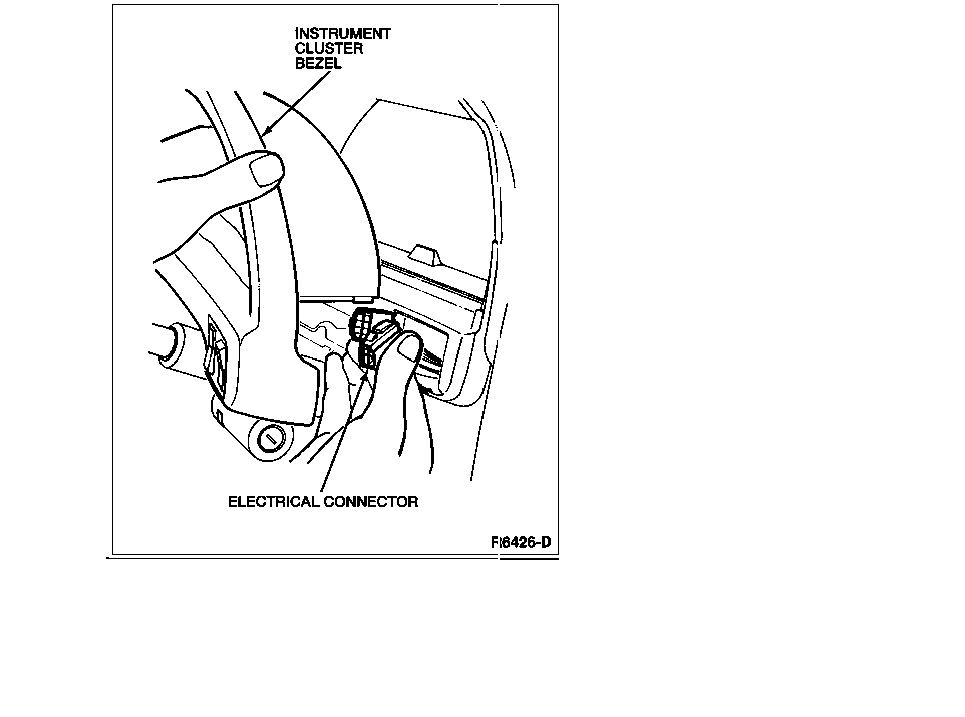
6. Remove the instrument cluster bezel.
7. Remove the left and right heater ducts. Refer to «Section
12-02».
8. Disconnect the speedometer cable from the transaxle.
9. Remove the four instrument cluster screws and the instrument cluster.
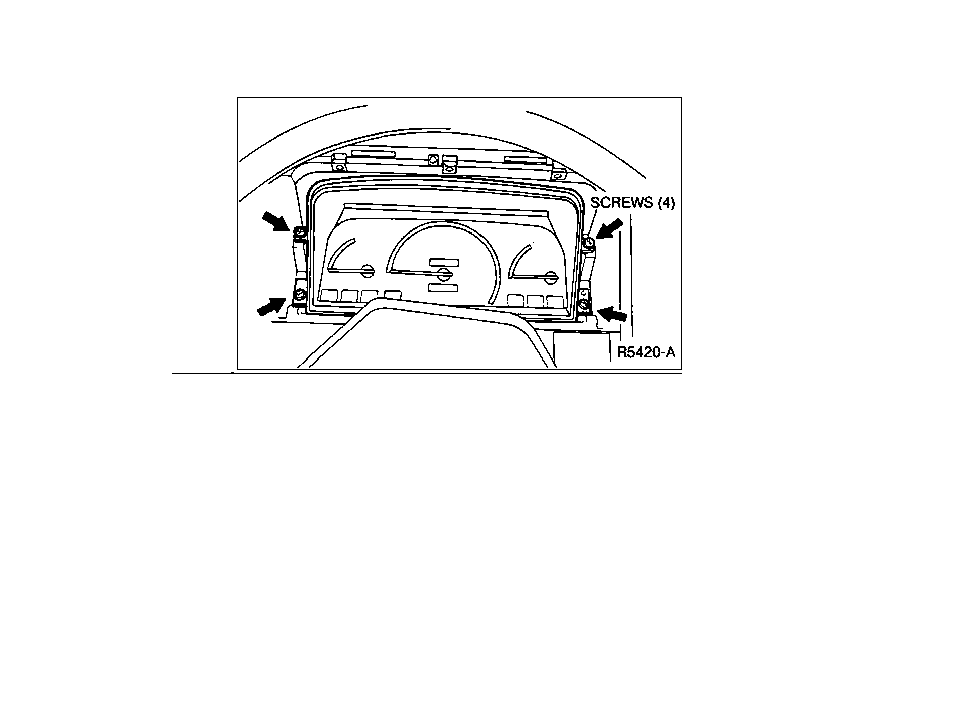
10. Pull the instrument cluster out of the dash slightly.
11. Lift the lock tab and disconnect the two instrument cluster electrical
connectors.
12. Press the lock tab and disconnect the speedometer cable from the instrument
cluster.
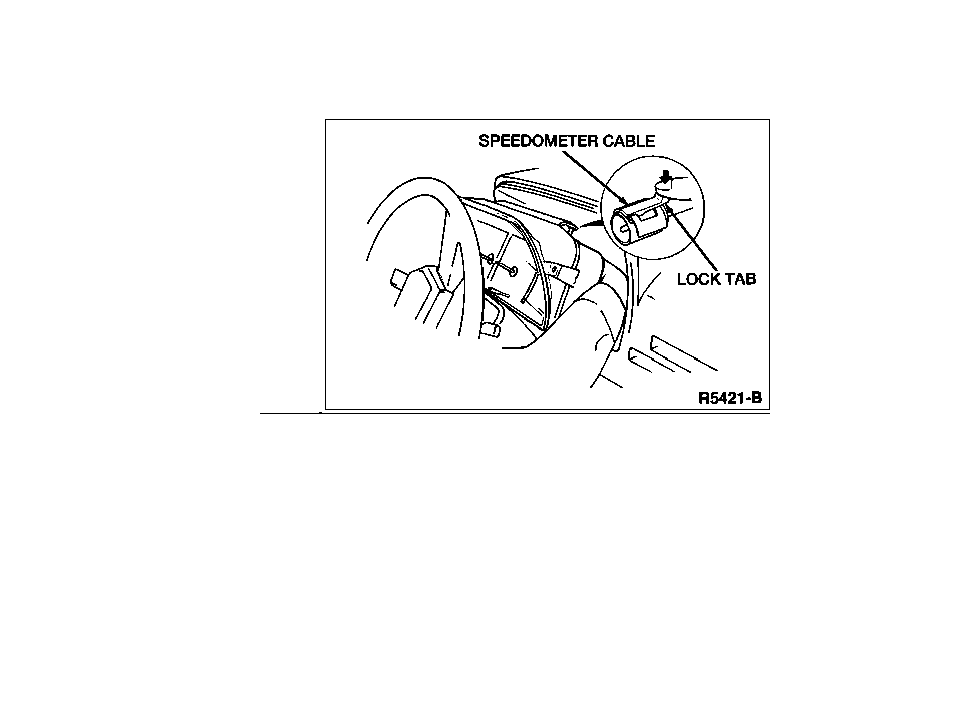
13. Remove the instrument cluster.
14. Remove the four shield nuts.
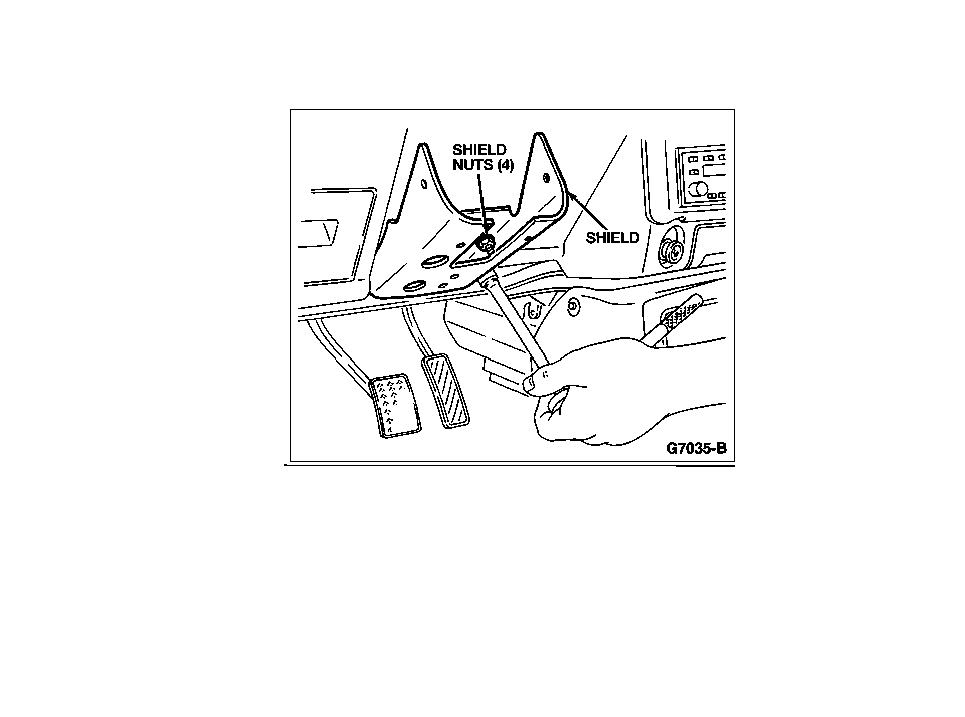
15. Remove the shield.
16. Remove the two shield bracket bolts.
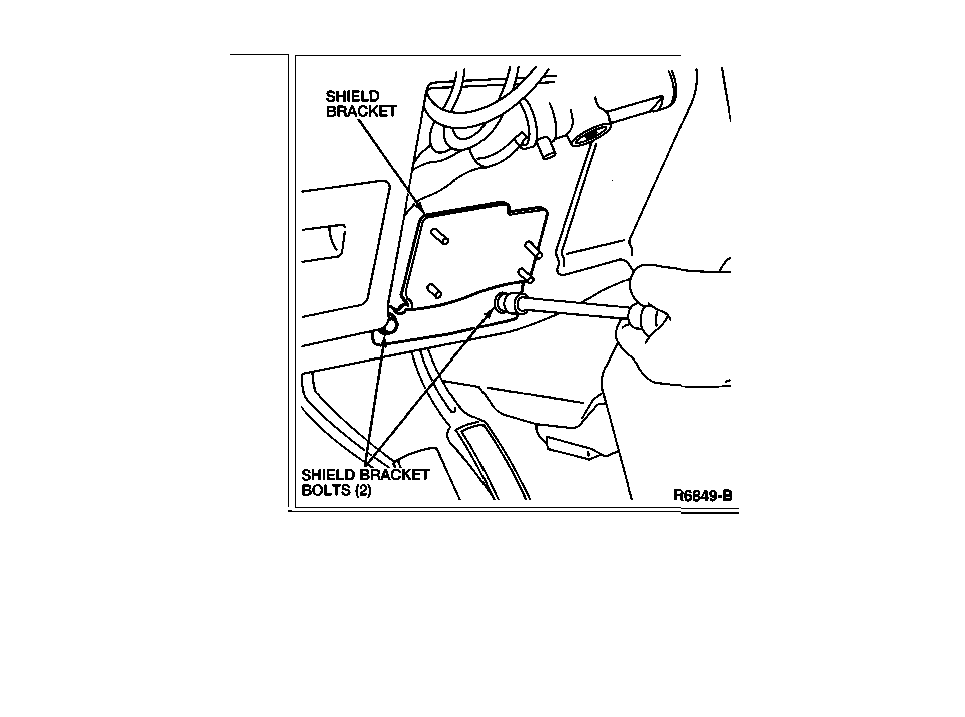
17. Remove the shield bracket.
18. Remove the two attaching screws securing the glove box hinges to the glove
box.
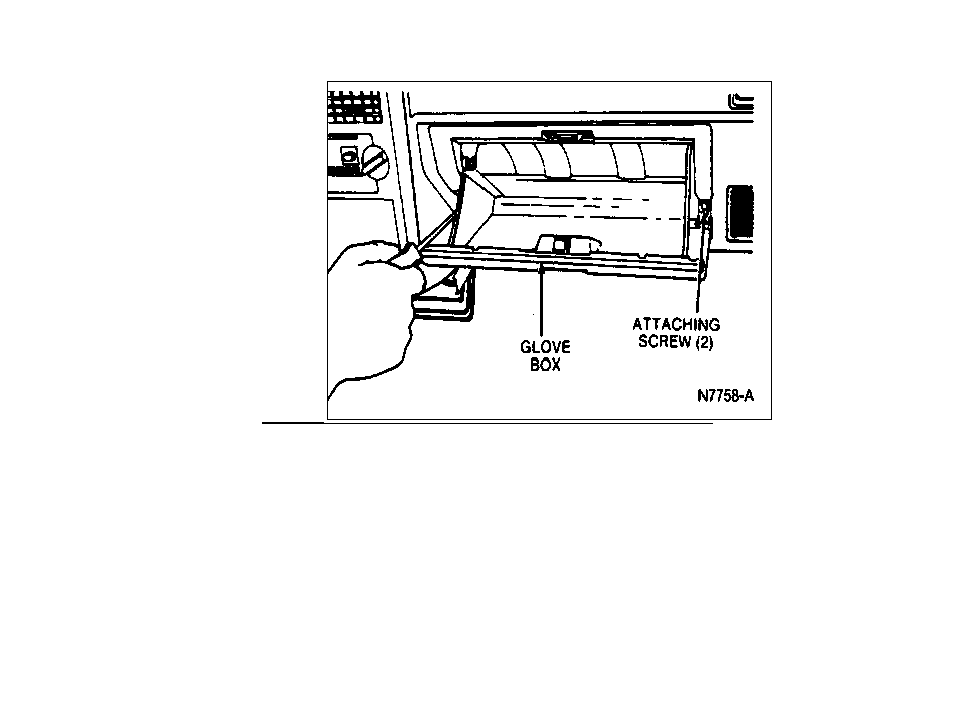
19. Remove the glove box.
20. Open the fuse panel cover.
21. Remove the two fuse panel screws.

22. Push the fuse panel forward, but do not remove the fuse panel.
23. Remove the shift lever console. Refer to the procedure in this section.
24. Remove the two support bracket bolts and nut.
25. Remove the support bracket.
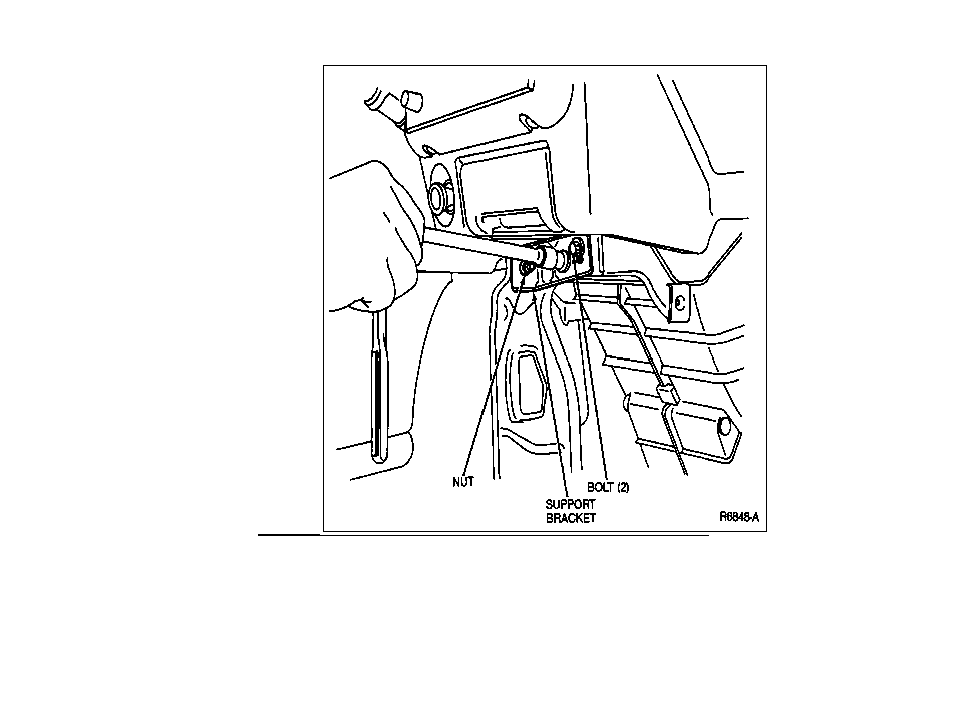
26. Remove the radio (if equipped). Refer to «Section
15-01».
27. Remove the heater/A/C control assembly. Refer to «Section
12-02».
28. Disconnect the cigar lighter electrical connector.
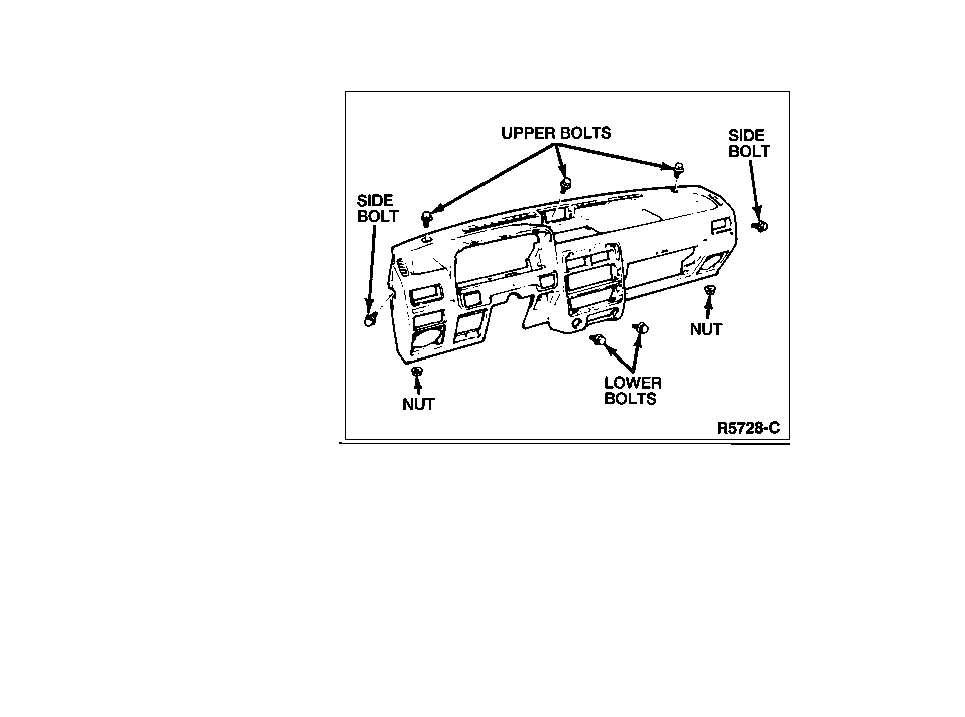
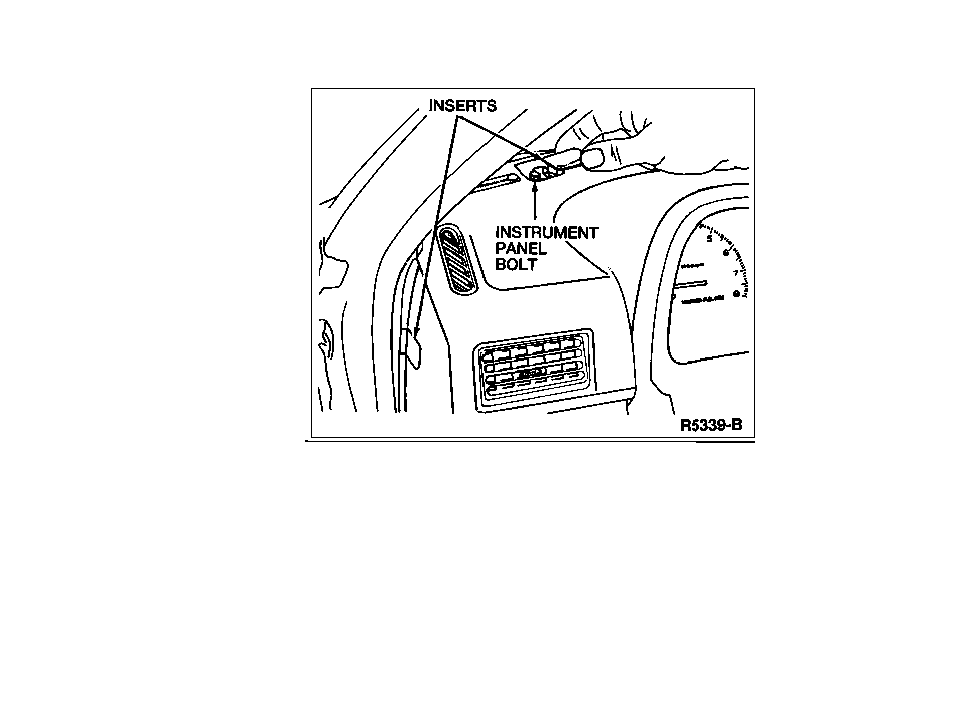
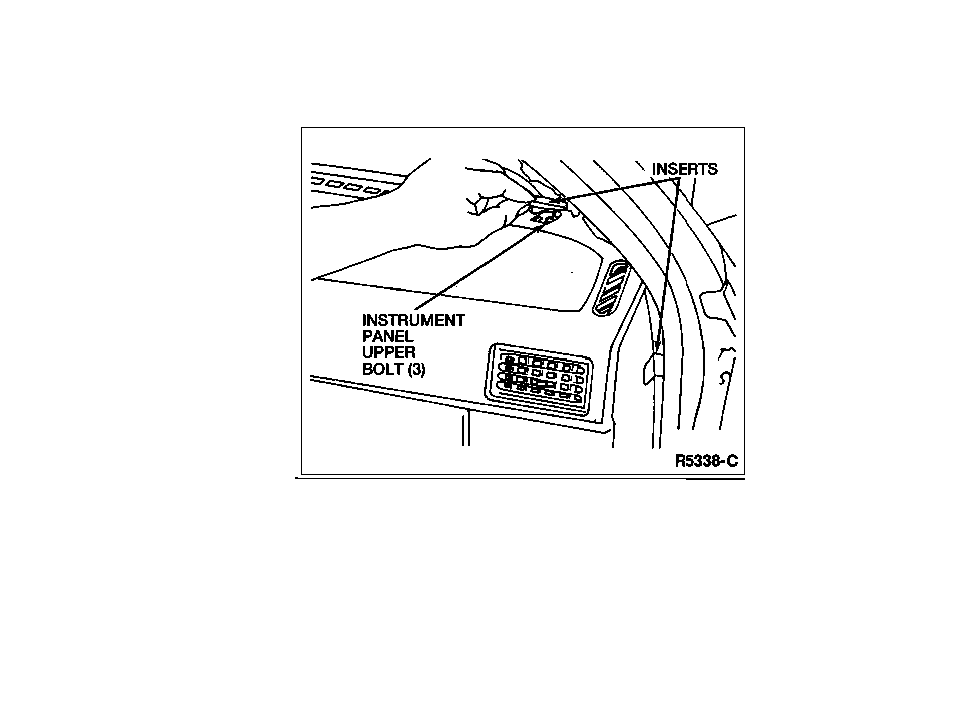
29. Remove the snap-in trim inserts concealing the five instrument panel upper
and side bolts.
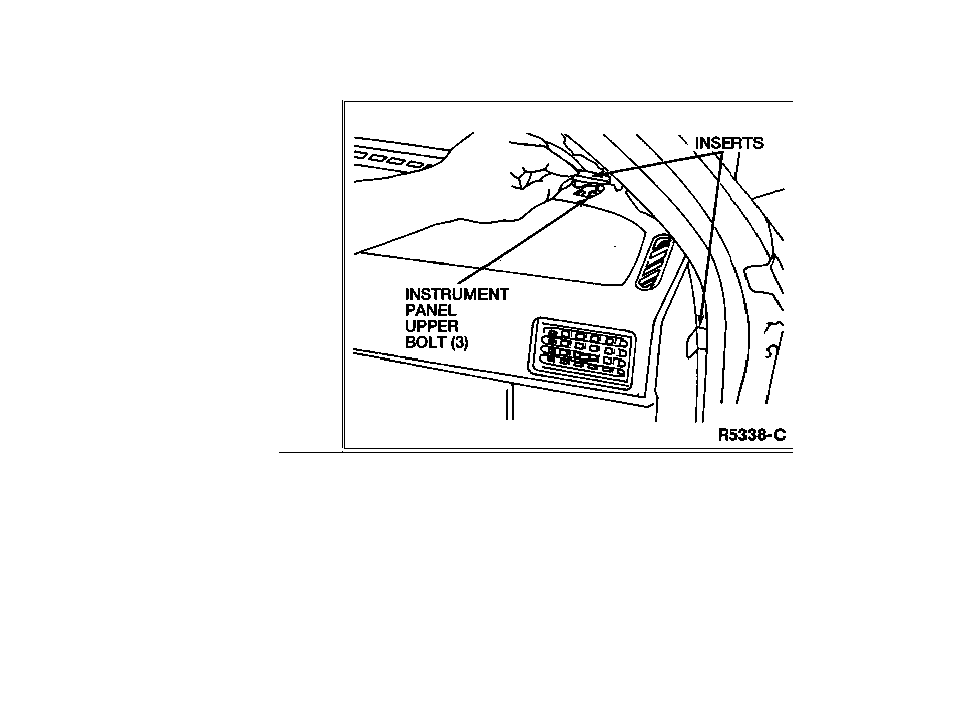
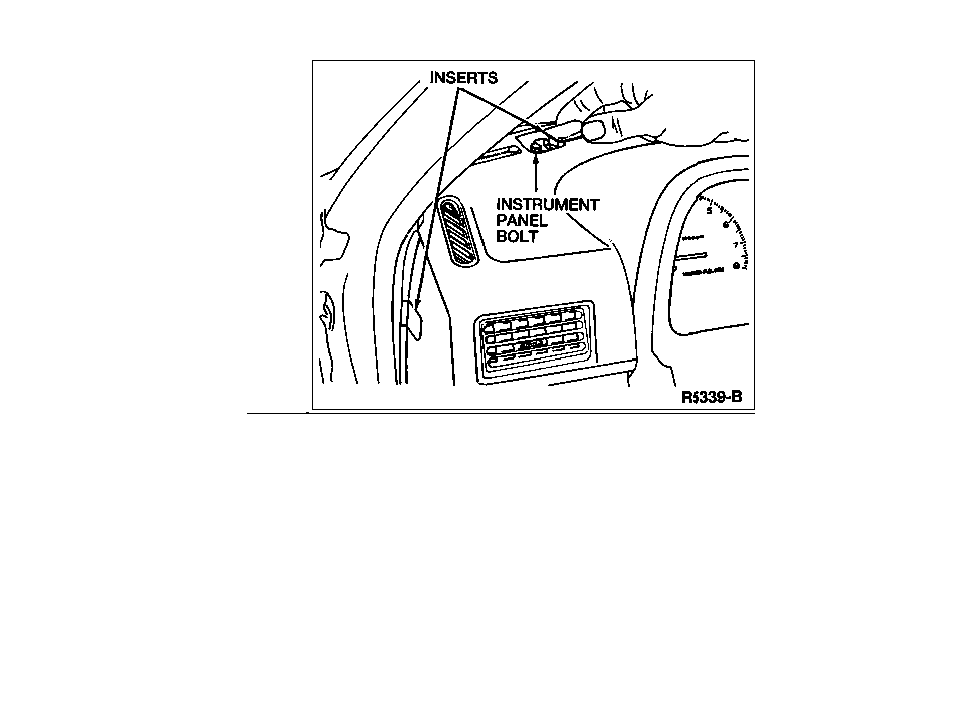
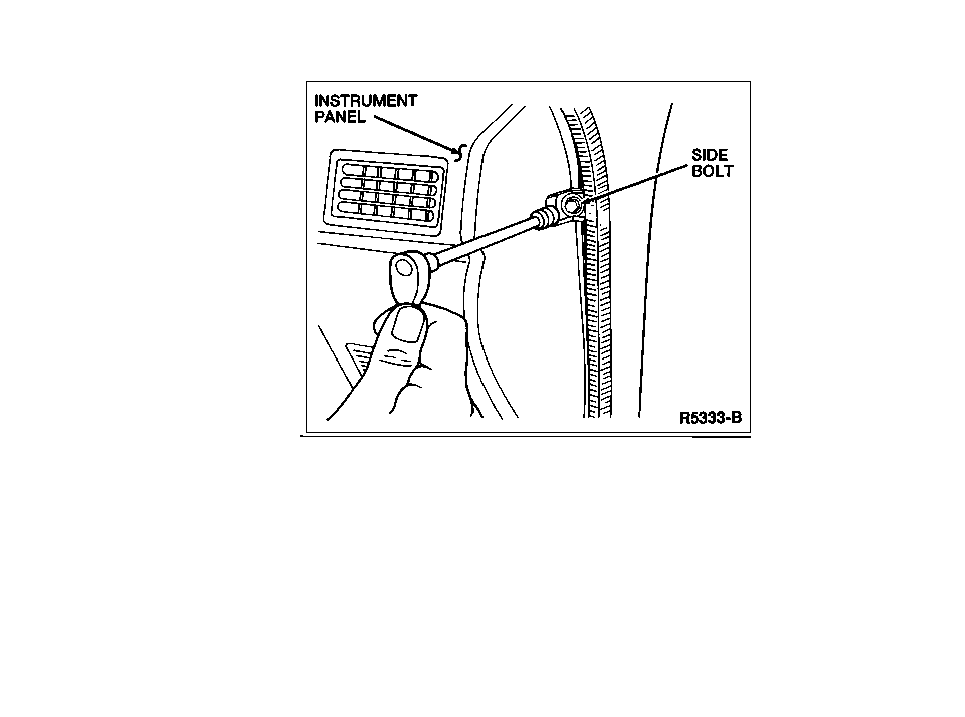
30. Remove the two side and three upper instrument panel bolts.
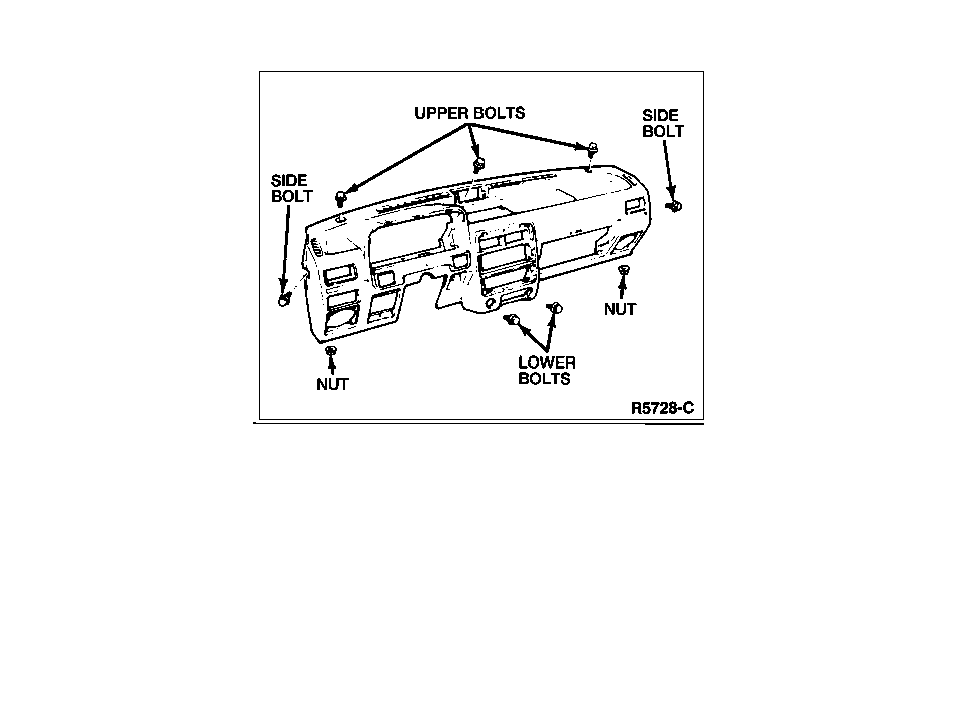
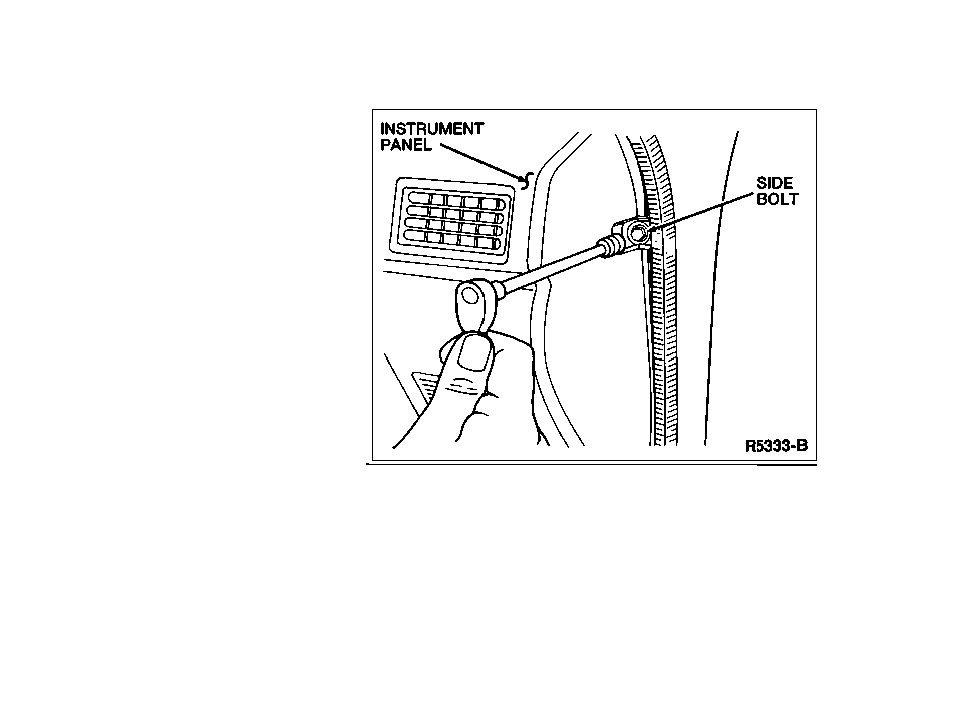
31. Remove the two instrument panel nuts.
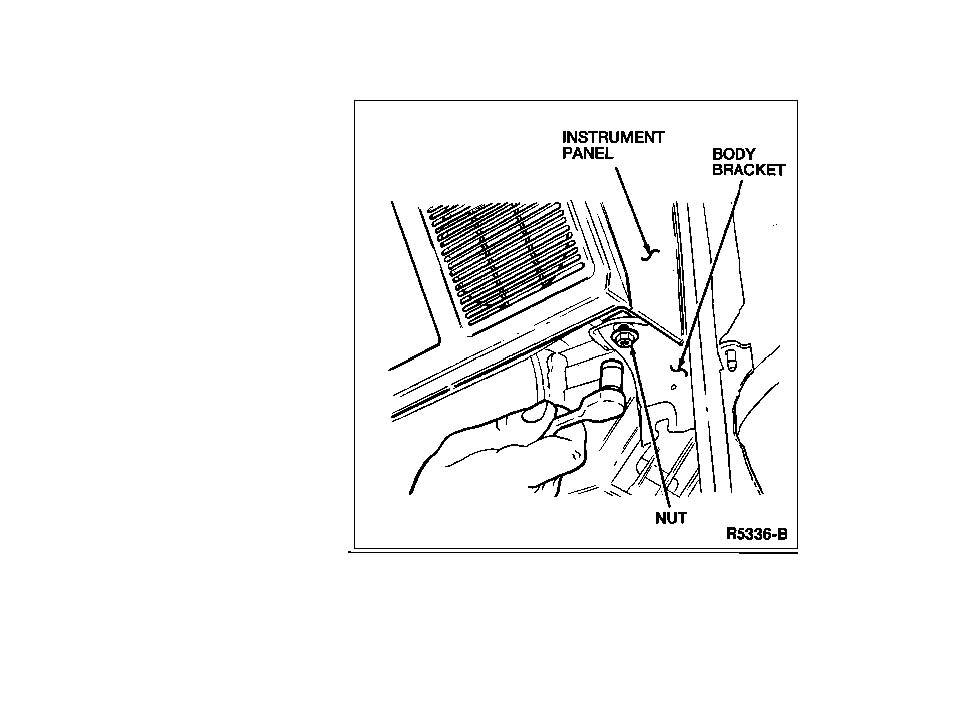
32. Disconnect the instrument panel electrical connectors.
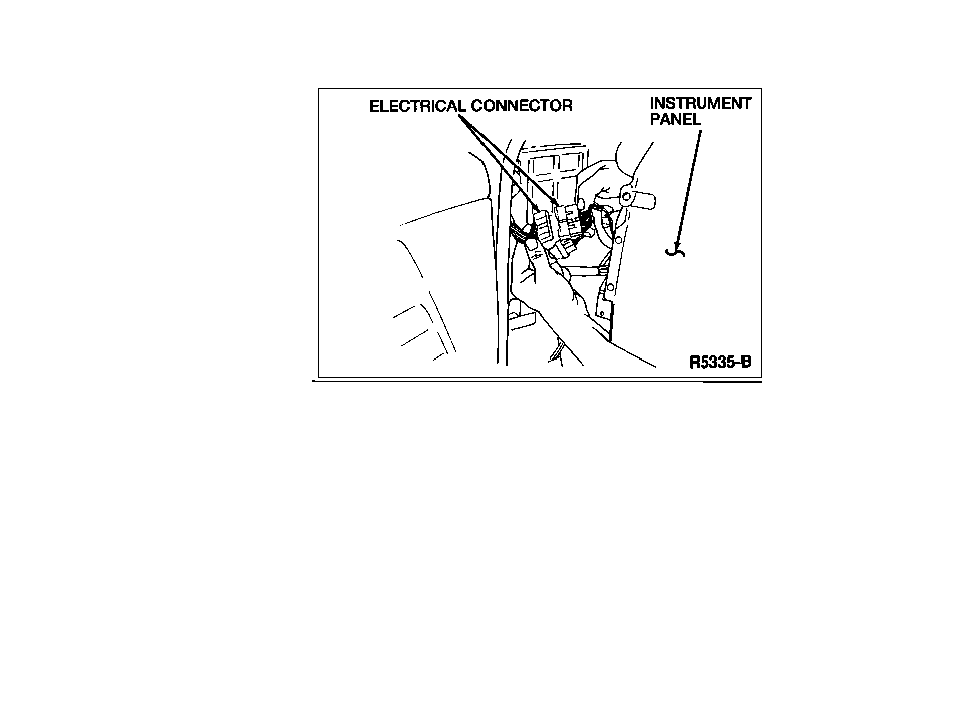
33. Remove the instrument panel.
Installation
1. Install the instrument panel.
2. Connect the instrument panel electrical connectors.
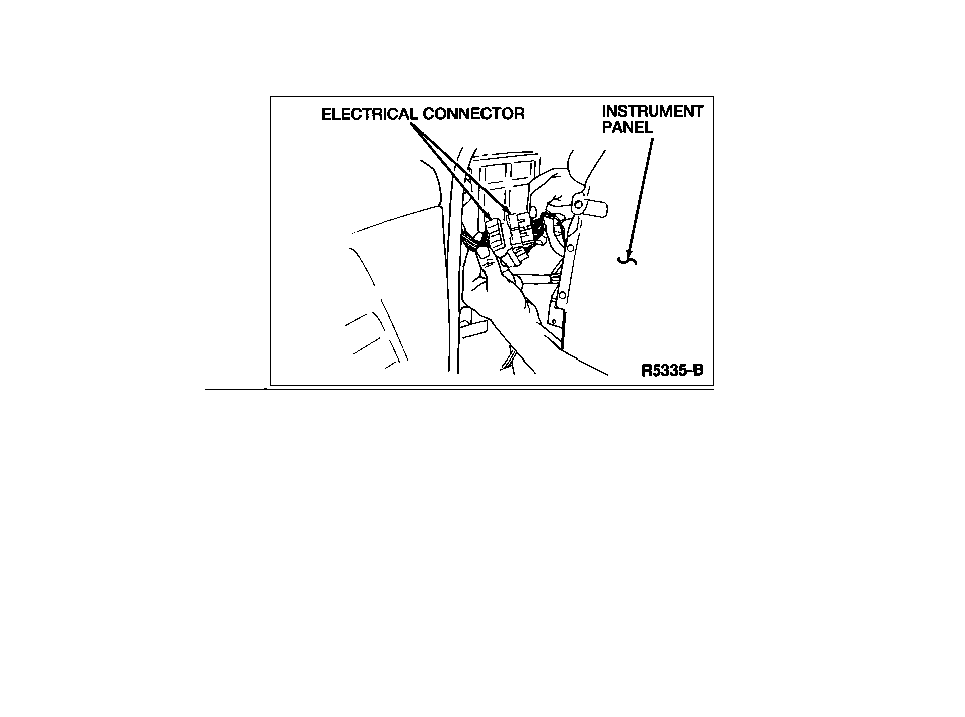
3. Install the two instrument panel nuts. Tighten the instrument panel nuts
to 8-11 N-m (6-8 lb-ft).
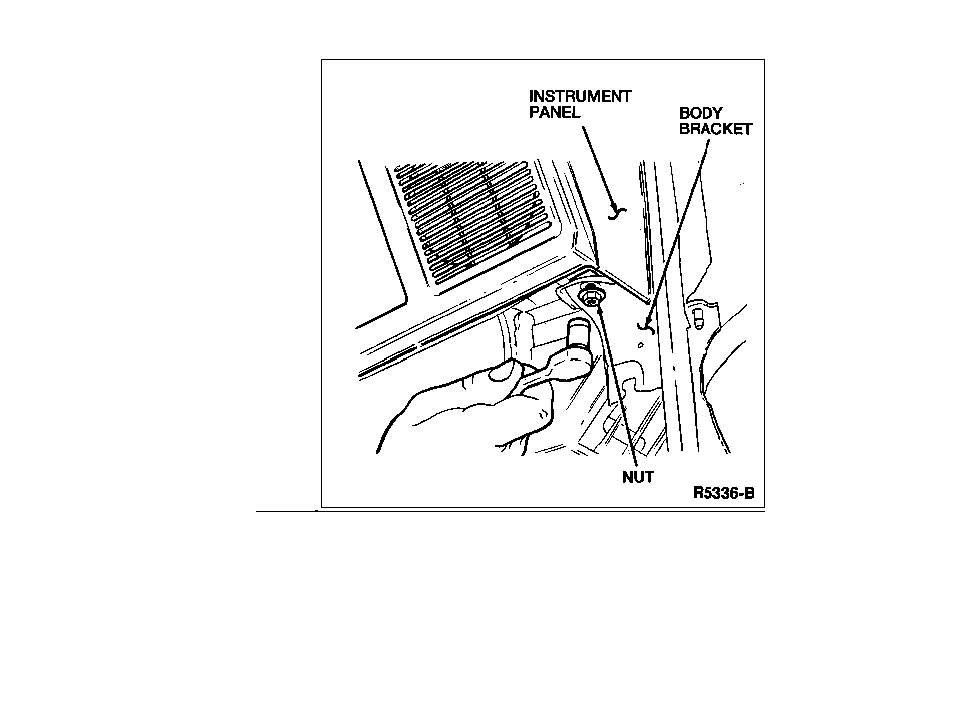
4. Install the two side and three upper instrument panel bolts. Tighten the
instrument panel side bolts to 9-13 N-m (7-9 lb-ft) and the instrument panel
upper bolts to 4-6 N-m (3-5 lb-ft).
5. Install the snap-in trim inserts concealing the five instrument panel
upper and side bolts.
6. Connect the cigar lighter electrical connector.
7. Install the heater/A/C control assembly. Refer to «Section
12-02».
8. Install the radio (if equipped). Refer to «Section
15-01».
9. Install the support bracket.
10. Install the two support bracket bolts and nut.

11. Remove the shift lever console. Refer to the procedure in this section.
12. Reposition the fuse panel and install the two fuse panel screws.

13. Close the fuse panel cover.
14. Position the glove box on the instrument panel and install the two attaching
screws.
15. Install the shield bracket and the two shield bracket bolts.
16. Install the shield and the four shield nuts.
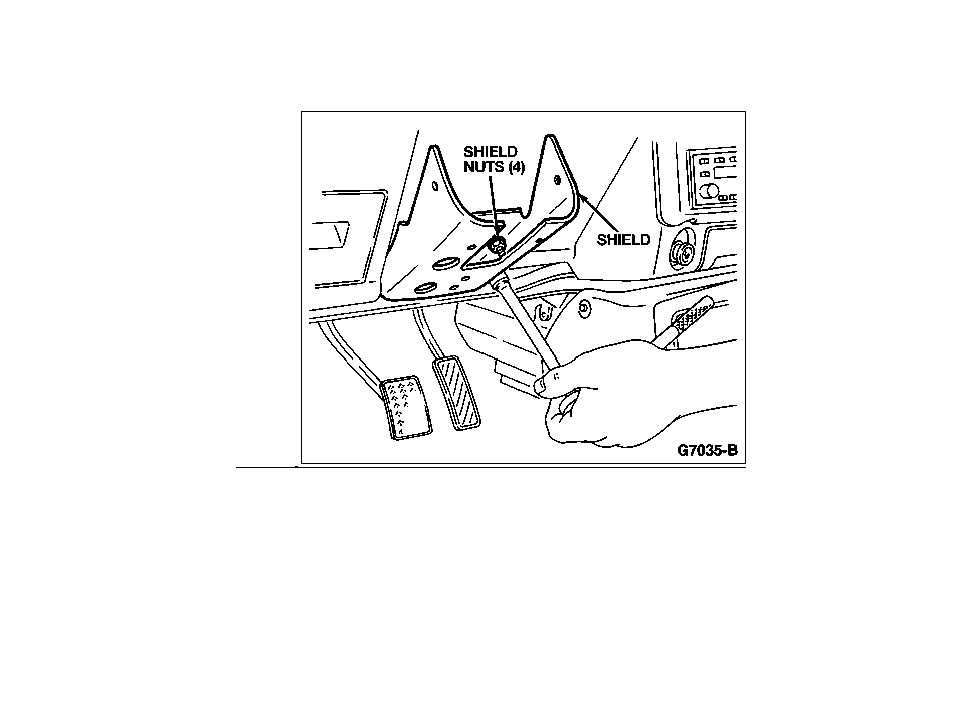
17. Install the instrument cluster.
18. Connect the speedometer cable to the instrument cluster.
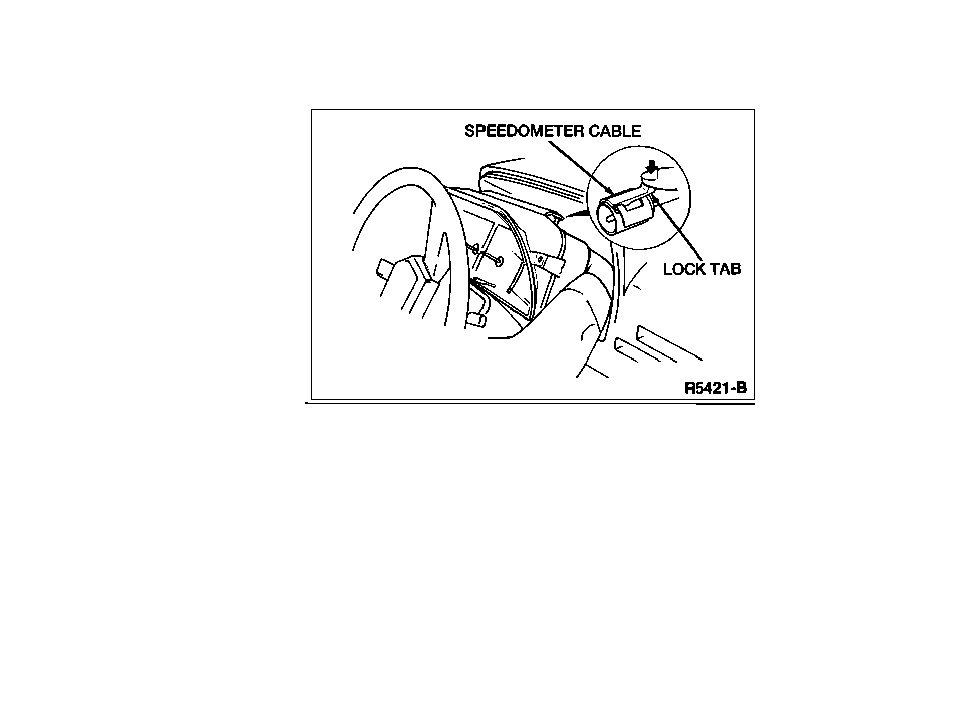
19. Connect the two instrument cluster electrical connectors.
20. Position the instrument cluster on the instrument panel and install the four
instrument cluster screws.
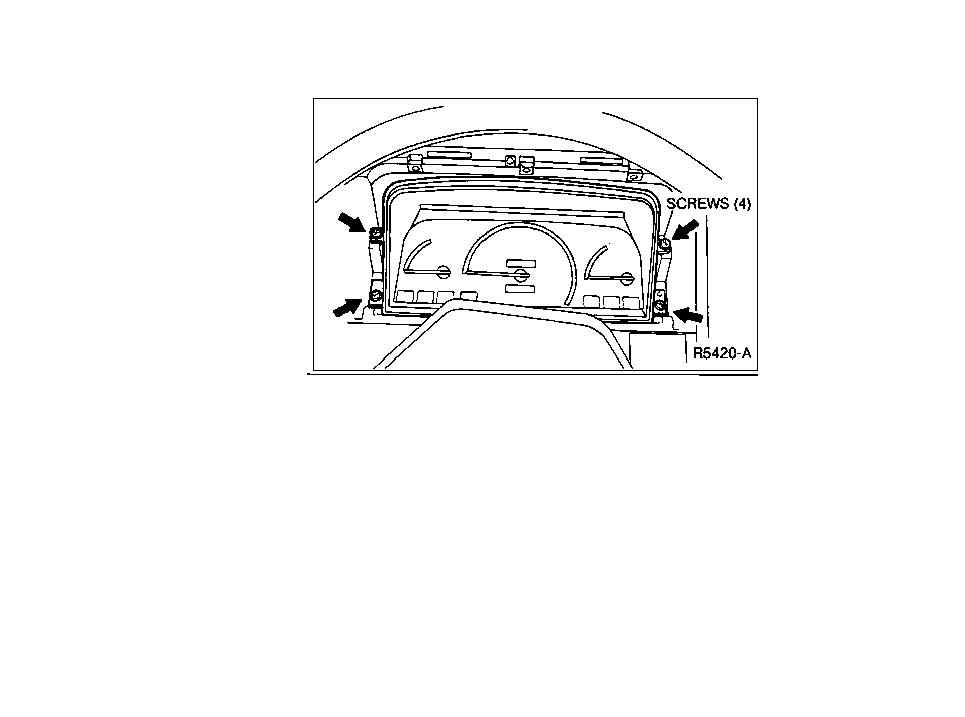
21. Connect the speedometer cable at the transaxle.
22. Install the left and right heater ducts. Refer to «Section
12-02».
23. Connect the electrical connectors to the switches on the instrument cluster
bezel.
24. Install the five instrument cluster bezel screws.
25. Install the combination switch assembly. Refer to «Section
11-05».
26. Install the steering wheel. Refer to «Section
11-04».
27. Connect the negative battery cable.
*Copyright © 2004 Ford Festiva Com-All Rights Reserved
*except data and images courtesy of Ford


