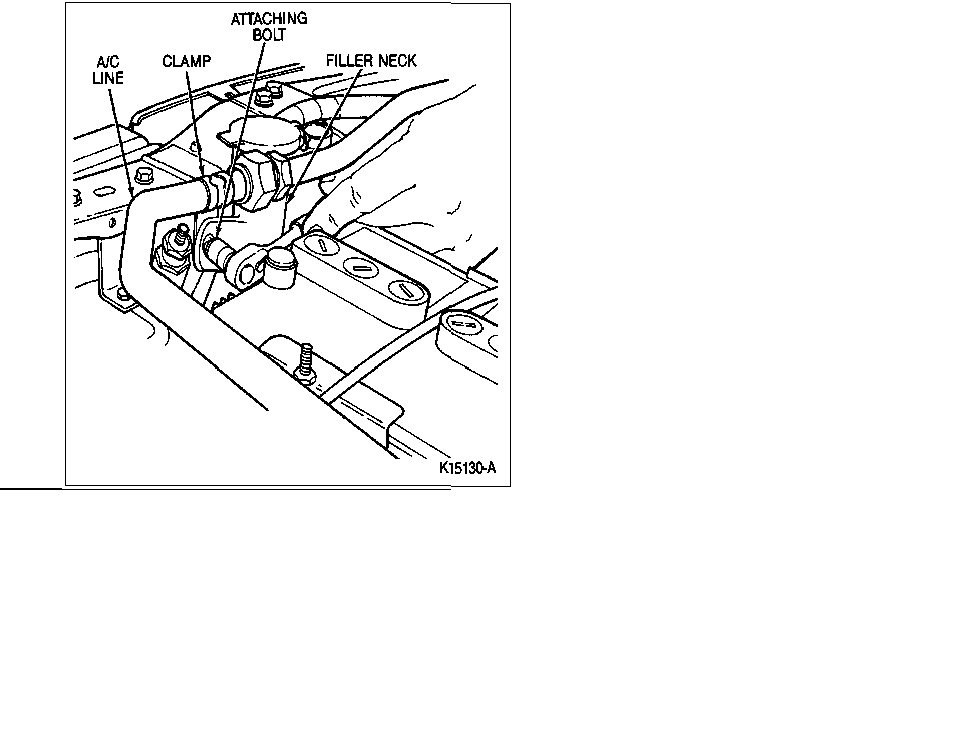
Windshield Washer Reservoir and Filler Neck
Removal
1. If the vehicle is equipped with A/C, remove the A/C line clamp nut.
2. Remove the filler neck attaching bolt.

3. Disconnect the negative battery cable.
4. Remove the coolant reservoir. Refer to «Section
03-03».
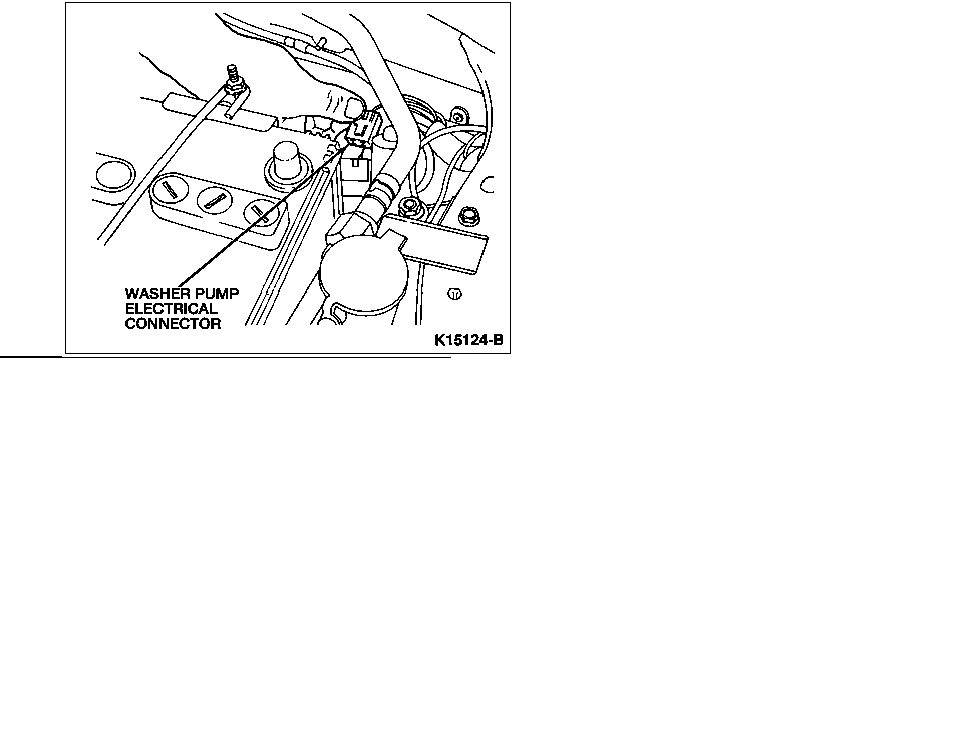
5. Disconnect the washer pump electrical connector.
6. Raise and support the vehicle.
7. Remove the LH front wheel and tire assembly.
8. Remove the LH front splash shield.
NOTE:
Place a suitable drain pan under the washer reservoir and drain the fluid from
the washer reservoir.
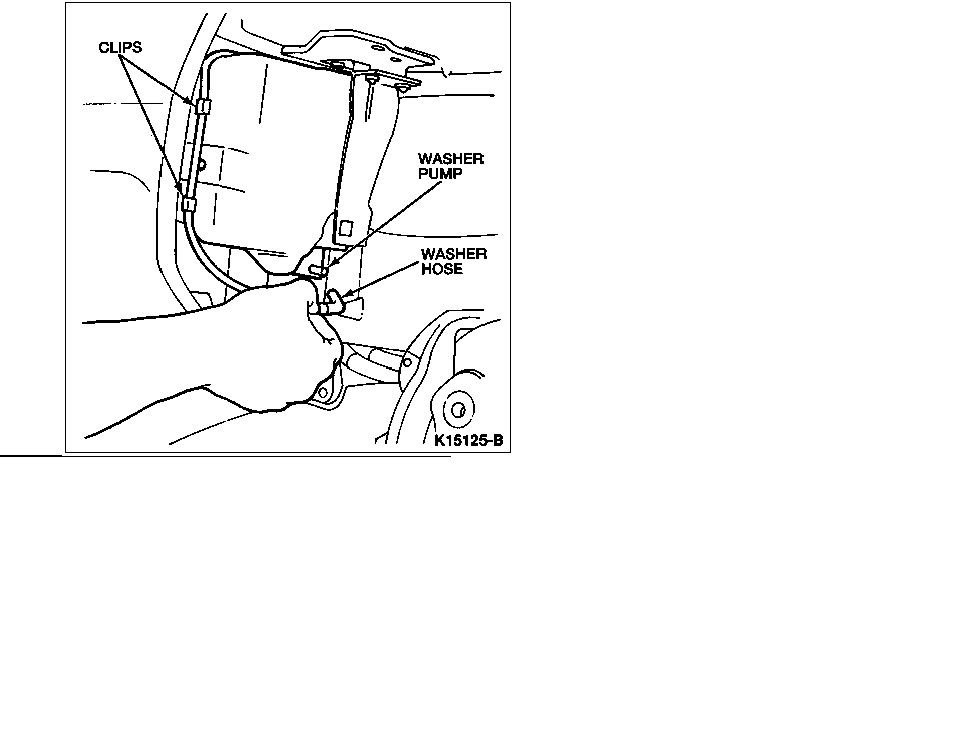
9. Disconnect the washer hose from the washer pump and detach the washer hose
from the washer reservoir clips.
10. Remove the two washer reservoir nuts and bolt.
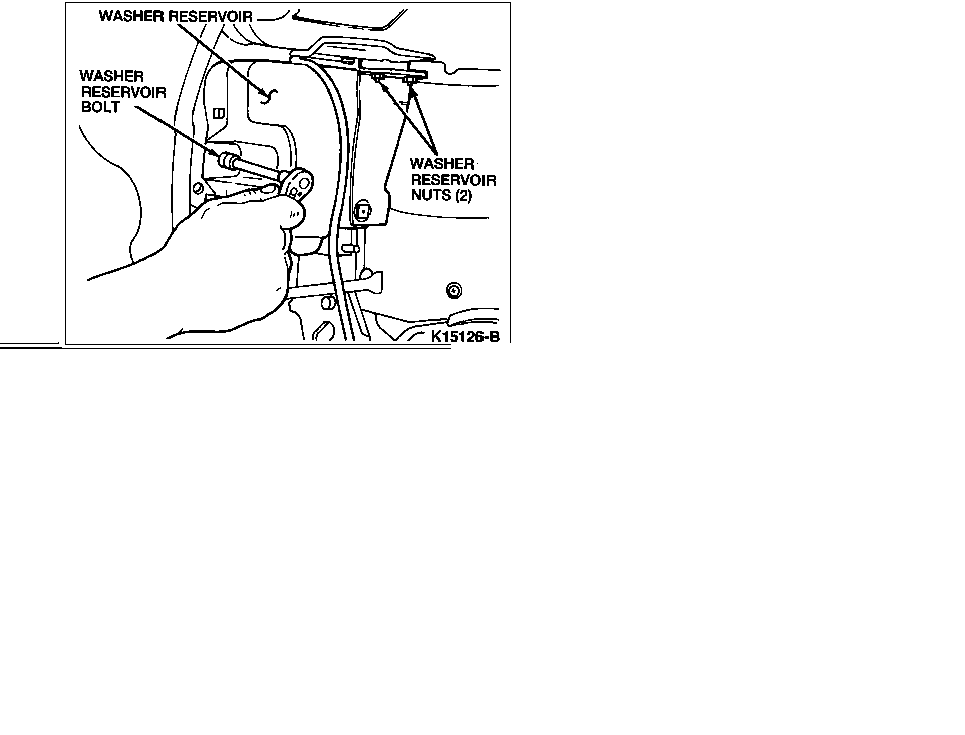
11. Detach the washer reservoir from the filler neck and remove the
reservoir.
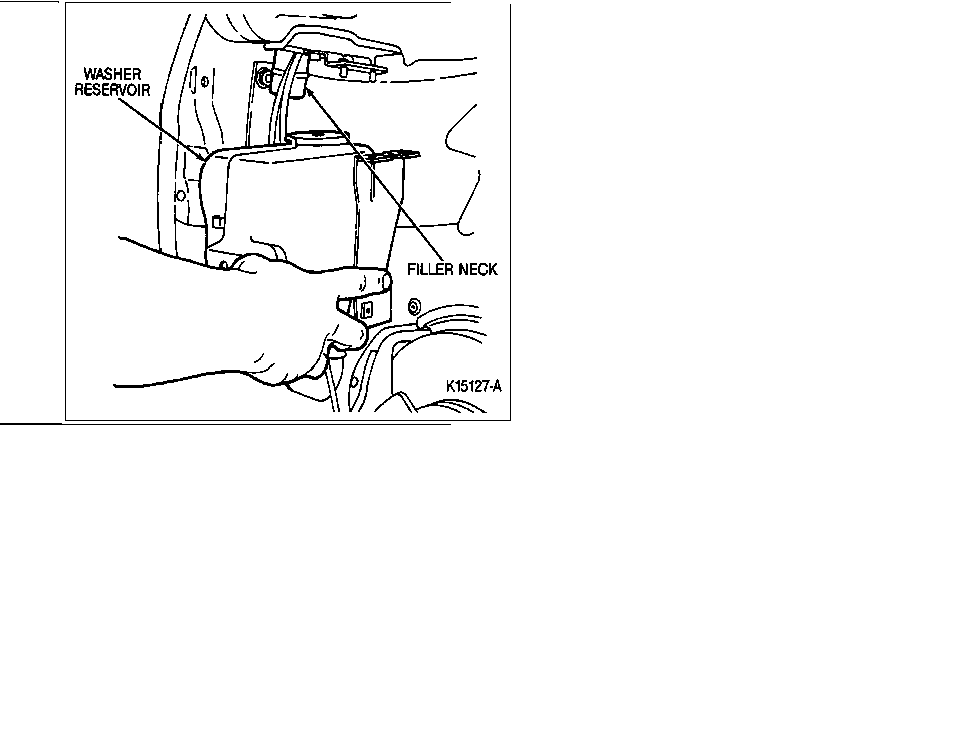
12. Remove the filler neck.
Installation
1. Position the filler neck and install the filler neck attaching bolt.
2. Attach the washer reservoir to the filler neck and install the two washer
reservoir nuts and the washer reservoir bolt.
3. Connect the washer hose to the washer pump, then attach the washer hose to
the washer reservoir clips.
4. Install the LH front splash shield.
5. Install the LH front wheel and tire assembly. Tighten the wheel attaching
bolts to 88-118 N-m (65-87 lb-ft).
6. Connect the washer pump electrical connector.
7. Install the coolant reservoir. Refer to «Section
03-03».
8. Lower the vehicle.
9. If the vehicle is equipped with A/C, install the A/C line clamp nut.
10. Connect the negative battery cable.