 Tweet
Tweet
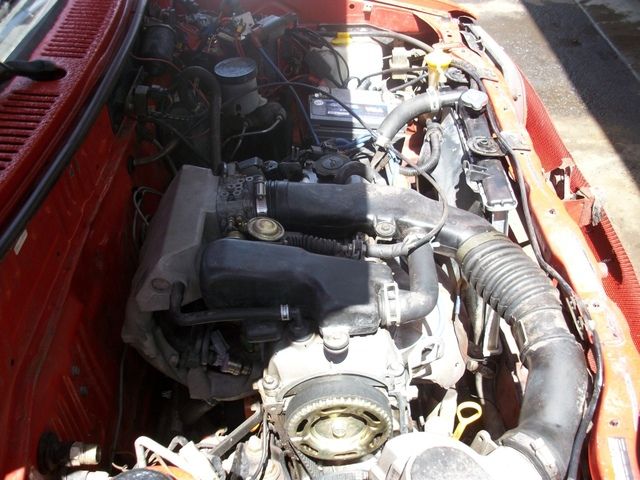
Well, I finally got around to moving my battery to the passenger's side so I can use Rocketman's VAF adapter and also free up some serious real estate. It was easy as pie, but took me two or more hours taking my time. I bought a 60 inch 2 gauge ground cable but you really only need a two or three footer. I bought this cable three months ago so I just kept it. I also bought a 4 gauge positive cable that was 53 inches long. I bought a Duralast Gold lawnmower battery with 340 ccas and a J hook battery mount kit.
The install will be described using pictures. The description will be above the following pictures.
First I trimmed the battery terminal clamps on both the positive and ground cables so only eyelets were left over.

To mount the battery, I used a piece of 6x12 cut to fit and used a paper template to locate three factory m6x1.00 bolt holes in the body. I drilled the holes through the 6x12 and secured it to the body with 2.00 inch long m6x1.00 bolts.
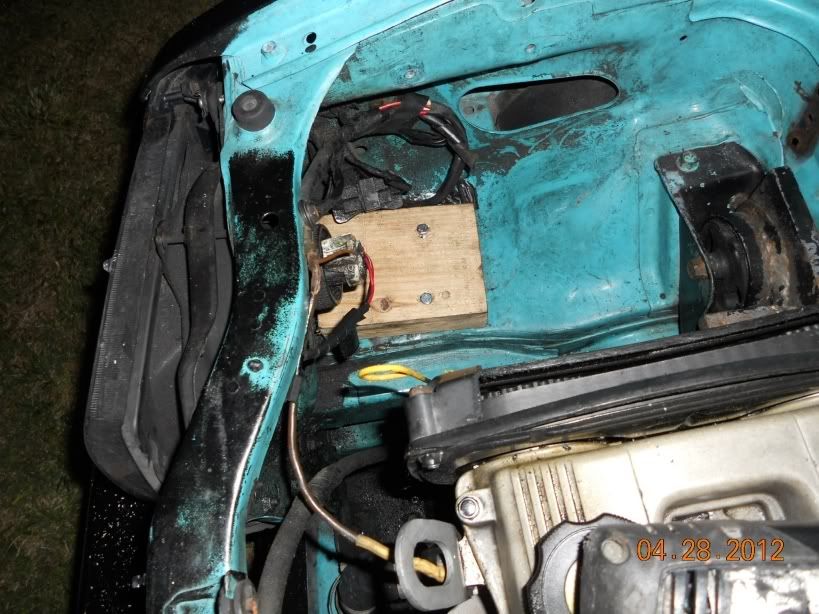
I then cut a piece of 1x6 and secured it to the 6x12 with some wood screws so the battery can have a nice flat seat. I also bought a small eyelet thing so I could hook the J hook from the battery mount kit to it. I measured and drilled a small hole into the body and put the eyelet in with some large washers for strength.
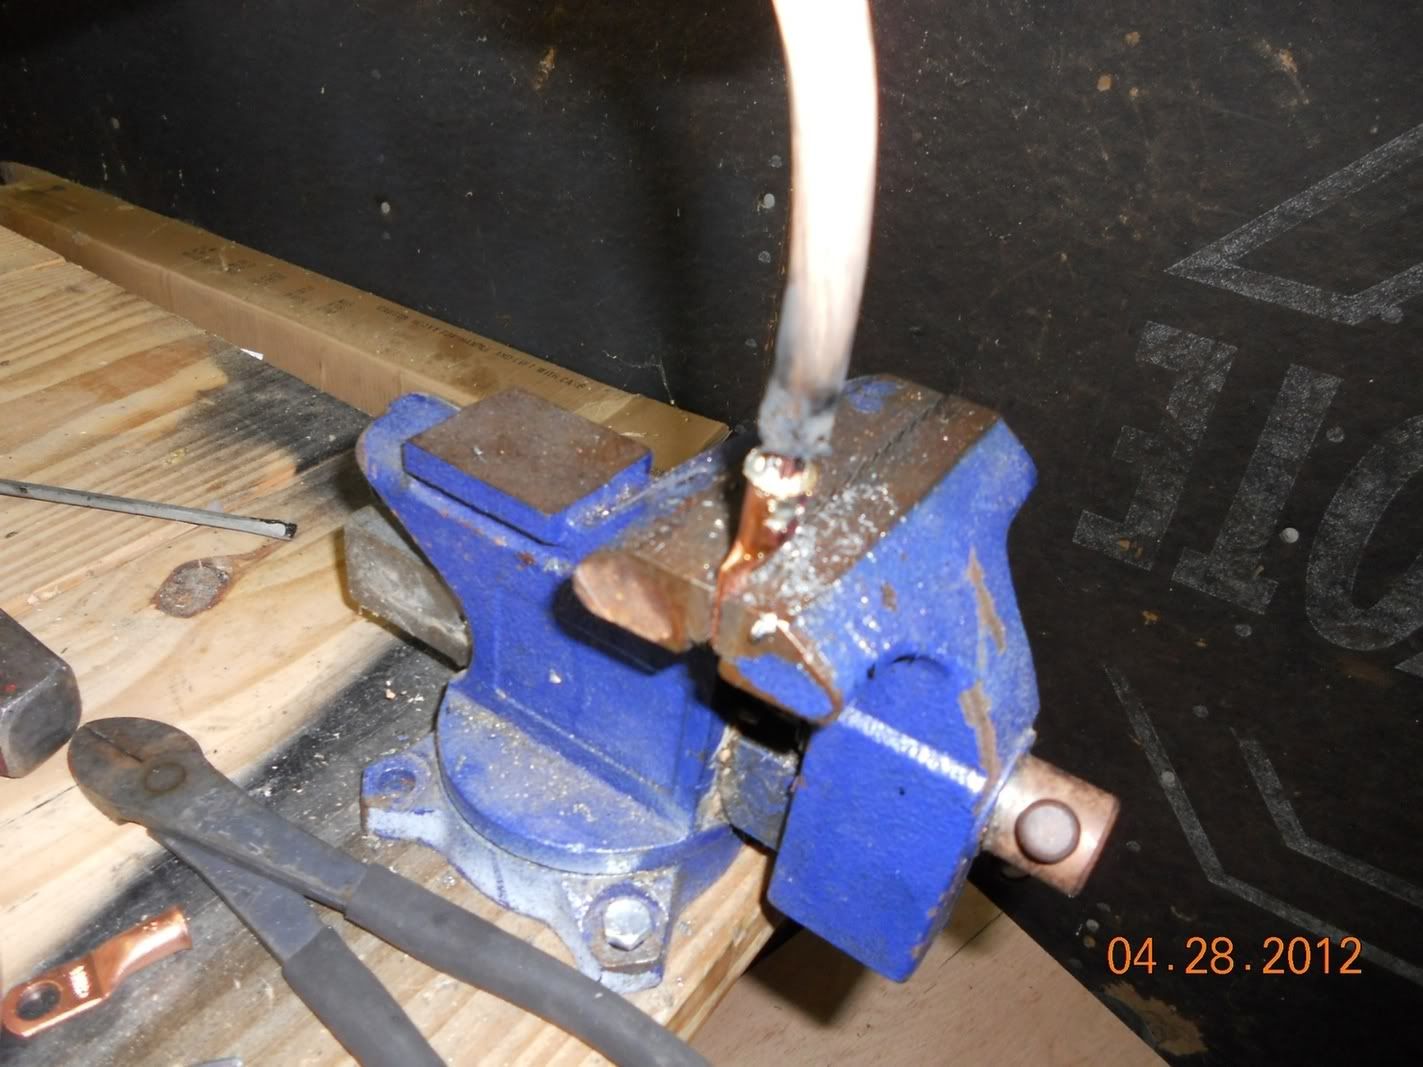
Then I got a battery lug and secured it to my vise and cut little slivers of solder and filled up the lug. I cut the head off the cable and trimmed some insulation to push into the solder filled lug. I used my Harbor Freight torch to melt the solder and solder the cable to the lug.
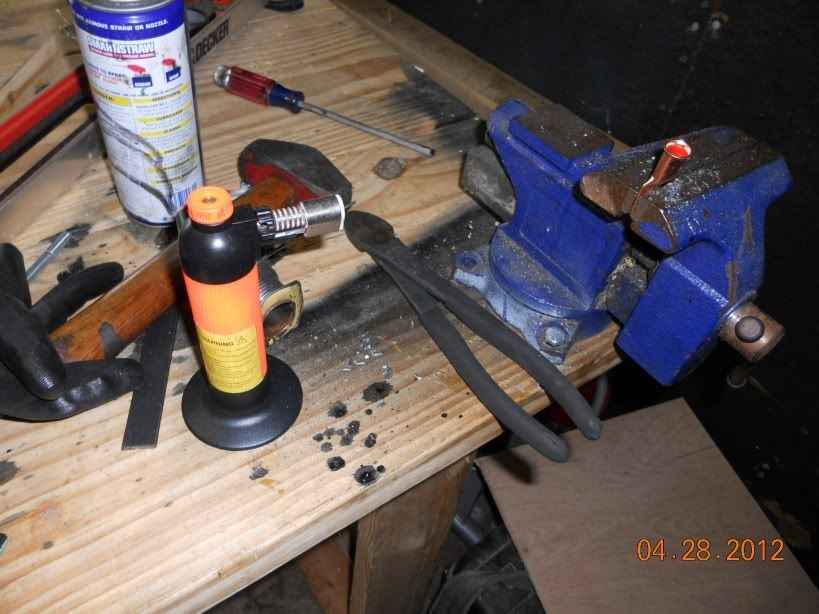
This is the cable with the solder cooled and hardened.
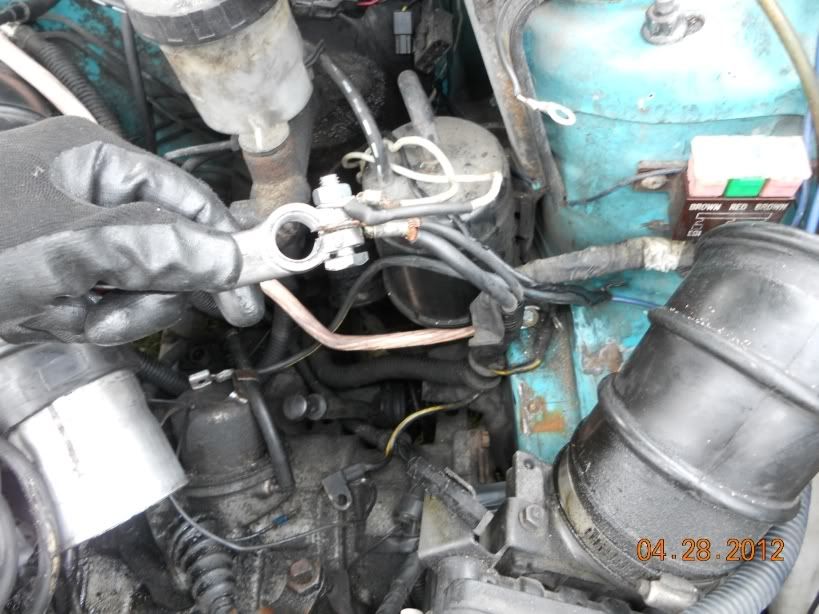
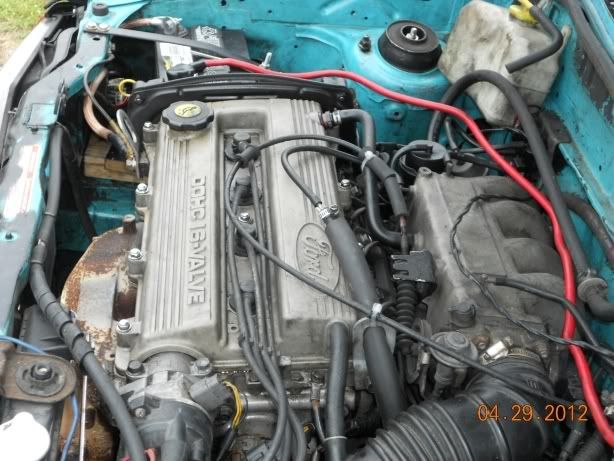
The ground cable was a small 6 gauge cable wrapped into a harness and secured to the body and top of the transmission. This is why I say you can get away with a short 1 or 2 feet long cable to secure to the lifting eye on the head on the passenger side.
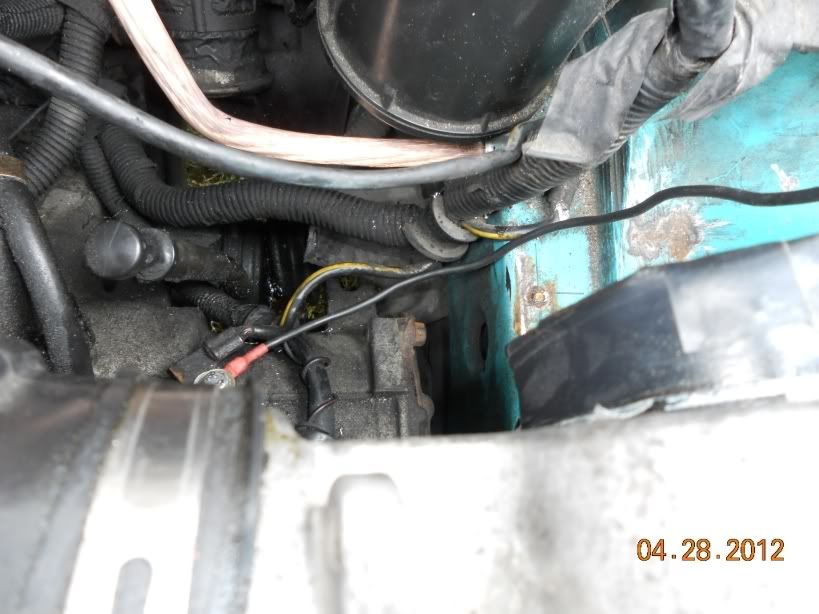
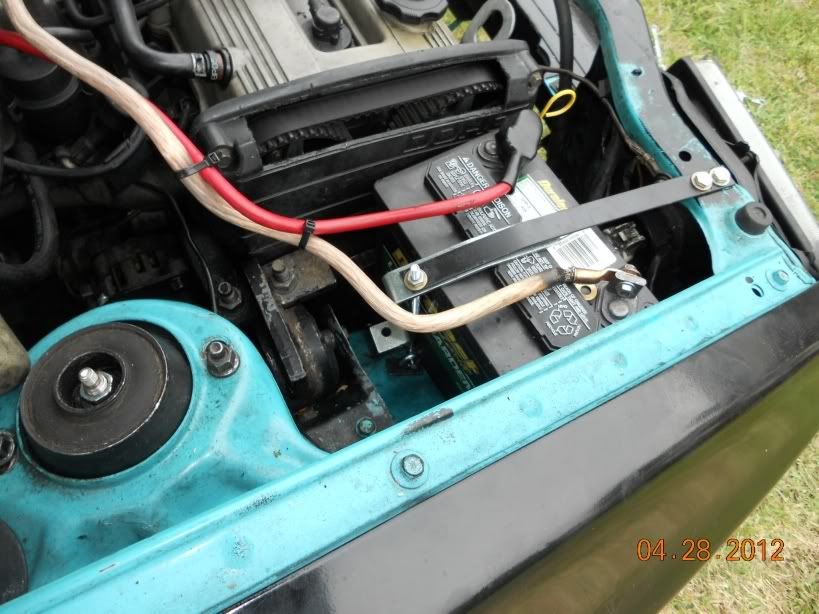
Next I connected the positive cable from the harness to the 52 inch 4 gauge battery cable. I hooked up all my relay and power wire that was on the positive terminal previously. I taped the heck out of the connection for corrosion and abrasion protection.
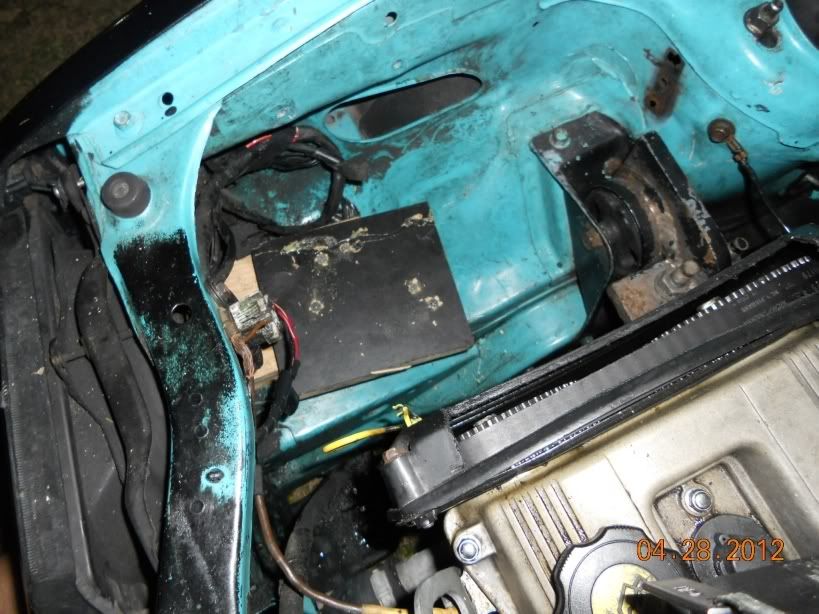
To make a secure mount for the battery, I used some L bracket and a piece of steel I had laying around. I did a ton of test fittings and measurements and came up with this way to secure the battery. It is tight as a tiger and doesn't budge. You can see the eyelet secured to the body in this picture at the base of the battery.
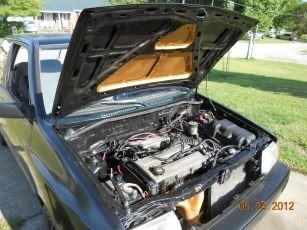
This is the finished job for now, I will probably redo the ground cable with a shorter one to clean up the engine compartment. Needless to say, car starts and runs like a champ and all electronics work. Now to design a nice cone filter set up with Rocketman's VAF adapter. But that will be another day in the near future. I noticed my disty O ring is hemorhagging (sic?) oil so that will be next.

The install will be described using pictures. The description will be above the following pictures.
First I trimmed the battery terminal clamps on both the positive and ground cables so only eyelets were left over.
To mount the battery, I used a piece of 6x12 cut to fit and used a paper template to locate three factory m6x1.00 bolt holes in the body. I drilled the holes through the 6x12 and secured it to the body with 2.00 inch long m6x1.00 bolts.
I then cut a piece of 1x6 and secured it to the 6x12 with some wood screws so the battery can have a nice flat seat. I also bought a small eyelet thing so I could hook the J hook from the battery mount kit to it. I measured and drilled a small hole into the body and put the eyelet in with some large washers for strength.
Then I got a battery lug and secured it to my vise and cut little slivers of solder and filled up the lug. I cut the head off the cable and trimmed some insulation to push into the solder filled lug. I used my Harbor Freight torch to melt the solder and solder the cable to the lug.
This is the cable with the solder cooled and hardened.
The ground cable was a small 6 gauge cable wrapped into a harness and secured to the body and top of the transmission. This is why I say you can get away with a short 1 or 2 feet long cable to secure to the lifting eye on the head on the passenger side.
Next I connected the positive cable from the harness to the 52 inch 4 gauge battery cable. I hooked up all my relay and power wire that was on the positive terminal previously. I taped the heck out of the connection for corrosion and abrasion protection.
To make a secure mount for the battery, I used some L bracket and a piece of steel I had laying around. I did a ton of test fittings and measurements and came up with this way to secure the battery. It is tight as a tiger and doesn't budge. You can see the eyelet secured to the body in this picture at the base of the battery.
This is the finished job for now, I will probably redo the ground cable with a shorter one to clean up the engine compartment. Needless to say, car starts and runs like a champ and all electronics work. Now to design a nice cone filter set up with Rocketman's VAF adapter. But that will be another day in the near future. I noticed my disty O ring is hemorhagging (sic?) oil so that will be next.


Comment