ok so some of you have seen my gauge pod in my car... its to big... im having trouble seing the bottom two gauges so i made a new one... and i took some pics along the way 
list of stuff you need:
3. 2 inch hose clamps
3. "L" brackets
3. extra nuts (what ever thread pitch and size your hose clamps are)
1. festiva "a pillar" cover
and your gauges...
tools:
flat head screw driver
hamer
razor blade
wrench for the 3 nuts (what ever size you got)
ok here is what you start with...
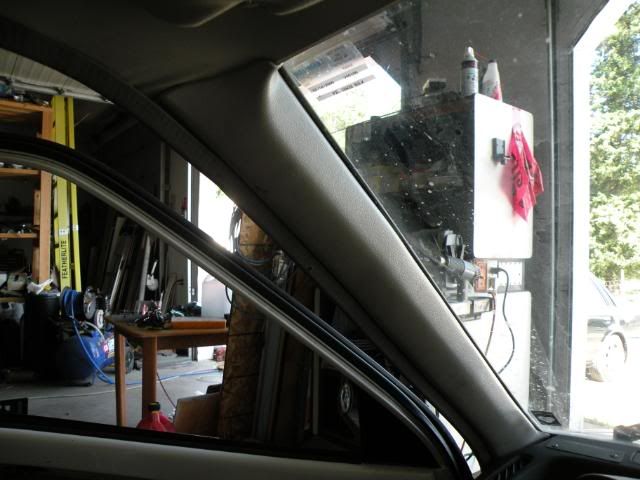
remove it.

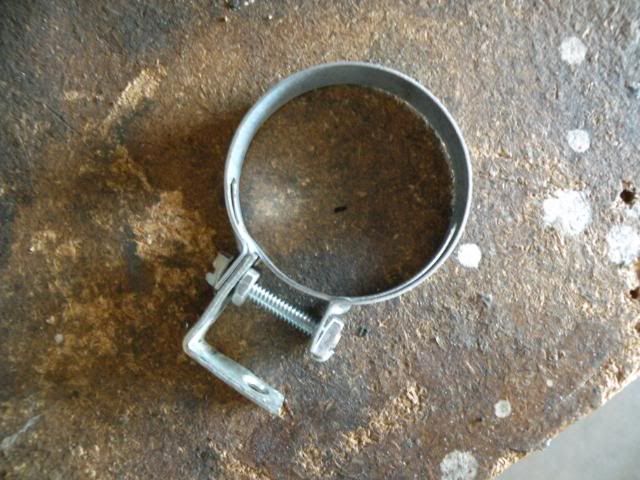
ok time to build the pods, get the "L" brackets and hose clamps and put them together like this... i had to round off the corner of the bracket to make it sit at the right angle...

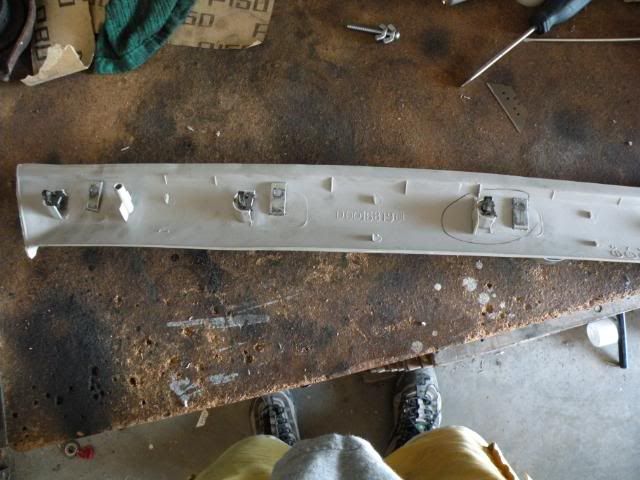
now mark where you want the gauge to sit and make sure tht there is enough room on the back of the cover cause there is clips and stuff that hold it to the pillar... after you have marked it cut the hole, i found the fastest and easiest way is to put the cover face down on a flat and solid metal surface (like the anvil of a vice) and use the flat head screw driver and hamer to punch a hole in it... then clean up the hole with the razor blade (it helps if its very sharp) and dont make the hole to big... here is the hole and the metal bracket.
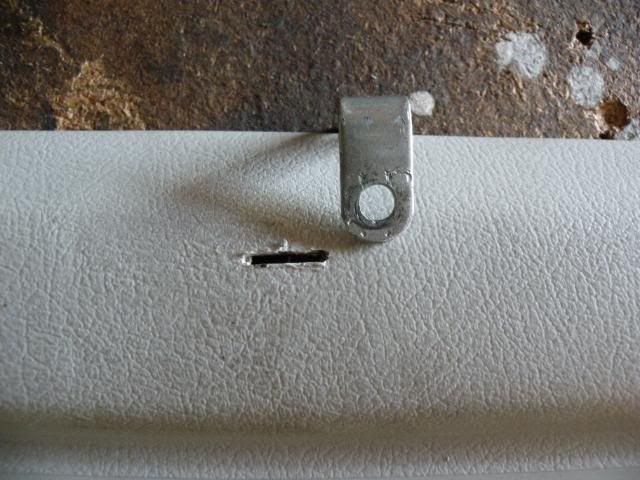
now thats done push the bracket through

and put on the clamp.

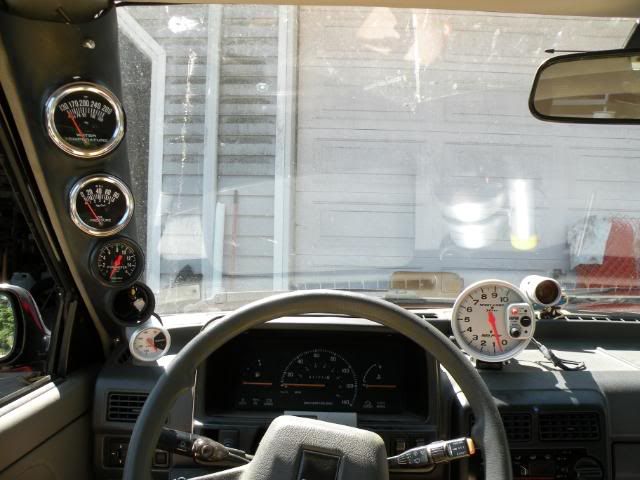
repeat that for the rest of the gauges and you should have somthing that looks like this....
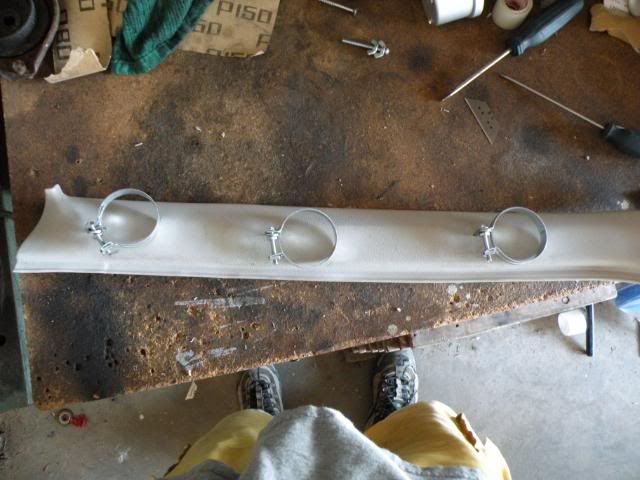
i only had one spare gauge so... it will have to do...
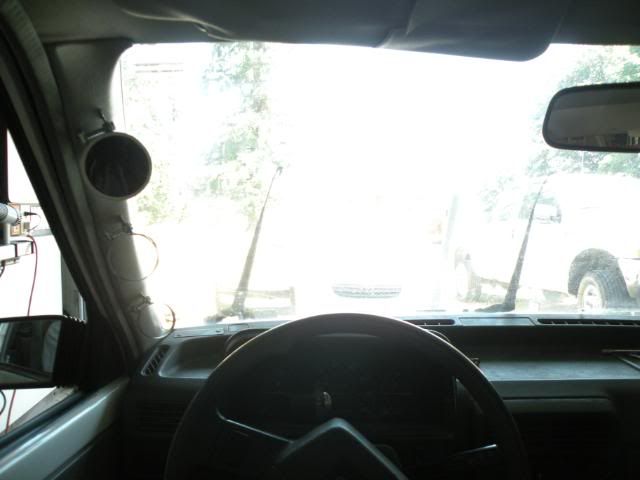
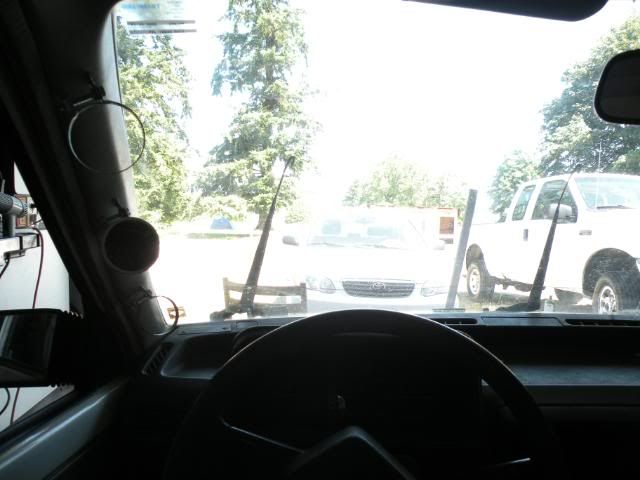
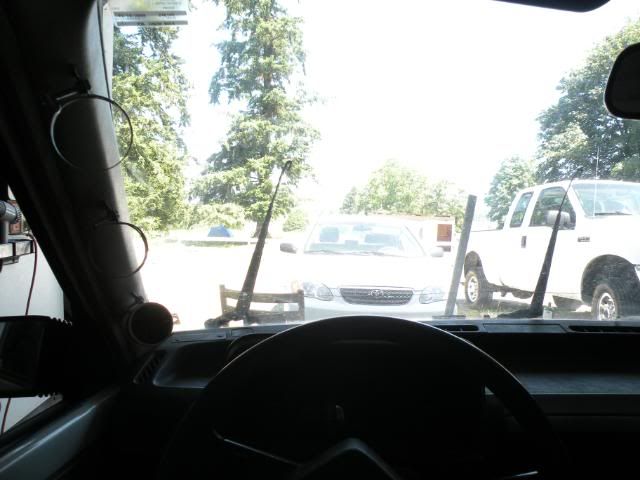
i think its a bit better looking than my old one... i had to pull out the bottom two gauges and tilt down the bottom one to be able to see it.... and there is just to much stuff look at lol... oo and the one missing is the one that i was using for mock-up, it was the only one that had a plug on the back... i didnt feel like riping apart my wires...
thats how you make a gauge pod for under 10 bucks... if you think its sticky material then its fine to stick it up there...
thanks.
mike.

list of stuff you need:
3. 2 inch hose clamps
3. "L" brackets
3. extra nuts (what ever thread pitch and size your hose clamps are)
1. festiva "a pillar" cover
and your gauges...
tools:
flat head screw driver
hamer
razor blade
wrench for the 3 nuts (what ever size you got)
ok here is what you start with...

remove it.

ok time to build the pods, get the "L" brackets and hose clamps and put them together like this... i had to round off the corner of the bracket to make it sit at the right angle...


now mark where you want the gauge to sit and make sure tht there is enough room on the back of the cover cause there is clips and stuff that hold it to the pillar... after you have marked it cut the hole, i found the fastest and easiest way is to put the cover face down on a flat and solid metal surface (like the anvil of a vice) and use the flat head screw driver and hamer to punch a hole in it... then clean up the hole with the razor blade (it helps if its very sharp) and dont make the hole to big... here is the hole and the metal bracket.

now thats done push the bracket through

and put on the clamp.

repeat that for the rest of the gauges and you should have somthing that looks like this....


i only had one spare gauge so... it will have to do...


i think its a bit better looking than my old one... i had to pull out the bottom two gauges and tilt down the bottom one to be able to see it.... and there is just to much stuff look at lol... oo and the one missing is the one that i was using for mock-up, it was the only one that had a plug on the back... i didnt feel like riping apart my wires...

thats how you make a gauge pod for under 10 bucks...
 if you think its sticky material then its fine to stick it up there...
 thanks.
mike.




 88' LX EMERGENSTEVIA
Comment