 Tweet
Tweet
Well today I left my keys in my bosses work truck so I was stuck at work for an extra 3 hours until my wife could come get me so I thought I'd take the spare time to start the relocation process of my battery to the hatch.
I'm going to make it a small write up as I go to help anyone else wanting to relocate the battery (seems to be a simple thing to do so far).
Things you need:
10 mm socket
Flat Head and phillips head
Wire- I used 0 gauge but I think 4 gauge would work just fine too.
New terminal ends- I'm using 5 total
Battery Box or dry cell battery
Overall cost: It can be done for less than $50 depends on what you want to get.
Overall time: about 2 hours or less
Step 1
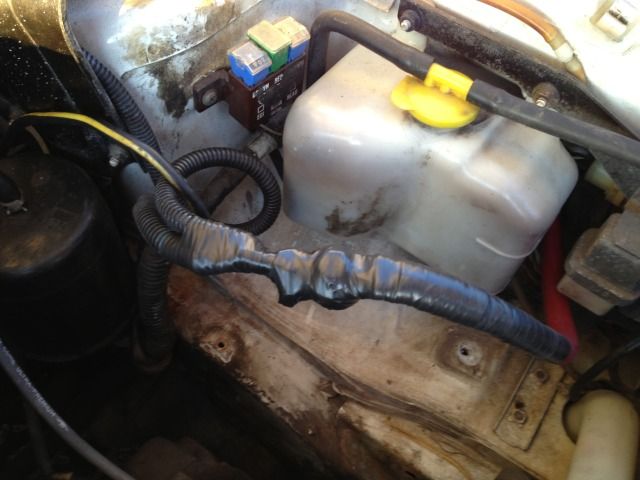
Remove your battery and pull it out. Then remove the battery tray: there are three bolts (10mm socket) holding it in two on top and one is under the holder holding it to the side of the car. Reach under and feel for it. (you may be able to see it from underneath the car easier but I didn't have that option).

Step 2
Next I began to pull off the drivers side front quarter panel.
There are six 10mm bolts and four screws holding it on (at least for me).
-3 on top
-1 in the door jam
- then remove the 4 screws which hold the panel to the mud guard
- then you can remove the last bolt which is behind the bumper (near the tire) - I have a stylus bumper so I'm not 100% if it is the same with stock bumpers.
- The last one is under the car connecting it to the body.
You can now pull the quarter panel off- it should slide off fairly easily.
Step 3
Now you can begin the process of routing the wire.
Look into where the quarter panel is and you can see where the ecu wires enter the car.
Take a flat head screw driver and pry the grommet out (or you can cut a hole in it) and push your wire through.
You should now be able to pull your carpet back and see the wire coming through and you can pull it the rest of the way.
Make sure to leave enough wire in the engine bay to connect it to the old positive terminal.

*I haven't zip tied mine down yet
Step 4
Pull up the carpet and route the wire down the side to the hatch (or wherever you are relocating the battery).
Then you can put it all back together.
Step 5
Attach a new terminal to the new wire in the engine bay. I used some like these http://www.amazon.com/gp/product/B00...ls_o00_s00_i00
I then cut off the old batter terminal connector from the old positive terminal. I used a 5/16 x 1/2" bolt with two washers and a nut and sandwiched them together.
Step 6
Get your battery box or dry cell and decide where you want to put it.
I got my battery box from autozone for $10.
Mount your box or battery so that it isn't tumbling around)
Once you decide where you want it you can cut your wire appropriately and put your new battery terminal on the wire.
I got new post style battery terminals like these

Then I got these for the new positive and negative wire- http://www.amazon.com/gp/product/B00...ls_o01_s00_i00
Find a good spot for a ground and you are good to go! I don't have a finished picture yet because I'm still finishing up a few things.
**The benefits to this: Room in the engine bay! Now my cai can be normal. Weight redistribution I suppose.. I can have a higher gauge wire to run my electronics (I have a large stereo setup and a high watt power converter that I use frequently..**
SIDE NOTE! Batteries emit gasses that can be harmful so get a proper battery box that is vented properly or get a dry cell battery. Just make sure you keep it safe
I'm going to make it a small write up as I go to help anyone else wanting to relocate the battery (seems to be a simple thing to do so far).
Things you need:
10 mm socket
Flat Head and phillips head
Wire- I used 0 gauge but I think 4 gauge would work just fine too.
New terminal ends- I'm using 5 total
Battery Box or dry cell battery
Overall cost: It can be done for less than $50 depends on what you want to get.
Overall time: about 2 hours or less
Step 1
Remove your battery and pull it out. Then remove the battery tray: there are three bolts (10mm socket) holding it in two on top and one is under the holder holding it to the side of the car. Reach under and feel for it. (you may be able to see it from underneath the car easier but I didn't have that option).
Step 2
Next I began to pull off the drivers side front quarter panel.
There are six 10mm bolts and four screws holding it on (at least for me).
-3 on top
-1 in the door jam
- then remove the 4 screws which hold the panel to the mud guard
- then you can remove the last bolt which is behind the bumper (near the tire) - I have a stylus bumper so I'm not 100% if it is the same with stock bumpers.
- The last one is under the car connecting it to the body.
You can now pull the quarter panel off- it should slide off fairly easily.
Step 3
Now you can begin the process of routing the wire.
Look into where the quarter panel is and you can see where the ecu wires enter the car.
Take a flat head screw driver and pry the grommet out (or you can cut a hole in it) and push your wire through.
You should now be able to pull your carpet back and see the wire coming through and you can pull it the rest of the way.
Make sure to leave enough wire in the engine bay to connect it to the old positive terminal.
*I haven't zip tied mine down yet
Step 4
Pull up the carpet and route the wire down the side to the hatch (or wherever you are relocating the battery).
Then you can put it all back together.
Step 5
Attach a new terminal to the new wire in the engine bay. I used some like these http://www.amazon.com/gp/product/B00...ls_o00_s00_i00
I then cut off the old batter terminal connector from the old positive terminal. I used a 5/16 x 1/2" bolt with two washers and a nut and sandwiched them together.
Step 6
Get your battery box or dry cell and decide where you want to put it.
I got my battery box from autozone for $10.
Mount your box or battery so that it isn't tumbling around)
Once you decide where you want it you can cut your wire appropriately and put your new battery terminal on the wire.
I got new post style battery terminals like these
Then I got these for the new positive and negative wire- http://www.amazon.com/gp/product/B00...ls_o01_s00_i00
Find a good spot for a ground and you are good to go! I don't have a finished picture yet because I'm still finishing up a few things.
**The benefits to this: Room in the engine bay! Now my cai can be normal. Weight redistribution I suppose.. I can have a higher gauge wire to run my electronics (I have a large stereo setup and a high watt power converter that I use frequently..**
SIDE NOTE! Batteries emit gasses that can be harmful so get a proper battery box that is vented properly or get a dry cell battery. Just make sure you keep it safe


Comment