Here is a how to on installing an aftermarket sunroof. I know there is more than one way to skin a cat, but for this write up I'll be outlining the steps I took using the tools I had available. I was lucky and the sunroof I purchased on CL came with a template, instructions, and inner liners.
I'm not sure what size the originally equipped Festiva sunroof was, but the one I bought was approximately 15x28 and seems to be a very nice fit for the Festiva. If you are interested in the exact model I got it is the SFC/CRL Genesis. I believe it is the smallest one they make in that model. SFC Genesis Sunroof
What you'll need:
1. Poker? (Something with a point that you can push through the headliner and make a dimple on the roof sheet metal. I used ball point pen.)
2. Marker/Sharpie
3. Ruler/Tape measurer
4. Masking/Painters tape
5. Drop Cloth
6. Dremel w/ cutting wheels
7. Sawzall
8. Angle Grinder
9. Primer (or something to treat the exposed metal)
10. Silicone Sealant
11. Allen Wrench (this could be different depending on the sunroof manufacturer.)
Prep:
1. Cut out template (If your sunroof didn't come with one make one using the frame from your sunroof.)
2. Test fit the template on the inside of the car with the headliner, visors, mirror, and dome light all still installed. (Don't get too close to the rearview mirror as the roof does start curving down toward the windshield.)
3. Once you've got the ideal position take your poker and stick it through the template and headliner from the center of the template and poke it hard enough against the roof to leave a small indention. (My template came with this puncture spot marked on the template. It was at dead center from left to right and just 3 or 4 inches in from the rear edge.)
4. Now place your template on the roof with the hole you just made in it lined up with the indention you just left on the roof. From here you'll do a rough alignment to try and center it from side to side and keep it the same distance from the windshield.
5. Tape it down on the corners and draw a 2 or 3 inch line at the center on front and back of the template.
6. My instructions went into a lot of detail about centering the template, but basically you want to have it the same distance from the edge on both the right and the left sides and then about 3 or 4 inches in from the edge of the template on both sides you should measure from the template to the windshield and make sure it is the distance. (Get it as close as you can, but it's not crazy important...it's not like someone is going to measure your sunroof and laugh at you if you're off just a little bit...at the same time though. Do your measurements and try to square it up. You don't want your sunroof to be noticeably closer to one side or the other or farther away from the windshield on one side or the other.
7. Once you've got it squared up tape it down in about 6-8 spots around the edge and then draw a line all the way around the template.
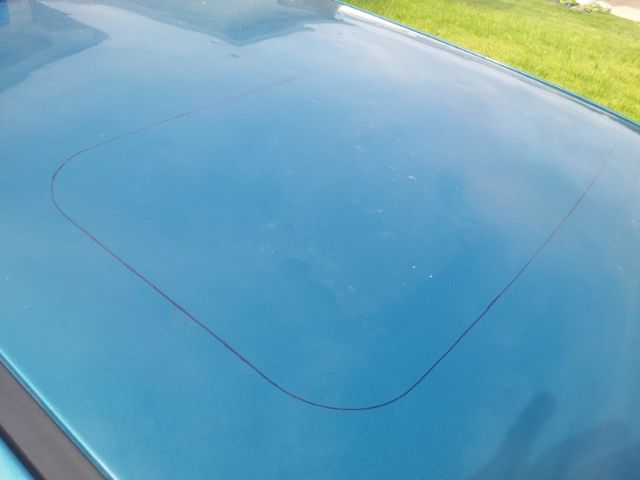
8. To protect your paint from whatever tool you may be using to cut through the roof you might want to lay a 2" strip of tape about 1/4" away from your template line.
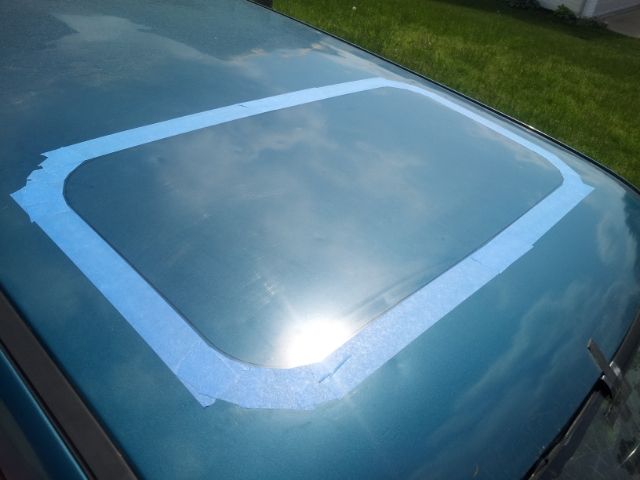
9. Now you are almost ready to start cutting. Remove your headliner, flip your visors down...or remove them all together, make sure your wires for the dome light are out of the way. Too make life easier I removed both front seats and then laid down a drop cloth to catch all the debris. I mostly made sure to cover the dashboard and then I just vacuumed really well when I was done.
10. There is one roof support bracket that goes right across the center of the hole you are about to cut. It is mounted by a screw on each end and some sticky foam to the roof. If you can get the screws off now it's one less thing you have to cut through.
Cutting: Make sure to cut small...it's easier to grind away excess than to realize you cut your hole too big!!
1. Using what I had available I took my Dremel and cut an inch or so slit at the start of the curve at the front drivers side windshield. Then I stuck my sawzall in that slit and cut along the straight edge until I reached the curve at the passenger side.
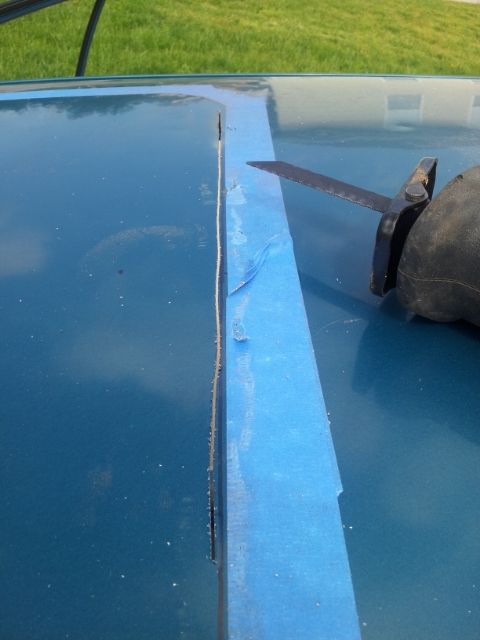
2. I ended up doing this on each side and then also cutting straight across and skipping the curve since the sawzall couldn't handle the precision required for the curves. It probably would have been easier to just cut all the curves with the Dremel first and then make the straight cuts with the sawzall.
This was roughly how I cut it out though.
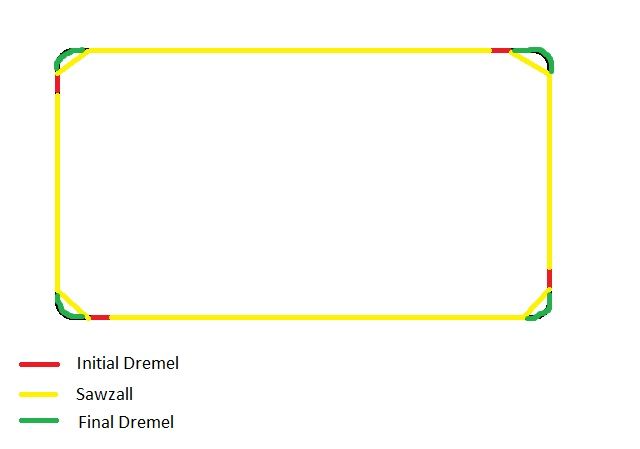
As you can see in this photo I had just finished cutting all the hole completely out. I still had to go back and Dremel all my corner.
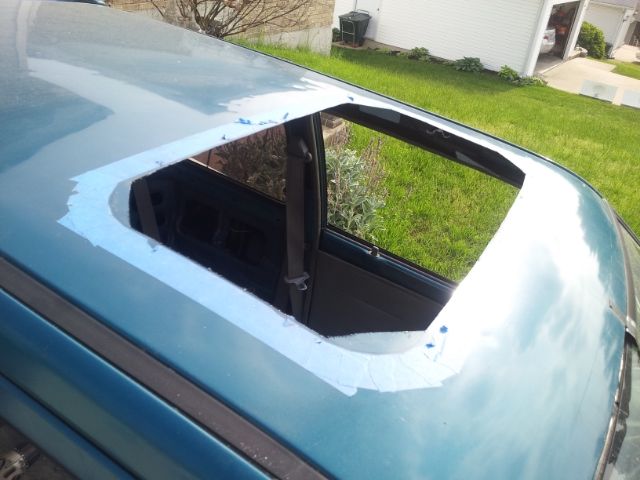
3. After I got the hole completely cut out and Dremeled the corners I then had to use trial and error with the sunroof frame and my angle grinder until I had it big enough to get the frame into the hole.
Installation:
1. When the hole has been cut to the proper size make sure to treat your exposed metal with some sort of rust proofing. I sprayed mine with some rustoleum metal primer.
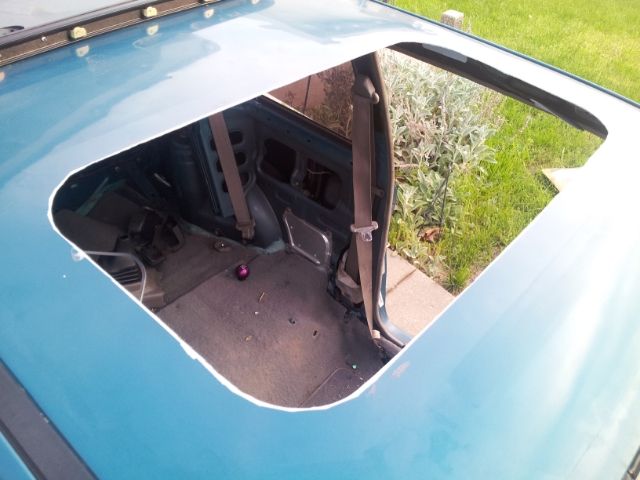
2. Now your ready to drop in the frame of the sunroof. Apply the silicone sealant on the underside of the frame. Make sure to keep a consistent amount going around the entire frame and over lap your starting point just a bit. You don't want this thing leaking!
3. My sunroof had an inner ring that fit inside the frame and then using an allen wrench you tightened all the screws around the inner edge and it pressed this ring to the frame and frame to the roof.
4. If you can clean up as much of the excess sealant that comes oozing out onto your roof. Or you can let it dry and use a razor or something to scrape it off later.
5. You have now pretty much successfully installed a sunroof. My glass was removable so at this point I put it in to see what it looked like.
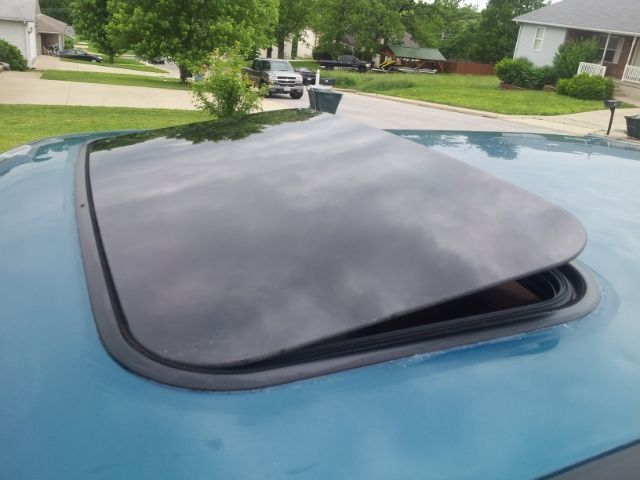
6. To finish it off you need to cut a hole in your headliner and install it. I pulled the glass on my sunroof and installed the headliner as best I could. Then took a sharpie and traced around the inside edge of the sunroof frame.
7. Removed the headliner and using a sharp knife I cut the hole out. (A nice exacto knife or box cutter would probably have worked better.)

8. Put the headliner back in and if your kit comes with it, install the finishing trim that holds the headliner to the sunroof frame. My sunroof also came with a finishing trim the covers up the allen screws. Finally install your visors, rear view mirror, and dome light.
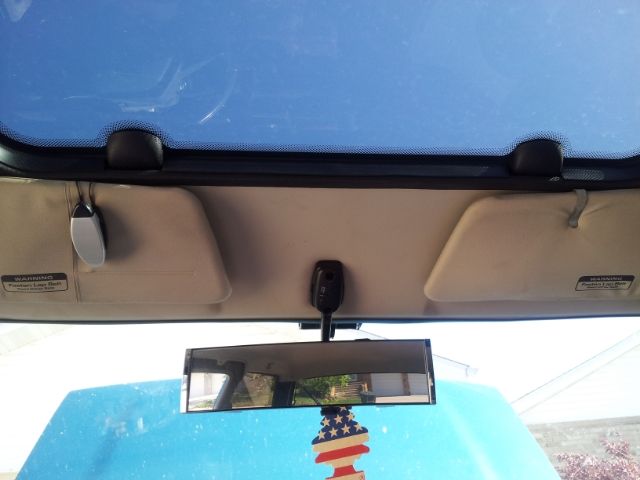
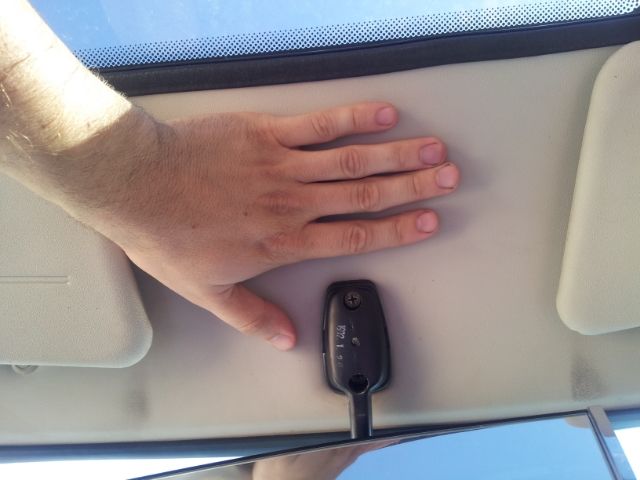
Here is the final product.
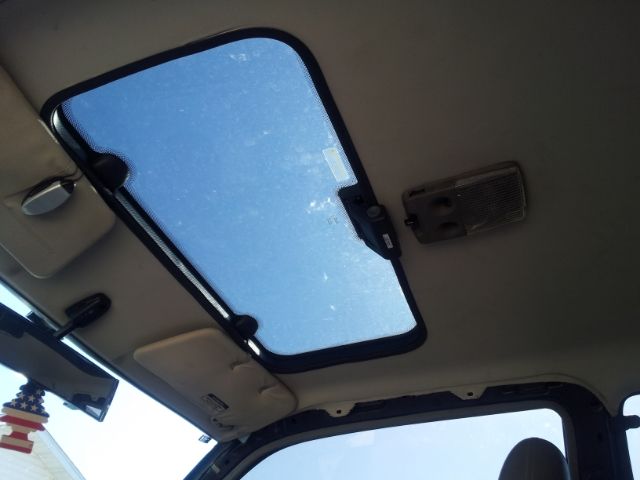
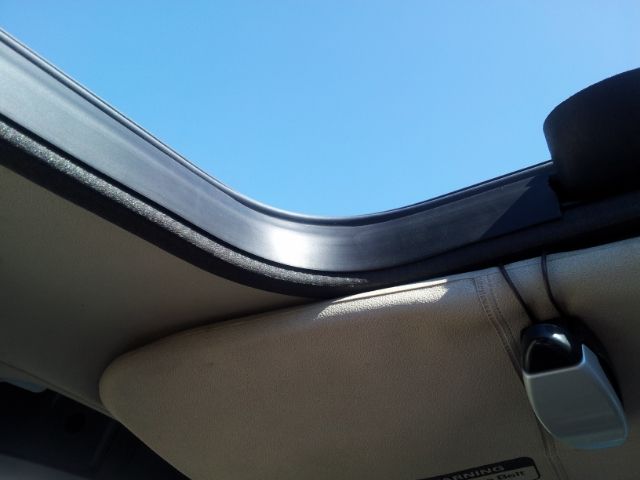
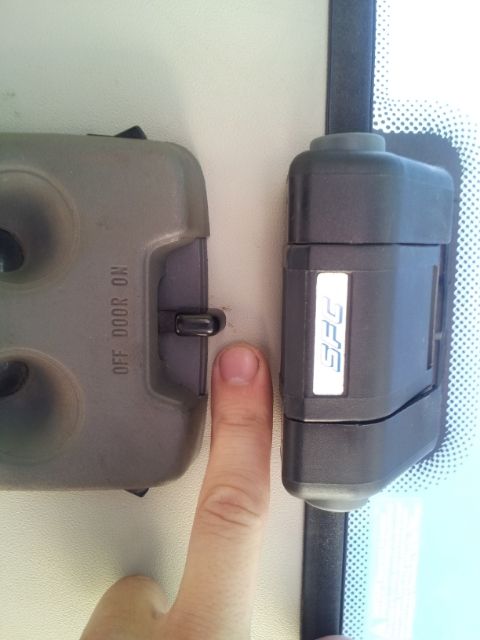
I even allowed just enough room to keep my escort dome light!
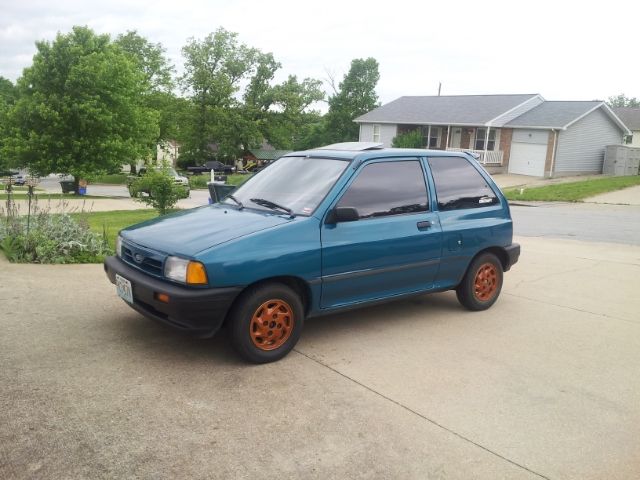
I'm not sure what size the originally equipped Festiva sunroof was, but the one I bought was approximately 15x28 and seems to be a very nice fit for the Festiva. If you are interested in the exact model I got it is the SFC/CRL Genesis. I believe it is the smallest one they make in that model. SFC Genesis Sunroof
What you'll need:
1. Poker? (Something with a point that you can push through the headliner and make a dimple on the roof sheet metal. I used ball point pen.)
2. Marker/Sharpie
3. Ruler/Tape measurer
4. Masking/Painters tape
5. Drop Cloth
6. Dremel w/ cutting wheels
7. Sawzall
8. Angle Grinder
9. Primer (or something to treat the exposed metal)
10. Silicone Sealant
11. Allen Wrench (this could be different depending on the sunroof manufacturer.)
Prep:
1. Cut out template (If your sunroof didn't come with one make one using the frame from your sunroof.)
2. Test fit the template on the inside of the car with the headliner, visors, mirror, and dome light all still installed. (Don't get too close to the rearview mirror as the roof does start curving down toward the windshield.)
3. Once you've got the ideal position take your poker and stick it through the template and headliner from the center of the template and poke it hard enough against the roof to leave a small indention. (My template came with this puncture spot marked on the template. It was at dead center from left to right and just 3 or 4 inches in from the rear edge.)
4. Now place your template on the roof with the hole you just made in it lined up with the indention you just left on the roof. From here you'll do a rough alignment to try and center it from side to side and keep it the same distance from the windshield.
5. Tape it down on the corners and draw a 2 or 3 inch line at the center on front and back of the template.
6. My instructions went into a lot of detail about centering the template, but basically you want to have it the same distance from the edge on both the right and the left sides and then about 3 or 4 inches in from the edge of the template on both sides you should measure from the template to the windshield and make sure it is the distance. (Get it as close as you can, but it's not crazy important...it's not like someone is going to measure your sunroof and laugh at you if you're off just a little bit...at the same time though. Do your measurements and try to square it up. You don't want your sunroof to be noticeably closer to one side or the other or farther away from the windshield on one side or the other.
7. Once you've got it squared up tape it down in about 6-8 spots around the edge and then draw a line all the way around the template.

8. To protect your paint from whatever tool you may be using to cut through the roof you might want to lay a 2" strip of tape about 1/4" away from your template line.

9. Now you are almost ready to start cutting. Remove your headliner, flip your visors down...or remove them all together, make sure your wires for the dome light are out of the way. Too make life easier I removed both front seats and then laid down a drop cloth to catch all the debris. I mostly made sure to cover the dashboard and then I just vacuumed really well when I was done.
10. There is one roof support bracket that goes right across the center of the hole you are about to cut. It is mounted by a screw on each end and some sticky foam to the roof. If you can get the screws off now it's one less thing you have to cut through.
Cutting: Make sure to cut small...it's easier to grind away excess than to realize you cut your hole too big!!
1. Using what I had available I took my Dremel and cut an inch or so slit at the start of the curve at the front drivers side windshield. Then I stuck my sawzall in that slit and cut along the straight edge until I reached the curve at the passenger side.

2. I ended up doing this on each side and then also cutting straight across and skipping the curve since the sawzall couldn't handle the precision required for the curves. It probably would have been easier to just cut all the curves with the Dremel first and then make the straight cuts with the sawzall.
This was roughly how I cut it out though.

As you can see in this photo I had just finished cutting all the hole completely out. I still had to go back and Dremel all my corner.

3. After I got the hole completely cut out and Dremeled the corners I then had to use trial and error with the sunroof frame and my angle grinder until I had it big enough to get the frame into the hole.
Installation:
1. When the hole has been cut to the proper size make sure to treat your exposed metal with some sort of rust proofing. I sprayed mine with some rustoleum metal primer.

2. Now your ready to drop in the frame of the sunroof. Apply the silicone sealant on the underside of the frame. Make sure to keep a consistent amount going around the entire frame and over lap your starting point just a bit. You don't want this thing leaking!
3. My sunroof had an inner ring that fit inside the frame and then using an allen wrench you tightened all the screws around the inner edge and it pressed this ring to the frame and frame to the roof.
4. If you can clean up as much of the excess sealant that comes oozing out onto your roof. Or you can let it dry and use a razor or something to scrape it off later.
5. You have now pretty much successfully installed a sunroof. My glass was removable so at this point I put it in to see what it looked like.

6. To finish it off you need to cut a hole in your headliner and install it. I pulled the glass on my sunroof and installed the headliner as best I could. Then took a sharpie and traced around the inside edge of the sunroof frame.
7. Removed the headliner and using a sharp knife I cut the hole out. (A nice exacto knife or box cutter would probably have worked better.)

8. Put the headliner back in and if your kit comes with it, install the finishing trim that holds the headliner to the sunroof frame. My sunroof also came with a finishing trim the covers up the allen screws. Finally install your visors, rear view mirror, and dome light.
Here is the final product.


I even allowed just enough room to keep my escort dome light!



Comment