Announcement

Collapse
No announcement yet.

ford aspire coil spring isolators

Collapse
X
 
  • Filter
  • Time
  • Show
Clear All
new posts

  • #16
    Got my spring pads in today.
    now i just need to have them trimmed to fit
    Packing them up to be shipped with originals in box for comparison and measurements.


    The only problem is.
    I didn't know they came in pairs.
    So instead of having 6 pads.
    I have 6 pairs of 2 lol.
    Looks like ill be having a second set made as spares.

    They are stiffer than stock but still bend , flex, give, and squish.
    They should be a nice upgrade.
    Last edited by rmoltis; 02-10-2015, 01:38 PM.
    Running 40psi.....in my tires.


    http://aspire.b1.jcink.com/index.php?showtopic=611&st=0

    Comment


    • #17
      I just posted this in my build thread but figured I would report here as well for easy access.

      So I finally had some time today to get a sample started with these pads.
      I decided to start with one of the front upper isolators.

      I started by getting i.d. gages to measure spring perches and a set of calipers for measuring the struts and other things.

      Then once all measurements were down and on paper I proceeded to use a razor blade line to mark the inside and outside diameters of the circle.
      as well as the raised wall thickness on the sides.

      I took my dremel with the little router end attachment.
      set the depth relative to the thickness of what I wanted the pads to be.
      The. I started from the inside outwards.
      I did this to have a stable platform for the router head to stay flat on as I worked my way outwards.
      I used a water bottle with a pinhole drilled in it to keep the elastomer cool while working.
      I would squeeze spray the water.
      Then once the rough carving was done.
      I proceeded to do the fine edges of the traced circle.
      Especially since this part has tolerances.

      Then after all that I took a jigsaw with a plastic cutting blade and turned it up on medium high speed.
      I cut the outer circle flush first.
      Then I cut the inner circle last.

      Once cutting was done I took my dremel head and carved everything flat and smooth.

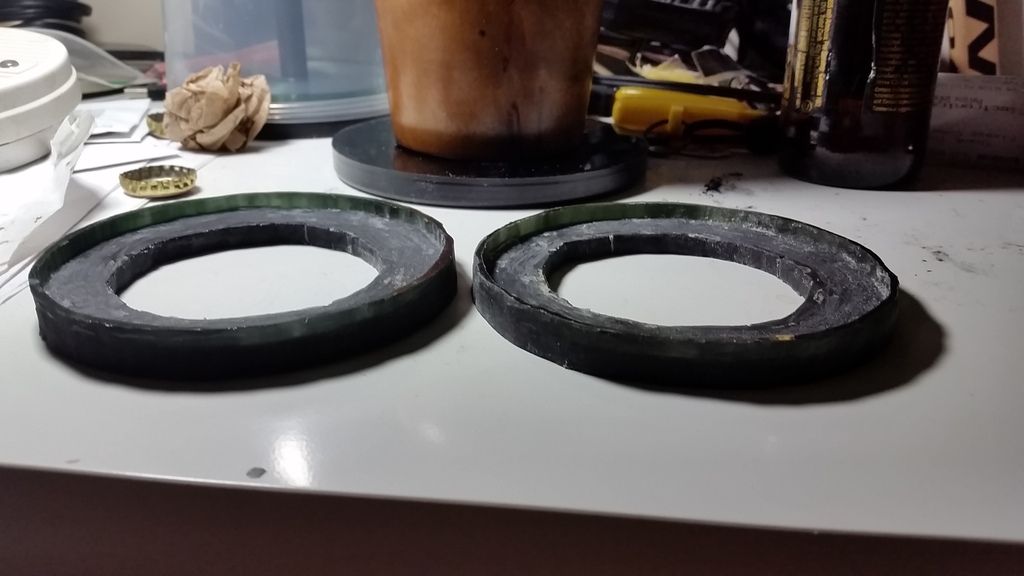
      And here is the finished product. It only took me a few hrs to make lmao. Just 5 more to go.
      Best part is that these are an upgrade over stock. It is stiffer yet still squishy like rubber.
      Should last a long time.


      I will be test fitting them tonight or tomorrow. And will fine tune it's shape to fit before installation.

      Who says people don't make things by hand anymore!
      Last edited by rmoltis; 04-13-2015, 07:18 PM.
      Running 40psi.....in my tires.


      http://aspire.b1.jcink.com/index.php?showtopic=611&st=0

      Comment


      • #18
        Got a 2nd one done yesterday as well as touching up/smoothing out the first one.
        Just need 4 more rear uppers and lowers.
        Although I am considering just making a set of 4 uppers.
        It would shave 6hrs off the "machining" process.


        Now that I've done my 2nd one and have noticed that this process is easily repeatable.
        My 2nd one has almost the exact same dimensions as the first.
        (These can't be perfectly made by hand and eye) they come out a little crude compared to oem parts.
        But the tolerances are perfect and the test fitment was spot on.

        I'm excited to see my long journey to get a set of these made is coming to an end.
        Last edited by rmoltis; 04-16-2015, 06:53 AM.
        Running 40psi.....in my tires.


        http://aspire.b1.jcink.com/index.php?showtopic=611&st=0

        Comment


        • #19
          Did you notch them for the end of the spring?
          2008 Kia Rio- new beater
          1987 F-150- revived and CLEAN!!!
          1987 Suzuki Dual Sport- fun beater bike
          1993 Festiva- Fiona, DD
          1997 Aspire- Peaspire, Refurb'd, sold
          1997 Aspire- Babyspire, DD
          1994 Aspire - Project Kiazord
          1994 Aspire- Crustyspire, RIP


          "If it moves, grease it, if it don't, paint it, and if it ain't broke don't fix it!"

          Comment


          • #20
            yes, i just wanted a gurantee the insulators would not work their way out of the top.
            i had this concept that if it were a disc shape that after a few thousand miles of aggresive driving
            and the spring compressing and uncompressing that it could slide out.

            also the spring pads total height was taller than the lip on the spring perchs up top on the front.
            so i had to remove half the disc thickness to help give the spring some metal backing behind the perch.
            so the dish effectively acts also as dampener for lateral motion of the spring pushing on the spring perch edges.
            help remove any metal to metal contact or vibrations.

            my last step when i finish the 4th isolator.
            will be to flute the side that rests against the body of the vehicle/topside of the bushing.
            you know how it has little square raised sections.
            they are to help dampen some of the smaller vibrations.
            since you effectively remove much surface contact area between squares, you put more weight on less dampening material.
            and so it effectively has more give.
            it will be a huge part of making sure these thing offer optimal comfort, optimal vibration, noise & harshness dampening.


            Last edited by rmoltis; 04-16-2015, 11:14 PM.
            Running 40psi.....in my tires.


            http://aspire.b1.jcink.com/index.php?showtopic=611&st=0

            Comment


            • #21
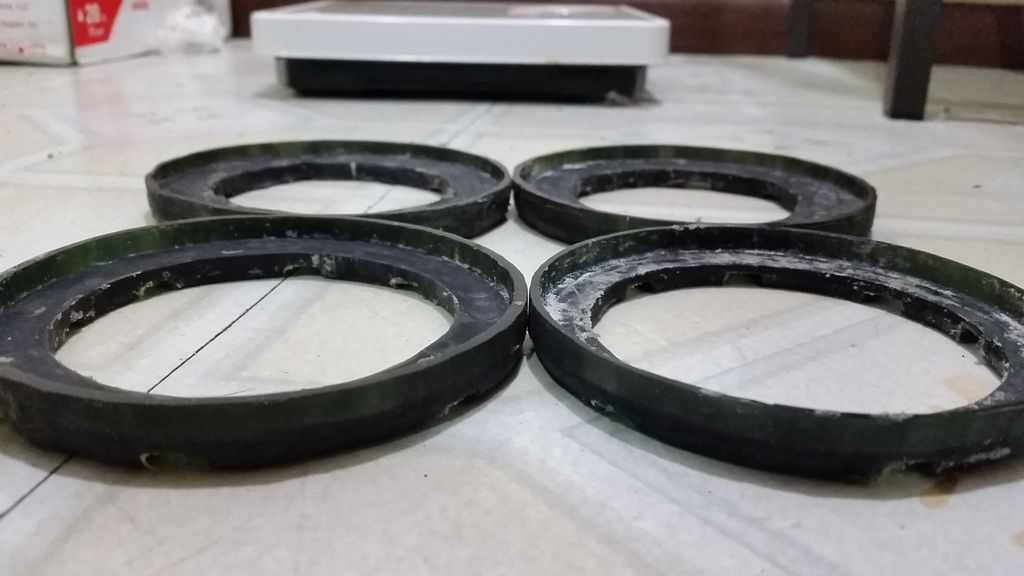
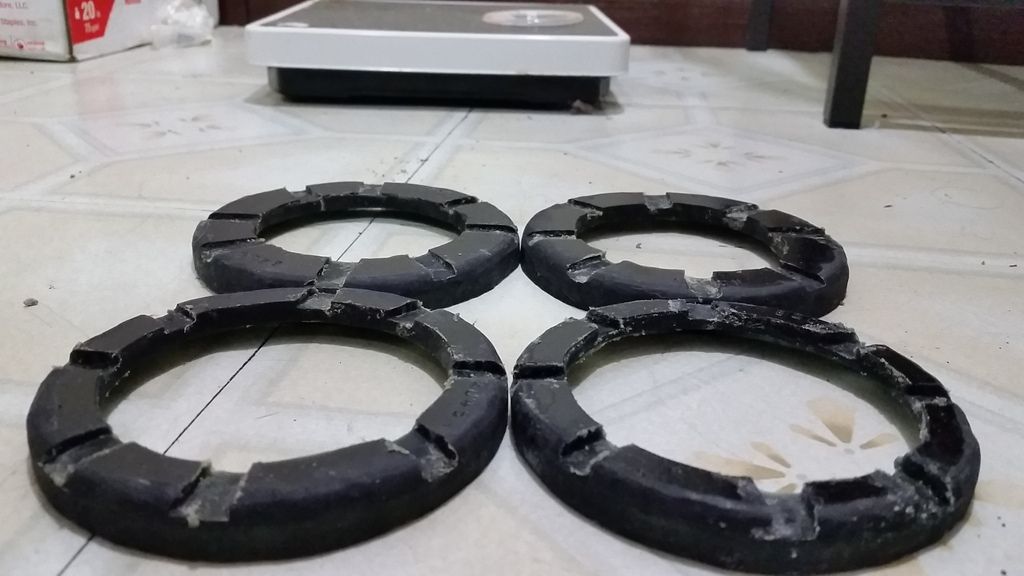
              I finally got some spare time to finish up the last isolator.
              Now I have all 4 done.
              I rounded the bottom edges and cut some little trenches into the top side of them all.


              The little trenches were the only part that I did by eye without measuring or placing them.
              So they are slightly crude lol.
              Running 40psi.....in my tires.


              http://aspire.b1.jcink.com/index.php?showtopic=611&st=0

              Comment


              • #22
                So now that my coil spring isolators have been finished.
                I put together my strut assemblies.

                All new parts.
                Struts, strut bellows, strut mounts, bump stops, elastomer isolators, bearings, king springs, and nuts.


                The isolators were a perfect fit and look as though they will do a great job.

                Things will keep moving forward one thing at a time.

                I just wanted to show the end product of this thread and see it through to the end.
                My last couple posts in here will be a review about how they work once the car is back on the road.
                Last edited by rmoltis; 04-23-2015, 07:52 PM.
                Running 40psi.....in my tires.


                http://aspire.b1.jcink.com/index.php?showtopic=611&st=0

                Comment

                Working...
                X