Announcement

Collapse
No announcement yet.

"Silver Bullet" Restore/Update/Repair/Upgrade thread

Collapse
X
 
  • Filter
  • Time
  • Show
Clear All
new posts

  • #46
    Looking good

    I'm always amazed by the places people use RTV. I do believe this is the first time I've seen it used as a head gasket though
    If a hammer doesn't fix it you have an electrical problem


    WWZD
    Zulu Ministries

    Comment


    • #47
      Darn Link, so much work for that B6! You are a go getter!

      Karl
      '93GL "Prettystiva" ticking B3 and 5 speed, backup DD; full swaps in spring!
      '91L "AquaMutt" my '91L; B6 swap/5 speed & Aspire brakes, DD/work car
      '92L "Twinstiva" 5sp, salvage titled, waiting for repairs...
      '93GL "Luxstiva," '94 B6 engine & ATX; needs overhauled
      '89L "Muttstiva," now a storage bin, future trailer project

      Comment


      • #48
        Thanks, guys! I really do need (and very much appreciate) the encouragement. So here's a shot of the bearings I was talking about earlier. These are the main caps and bearings, ordered 5-1 left to right. #4 has the pit.


        IMG_20110707_163812 by link5186, on Flickr

        I went on a measuring frenzy this afternoon and here's my white board full of results. All in inches. You can barely read the sheet of paper in the large sized image. My copy of it is clear as day.


        IMG_20110707_163755 by link5186, on Flickr

        I was really suprised by the amount of wear on the pistons! I measured them thrice just to be sure, and they really are that far under spec. The cylinders we're a little weirder than I expected too, though. #1 was kind of hour glassed and there was a bit of taper on #2 and #4. Doesn't matter though, I need pistons. I'll order them after I get the block to the machine shop. Looking at probably .020" over (that's 0.5mm for the metric fiends). The crank was in a lot better shape than I expected. It's going to the machine shop sometime too, though. I may be able to just polish it up, but if not, no biggie. Plenty of room to grind 'em under for bigger bearings. Here's a shot of the crank:


        IMG_20110707_163900 by link5186, on Flickr

        Ignore the man behind the camera. I then proceded to clear off some gasket material and sanded off any stubborn remaining stuff with my orbital. It came out pretty clean. I also checked the deck. Some good news, finally. It's flat! I then punched out the freeze plugs. Time to shop around for a block heater 
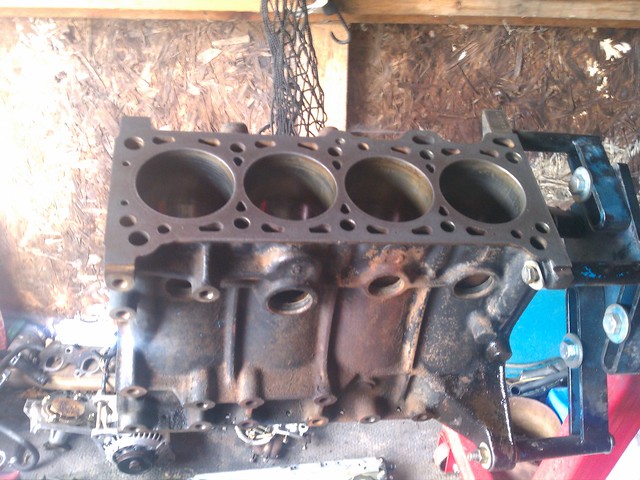
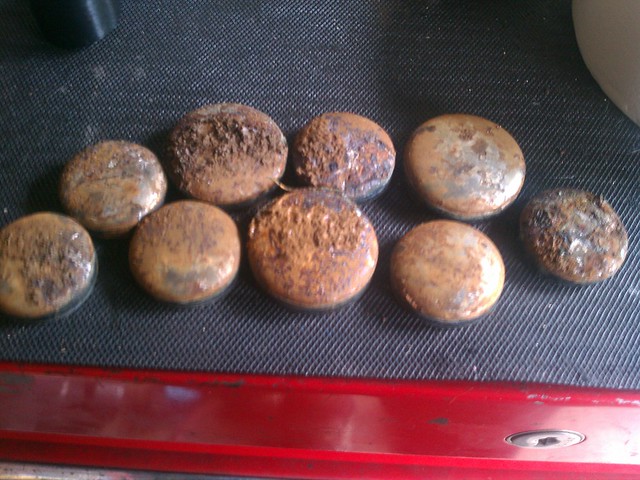
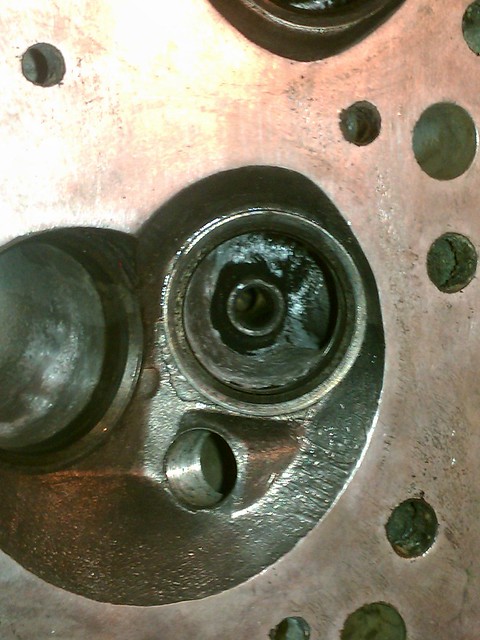
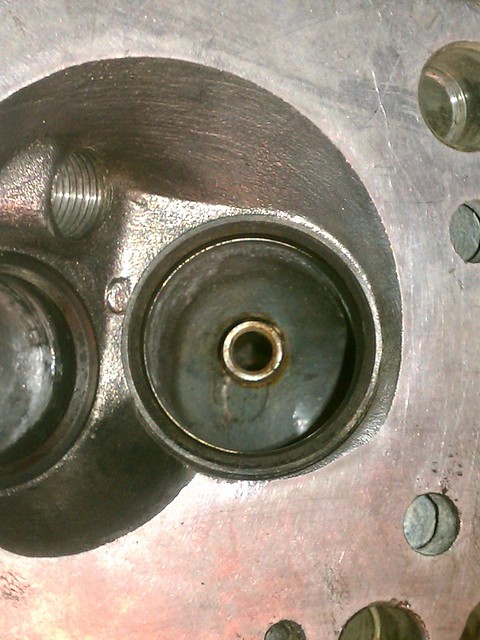
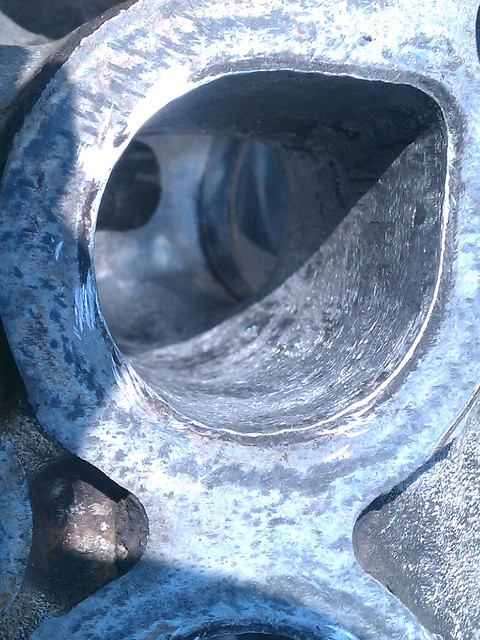
. I'll have the machine shop bake the block to get rid of some of the left over scale/sediment, and they can install the new freeze plugs (it's like $2 for all of them). Here's a few pics of the block again, ready to be pulled from the stand and taken in:


        IMG_20110707_170956 by link5186, on Flickr


        IMG_20110707_171015 by link5186, on Flickr

        And a shot of the back side of the freeze plugs so you can see the crud I've been fighting with:


        IMG_20110707_172400 by link5186, on Flickr

        And believe me, that stuff was everywhere in there. The head had me worried. I don't have a before pic, but all the coolant ports were literally plugged with white powdery crud. I took a small brush and the air nozzle and cleaned them out. I got that crud all over me, the shed, and my tool box. I then hit the head with the orbital sander with some fine paper to clean off all the head gasket left overs. After that I checked for warpage. Suprise! It's flat, too! I figured it would have been warped for sure, but I was thankfully wrong. Here it is with the bottom cleaned up:


        IMG_20110707_175218 by link5186, on Flickr

        I haven't pulled the valves or the cam yet. I'll do that later on. I want to take the head into work and hit it with the parts washer first to get all the nasty sludgy cruddies out. Then I'll tear it down, do some measuring and check for cracks. The plan is to reuse everything in the head so long as it's good. I'll probably replace the HLAs just to be safe either way and new valve stem seals are coming in my gasket kit. I'll go ahead and re-lap the valves as well.

        Calling it an early night tonight. After spending the last couple nights farting around with it until 11:30 and getting in trouble with the wife, it's time for a little change. That and money's getting tight again. Good thing this isn't my primary!
        91 L 5sp "The Silver Bullet" B6, Brake/Susp Swapped Build Thread
        92 L 5sp "Red" RIP
        95 Grand Prix SE DD
        Wife's Stuff:
        89 L 5sp "Carby Car"
        97 Aspire auto "Pink Panther"
        Build Thread

        Spring 2013 IndyStiva:
        http://www.fordfestiva.com/forums/sh...eet-April-20th

        Comment


        • #49
          So I took the head to the shop and cleaned it up with the parts washer. Got some of the carbon out of the chamber and ports and got all the sludge out from around the cam. Took it back home and then ran the crank and block into Indy for some machining. Ordered pistons today from Rock Auto. $32 after shipping, right on! Then I took a little trip to Harbor Freight and had a decent time shopping around. I don't get it, they sell engine cylinder hones but not stone sets. Whatev. I did pick up some new wire cup brushes and a few other things. I might make a night out of tonight and tear down the head. Didn't get to yet because I left Indy and went straight to the parents' place. I might make a late night out of it and tear it down when I get home. I might not. We'll see.
          91 L 5sp "The Silver Bullet" B6, Brake/Susp Swapped Build Thread
          92 L 5sp "Red" RIP
          95 Grand Prix SE DD
          Wife's Stuff:
          89 L 5sp "Carby Car"
          97 Aspire auto "Pink Panther"
          Build Thread

          Spring 2013 IndyStiva:
          http://www.fordfestiva.com/forums/sh...eet-April-20th

          Comment


          • #50
            Well I got the head torn down today. Cam looks pretty good. I decided to try my hand at porting. I opened up the exhaust ports around the bends and smoothed out that gnarly ridge. Stayed fairly conservative with it. I also smoothed the edges on the intake ports. I managed to do it all without damaging valve seats, so yay for that. I'm throwing enough cash at the machine shop as is. I've still got a bit of cleaning up to do, but I'd say it looks pretty good for my first attempt. I'll post pics of the finished product tomorrow.

            Sent from the bathroom via crapatalk
            91 L 5sp "The Silver Bullet" B6, Brake/Susp Swapped Build Thread
            92 L 5sp "Red" RIP
            95 Grand Prix SE DD
            Wife's Stuff:
            89 L 5sp "Carby Car"
            97 Aspire auto "Pink Panther"
            Build Thread

            Spring 2013 IndyStiva:
            http://www.fordfestiva.com/forums/sh...eet-April-20th

            Comment


            • #51
              Coming along nicely!
              -M3NTAL MARK! Woo!!

              Comment


              • #52
                Finally an update, I know it's been long coming. First off, a few shots of the port job I did on the head. This is the exhaust side after a bit of grinding and before a final cleanup:

                IMG_20110709_221324 by link5186, on Flickr

                And a shot of an intake side:


                IMG_20110709_221340 by link5186, on Flickr

                The intake side wasn't that bad, I just took off the step before the valve seat relief. The exhaust side took a good bit more grinding. Then even more cleaning up. Here's how they turned out after a decent smoothing and cleaning:


                IMG_20110716_155121 by link5186, on Flickr

                Not bad for my first time, eh? So after that I had my nephew over for the weekend and had him help out with the assembly process. It was a pretty long day. I had to get a fresh set of head guide pins from the mazda dealer. I pulled the oil pump from the teardown of my parts car's engine and checked it out and cleaned it up for use on the b6. Crank was ground .010" under on the rods and mains and the block was bored .020" over. Checked clearances with plastigage and threw it all together. Got the head set on it and called it a night. The next day I spent delivering parts and then having an awesome time with my nephew at the golf course. Took him home Sunday and went to see my wife's grandma in the hospital (she fell 
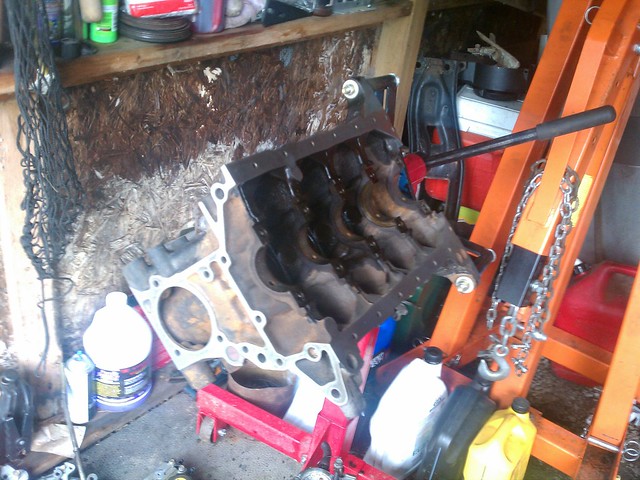
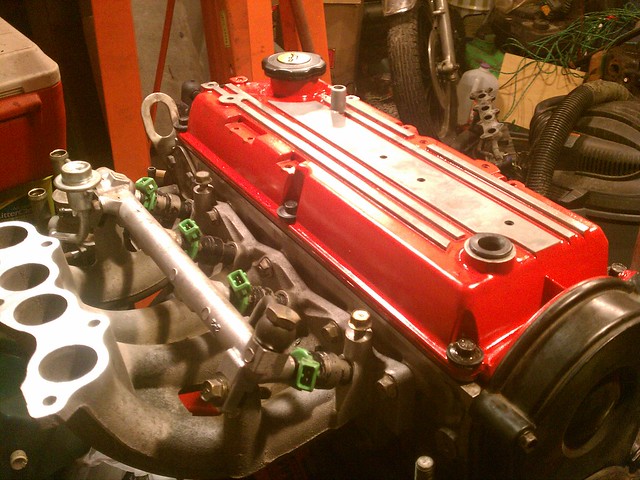
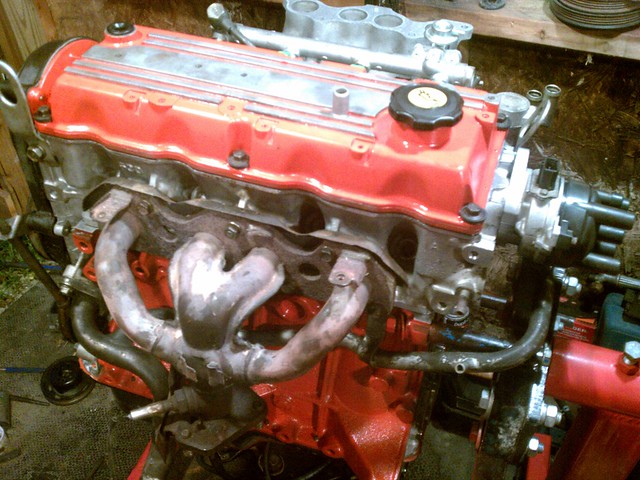
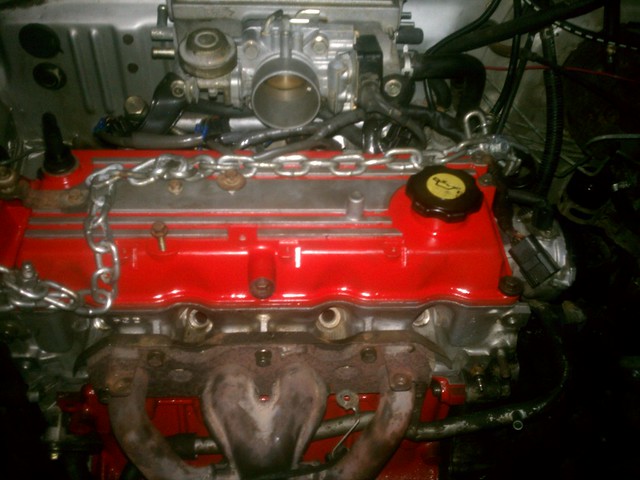
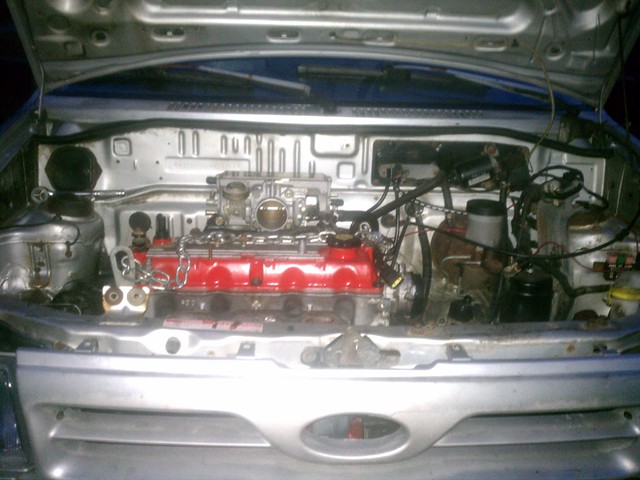
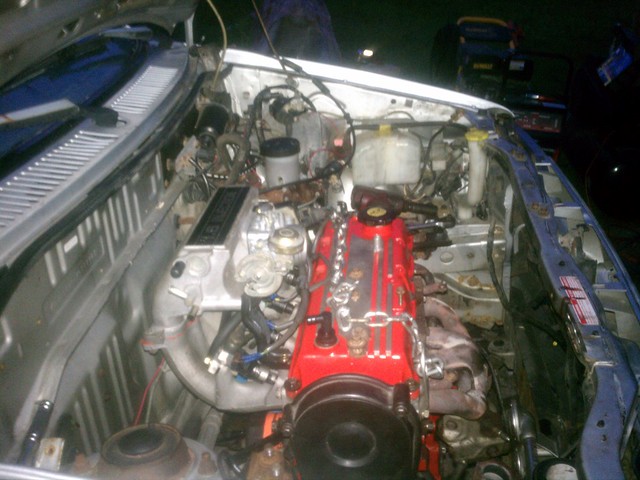
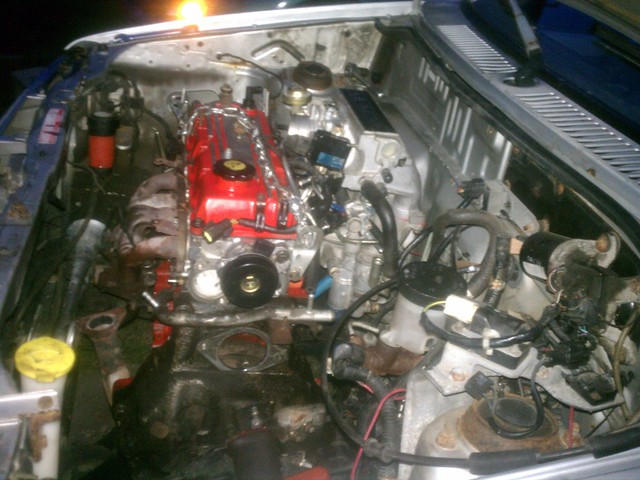
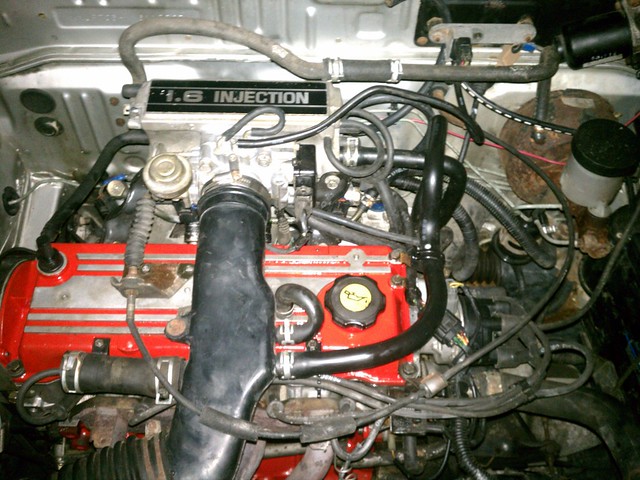
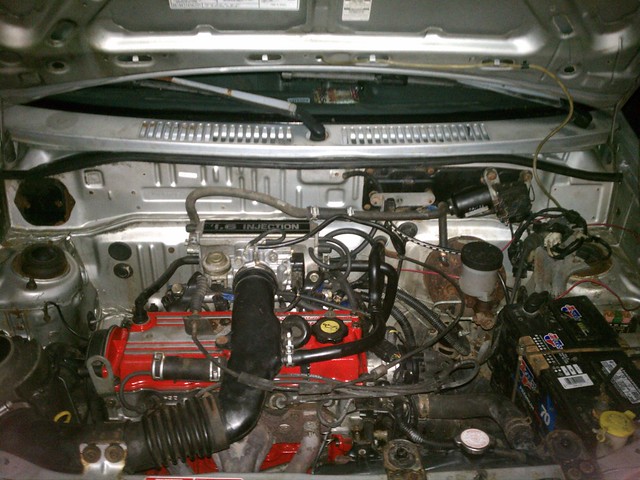
). I then spent the next few weekday evenings putting all the manifolds and other goodies on. Here's a few shots of it almost ready to drop in:
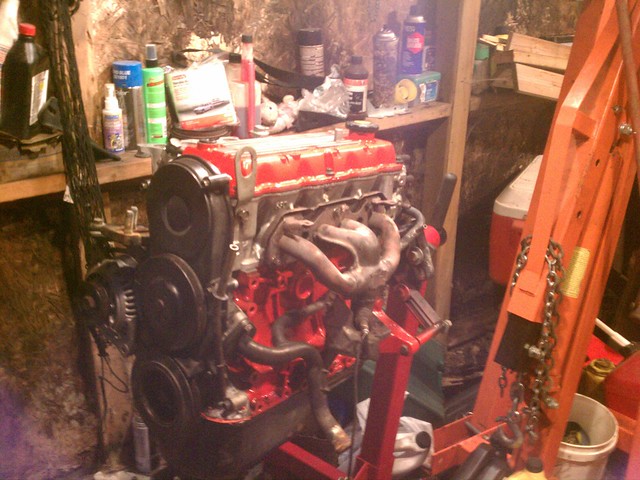

                IMG_20110805_211216 by link5186, on Flickr


                IMG_20110805_211227 by link5186, on Flickr


                IMG_20110805_211240 by link5186, on Flickr

                Yup, that's an aspire exhaust manifold. I have the b6 one but I'm not putting it on until I have money to replace the exhaust. I was also short the intake manifold upper gasket and the throttle body gasket, so I had to order those. Karl asked about whether the B6 body would bolt on to the B3 and the answer is a confimed yes!

                Anyway, I spent the next few days driving my wife's car (about which she is never too keen) while working on completing the swap in the evenings. Nothing exciting about pulling a b3, we've all done it, right? So here's a few shots of the B6 just after I got it bolted to the transmission:


                IMG_20110806_211139 by link5186, on Flickr


                IMG_20110806_211147 by link5186, on Flickr

                Ignore the RTV in these two shots on the intake manifold sections, it's long gone now, replaced with a real gasket:


                IMG_20110806_211156 by link5186, on Flickr


                IMG_20110806_211205 by link5186, on Flickr

                So later on I got all the other niceties on and all the vacuum and coolant lines routed and connected. It's currently a vacuum line mess since I didn't have any plugs so I routed hoses from manifold port to manifold port. I also had to modify the throttle cable bracket since there wasn't enough adjustment to close the butterfly.


                IMG_20110810_212605 by link5186, on Flickr


                IMG_20110810_212622 by link5186, on Flickr

                I still have some tidying up to do. I plan to run a solid line across the firewall for the brake booster and plan to piece together a cold air intake. I had to remove the resonator because of a clearance issue with the throttle cable. It wasn't going to happen. I also had planned to use the B6 VAF, but it threw a code and ran like crap so now I'm using the B3 VAF. Still running the B3 ECM but with B6 injectors. I ran it until it warmed up then dumped the oil and refilled. Then I went on my first road run with it. After a little driving to seat the rings I changed the oil and filter. I've been running it daily for almost a week now and so far so good. I've gone about 400 miles on it so far. This thing pulls like a champ and has a nice growl to it. The Bullet got a bit of an attitude! I've been shopping around the junkyards off and on for a B61K ECM lately, but haven't found one yet. If it opens it up as much as I've been told I'm in for a treat when I find one.
                91 L 5sp "The Silver Bullet" B6, Brake/Susp Swapped Build Thread
                92 L 5sp "Red" RIP
                95 Grand Prix SE DD
                Wife's Stuff:
                89 L 5sp "Carby Car"
                97 Aspire auto "Pink Panther"
                Build Thread

                Spring 2013 IndyStiva:
                http://www.fordfestiva.com/forums/sh...eet-April-20th

                Comment


                • #53


                  Give these guys a call. They have a junk yard here in Anderson. Not a ton of cars there but worth a shot! They have a fairly nice festiva as well.

                  Good work by the way!
                  -------------------------------------------------------------------------------------------
                  Nancy- 1.8L BP, aspire swap, g-trans
                  The Adventures of Nancy! Build Thread
                  -------------------------------------------------------------------------------------------

                  My Musica! Click me!

                  Comment


                  • #54
                    i am really loving this build thread . keep it up. The b6 does have its benefits but if im gonna do a motor swap im gonna go with something that looks nothing like the b3. as reliable as they are im kinda sour towards mine cause when i got it i have been playing hell with it. but to one is his own. great build again bro.

                    Comment


                    • #55
                      .... About the sludge and crud in the water / anti freeze system. Do you think if you had used, along the way, a radiator cleaner, that it might have reduced or even eliminated that crud? Or, perhaps replacing the anti freeze, say every year or two or three?
                      .
                      A hunch is creativity trying to tell you something.

                      Comment


                      • #56
                        Lookin good man! And good job on the head porting. The exhaust side will thank you

                        As far as the the B3 vs. B6 throttle body, they are exactly the same other than a few extra vacuum ports on the B6 unit. I typically use the B3 TB so all the lines will hook back up in their original spots.
                        If a hammer doesn't fix it you have an electrical problem


                        WWZD
                        Zulu Ministries

                        Comment


                        • #57
                          Boydg1-- as far as the crud goes it was mostly from oil in the coolant. While some of it may have come out with a good chemical flush, fill, flush and another fill I doubt it would have made much of a dent in it. Since it was going to the machine shop anyway I had it baked clean. After all the picking I did at it beforehand a chemical flush might have been good enough, but I tend to be a bit picky. It also didn't help that the head was full of puffy crud. I cleaned it out as well as I could, and I'll probably flush the cooling system out in a few months to get rid of the remaining crud. It has already slightly discolored the coolant.

                          Zanzer-- thanks! Wouldn't have done it without your awesome thread about the b3 head. I didn't even think to measure the port openings on the throttle bodies, but it's good to know. I'll be leaving it as is for a while, but I have been contemplating swapping out to a larger one (BP, B8?).

                          In other news I checked my fuel mileage today. 39.4 mpgs! Pretty sweet considering it runs a bit rich and I like to get on it. Believe me, I haven't been trying to get good mileage.

                          Sent from the bathroom via crapatalk
                          91 L 5sp "The Silver Bullet" B6, Brake/Susp Swapped Build Thread
                          92 L 5sp "Red" RIP
                          95 Grand Prix SE DD
                          Wife's Stuff:
                          89 L 5sp "Carby Car"
                          97 Aspire auto "Pink Panther"
                          Build Thread

                          Spring 2013 IndyStiva:
                          http://www.fordfestiva.com/forums/sh...eet-April-20th

                          Comment


                          • #58
                            Originally posted by link5186 View Post
                            Zanzer-- thanks! Wouldn't have done it without your awesome thread about the b3 head. I didn't even think to measure the port openings on the throttle bodies, but it's good to know. I'll be leaving it as is for a while, but I have been contemplating swapping out to a larger one (BP, B8?).

                            In other news I checked my fuel mileage today. 39.4 mpgs!
                            Glad I could help! :thumbup: Every now and then I pull a rabbit out of the hat LOL

                            Per the larger TB; contrary to what clubprotege says, the BP, B8, and 2nd gen B6/B6ME throttle bodies won't fit a B3 or first gen B6. The bolt pattern is different and the IAC hangs down too far and will hit either the valve cover, intake brace or fuel rail (depending on recipient engine). Your best bet to replace the 45mm B3/B6 (1st Gen) TB is to use a 50mm one from B6T. It's a direct bolt-on

                            Awesome fuel milage! That's better than my B3 Aspire motor is getting! :thumbright:
                            If a hammer doesn't fix it you have an electrical problem


                            WWZD
                            Zulu Ministries

                            Comment


                            • #59
                              Alrighty, time for a few updates. I've put about 3300 miles on the B6 so far. Over the last 2600-some it's eaten maybe a quarter of a quart of oil. Next oil change coming at the end of this week. Got the B6 ECM installed a while ago. Ran it for a bit with a modified B3 VAF then for a bit with an untouched B3 VAF. Found a B6 VAF about a week ago at a JY and threw it in. Fuel mileage has been hovering between 36 and 42 mpg. Last fill up was right at 40 with the new VAF.

                              I pulled the passenger door panel off over the weekend to check the speaker opening in the door and ordered me a component set on ebay. Also getting a new used clarion head unit. Gotta have some good tunes for the 11 hour trip to Madness!

                              Today I cut the driver side quarter out of the parts car. Here's an interesting shot of what a few minutes with an air hammer and a sawzall can do:


                              IMG_20110920_181257 by link5186, on Flickr

                              Then I trimmed a little excess off the front of the piece I cut and removed the fender well section from the panel. Next I lined it up with the quarter on the Bullet and marked him up so I know where I need to hack away. Sadly enough this is probably going to be the best looking section of paint on the car:


                              IMG_20110920_181131 by link5186, on Flickr

                              I'll finish it up at the shop after work tomorrow. I'll have to weld in some plating to reinforce the area where my rear axle mounts. The rust is getting the better of it on the outer section. Unfortunately my panel isn't perfect and will need a bit of a patch in the corner but it's certainly better than what I've got now. I was going to cut out a section on the passenger side but didn't. More fiberglass work over there. Shouldn't be too bad as the holes on that side aren't even a quarter the size of what I have on the driver side. I'm hoping I can get the holes in the rear patched up too. He isn't going to look pretty, but at least we'll stay dry.
                              91 L 5sp "The Silver Bullet" B6, Brake/Susp Swapped Build Thread
                              92 L 5sp "Red" RIP
                              95 Grand Prix SE DD
                              Wife's Stuff:
                              89 L 5sp "Carby Car"
                              97 Aspire auto "Pink Panther"
                              Build Thread

                              Spring 2013 IndyStiva:
                              http://www.fordfestiva.com/forums/sh...eet-April-20th

                              Comment


                              • #60
                                i cant wait to see how you do the quarter!

                                Comment

                                Working...
                                X