 Tweet
Tweet
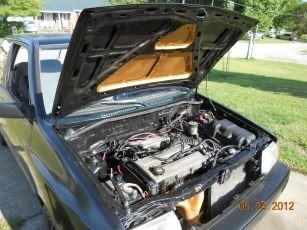
I finally got around to replacing my worn out LCA that I had known was bad since February of this year. Needless to say, I'm lucky the lower ball joint didn't rip apart and leave me on the side of the road. This job was quite easy, I think it took me an hour taking my time.
Tools you will need: floor jack, jack stands, electric impact, 14 mm deep socket, 9/16 deep impact, and 11/16 deep impact socket, large pry bar or thick screw driver, BFH, ratchet, 6 inch c clamp, grease.
First jack up the car and the front under the cross member and then put two jack stands on either side of the frame rails behind the front wheels. Leave key in ignition so you can turn the wheels while its in the air. Remove wheels and use wheel to sit on for comfort. The rest of the steps will be used using pictures.
Remove the two 14 mm nuts that secures the sway bar to the body of the car.

Remove the 11/16 nut and giant washer and control arm bushings. They are shown on the ground in the picture.

Next remove the 14 mm pinch bolt and nut and spread apart the part the bolt goes into. Use the BFH and smack the crap out of the old LCA. I don't think I really needed to do this but it felt good anyways. Next remove the 14 mm bolt that allows the LCA to pivot.
Sorry but I forgot to take pics of these two steps. Now just play around with the old LCA and remove from the sway bar.
This is the new LCA compared to the severely worn old one. Look how limp the ball joint assembly is, yikes!

I greased all the new bushings and the big hole in the new LCA to ease installation of the bushings.

I installed one of the bushings onto the sway bar as far as I could by hand.

Then I used a 6 inch C clamp to press the bushing all the way onto the sway bar to seat it. This by far was the most difficult part of the job.
This is from behind.

This is seen from the front.

Now use the C clamp to press on the outer bushing as far as it can go or enough so that you can put the large washer and nut on to start threading it on. Once this is done, its easy to just use the nut to compress the outer bushing onto the sway bar.
Now to install the LCA at its pivot point. I just played around with it till I could get the long 14 mm bolt to start threading into the welded nut. I only threaded it on about 3 or 4 threads, that way I could still manuver the lower ball joint into the pinch bolt.

Now put the ball joint into the pinch bolt area (I have no idea what this part is called). I used my jack to help me push it into place. There is a small groove on the lower ball joint that the pinch bolt must go through in order to secure the ball joint. When it is ready to be secured, tighten the 14mm nut while holding the 14mm bolt with a ratchet. I used my electric impact to tighten the nut.


Now you can tighten up the 14mm pivot bolt. Go tight but not too crazy or you might strip some threads. This is the new LCA installed and tightened down.

Now put the sway bar bushing clamps back on and tighen down the two 14mm nuts and put the wheel back on and you're done. Go take a test drive and listen for unusual noises.
Tools you will need: floor jack, jack stands, electric impact, 14 mm deep socket, 9/16 deep impact, and 11/16 deep impact socket, large pry bar or thick screw driver, BFH, ratchet, 6 inch c clamp, grease.
First jack up the car and the front under the cross member and then put two jack stands on either side of the frame rails behind the front wheels. Leave key in ignition so you can turn the wheels while its in the air. Remove wheels and use wheel to sit on for comfort. The rest of the steps will be used using pictures.
Remove the two 14 mm nuts that secures the sway bar to the body of the car.
Remove the 11/16 nut and giant washer and control arm bushings. They are shown on the ground in the picture.
Next remove the 14 mm pinch bolt and nut and spread apart the part the bolt goes into. Use the BFH and smack the crap out of the old LCA. I don't think I really needed to do this but it felt good anyways. Next remove the 14 mm bolt that allows the LCA to pivot.
Sorry but I forgot to take pics of these two steps. Now just play around with the old LCA and remove from the sway bar.
This is the new LCA compared to the severely worn old one. Look how limp the ball joint assembly is, yikes!
I greased all the new bushings and the big hole in the new LCA to ease installation of the bushings.
I installed one of the bushings onto the sway bar as far as I could by hand.
Then I used a 6 inch C clamp to press the bushing all the way onto the sway bar to seat it. This by far was the most difficult part of the job.
This is from behind.
This is seen from the front.
Now use the C clamp to press on the outer bushing as far as it can go or enough so that you can put the large washer and nut on to start threading it on. Once this is done, its easy to just use the nut to compress the outer bushing onto the sway bar.
Now to install the LCA at its pivot point. I just played around with it till I could get the long 14 mm bolt to start threading into the welded nut. I only threaded it on about 3 or 4 threads, that way I could still manuver the lower ball joint into the pinch bolt.
Now put the ball joint into the pinch bolt area (I have no idea what this part is called). I used my jack to help me push it into place. There is a small groove on the lower ball joint that the pinch bolt must go through in order to secure the ball joint. When it is ready to be secured, tighten the 14mm nut while holding the 14mm bolt with a ratchet. I used my electric impact to tighten the nut.
Now you can tighten up the 14mm pivot bolt. Go tight but not too crazy or you might strip some threads. This is the new LCA installed and tightened down.
Now put the sway bar bushing clamps back on and tighen down the two 14mm nuts and put the wheel back on and you're done. Go take a test drive and listen for unusual noises.


Comment