 Tweet
Tweet
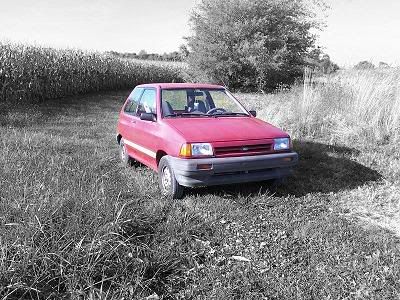
Here it is! Detailed pics of front wheel bearing replacement on a '95 Aspire! Note: I know my parts are worn, so please leave out comments about my equipment.
Step1
Raise the vehicle and remove the tire. Place the vehicle on a jack stand or similiar. For safety sake, do not leave the vehicle on jack.
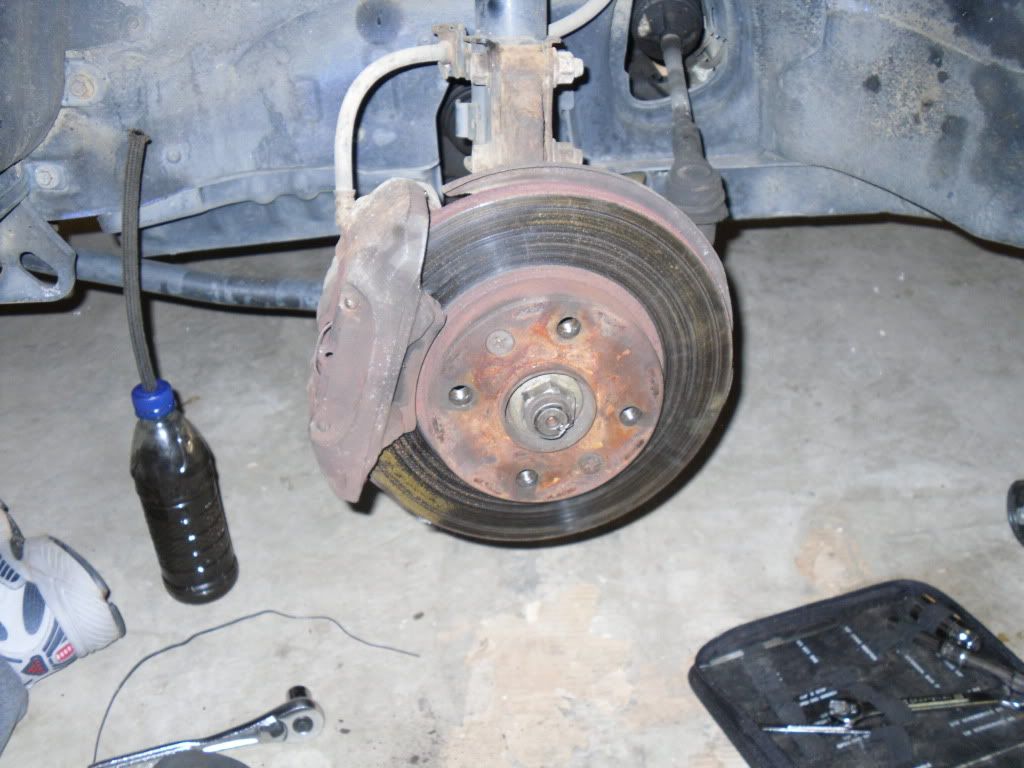
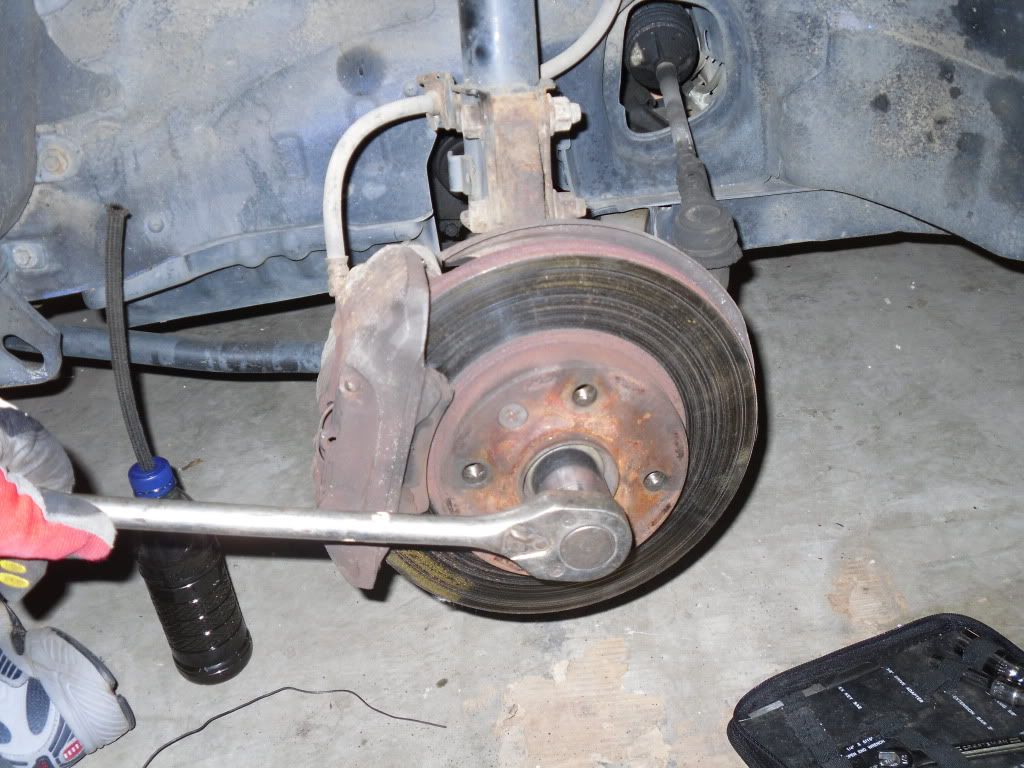
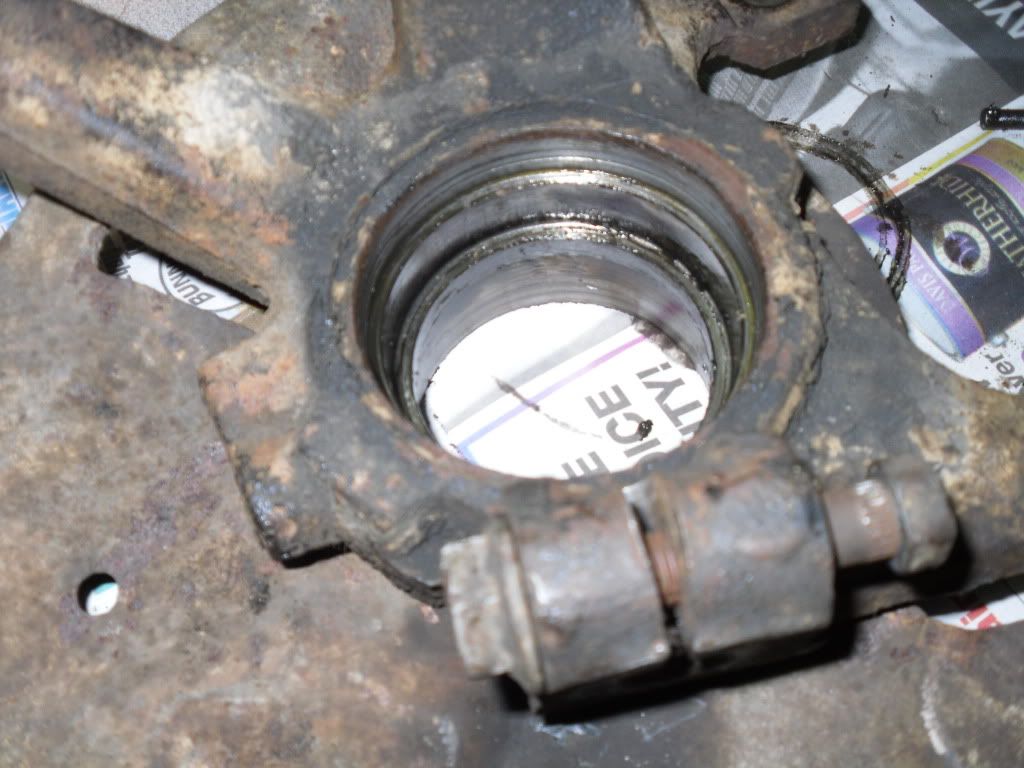
2. Have some apply the brakes on the car. Open the chiseled indention on the crunch nut and remove it. I used a flat head screw driver to open the chiseled indention. Make sure you open it entirely so that it does not scrape as the nut comes off.
3. The OEM Ford manual has you leave the brake unit on the car until later. I chose to remove it now to get it out of the way. To me, this was a better choice.
There are two bolts that hold the brake unit onto the rotor.
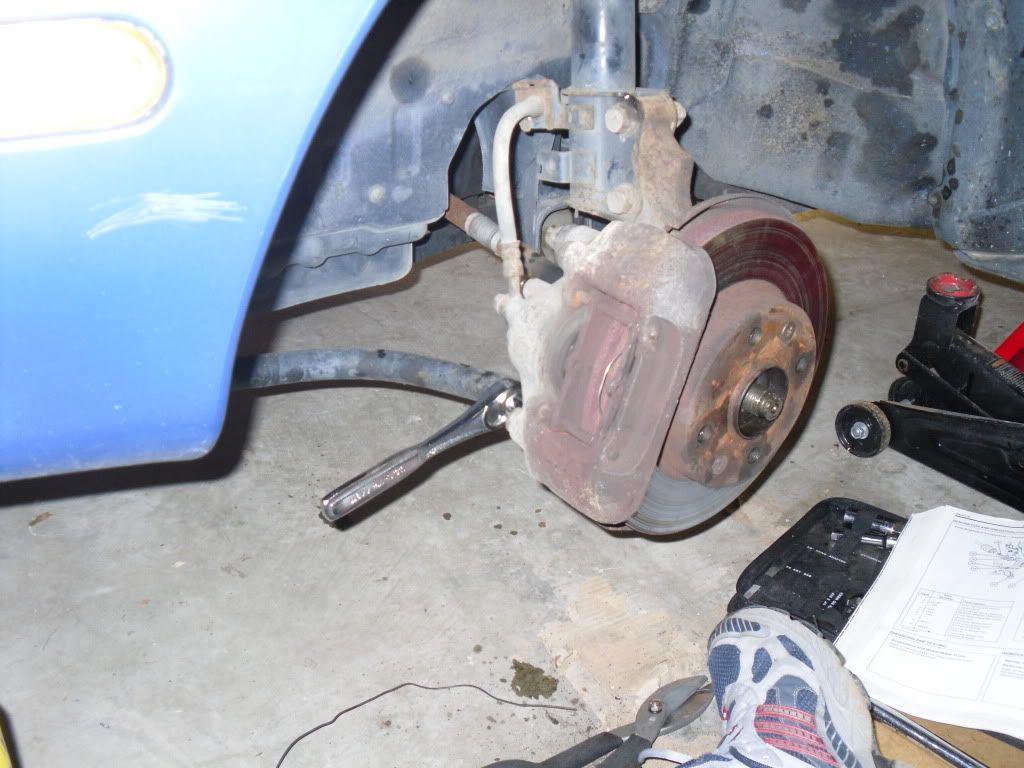
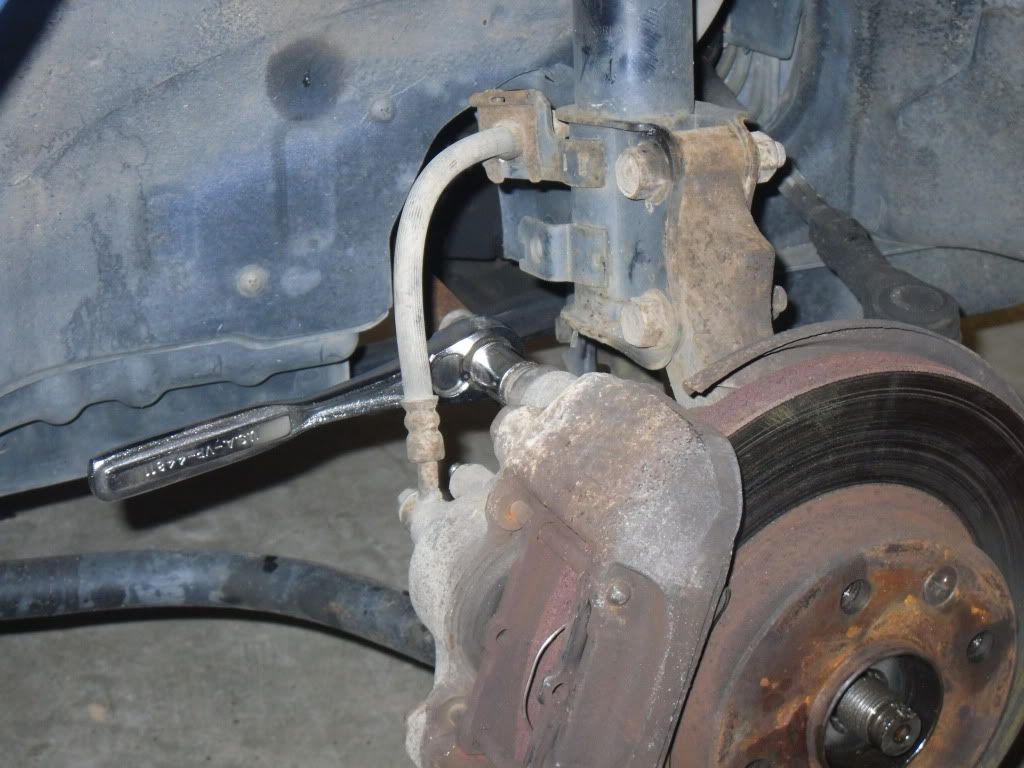
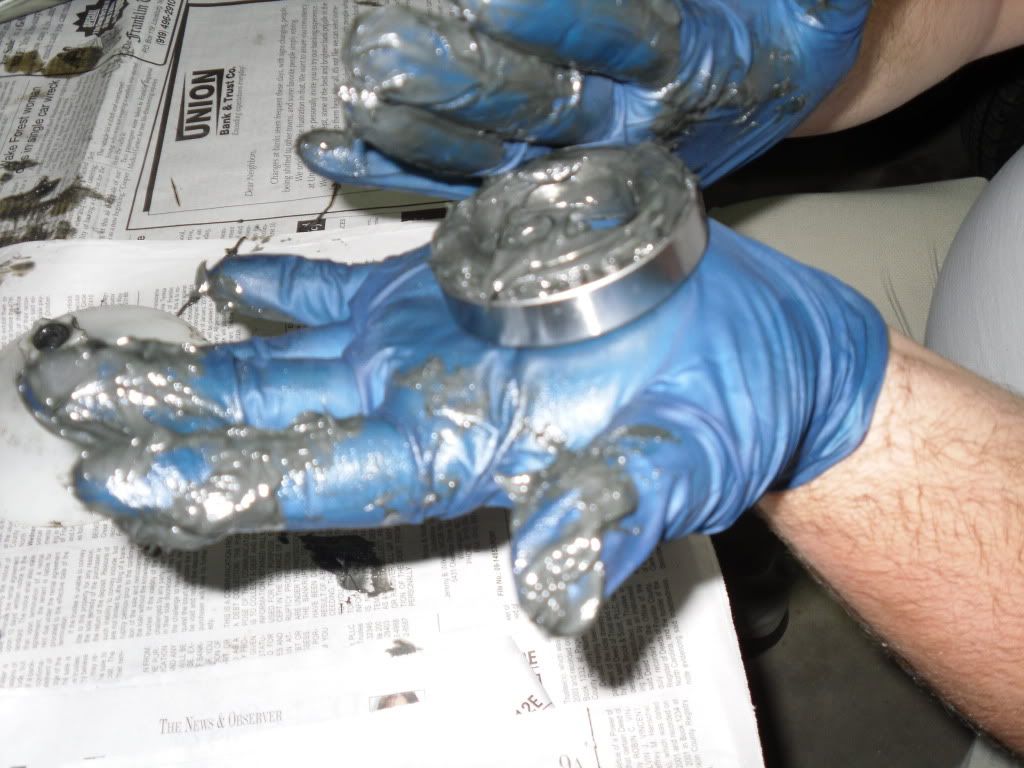
Once those two bolts were removed, I bled the brake unit into a bleeder bottle so I could loosen the brake shoes from the rotor. This can be done by opening the small bleeder valve near the top mount bolt of the brake unit. This bleeder valve should have a rubber peice covering the opening of the valve. This is to protect it from the eliments. Once this valve is open, gently pull the brake unit toward you. This compresses the part that squeezes the brakes onto the rotor and allows you to remove the brake unit from the rotor. I used wire to tie the brake unit up and out of the way. Do not touch the brake pads or rotor with greasy fingers. Also, do not let the brake unit "hang" only by the brake line. This will cause damage!
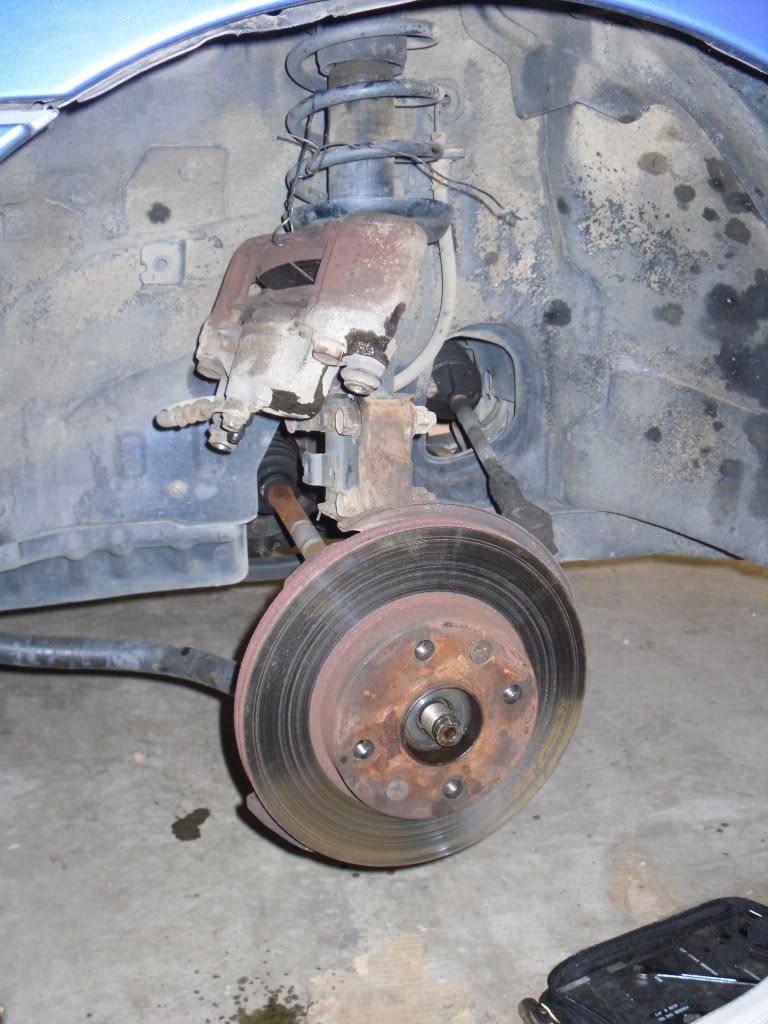
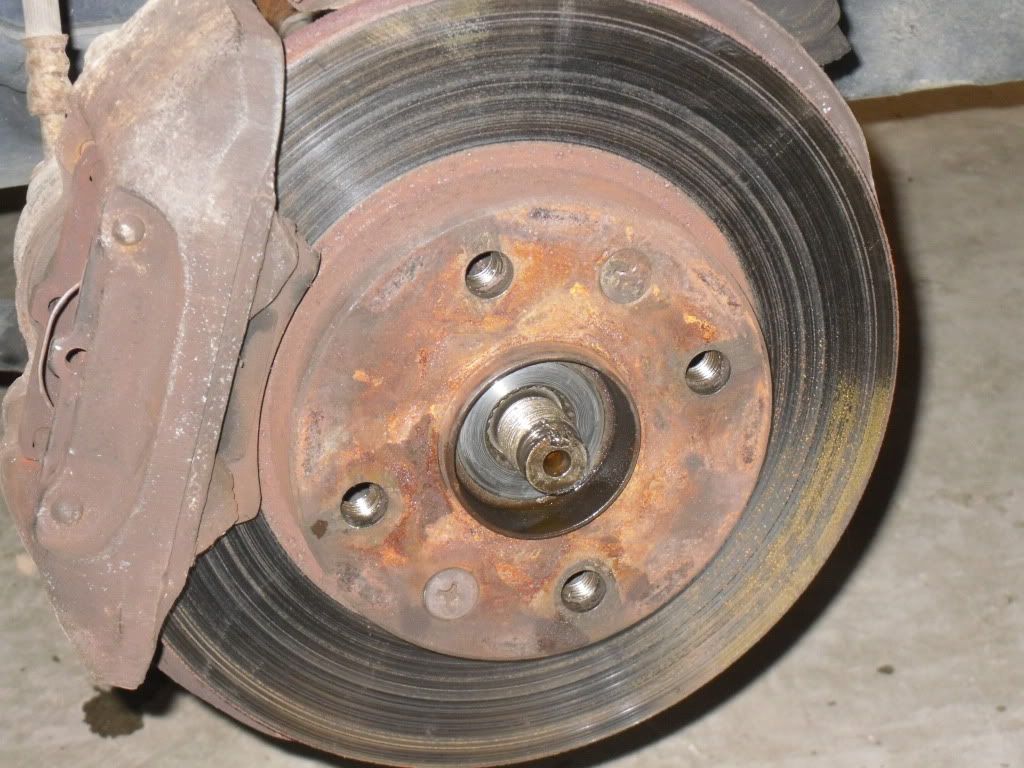
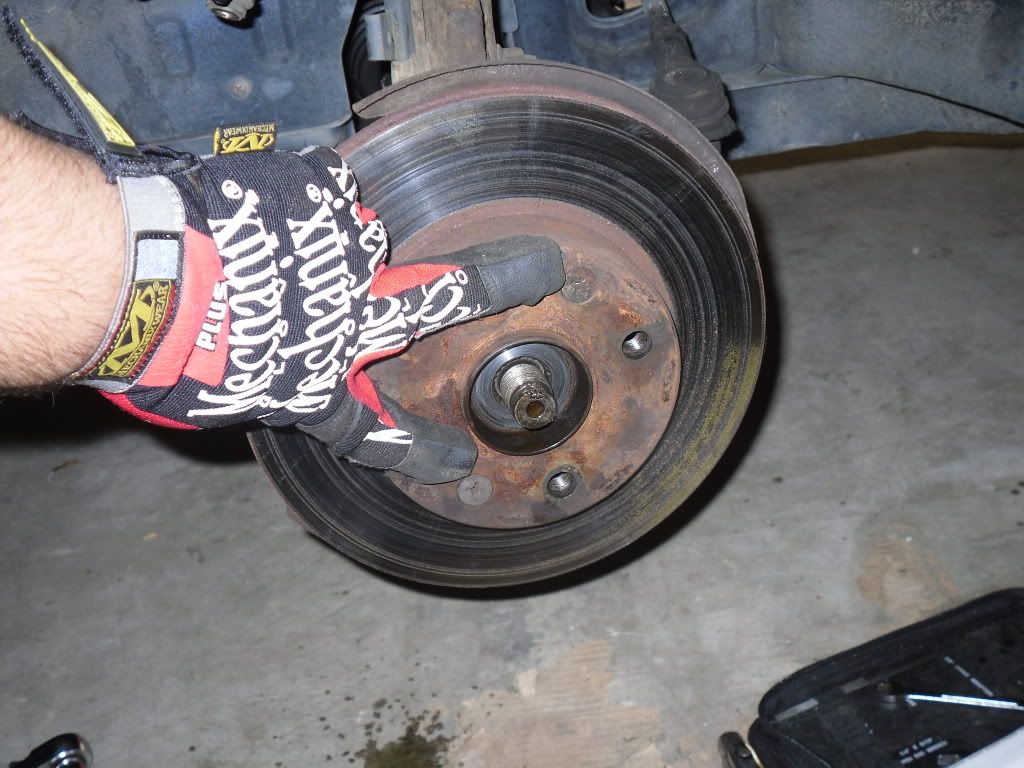
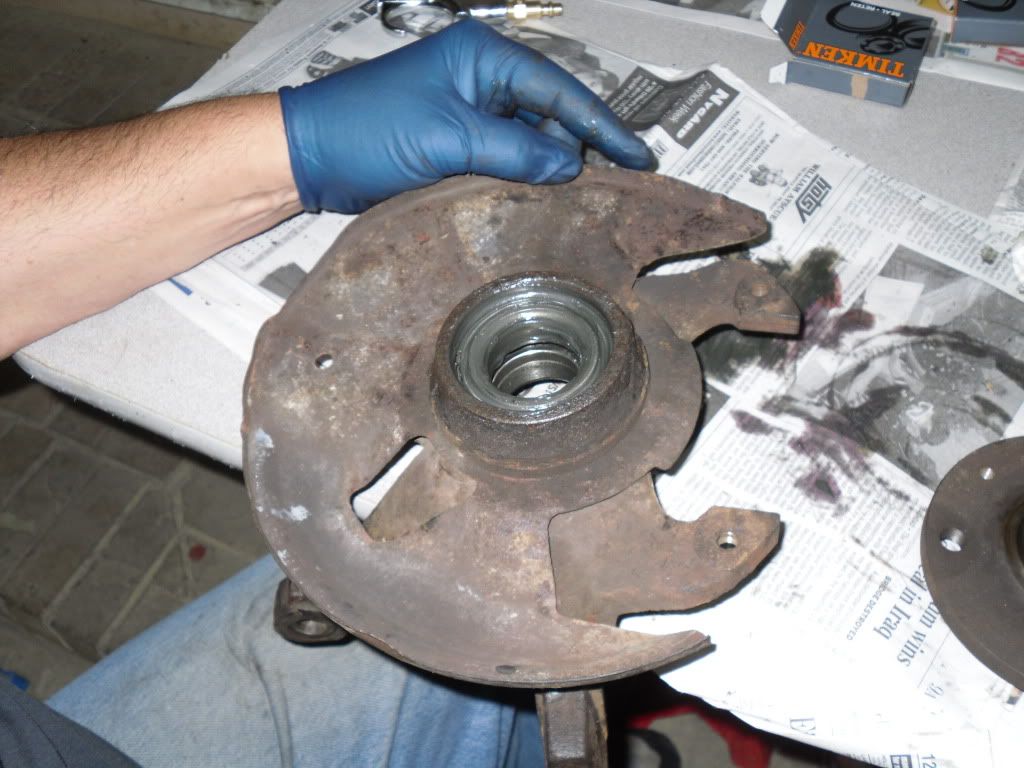
4. Remove the two screws that hold the rotor onto the car. Once I removed mine, I stood it up against the wall. I did not lay it on the ground. Remember, this what your brake pads clamp onto. Do not touch with greasy fingers or lay it in dirt!
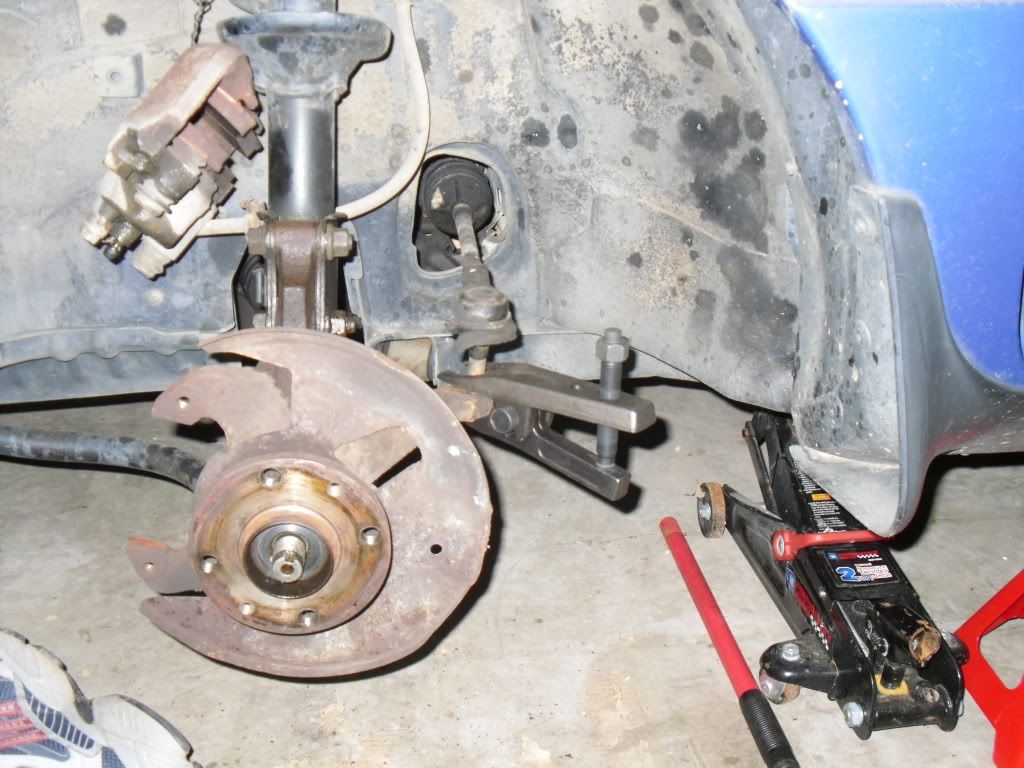
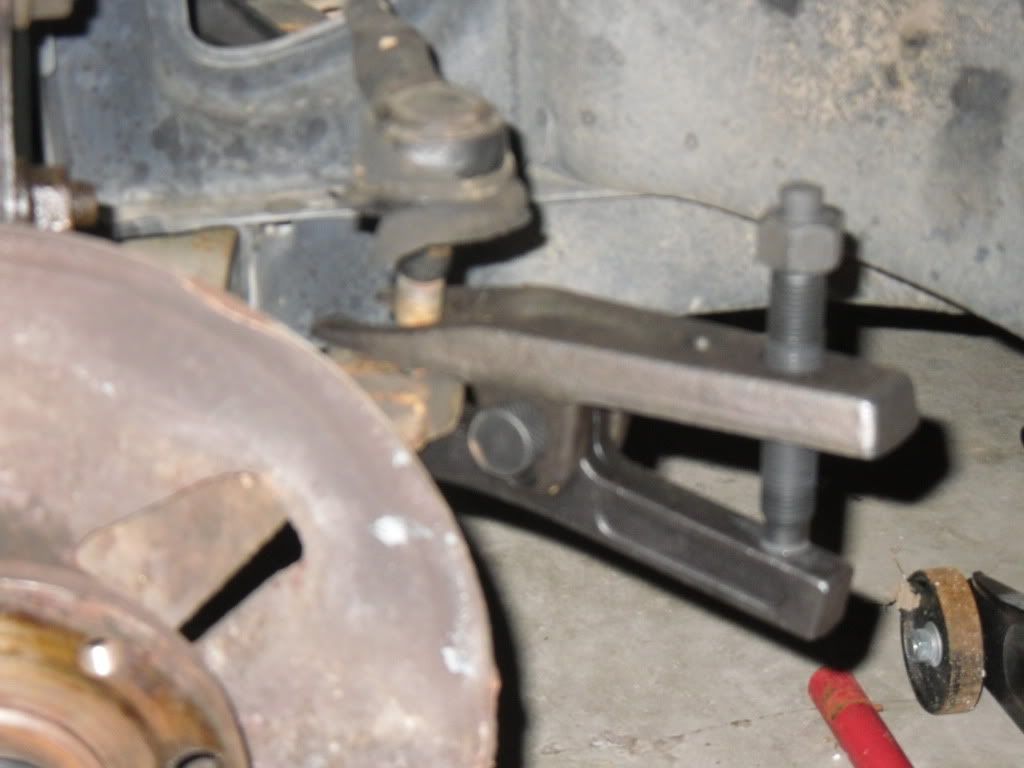
5. You are going to need to remove the cotter pin and nut that attaches the tie rod to the knuckle.
Once I removed mine, I could not get the tie rod to come off the knuckle. So a quick trip to Harbor Freight and I picked up a 9 dollar "pickle fork" (tie rod remover). This has a forked end that slides underneath the tie rod and has a screw you adjust to open the device. (this pries the tie rod out of the hole)
NOTE: Once the tie rod is removed, do not allow the tie rod end to "move". Basically, this is your car's alignment. The tie rod end is threaded onto the tie rod. This is how alignment is adjusted. Move it and your car will be "out of align". I later learned that I need to replace my tie rod ends (this unit mentioned). Good luck trying to find any bushing replacement parts.
Allow the tie rod to lower and lay it out of the way.
6. Loosen the two mounting bolts that are part of the strut tower. I loosened them, but did not remove them at this point.

7. Remove the lower pinch bolt that holds the knuckle onto the ball joint.
NOTE: A medium flat head screw driver might be needed to slightly pry open the pinch bolt area around the ball joint to allow the unit to be removed.
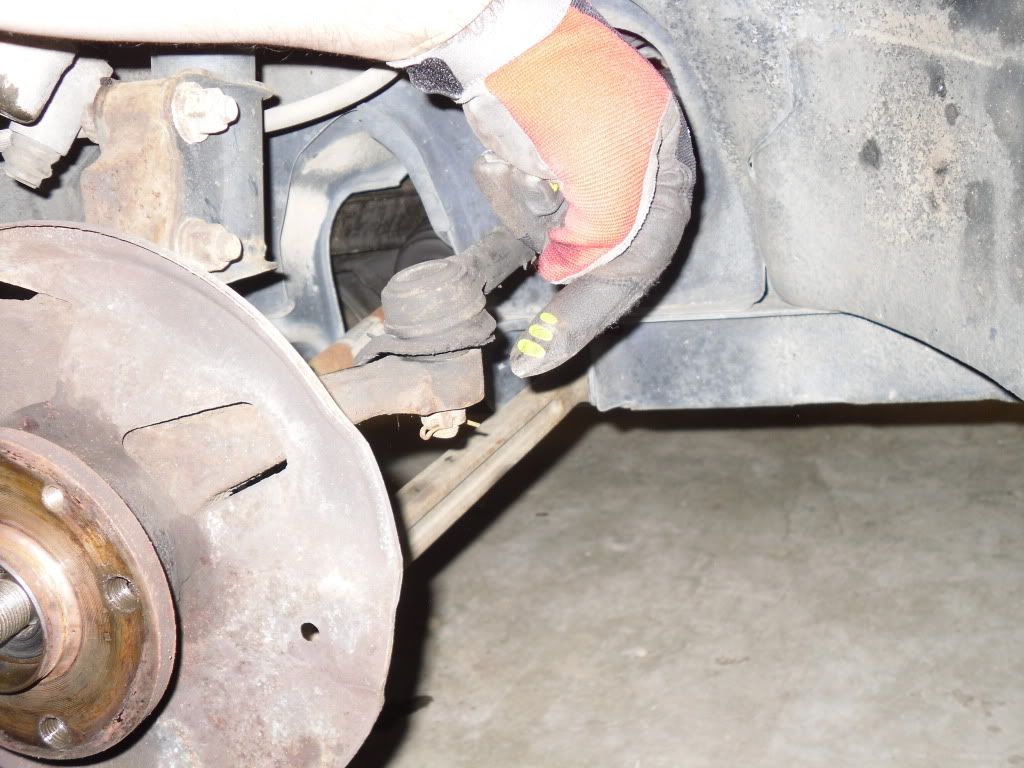
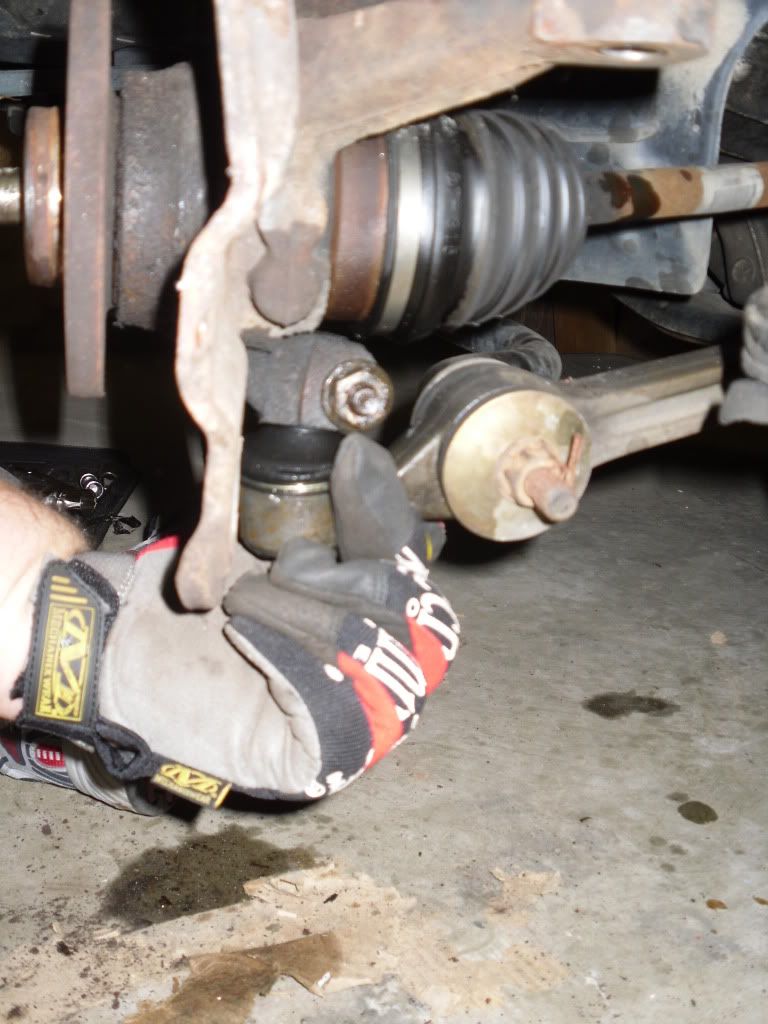
8. This got tricky and I had to call Dean to get some advice. I could not get the knuckle off of the ball joint without pulling the CV axle out of the transmission. Suggestion, now that the knuckle is loose from the steering, turn it so that you can see the drive axle inserted into the knuckle. If you push the axle toward the transmission, you will see that it "gives" a bit and is sort of "springy". I pushed it toward the transmission and was able to remove the drive shaft from the back of the knuckle. The knuckle itself, tilts outward just a bit and this helped in this process.
You can see where I tried to just pull the knuckle up off of the ball joint and it resulted in pulling the axle out of the transmission. Avoid doing this if possible!
Once the axle was out of the knuckle, I then tilted the whole unit toward me by pushing downward on the lower control arm and lifting the knuckle off of the ball joint.
This may not seem clear, but you will see what I'm talking about once you are at this step. The lower control arm and sway bar allowed me some "wiggle" room to get the knuckle off of the ball joint.
Igore my transmission spill in the pic!
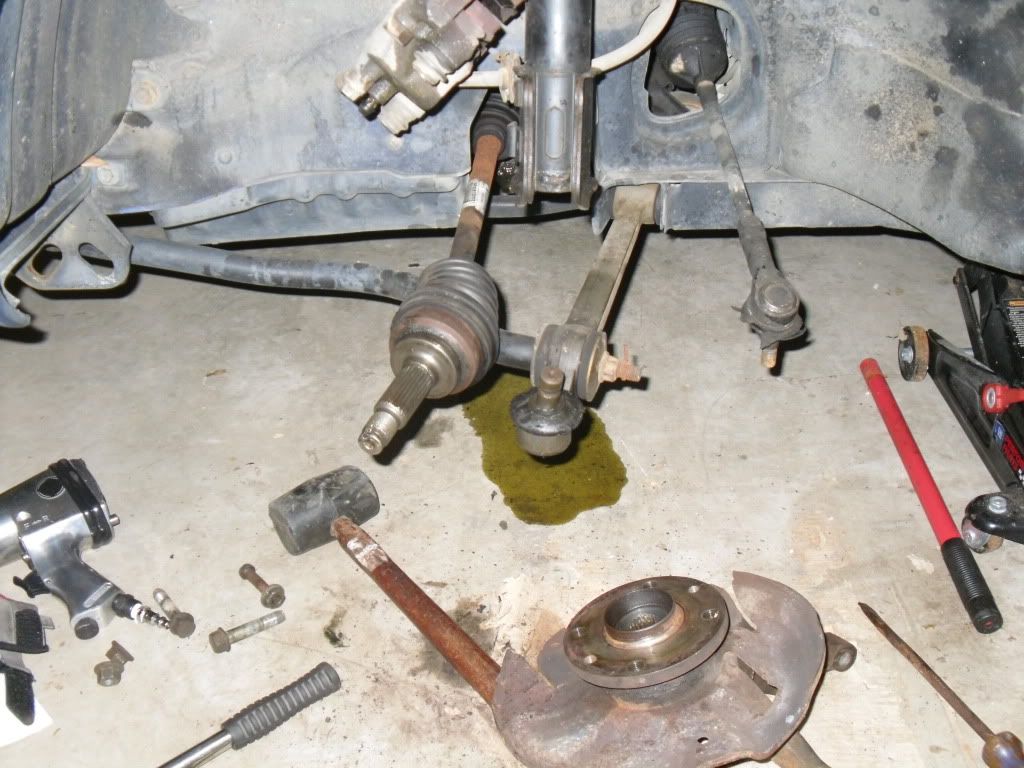
In this picture, you see the drive axle and enclosed cv joint laying over the sway bar. The sway bar is attached to the lower control arm and ball joint. This is one unit on the Aspire. The the far right is the tie rod.
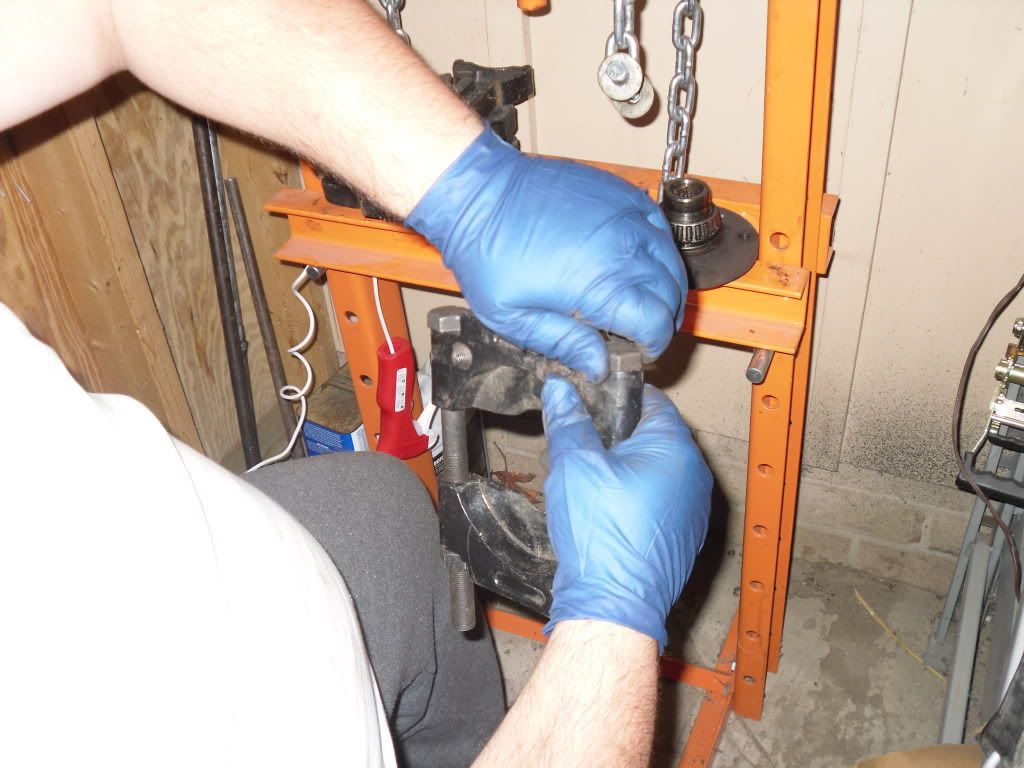
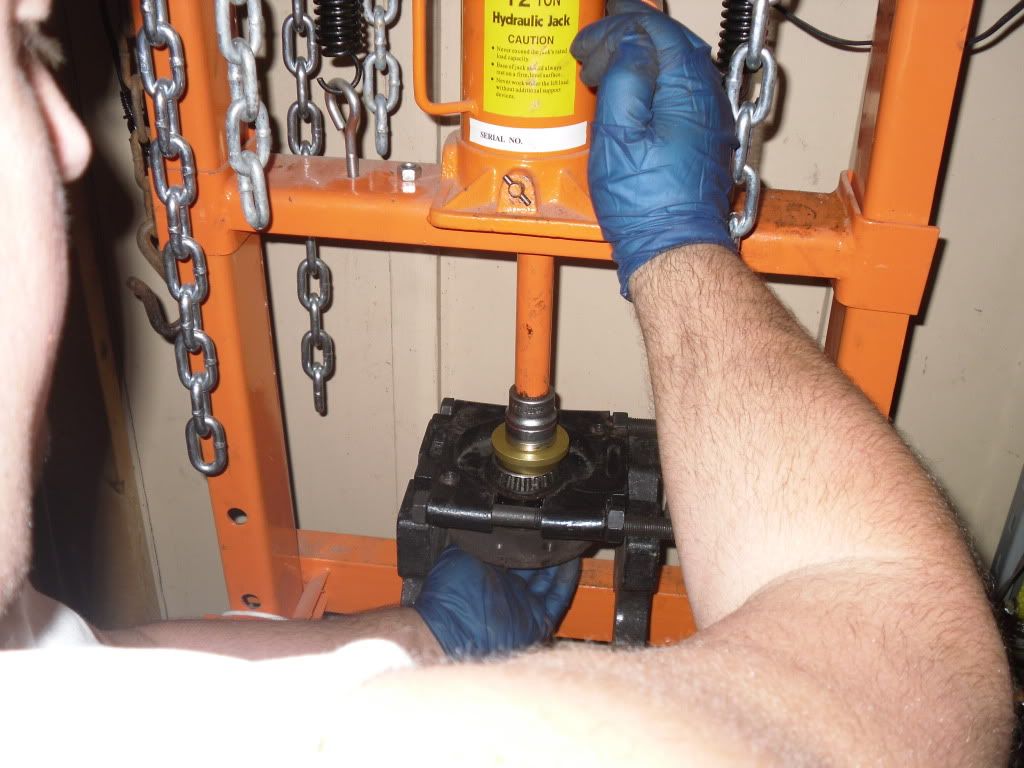
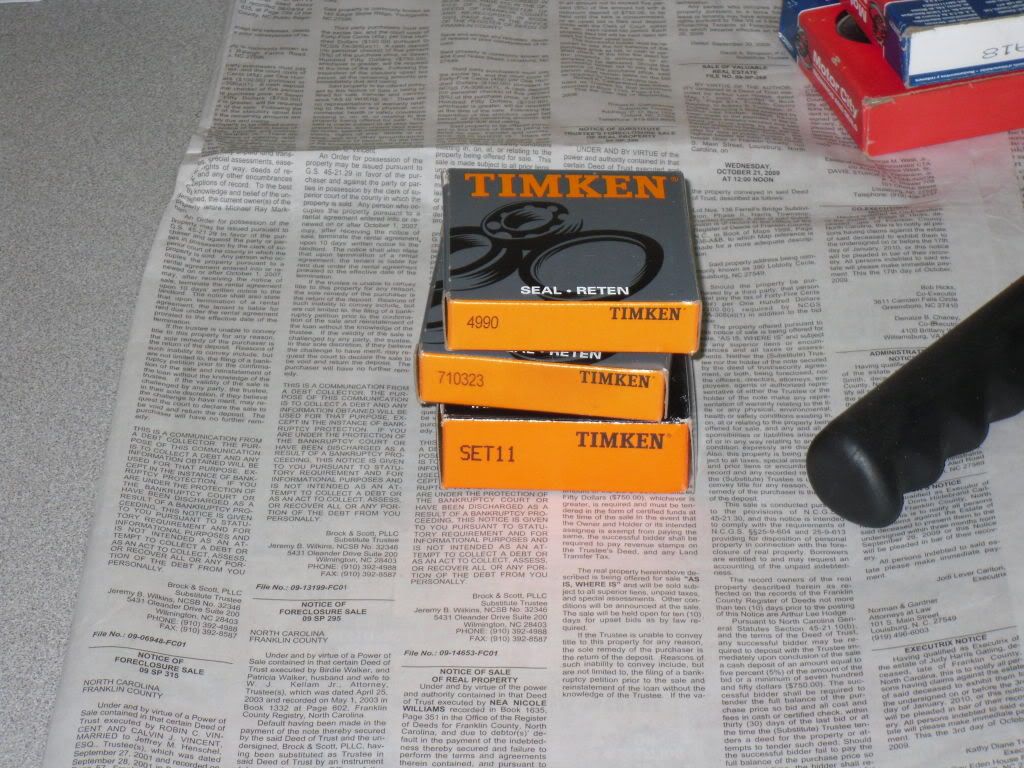
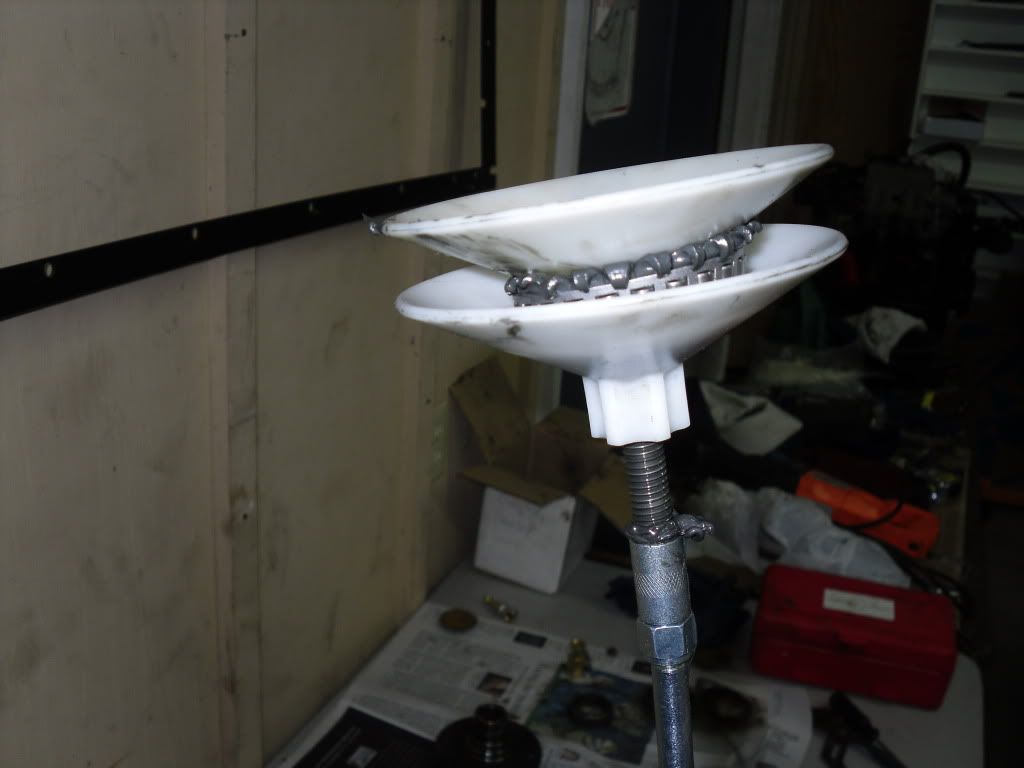
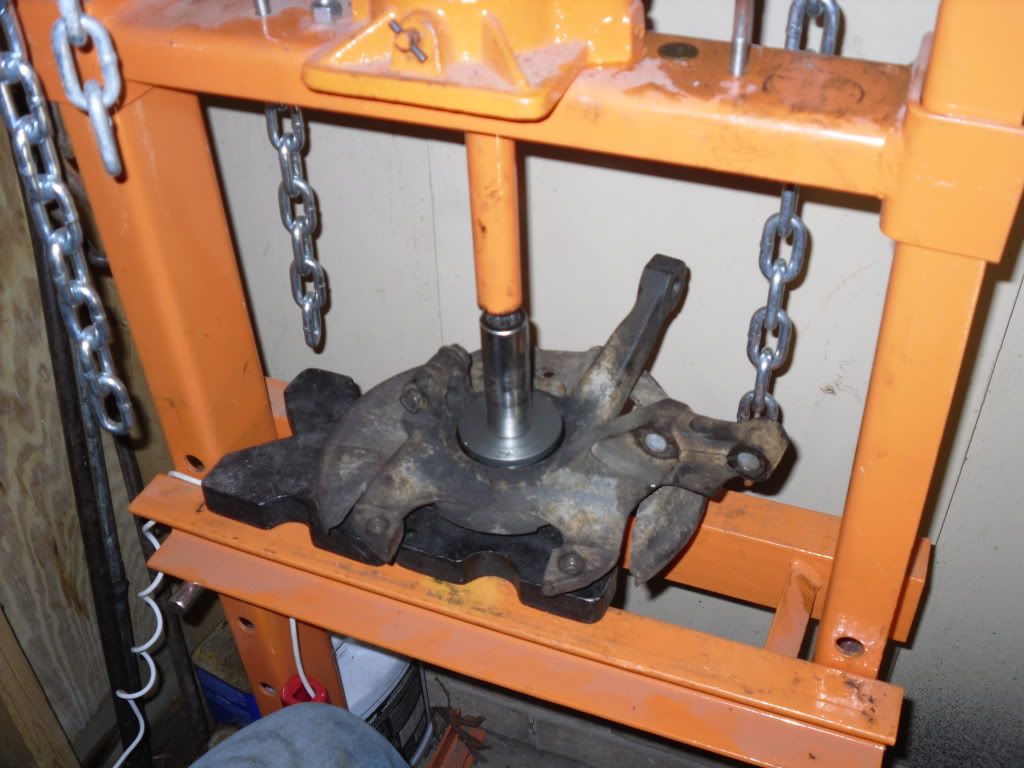
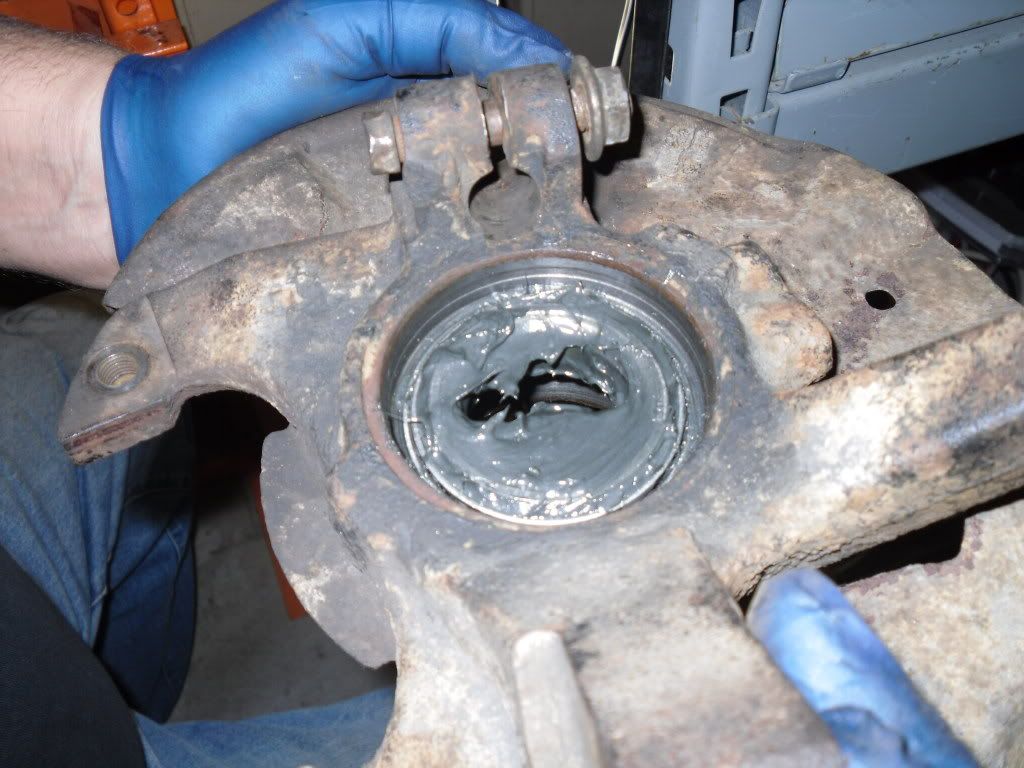
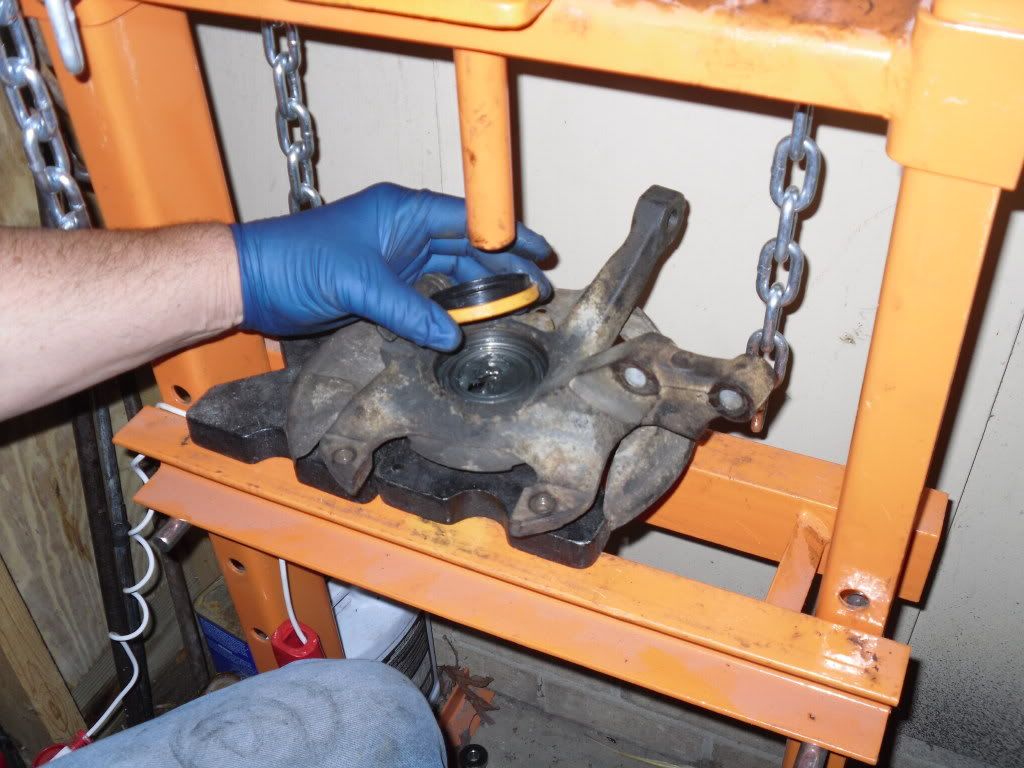
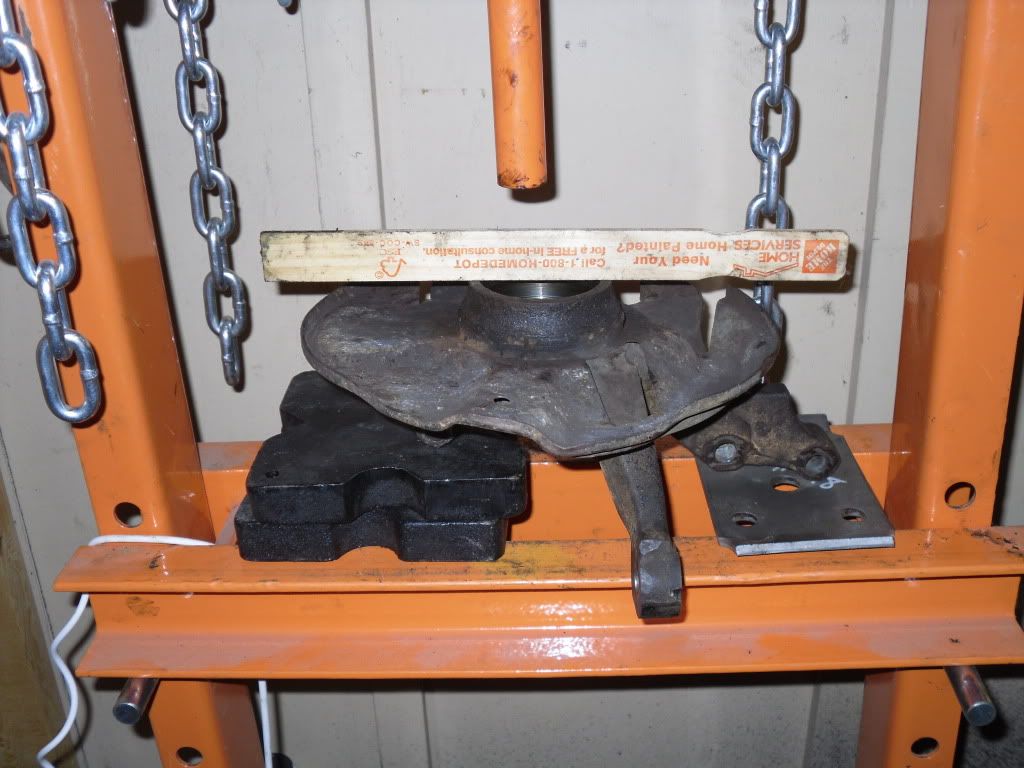
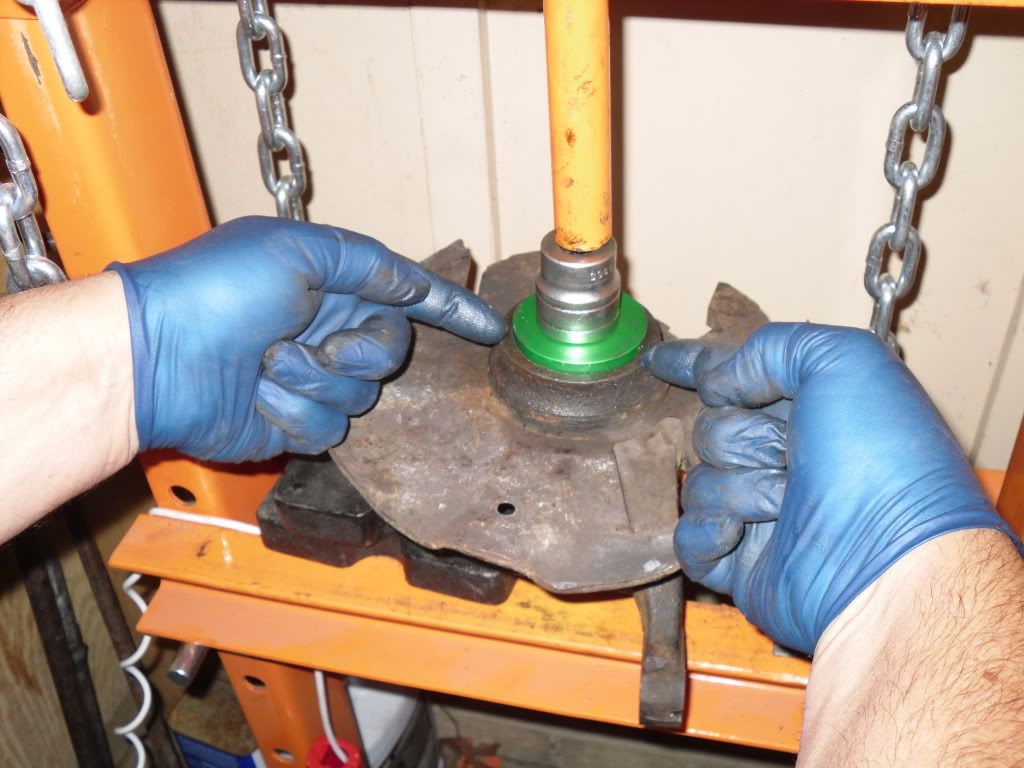
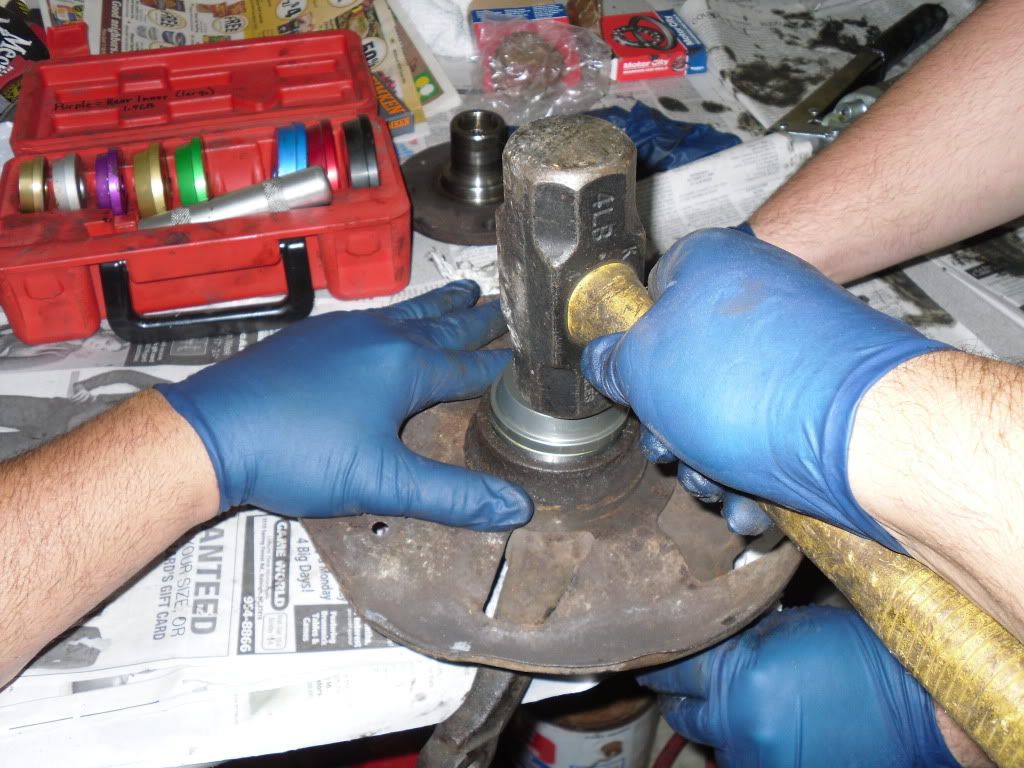
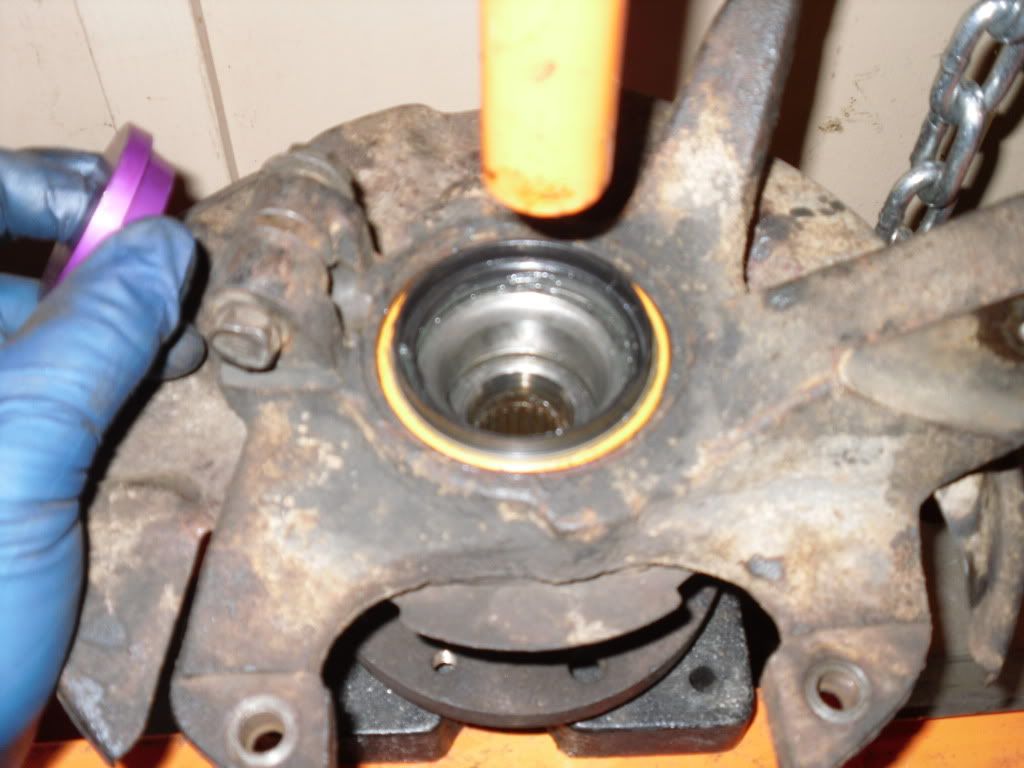
You are now ready to remove the bearings! We used a press in the steps that follow.
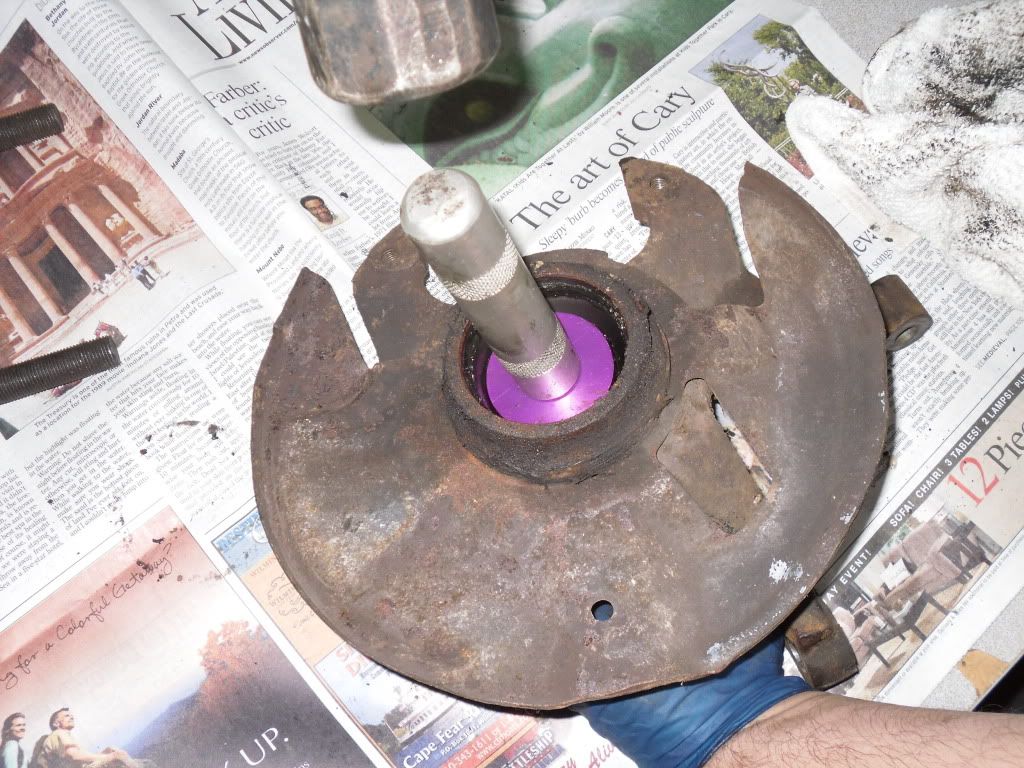
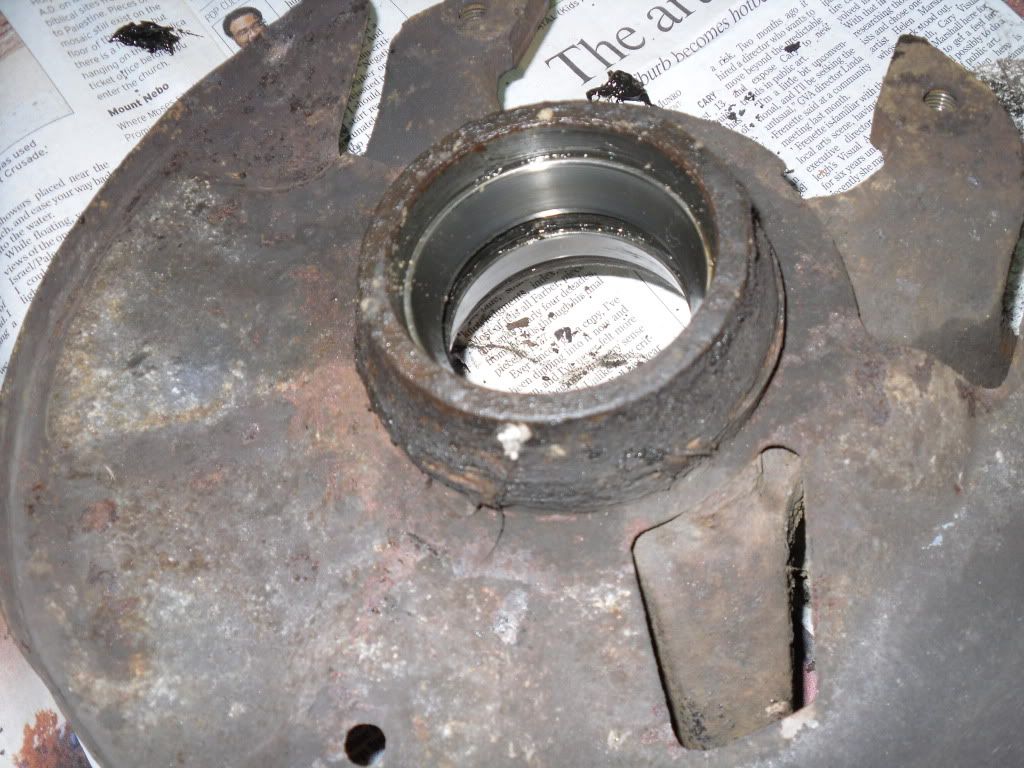
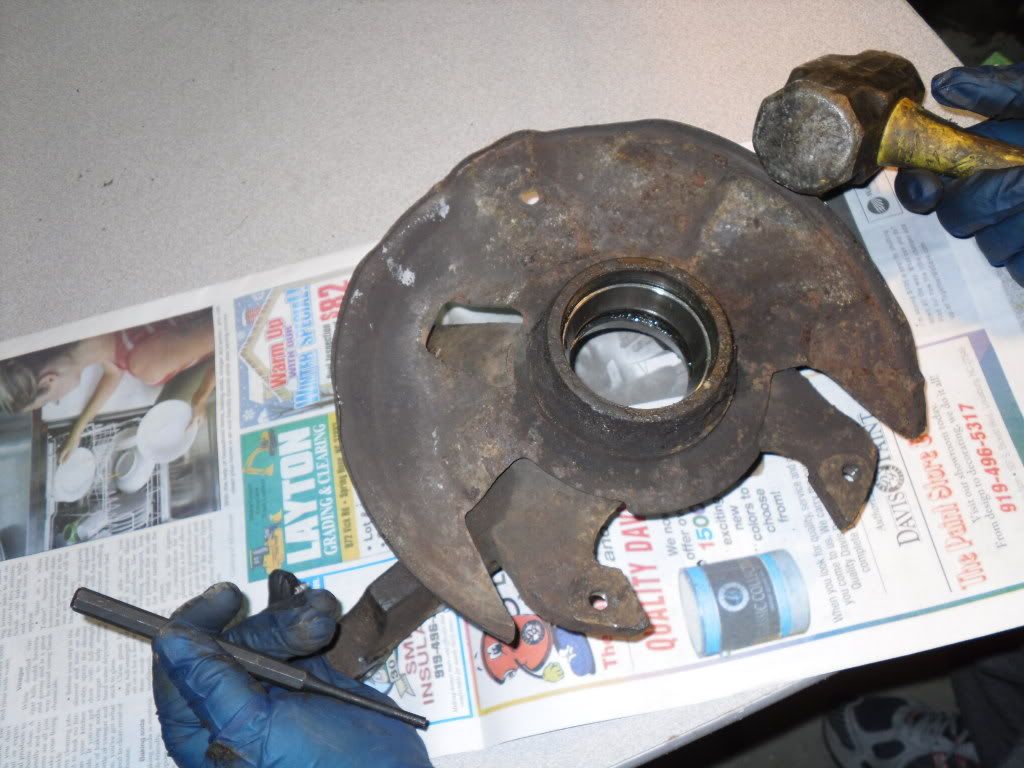
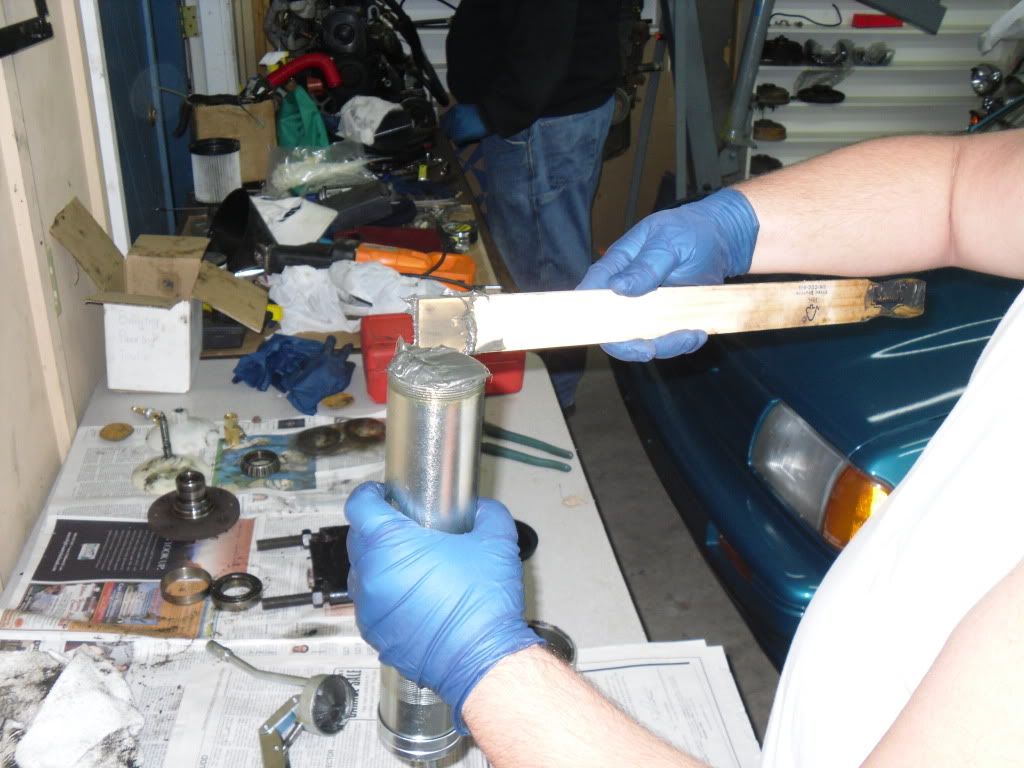
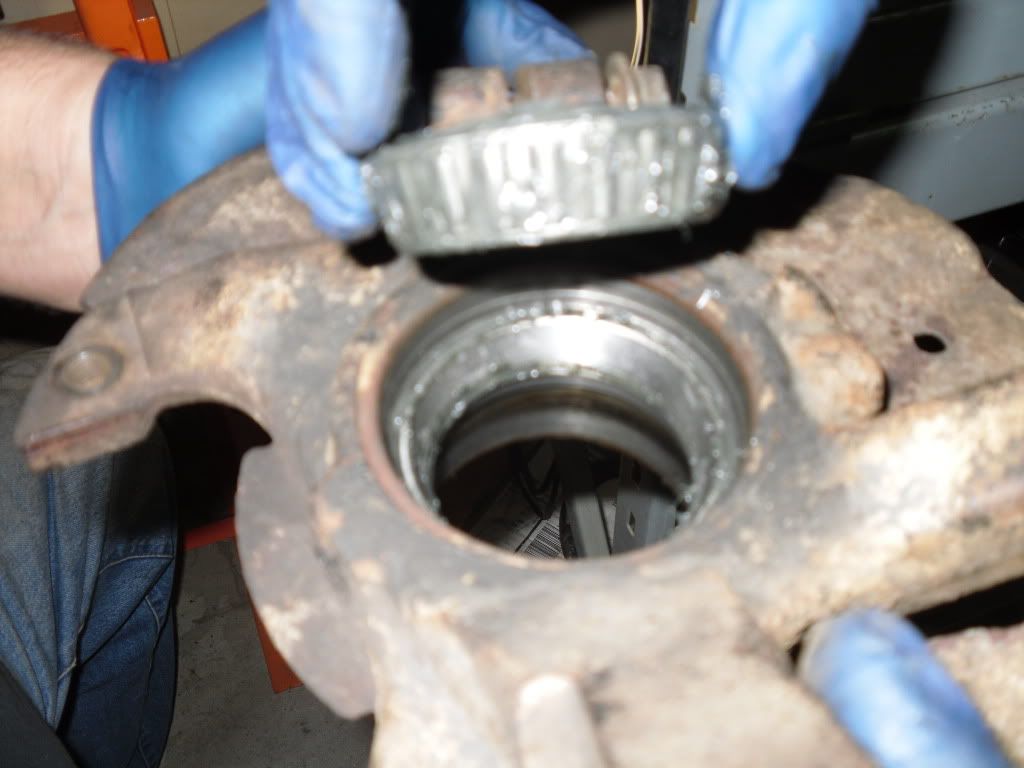
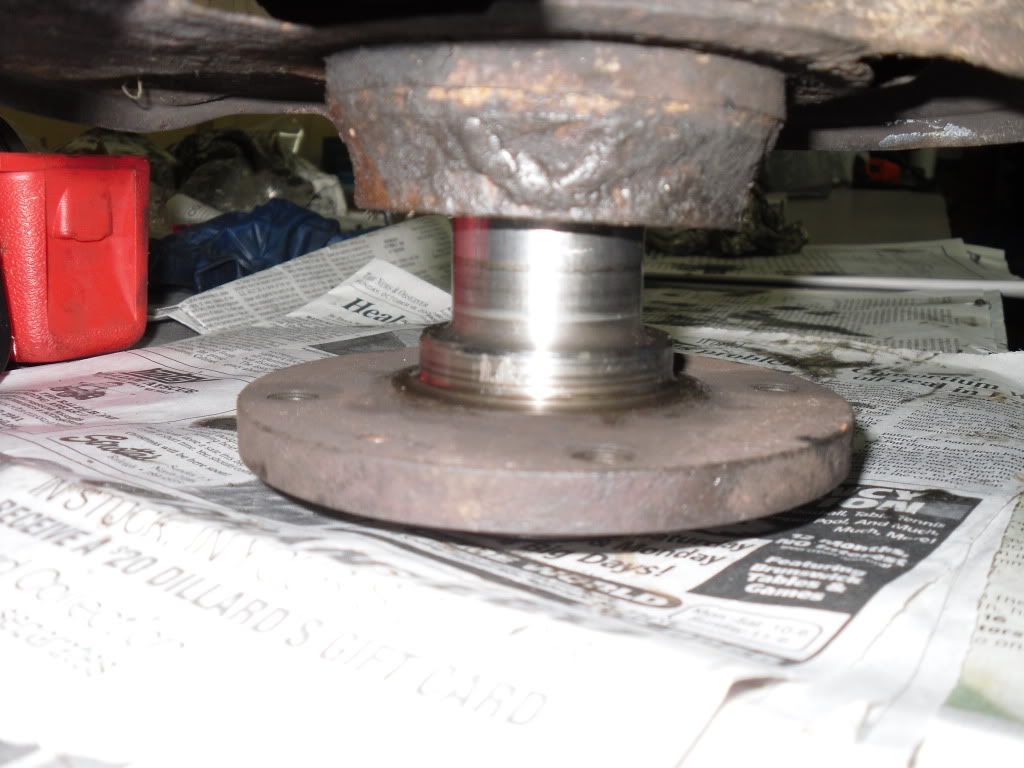
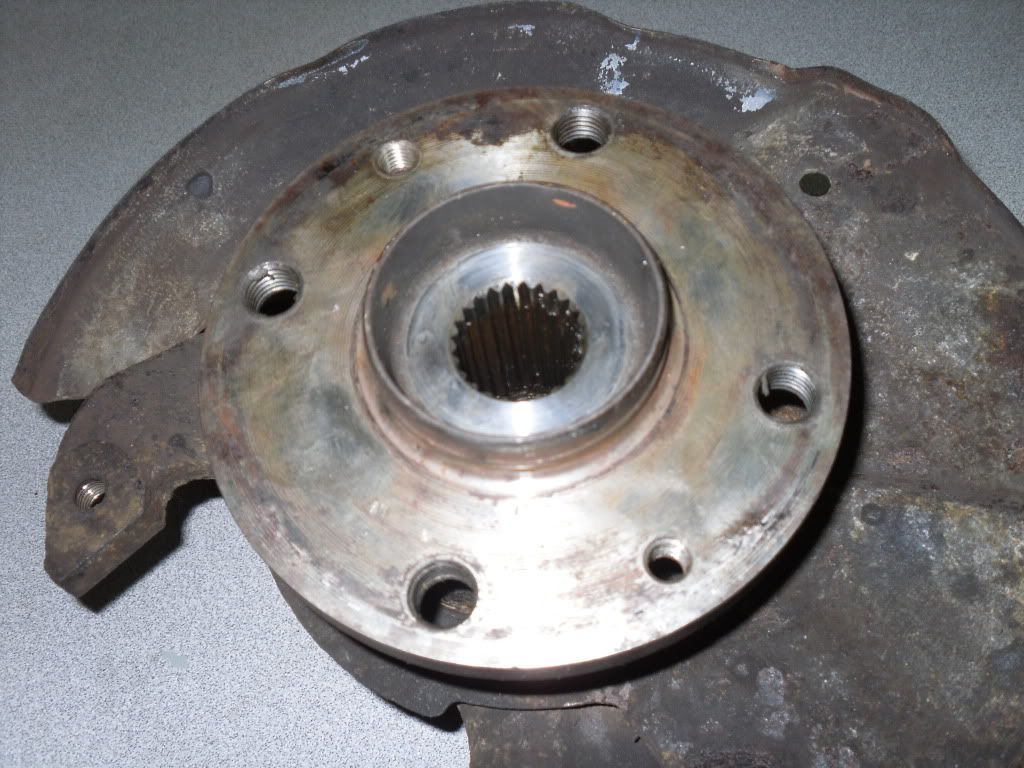
9. First, you have to seperate the spindle from the hub.

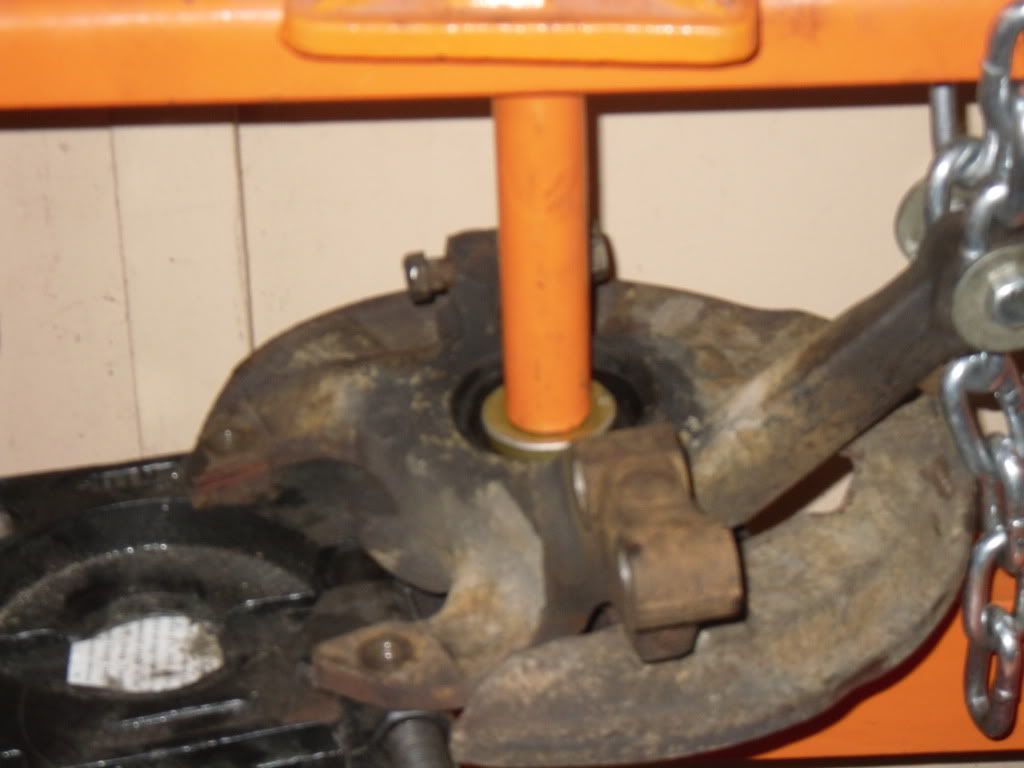
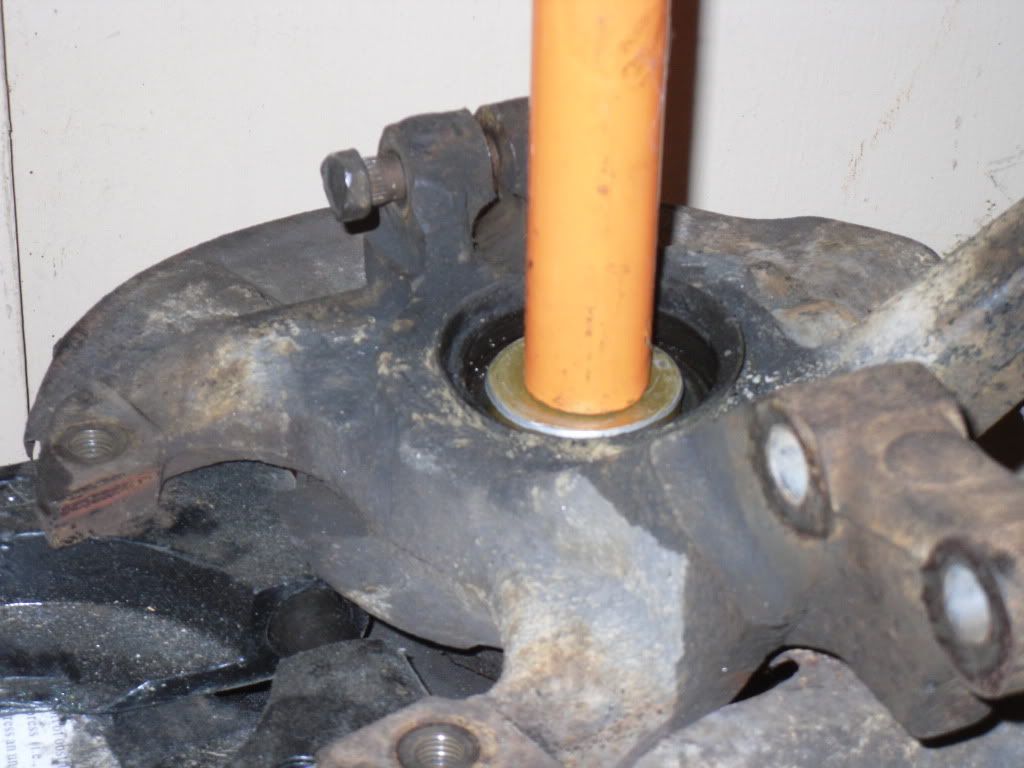
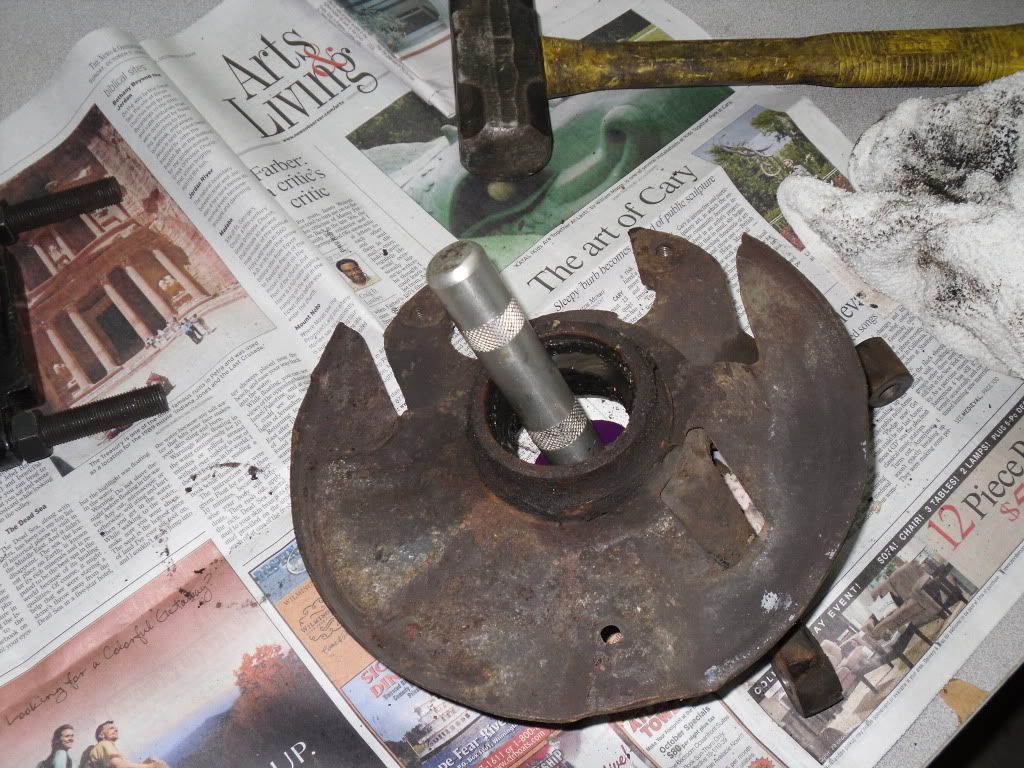
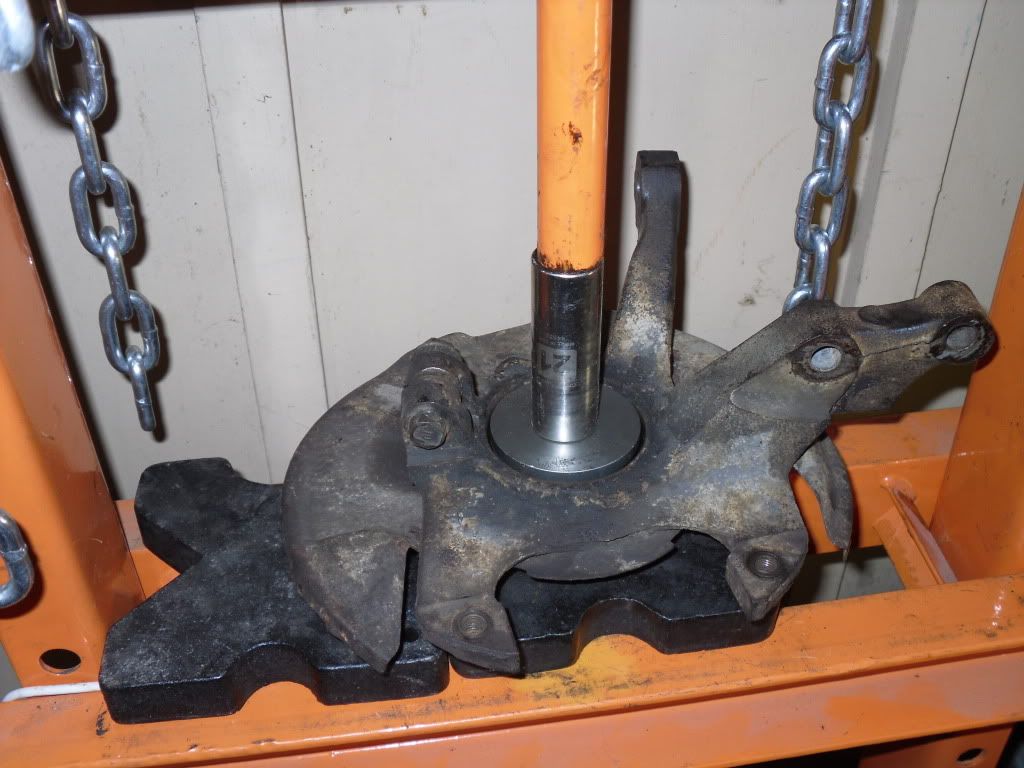
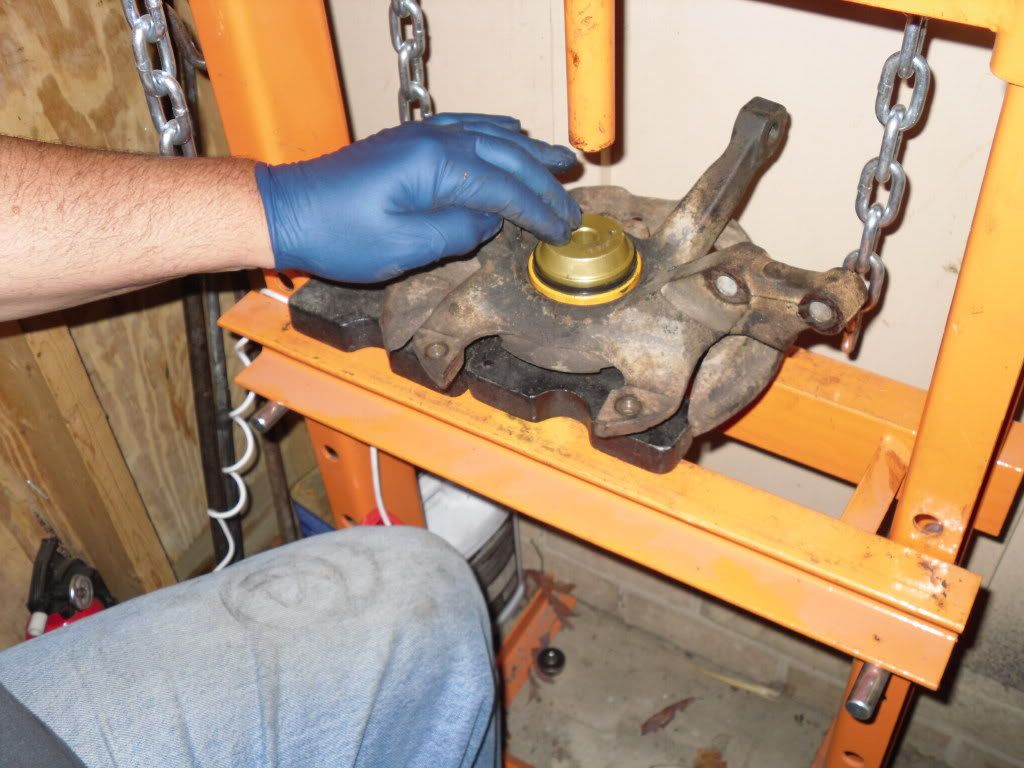
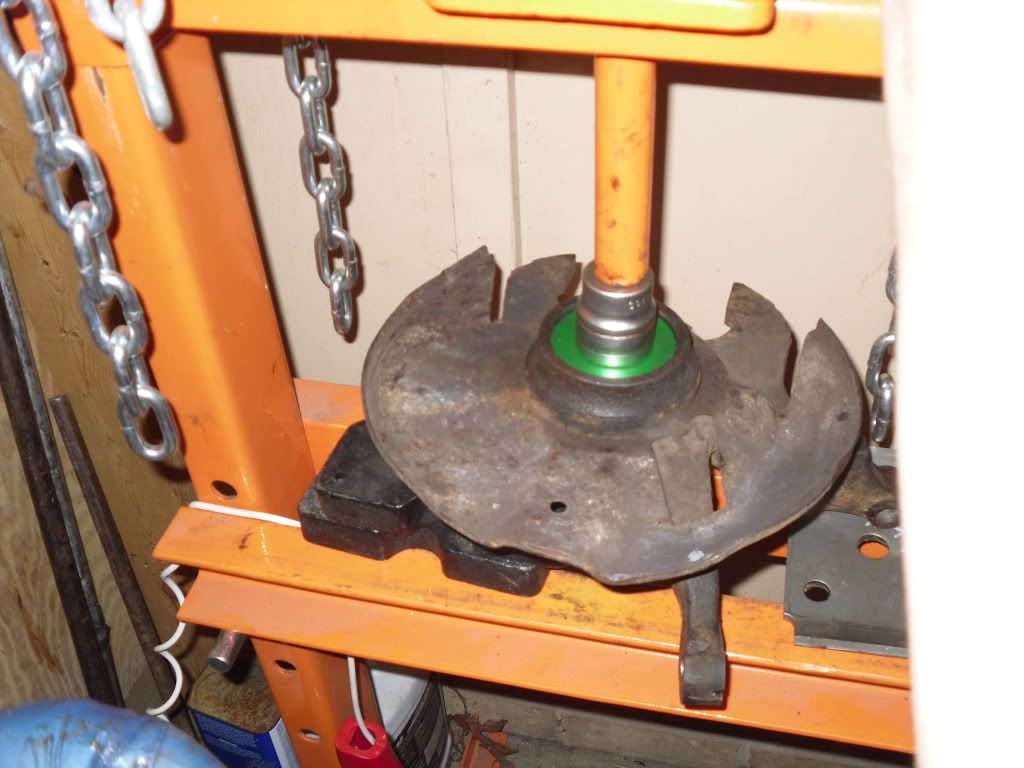
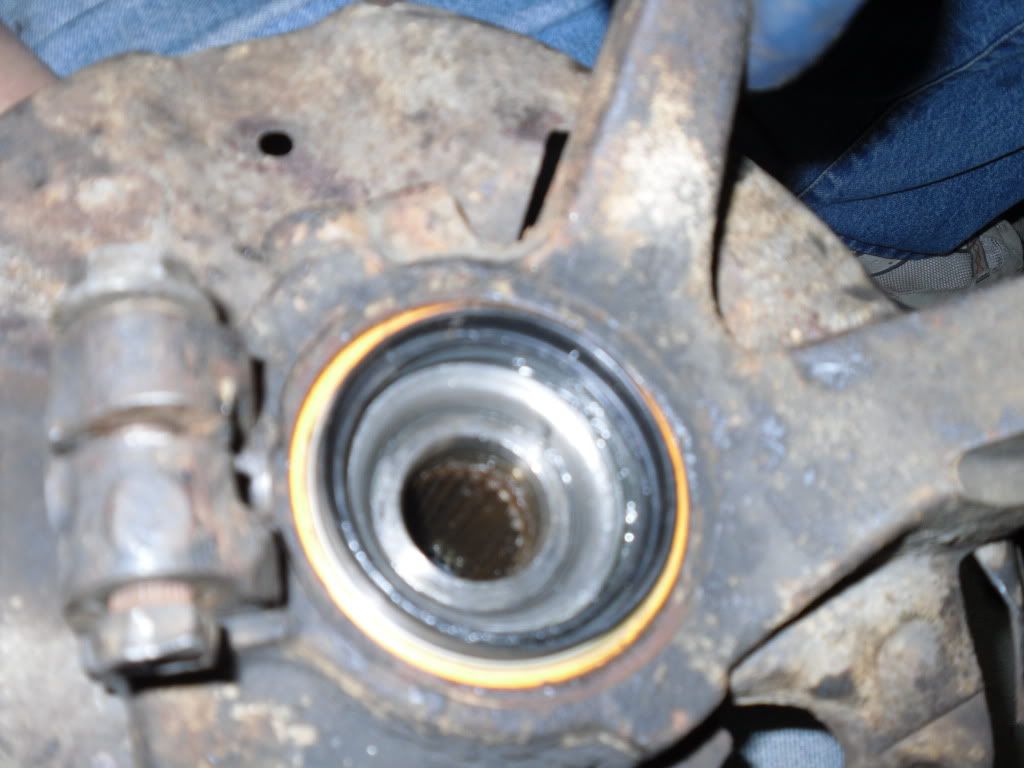
10. Go slow, take it easy and check your progress often! Is done? Nope... not yet...
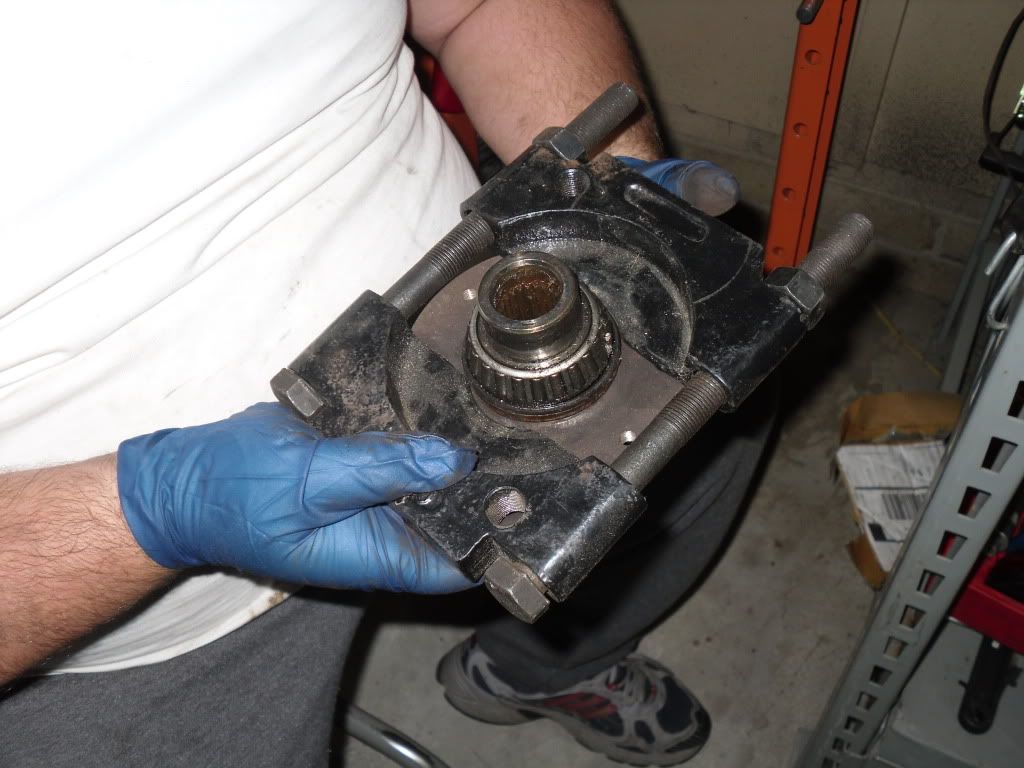
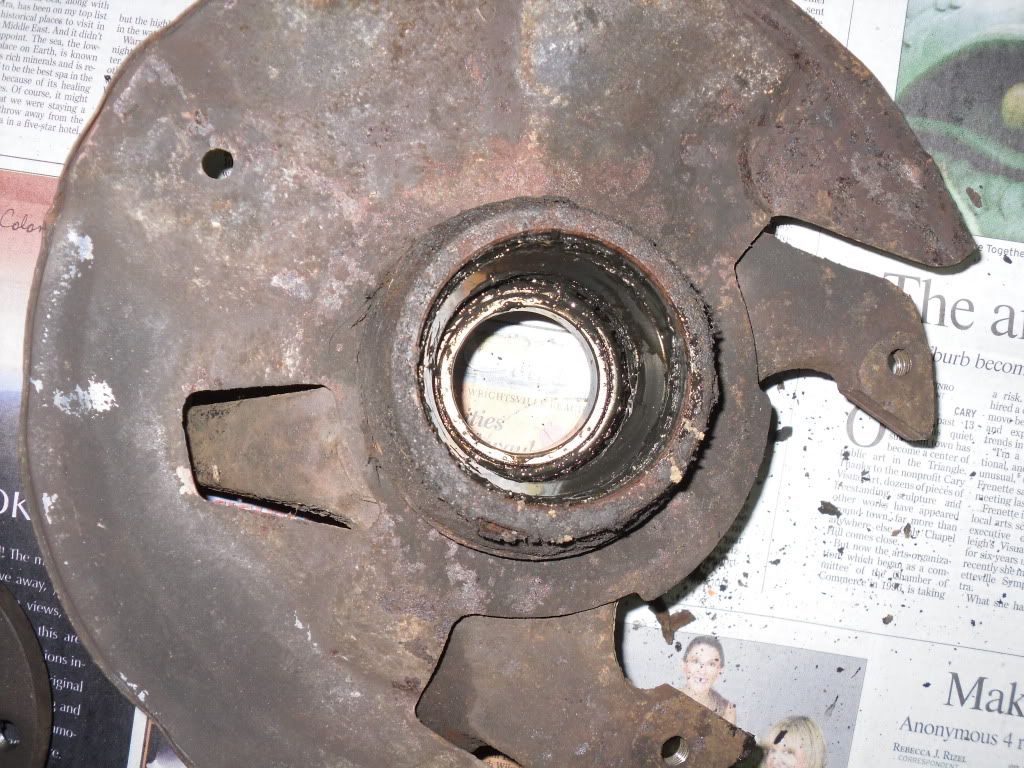
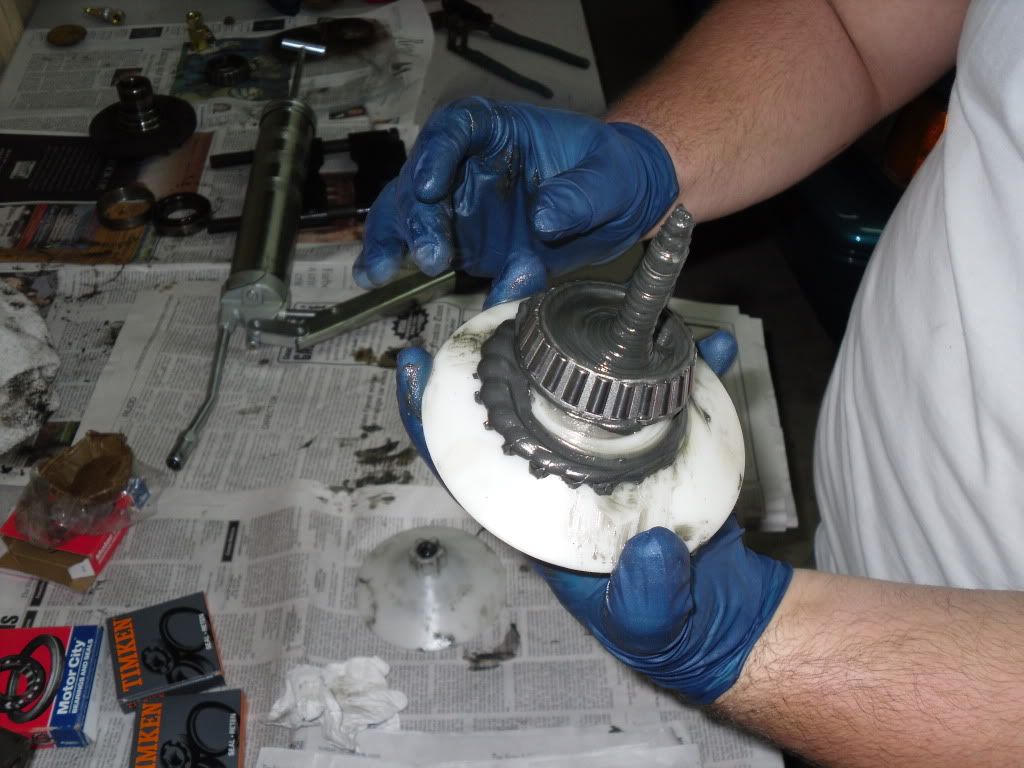
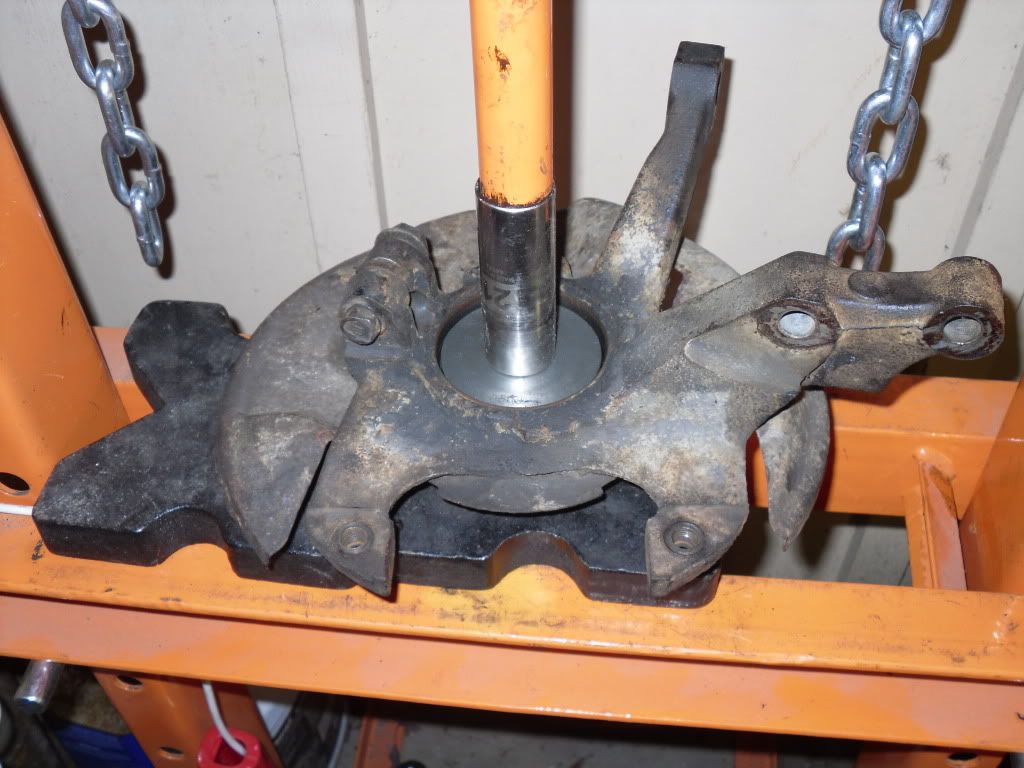
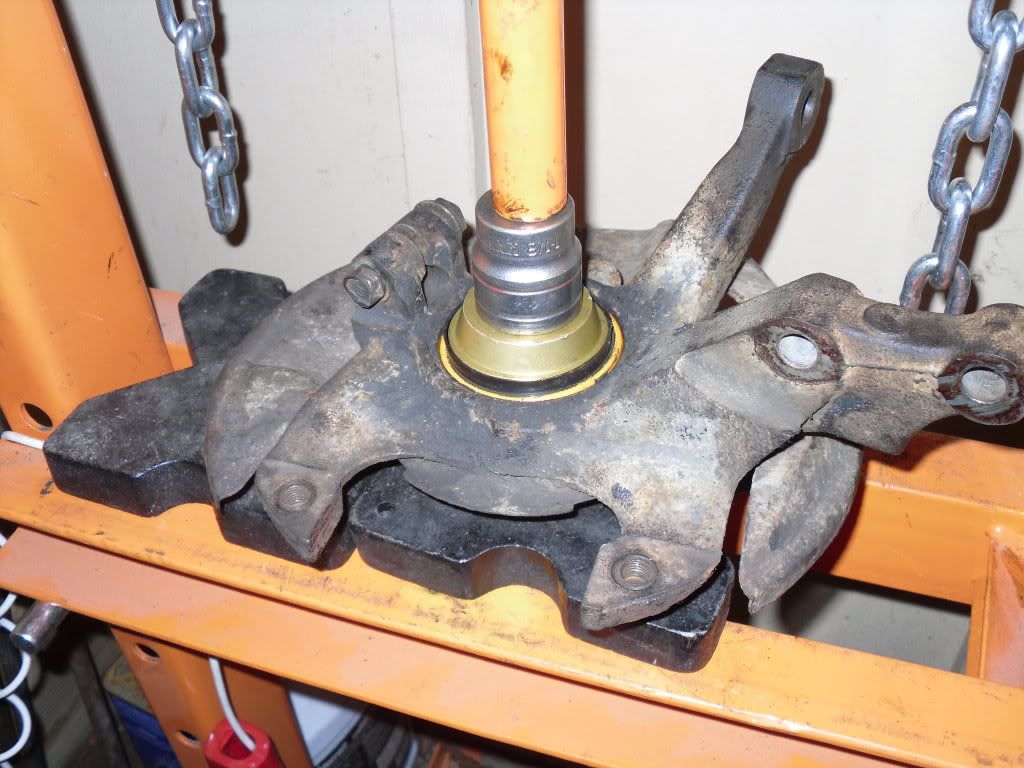
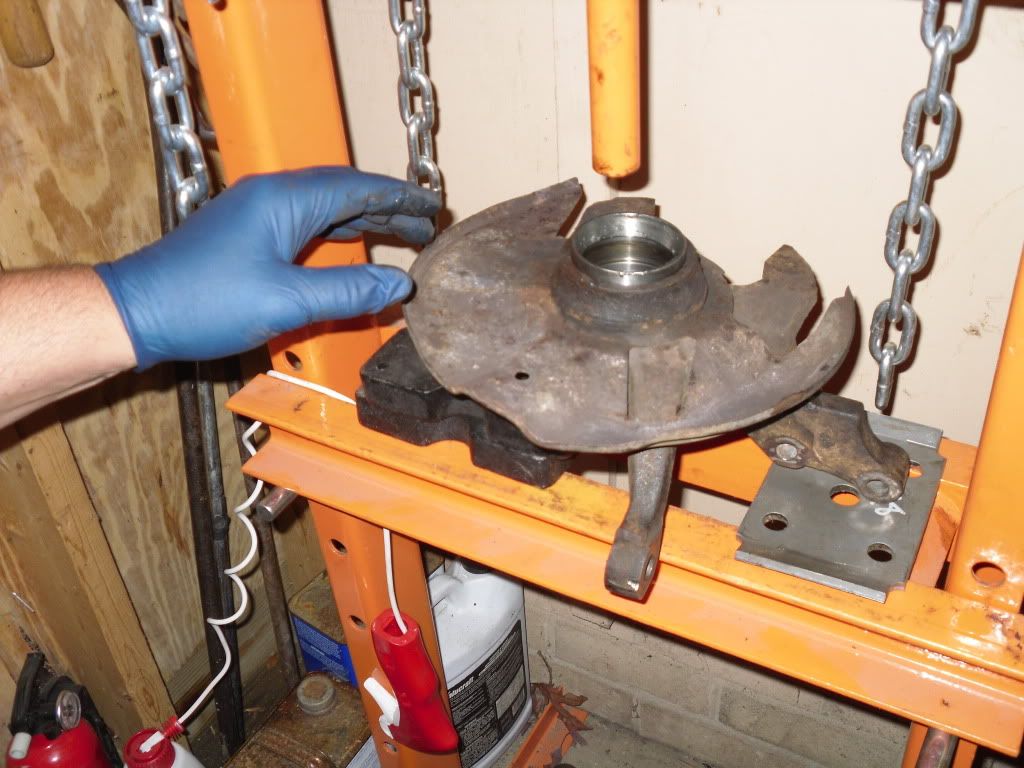
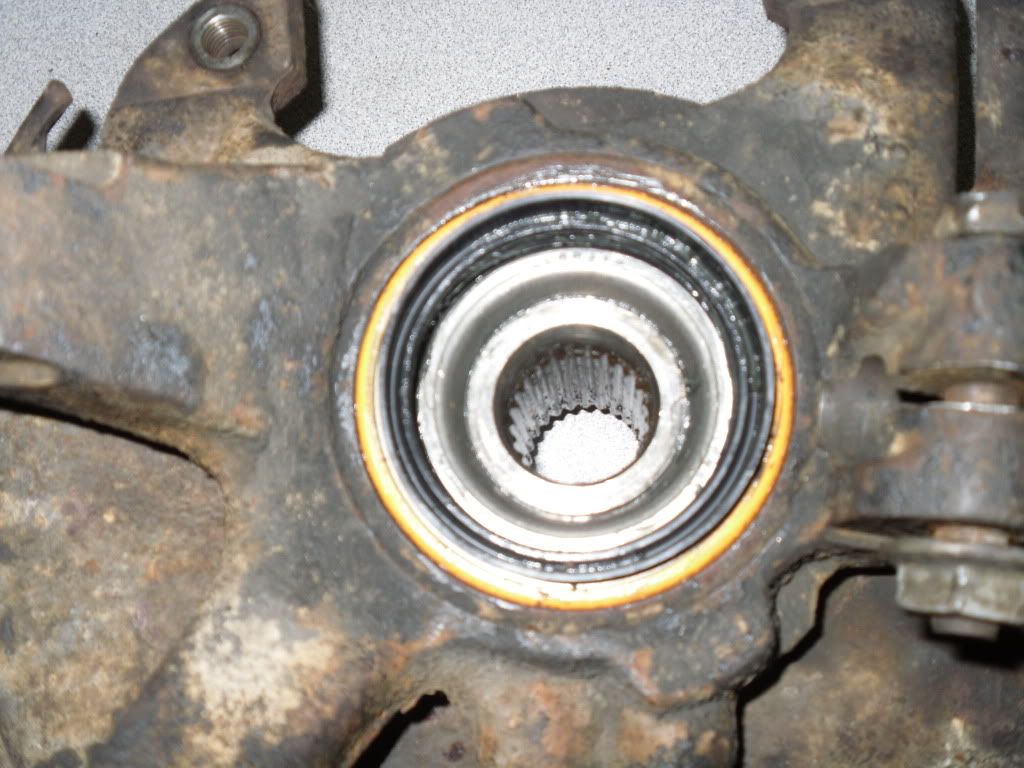
almost there... There it is! Plop... out it came from the bottom.
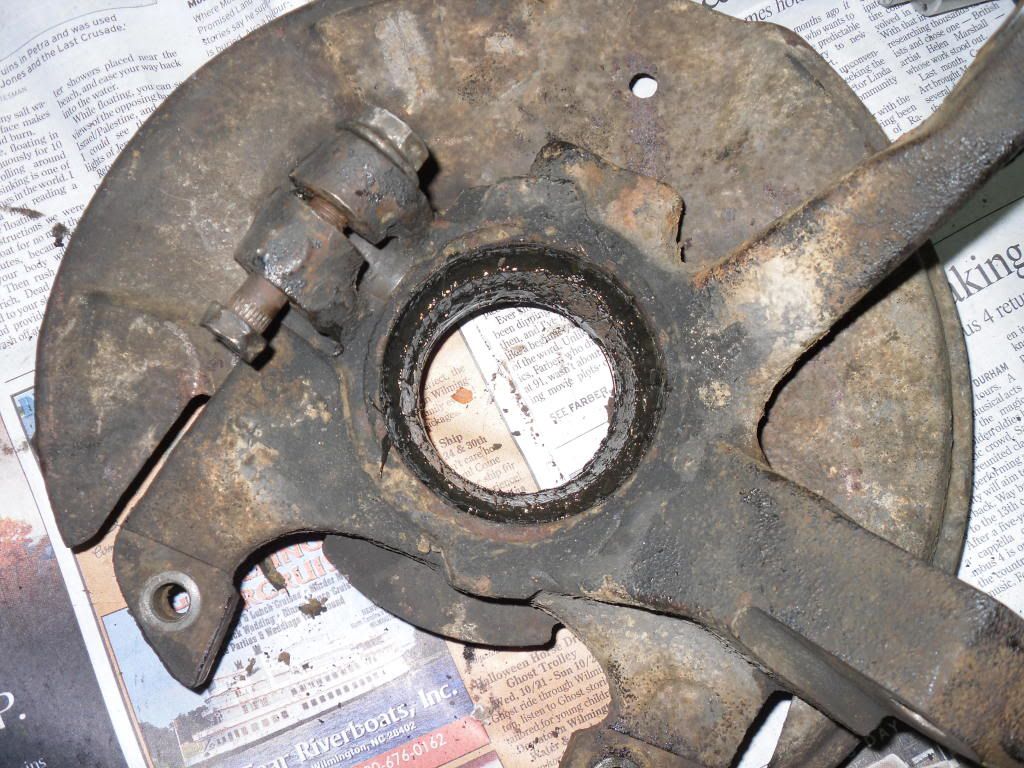
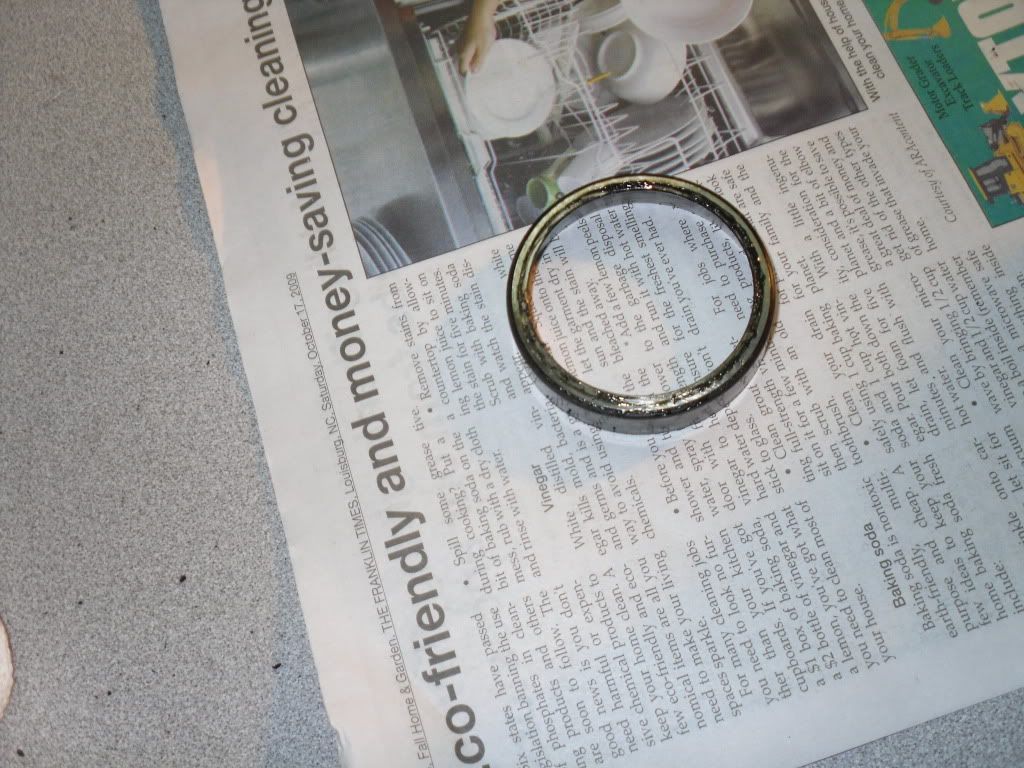
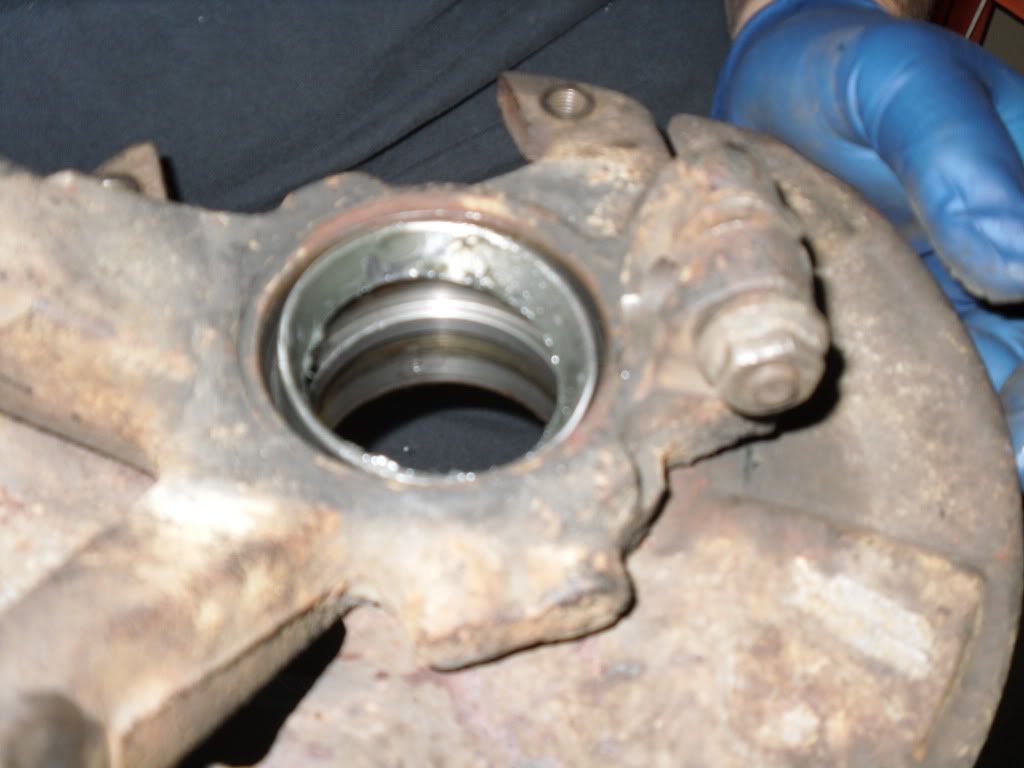
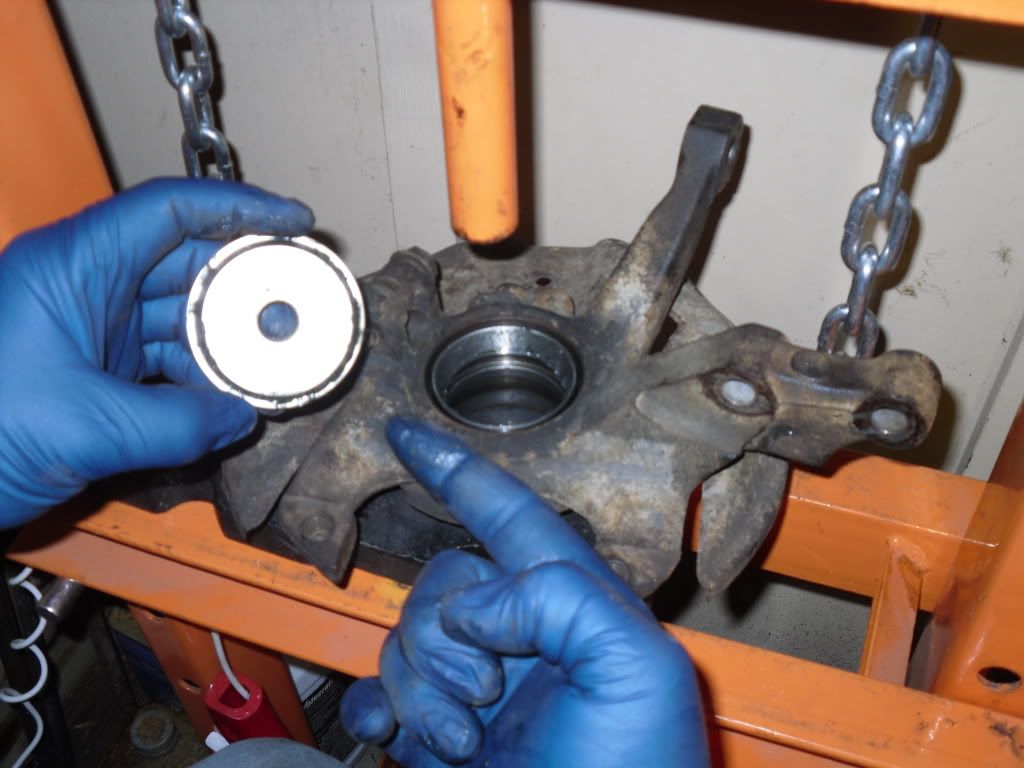
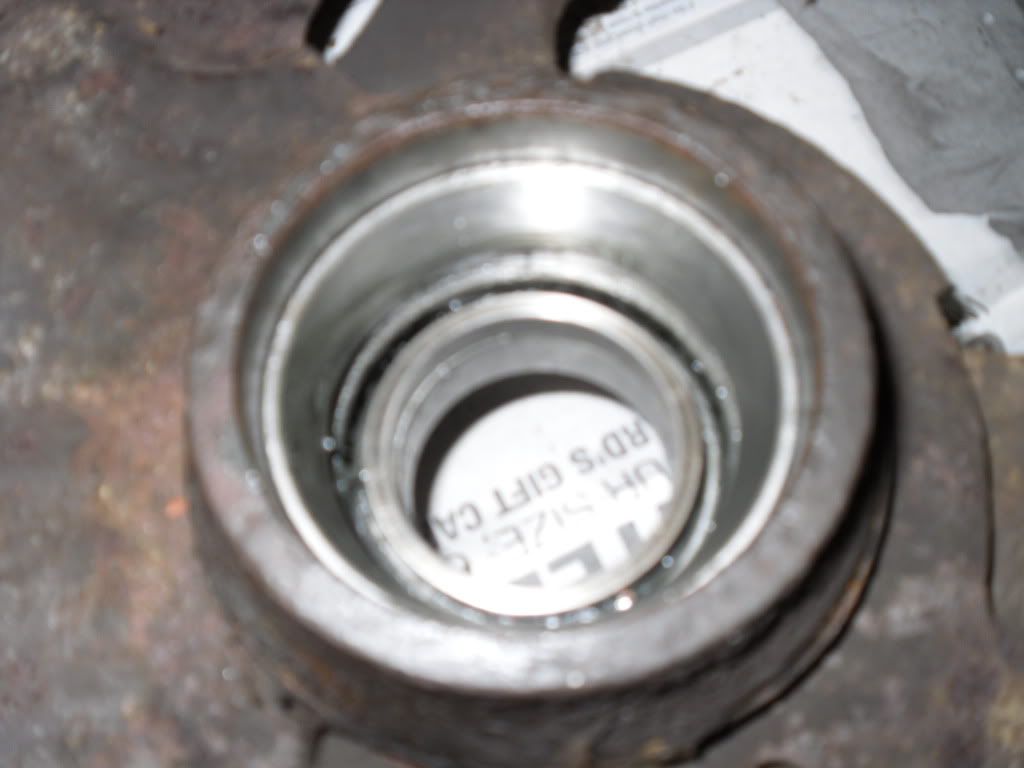
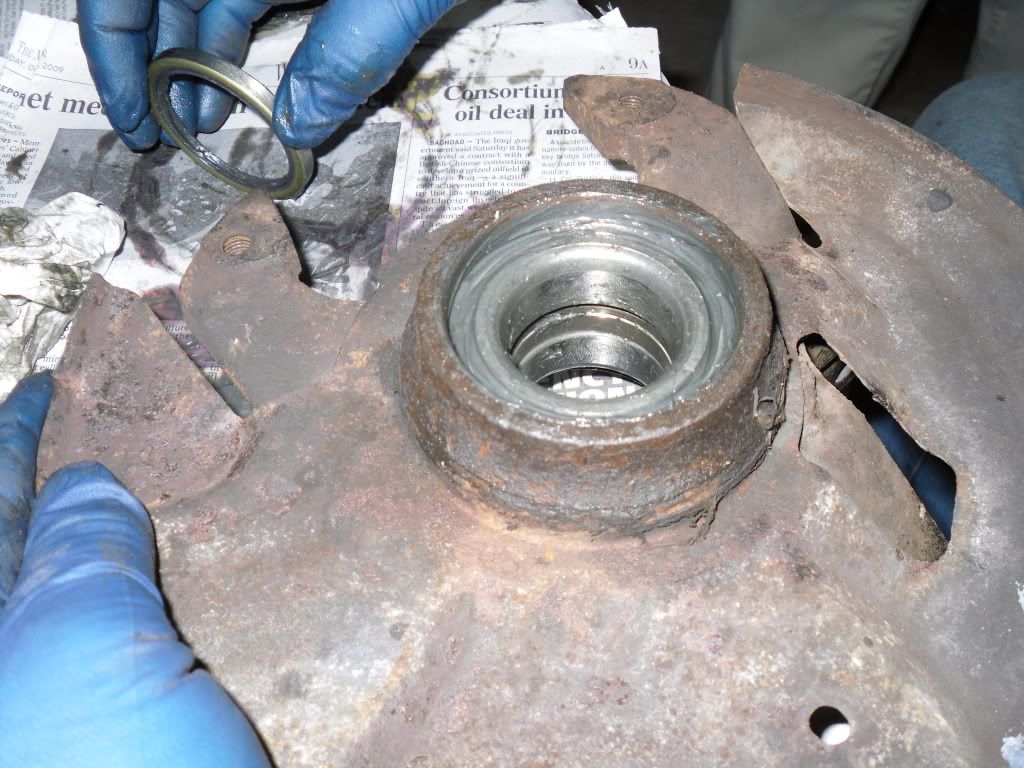
Take a close look... right above the wheel bearing is a small metal ring that easliy slides off off... this was actually the spacer! Spacers range in size from 1-21 (I believe)... mine was a 13. DON'T LOSE THIS PEICE! Remove it and set it aside.
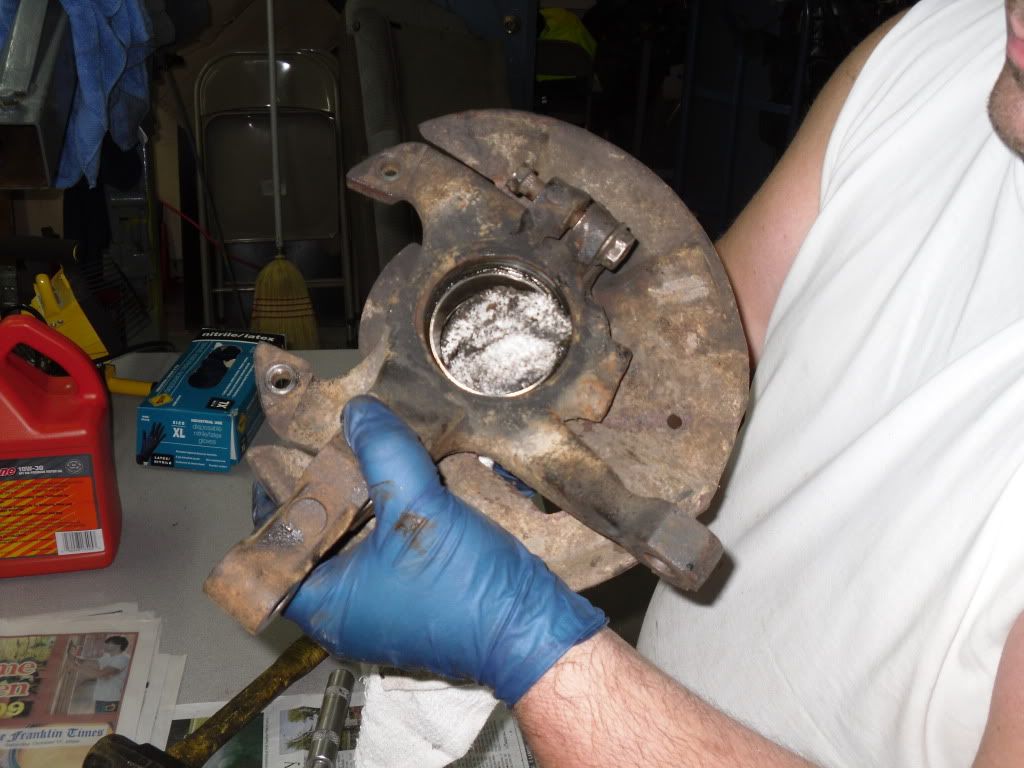
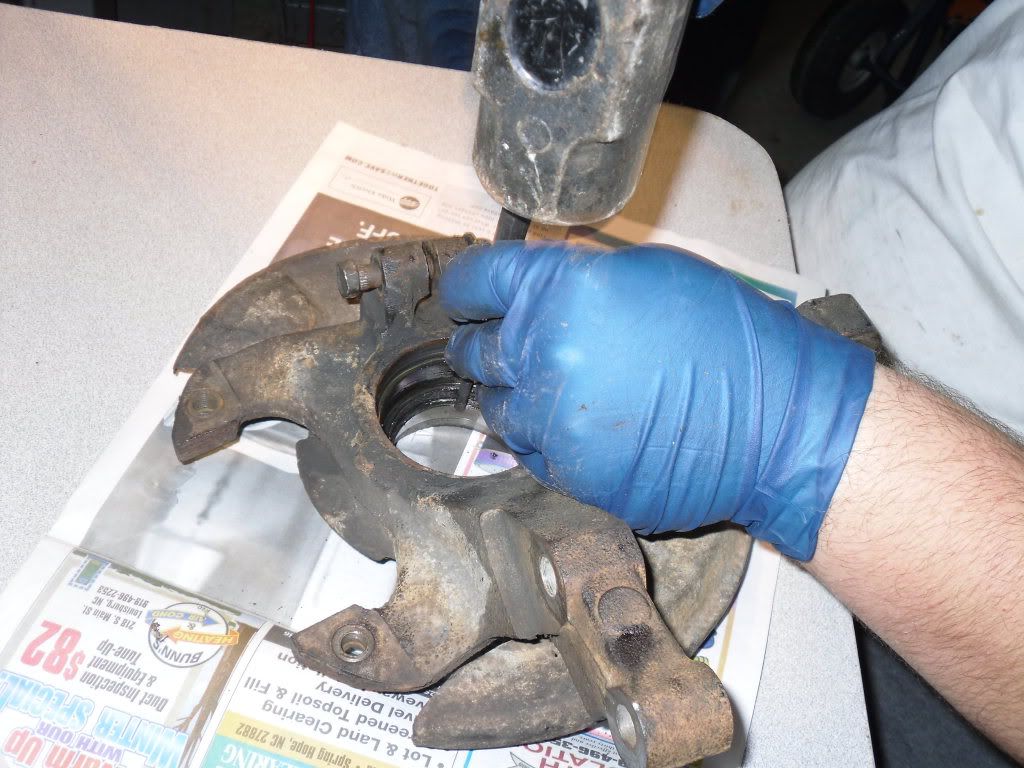
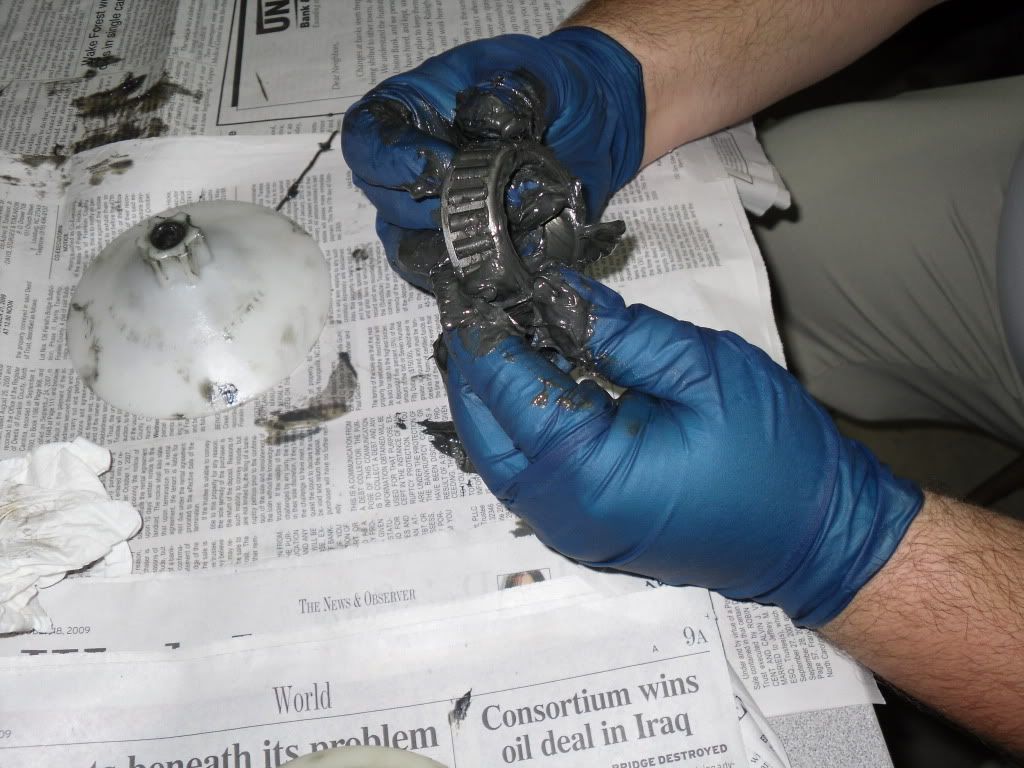
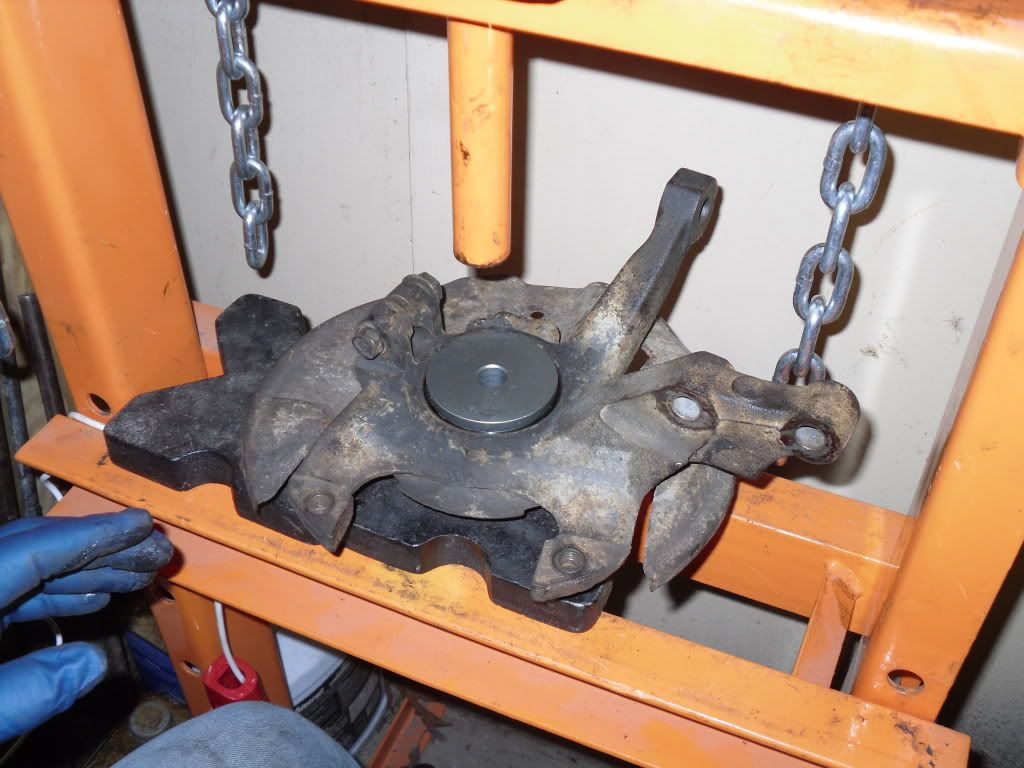
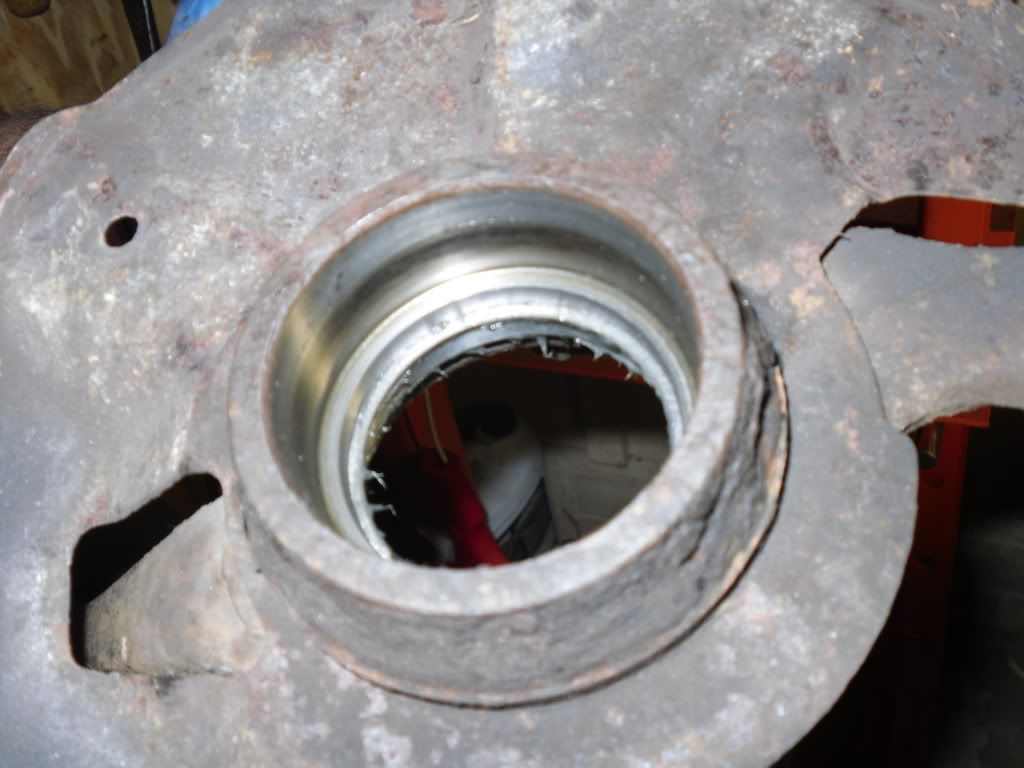
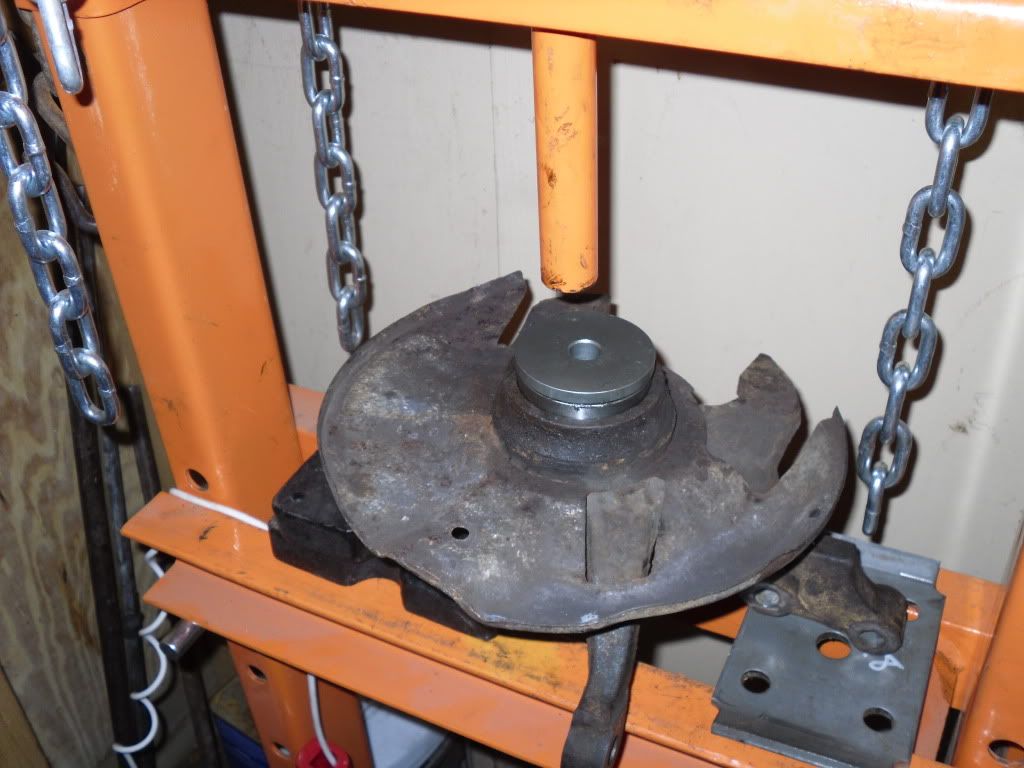
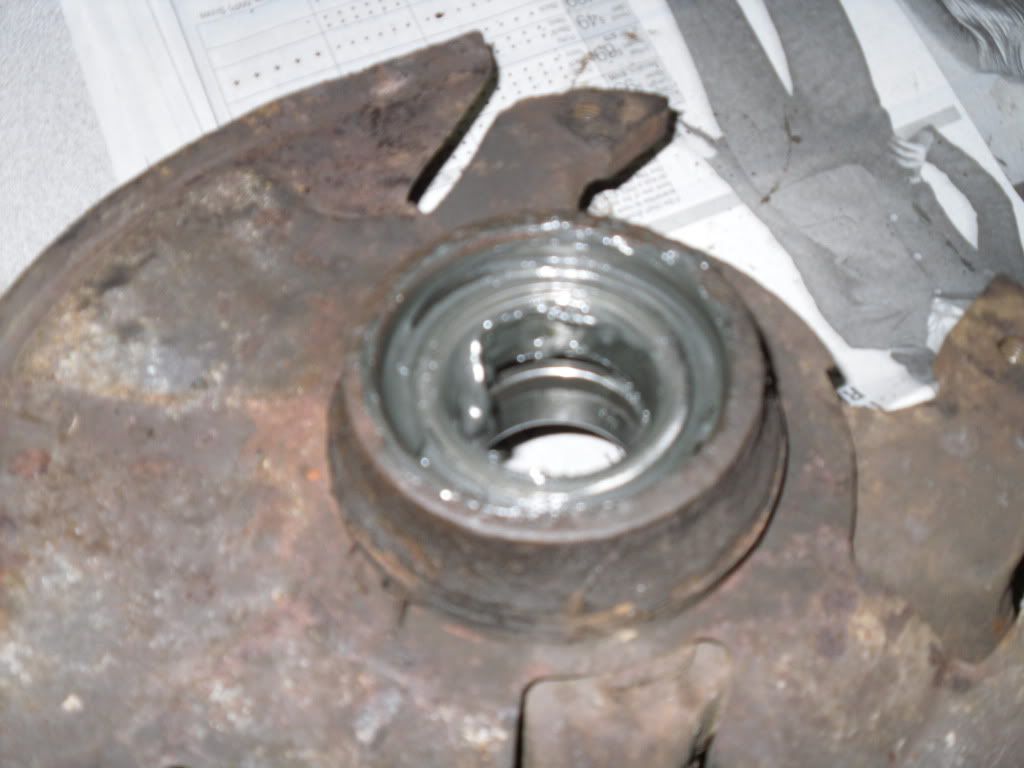
11. Now we have to remove the inner wheel bearing. Since the outer wheel bearing and spindle are now out of the way, flip over the knuckle and press out the inner wheel bearing. Sorry, no pic for this step. We did the same thing as in the pics above.
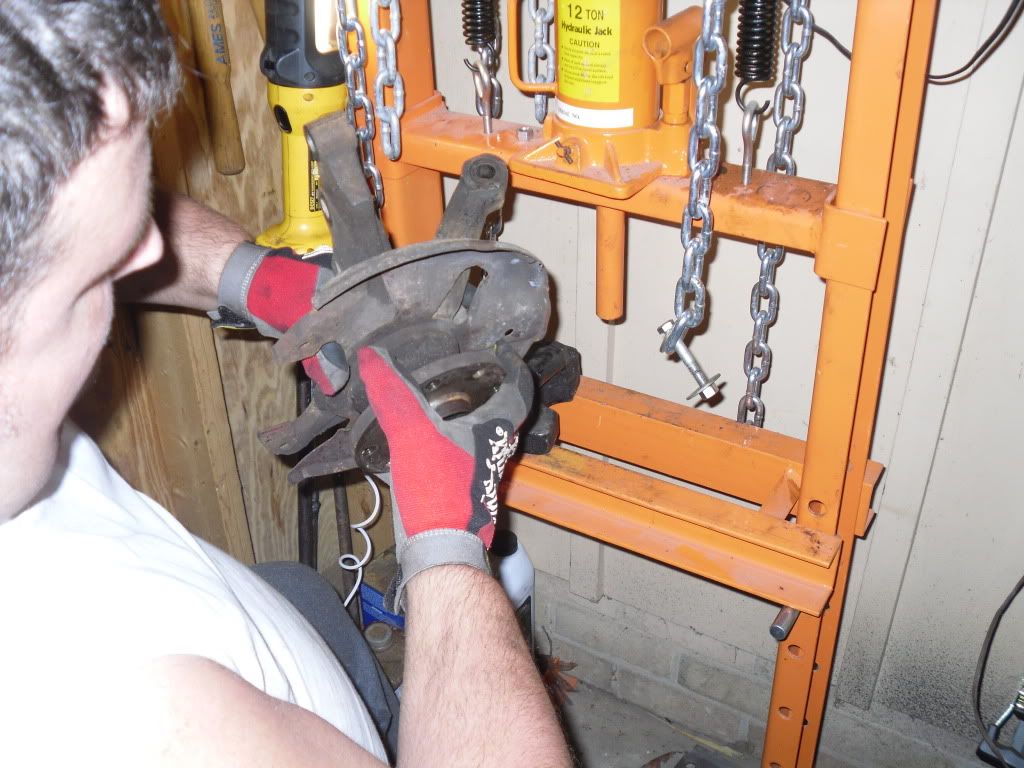
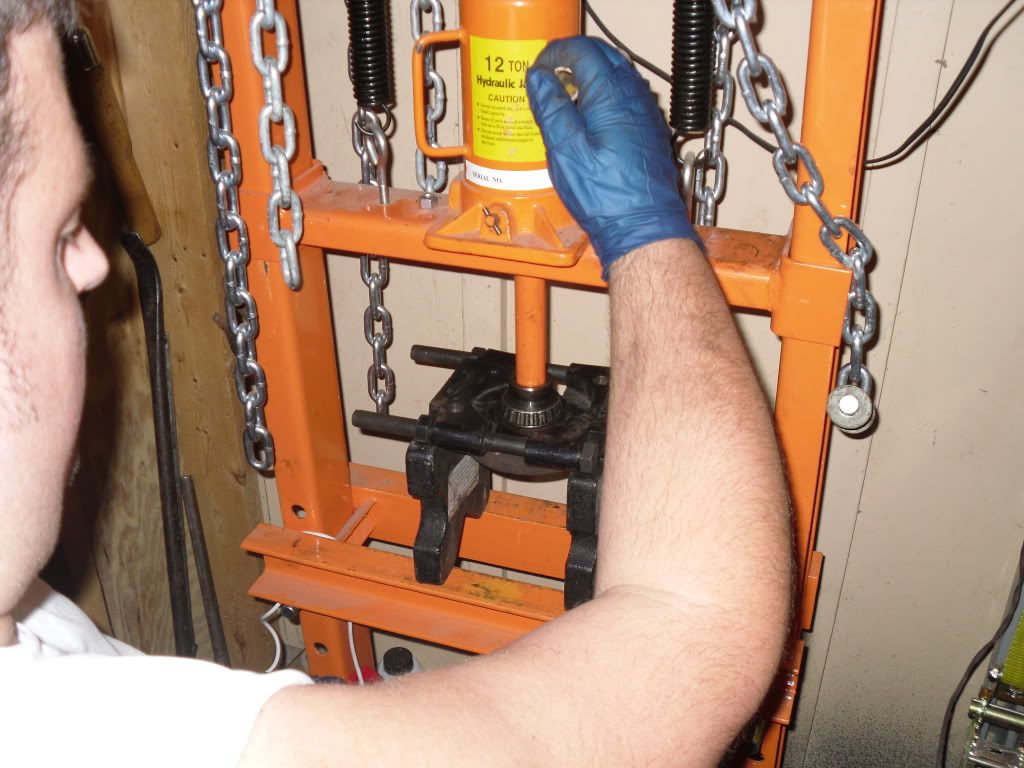
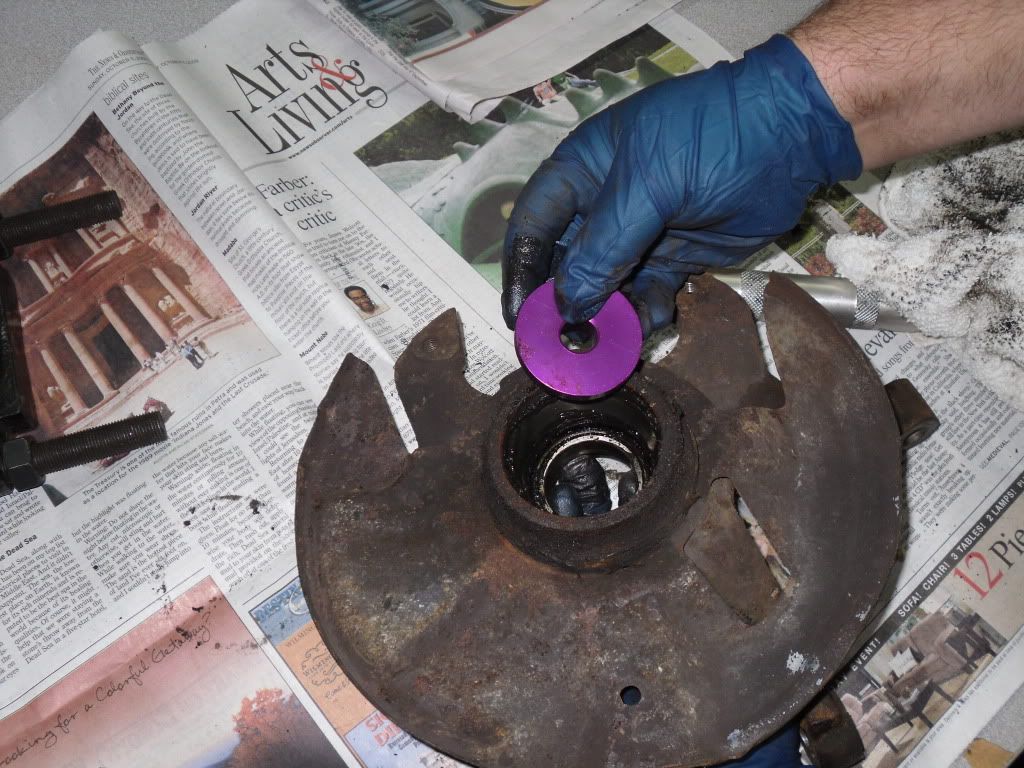
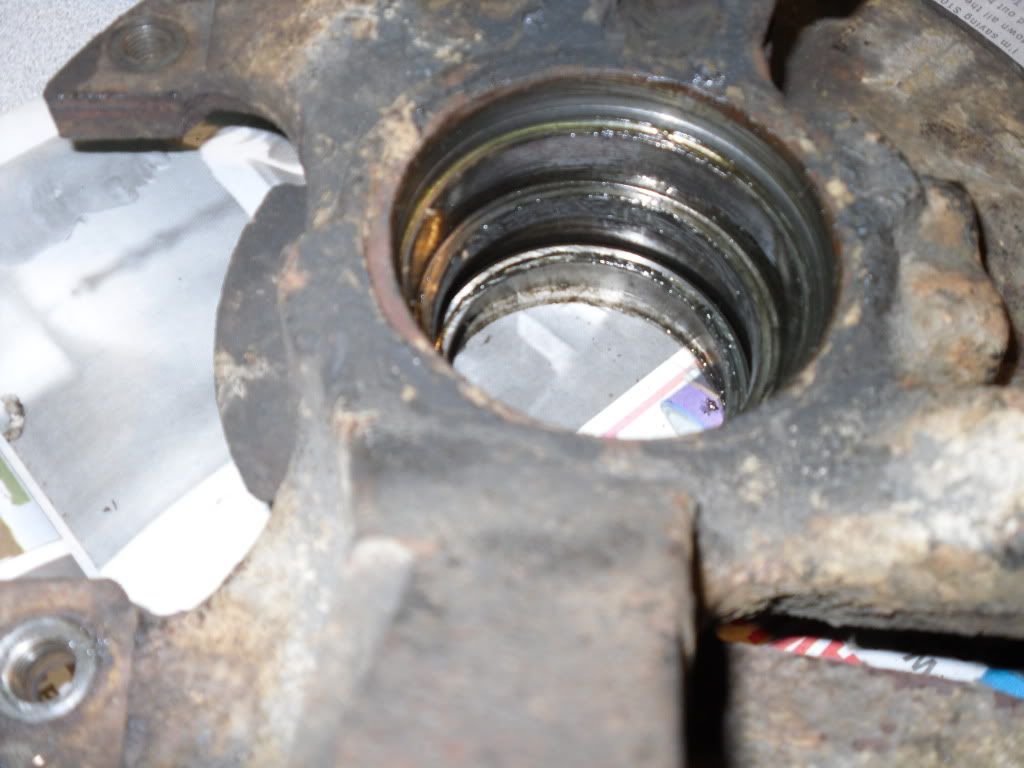
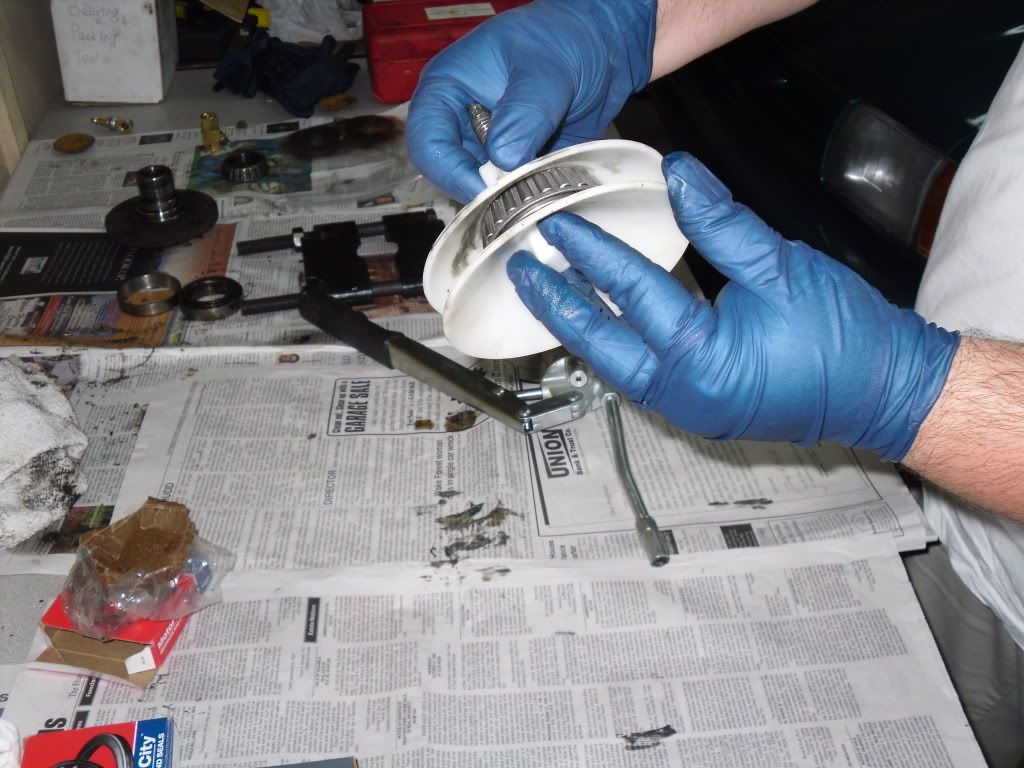
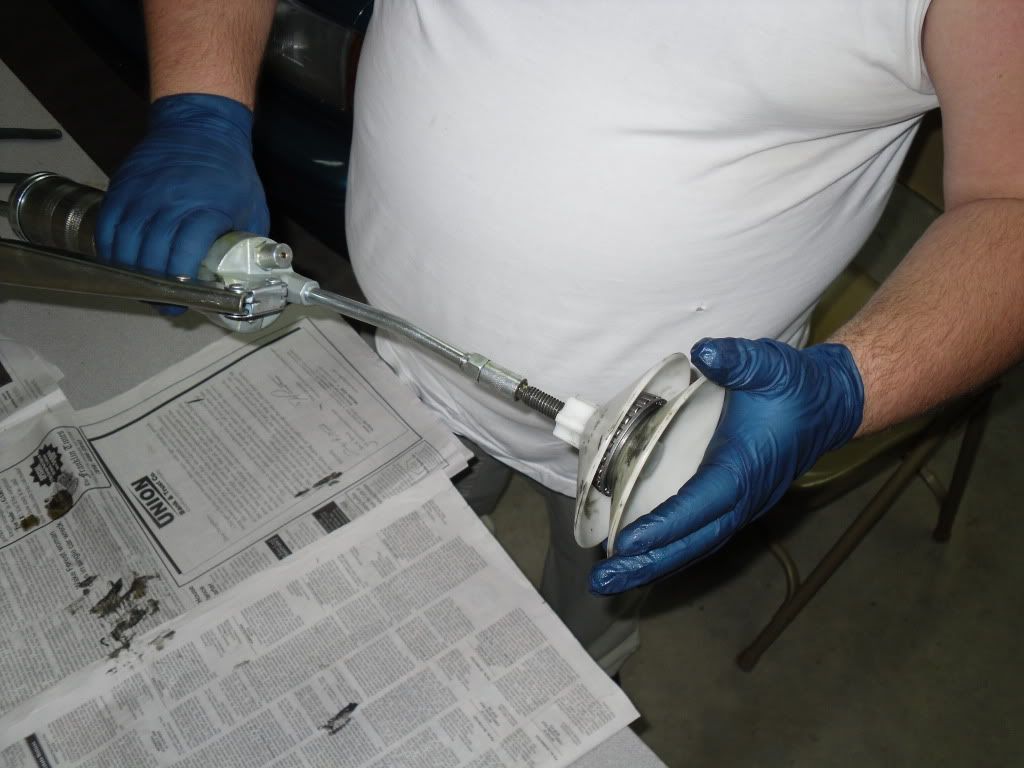
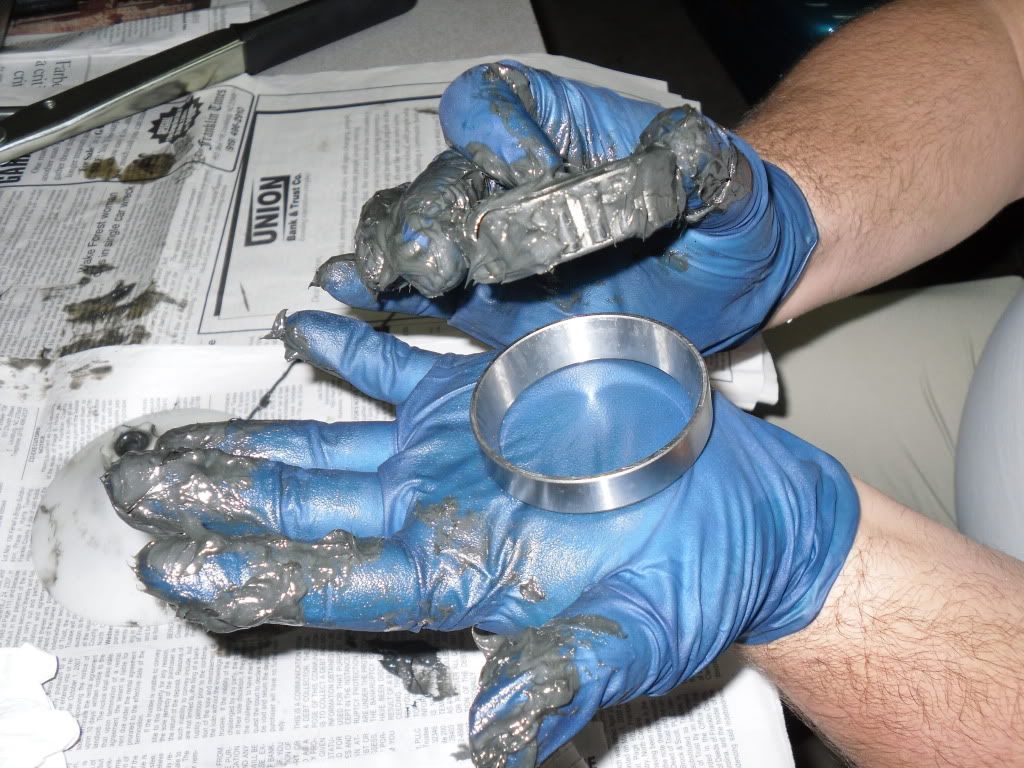
12. Now we have to remove the outer wheel bearing from the spindle. We used a wheel bearing puller device for this step.
This goes underneath the bearings in that small space shown here.
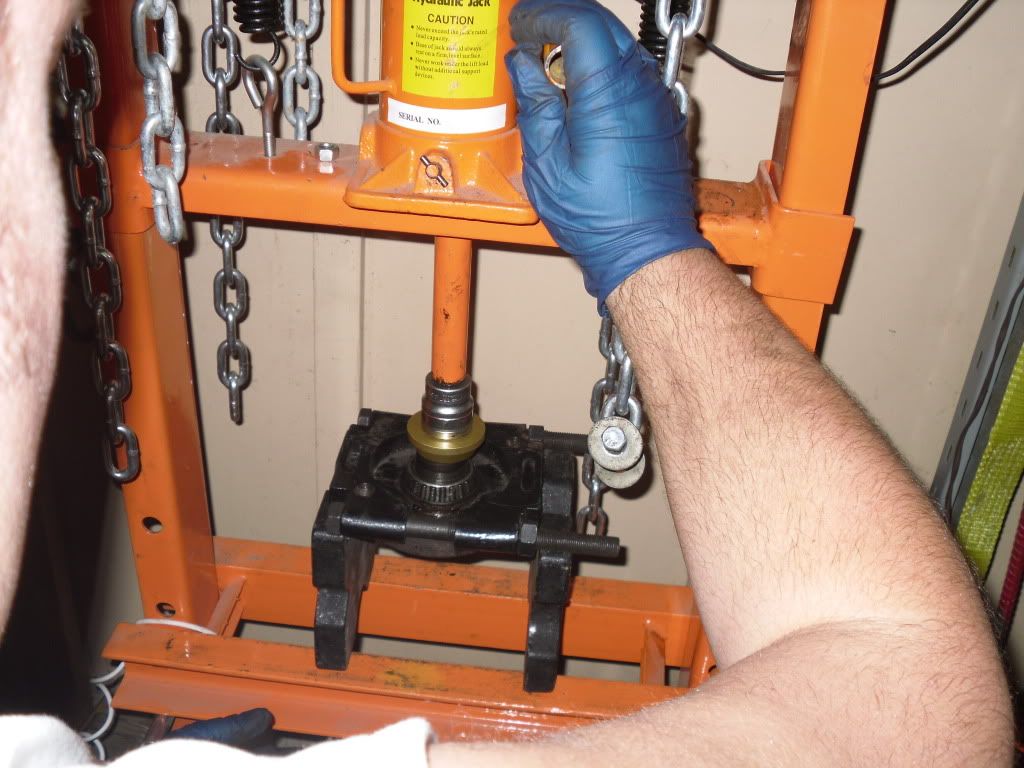
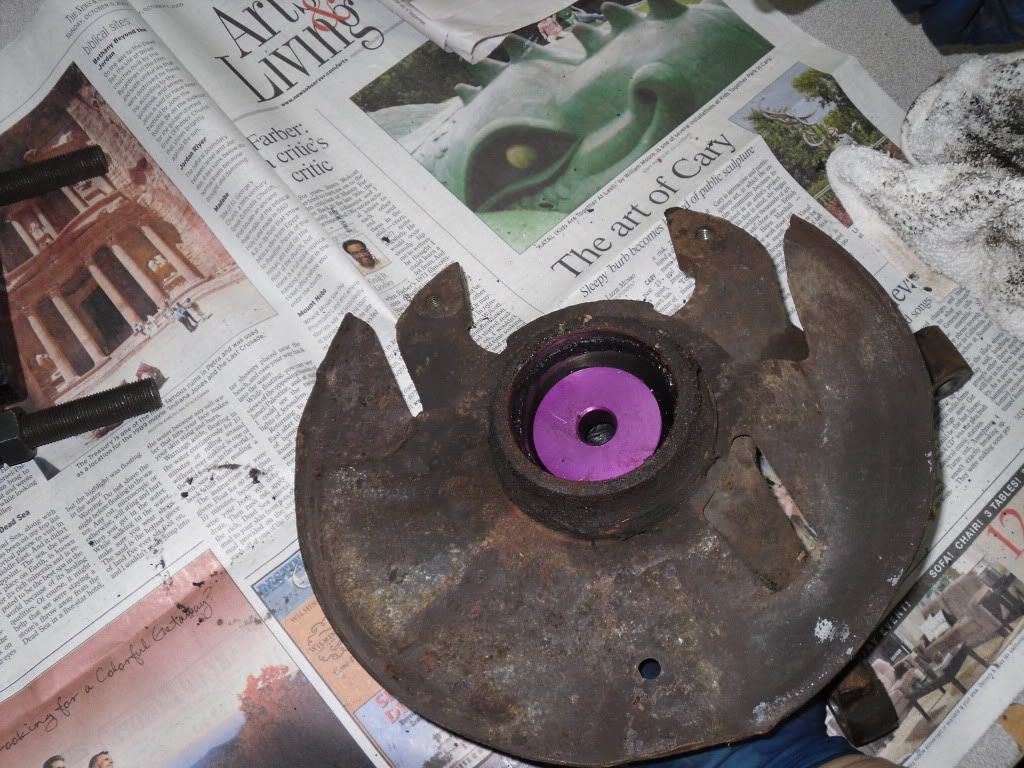
And looks like this when set up
Snug it in there!

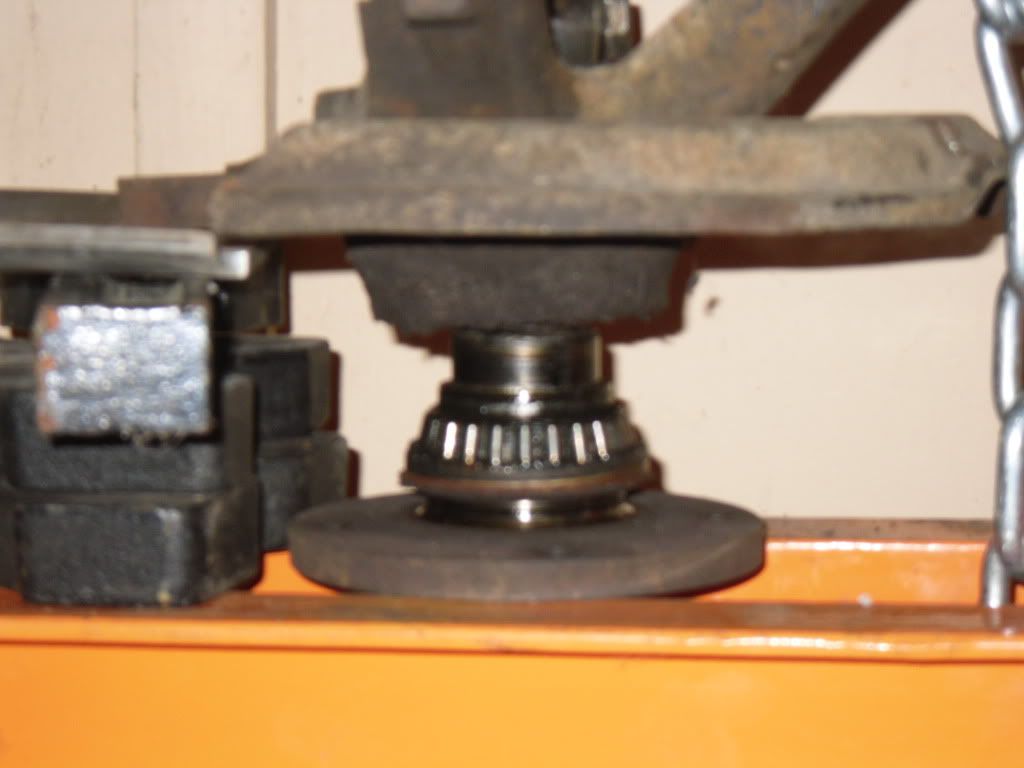
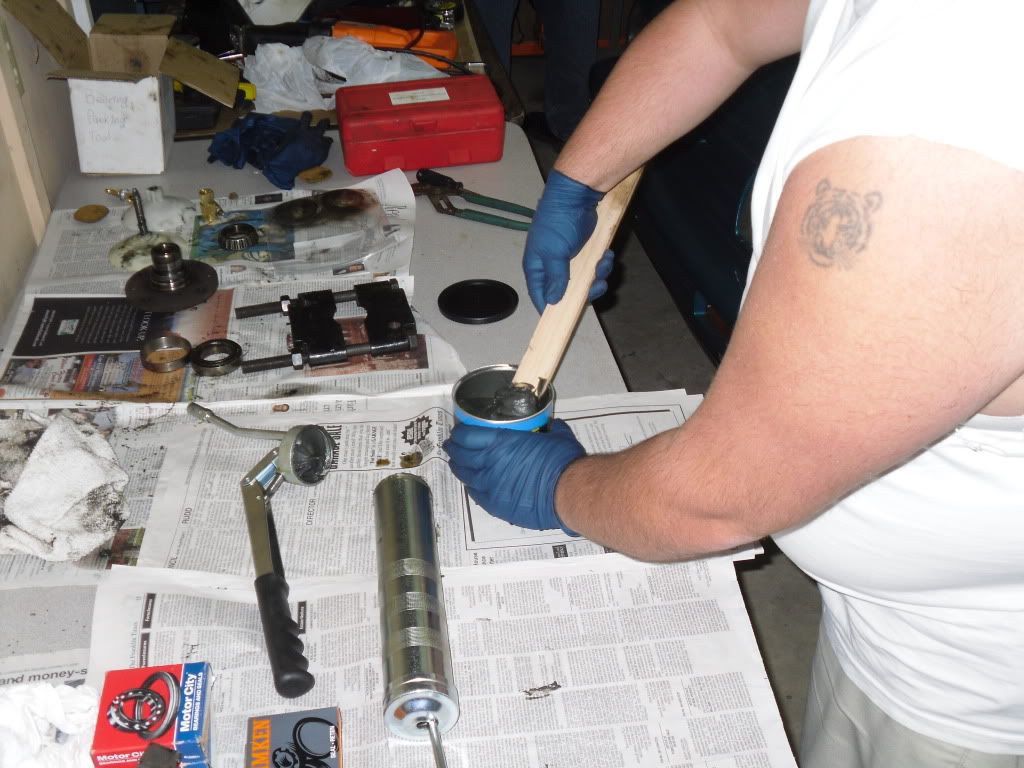
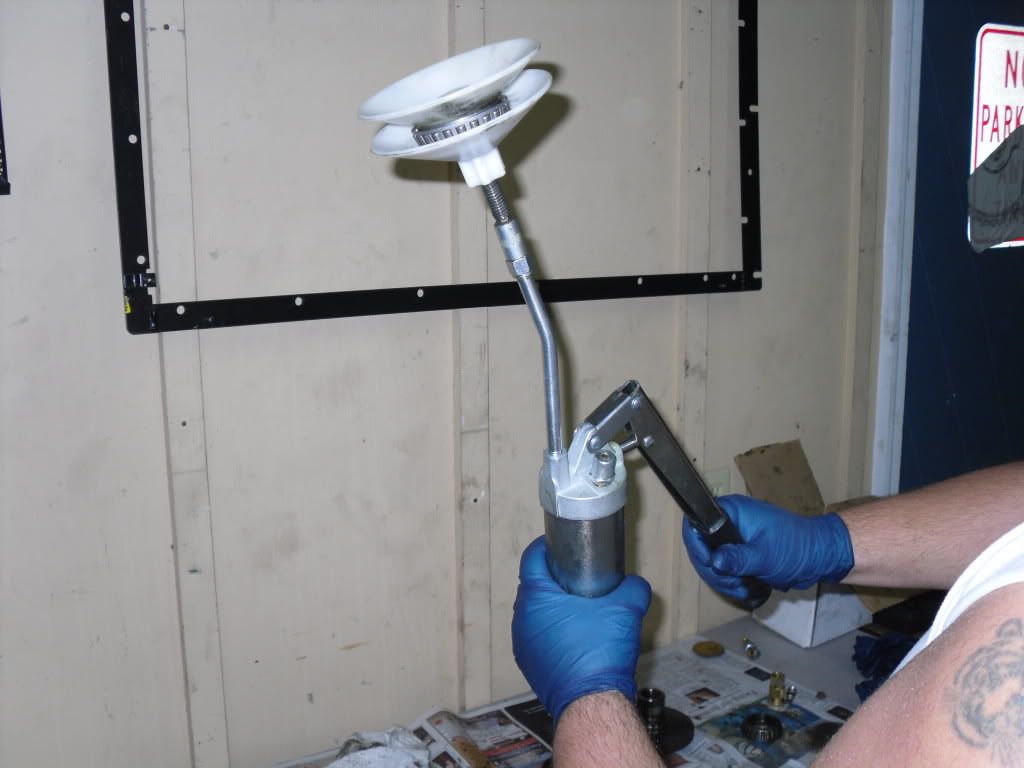
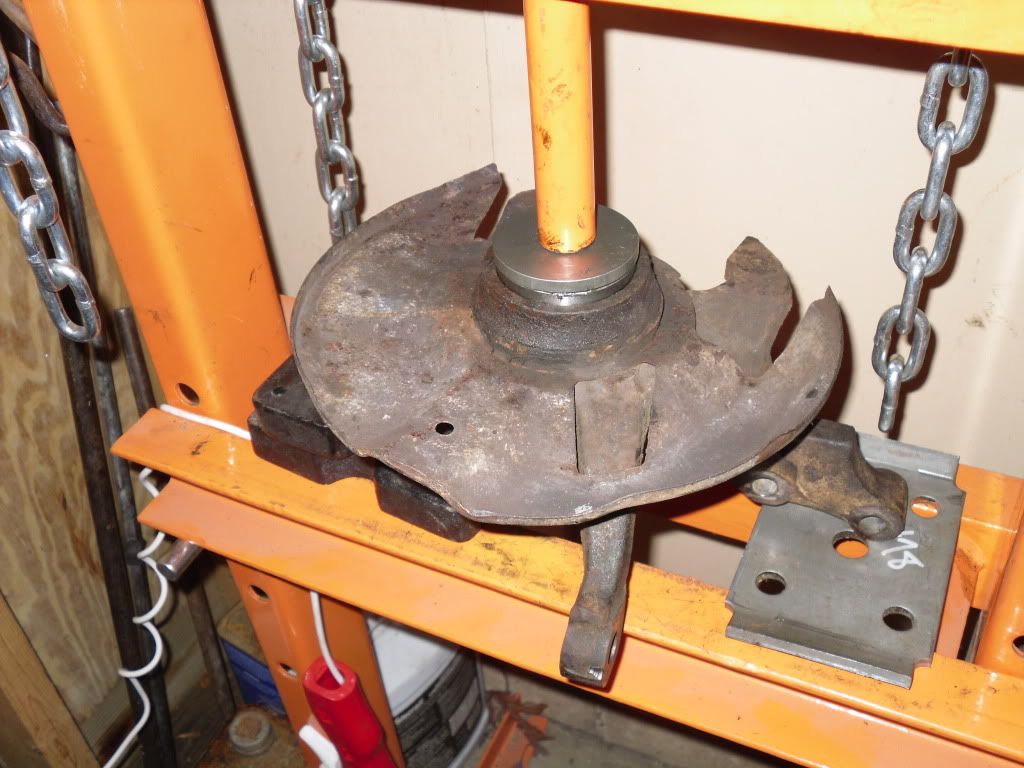
13. Time to use the press again... we got very familiar with the press during this whole replacement...
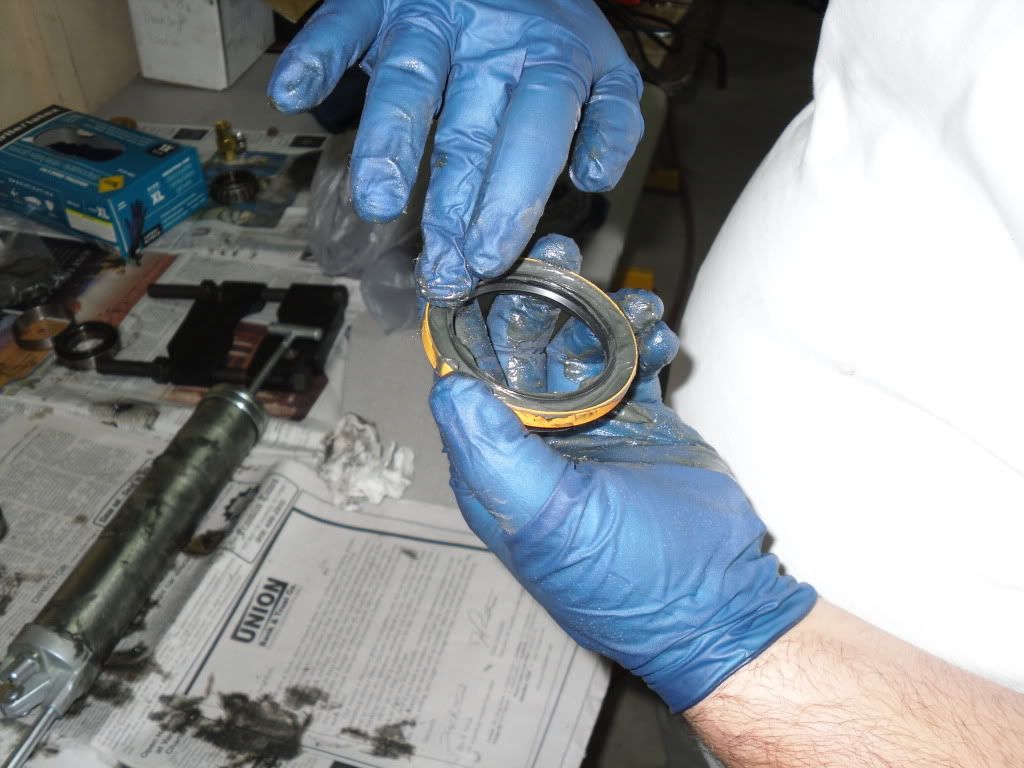
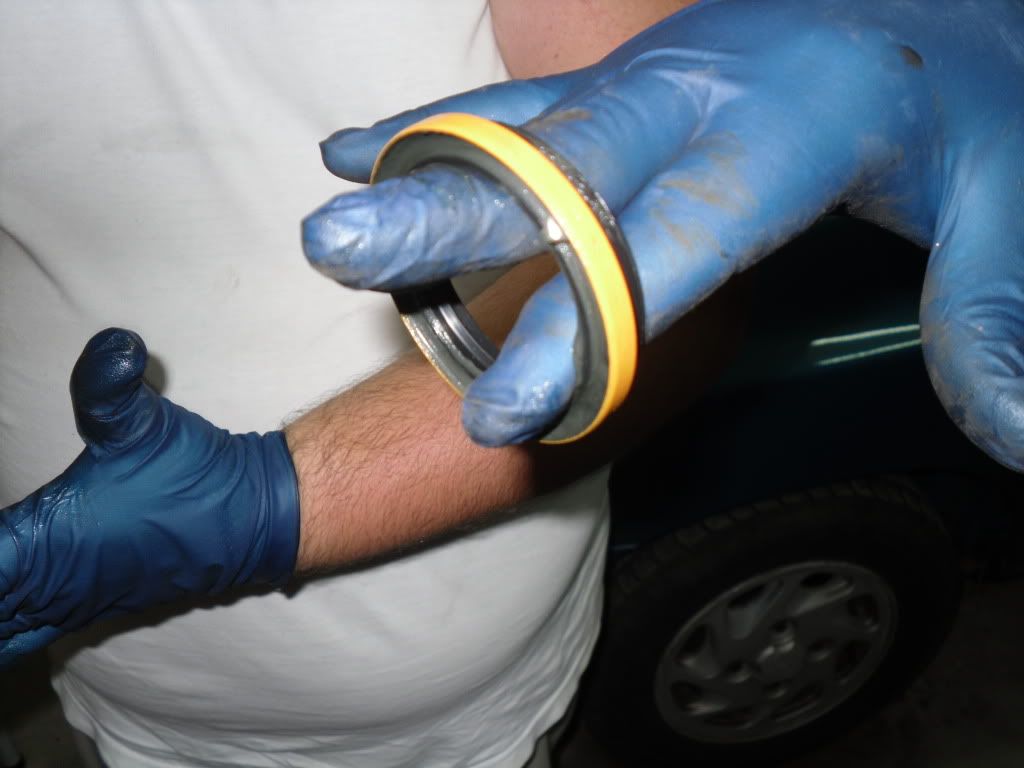
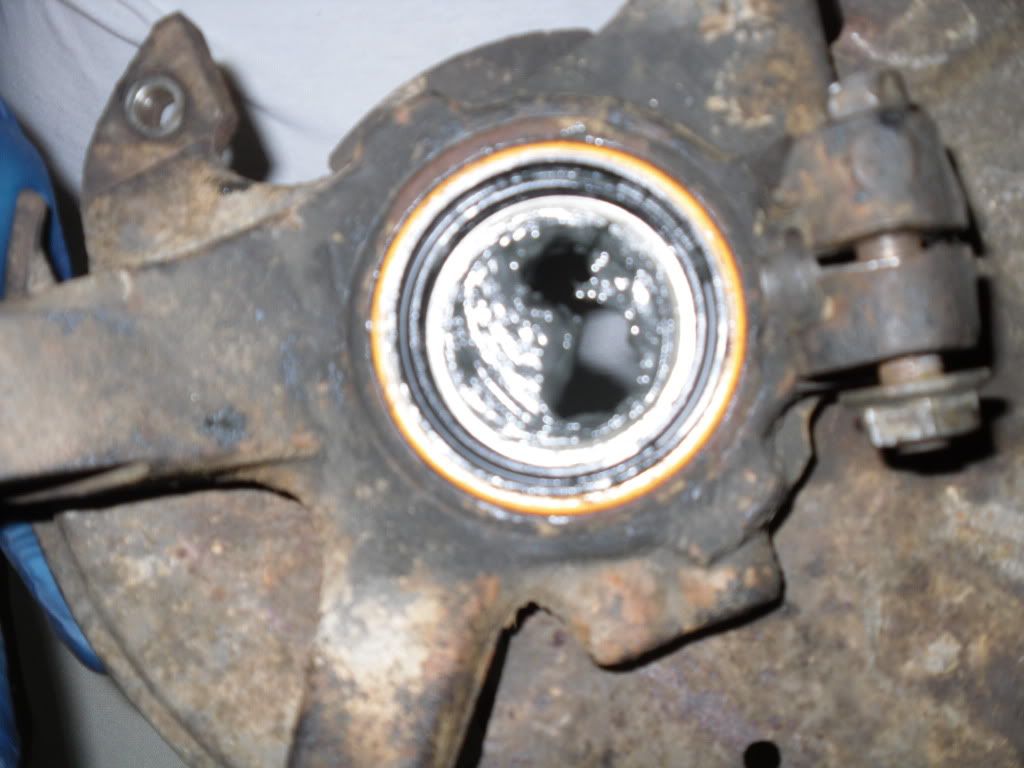
As we pressed, I noticed a metal peice bend a little bit. Turned out this was a seal that needs to be replaced later on anyway. So, don't worry about it.
Step1
Raise the vehicle and remove the tire. Place the vehicle on a jack stand or similiar. For safety sake, do not leave the vehicle on jack.
2. Have some apply the brakes on the car. Open the chiseled indention on the crunch nut and remove it. I used a flat head screw driver to open the chiseled indention. Make sure you open it entirely so that it does not scrape as the nut comes off.
3. The OEM Ford manual has you leave the brake unit on the car until later. I chose to remove it now to get it out of the way. To me, this was a better choice.
There are two bolts that hold the brake unit onto the rotor.
Once those two bolts were removed, I bled the brake unit into a bleeder bottle so I could loosen the brake shoes from the rotor. This can be done by opening the small bleeder valve near the top mount bolt of the brake unit. This bleeder valve should have a rubber peice covering the opening of the valve. This is to protect it from the eliments. Once this valve is open, gently pull the brake unit toward you. This compresses the part that squeezes the brakes onto the rotor and allows you to remove the brake unit from the rotor. I used wire to tie the brake unit up and out of the way. Do not touch the brake pads or rotor with greasy fingers. Also, do not let the brake unit "hang" only by the brake line. This will cause damage!
4. Remove the two screws that hold the rotor onto the car. Once I removed mine, I stood it up against the wall. I did not lay it on the ground. Remember, this what your brake pads clamp onto. Do not touch with greasy fingers or lay it in dirt!
5. You are going to need to remove the cotter pin and nut that attaches the tie rod to the knuckle.
Once I removed mine, I could not get the tie rod to come off the knuckle. So a quick trip to Harbor Freight and I picked up a 9 dollar "pickle fork" (tie rod remover). This has a forked end that slides underneath the tie rod and has a screw you adjust to open the device. (this pries the tie rod out of the hole)
NOTE: Once the tie rod is removed, do not allow the tie rod end to "move". Basically, this is your car's alignment. The tie rod end is threaded onto the tie rod. This is how alignment is adjusted. Move it and your car will be "out of align". I later learned that I need to replace my tie rod ends (this unit mentioned). Good luck trying to find any bushing replacement parts.
Allow the tie rod to lower and lay it out of the way.
6. Loosen the two mounting bolts that are part of the strut tower. I loosened them, but did not remove them at this point.
7. Remove the lower pinch bolt that holds the knuckle onto the ball joint.
NOTE: A medium flat head screw driver might be needed to slightly pry open the pinch bolt area around the ball joint to allow the unit to be removed.
8. This got tricky and I had to call Dean to get some advice. I could not get the knuckle off of the ball joint without pulling the CV axle out of the transmission. Suggestion, now that the knuckle is loose from the steering, turn it so that you can see the drive axle inserted into the knuckle. If you push the axle toward the transmission, you will see that it "gives" a bit and is sort of "springy". I pushed it toward the transmission and was able to remove the drive shaft from the back of the knuckle. The knuckle itself, tilts outward just a bit and this helped in this process.
You can see where I tried to just pull the knuckle up off of the ball joint and it resulted in pulling the axle out of the transmission. Avoid doing this if possible!
Once the axle was out of the knuckle, I then tilted the whole unit toward me by pushing downward on the lower control arm and lifting the knuckle off of the ball joint.
This may not seem clear, but you will see what I'm talking about once you are at this step. The lower control arm and sway bar allowed me some "wiggle" room to get the knuckle off of the ball joint.
Igore my transmission spill in the pic!
In this picture, you see the drive axle and enclosed cv joint laying over the sway bar. The sway bar is attached to the lower control arm and ball joint. This is one unit on the Aspire. The the far right is the tie rod.
You are now ready to remove the bearings! We used a press in the steps that follow.
9. First, you have to seperate the spindle from the hub.
10. Go slow, take it easy and check your progress often! Is done? Nope... not yet...
almost there... There it is! Plop... out it came from the bottom.
Take a close look... right above the wheel bearing is a small metal ring that easliy slides off off... this was actually the spacer! Spacers range in size from 1-21 (I believe)... mine was a 13. DON'T LOSE THIS PEICE! Remove it and set it aside.
11. Now we have to remove the inner wheel bearing. Since the outer wheel bearing and spindle are now out of the way, flip over the knuckle and press out the inner wheel bearing. Sorry, no pic for this step. We did the same thing as in the pics above.
12. Now we have to remove the outer wheel bearing from the spindle. We used a wheel bearing puller device for this step.
This goes underneath the bearings in that small space shown here.
And looks like this when set up
Snug it in there!
13. Time to use the press again... we got very familiar with the press during this whole replacement...
As we pressed, I noticed a metal peice bend a little bit. Turned out this was a seal that needs to be replaced later on anyway. So, don't worry about it.


 2009 Festiva Madness link with pictures. 51 Festivas & 4 Aspires from eight states attended.


Comment