.... I have a question for you if you don't mind answering. In this "POST #15", HOW did you post full screen multiple pics??:?: This sure would make it a lot easier in explaining a detailed circumstance.
Thanks
.:angel11:.
.
-
Your disty should not be that far CCW. Your timing belt is off a tooth....or 2.
You need to reset the timing. Do you have a Haynes manual? Haynes does a good job showing how to set the timing correctly. I did it at deer camp last Nov. when my belt broke. I had to lay in the cold dirt with borrowed tools and it was pretty easy. I bought a 2nd Haynes manual, along with the belt. Mine was 130 miles away.
Leave a comment:
-
Still not sure about the timing, but I did get to hear it breath life for a solid minute tonight! I ended up removing the hose from the tank to the pump, and connected a hose to the pump going to my gas can with seafoam in it. It ran for a second and would die... I had the GF start it, while I was under the hood, and I played with the throttle( my cable was too short, so I need to get a bracket fabbed up to get the pedal hooked back up) to keep it running. I am hoping that maybe the carb. just had some dust in it from sitting around, and the seafoam took care of it. I ran out of gas in the can, and daylight to reconnect the tank and stuff back up, so I guess I will find out tomorrrow. Any ideas what would cause it to need to be "pumped" to stay running? Is it like I was thinking about the carb just needing cleaned out a bit with the seafoam? I hope so, because just hearing it run, almost brought a tear to my eye.... my baby boy is back! Pics coming when its all cleared up!Leave a comment:
-
The disty was all the way cc-wise before. I have not checked the mechanical timing yet but if the weather permits I will tomorrow. Would you guys agree that this may be what is keeping it from staying running? I'm sure that's what was locking it up just not about the running issue. It hasn't ran right since my mom ran it out of gas. I replaced the filter on the firewall and figured the carb was clogged so that's why I got this one.Leave a comment:
-
i'm more worried about the timing belt shifting a few teeth... you should verify your mechanical timing (even if you didn't touch it). also verify your spark wire position on the dizzy.Leave a comment:
-
.... Before you moved the distributor at all, did you scribe a mark so you could go BACK to the original location?:?: Was it running OK before you changed the the position of the distributor?:?:
.Leave a comment:
-
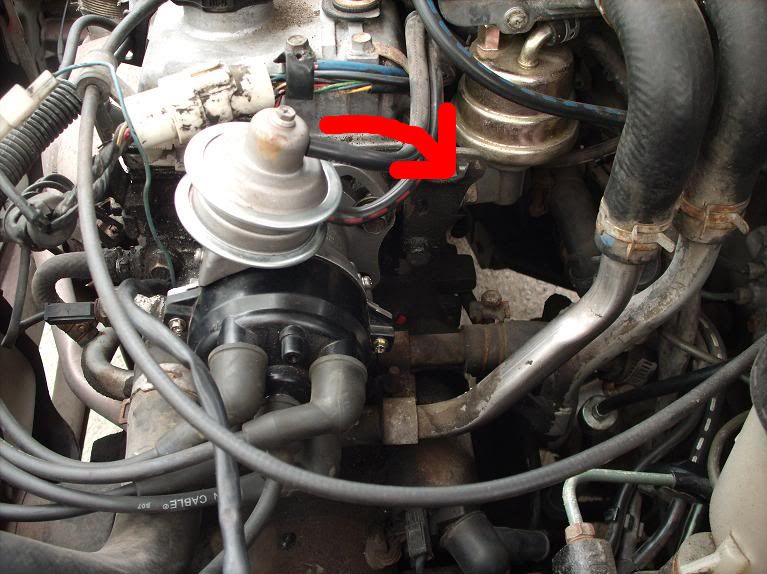
Ok, well, I got it installed, but no pics yet... teasing for now until it runs right. I think I may have a problem with my timing. I can get it to "start" for a second, but then it dies. I tried turning the disty a little bit, and it got worse. I would then not start at all and it sounded like it was locking up the starter like it was wanting to fire in the opposite direction.
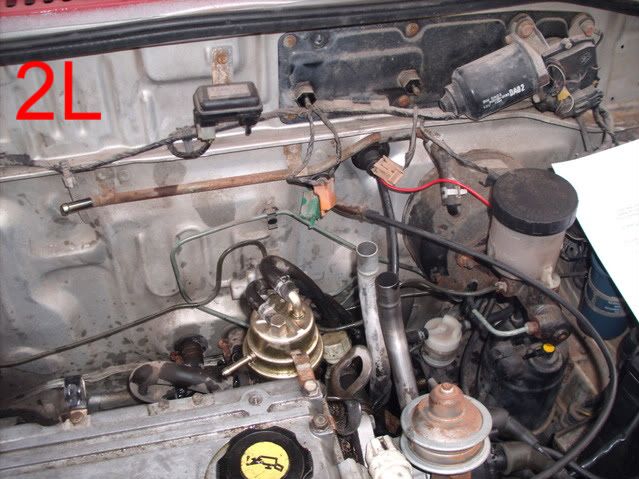
Ok, so as you can see from the following picture, the disty is all the way counter-clockwise. I moved it to the mid-way point, and that is when it started to lock the starter up. I moved it back first to 1/4 way, and then to where it was, and it will still only run for like 2-3 seconds. Is this a timing issue do you think? Or, is it something else? I wasn't too sure about the choke, so I have adjusted it a little too, but still nothing. When it locks up the starter, and I shut it off, I can see a little smoke rolling out of the carb. I'm sure the locking up thing is timing, but why won't it run? Very aggrivating, as I have been working on swapping that damned carb for 3 days now, and finally got the right hoses (that aren't worn and rotted), and got the choke figured out, and actually had time before the darkness or rain hit. I was sooooo pumped and ready to fire this bad boy up, but no such luck.
Leave a comment:
-
Thanks!
My birthday camera from my sons! 10 megapixel Kodak C142. It is amazing.
Especially compared to the one I had previously. A no name that always looked like I was taking pics in a fog.
Leave a comment:
-
Ok, so I took care of the 2 metal lines. I could not for the life of me break the big bolt loose on the shorter line so I ended up hacking that bracket off. I then pushed the smaller one back towards the firewall a little and connected them with a hose as was suggested. I also removed all the wire clips and zip-tied them up like was mentioned. I removed the charcoal canister as well, which is where the following question comes in... Where does the hose attached to the metal line go to? Is that just the fuel tank return or something? Does it need capped off or just let it hang there or...? I am getting ready to try putting in the hose barb into the pcv connection as suggested and I will let you all know how that goes. Pics are on the way but I'm on my iPod right now so I can't load them at the moment. ThanksLeave a comment:
-
Doyle, take that wiring harness, the one in all the pictures, wind it up in a ball, and zip tie it up into the drivers side corner. YOU DONT NEED ANY OF IT!
As told before by Tom and myself, you only need the the PCV, the breather line and the 2 vacuum lines to disty. Really, we are not messin with you!
You will only need the 1 electrical line, and that is the RED one from alternator to the choke on the carb. Put a 1/4" wire connector on that red wire and attach to choke. Then go for a drive!
I took some pics of my harness for you, I think you will recognize the connectors!


Your engine should look something like this
I still havent gotten rid of the EGR valve, but I will!
Also notice the RED wire to the choke here.

The hoses to the old air breather, you can see here, I removed the short one and looped the long one to where the short one was temporarily. Just a bypass now.

I have a lot of close-up pics of the vacuum lines to disty if you need and how I plugged all the ones I dont use. Just ask!
Last edited by drddan; 03-22-2011, 10:15 AM.Leave a comment:
-
Simple answer--you only need:
the PCV,
the breather line (E in your first post--either a breather filter, or a hose plumbed into the air filter housing),
the two vacuum hoses going to the vacuum advance on the disty,
the fuel line, and
a 12V source (when the engine is running) for the electric choke.
Get rid of the rest.
The two metal pipes coming up from below in 2L, just connect to each other with a hose. Later you can do something nicer-looking with them.Last edited by TominMO; 03-22-2011, 08:04 AM.Leave a comment:
-
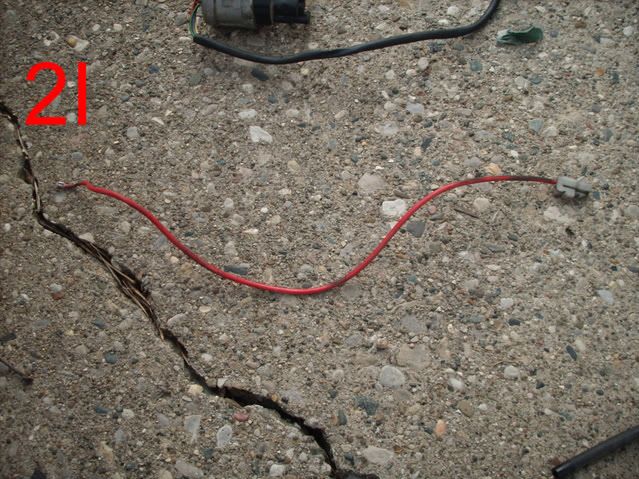
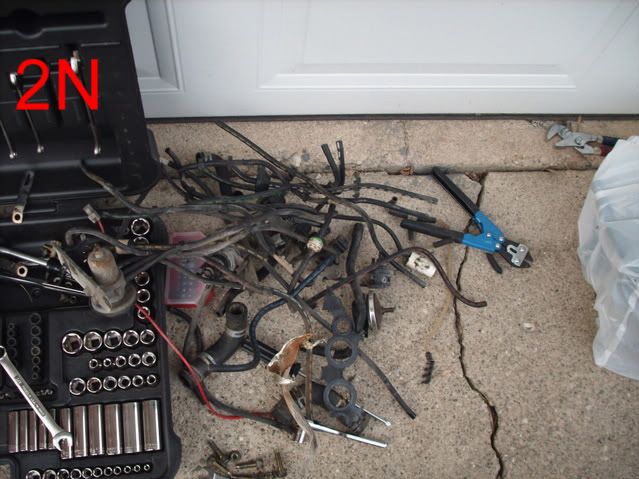
#2-I, the RED wire, laying on the concrete that you unplugged from the alternator goes to the electric choke. Hang on to that, let one of the other guys tell you how to hook it up to your new carb, which I am NOT familiar with.
Doing a good job.
.........:thumbright:.......
.Last edited by boydg1; 03-21-2011, 07:42 PM.Leave a comment:
-
Have not looked at the new intake yet, but I will get to it hopefully tomorrow. Today I went ahead and started ripping stuff off. And of course, more pictures and more questions:
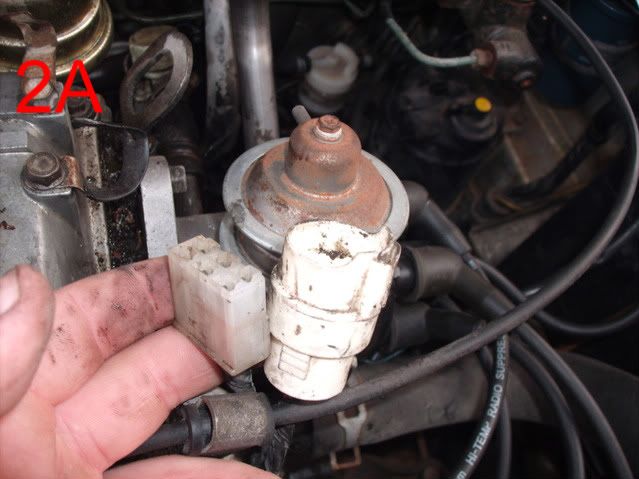
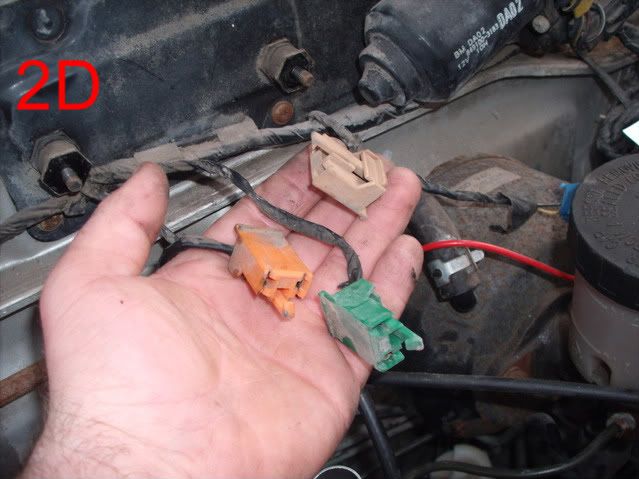
2A= What are these plugs for? I have what was plugged into them, but I don't know if I need to save these pieces and reconnect after I put on the new carb.
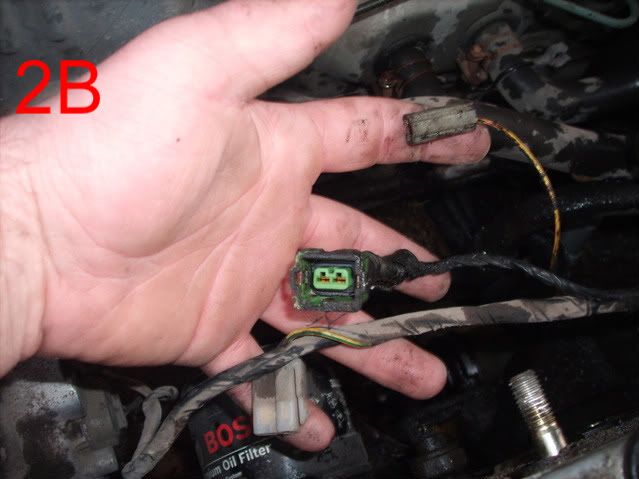
2B= Same as 2A.
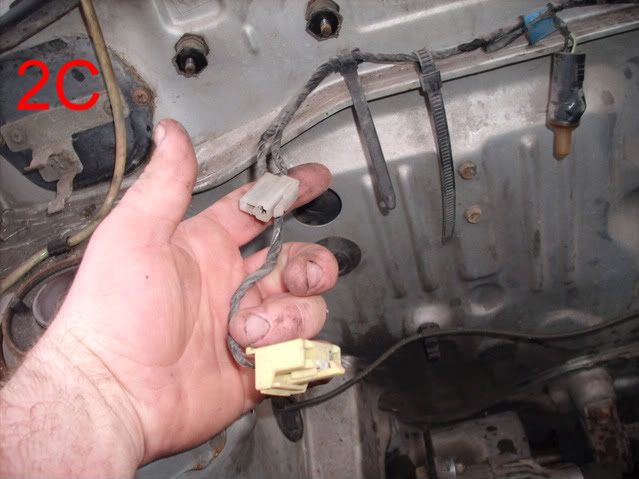
2C= Same as 2A.
2D= Same as 2A.
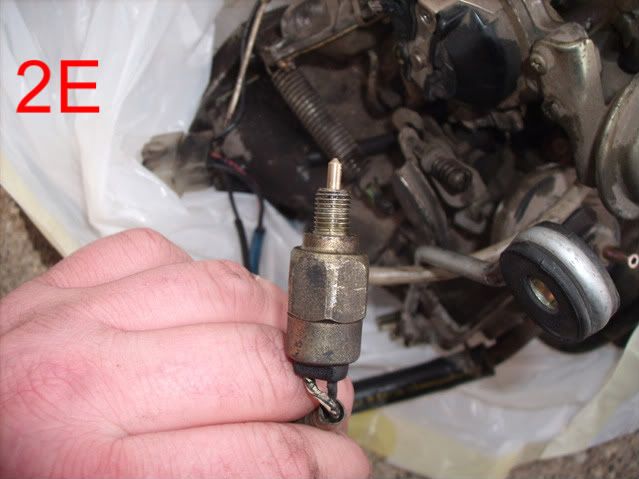
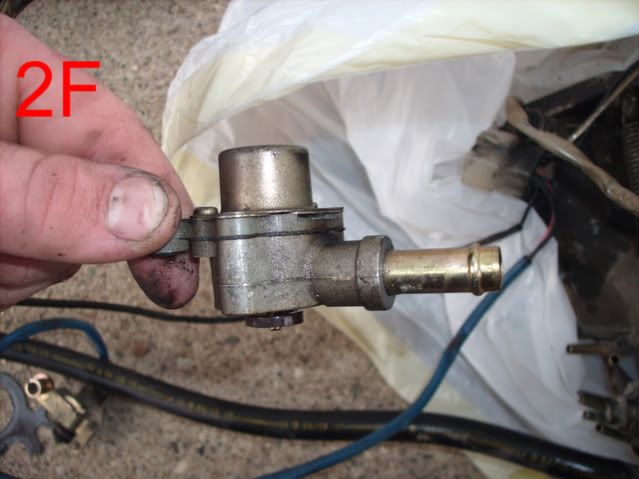
2E= What is this? Is it necesary to install it on the new setup?
2F= Same as 2E.
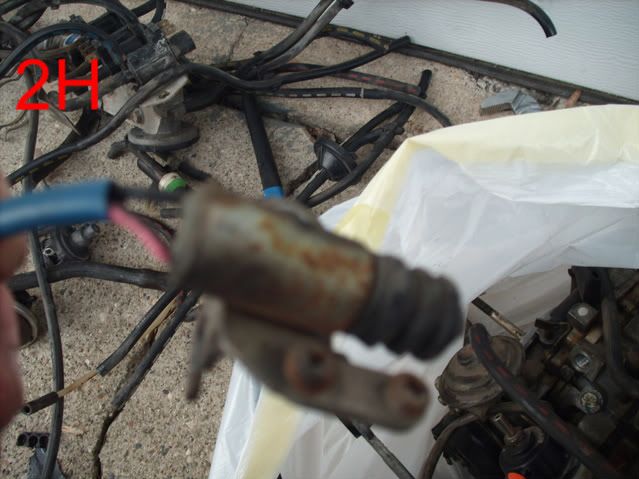
2H= Same as 2E.
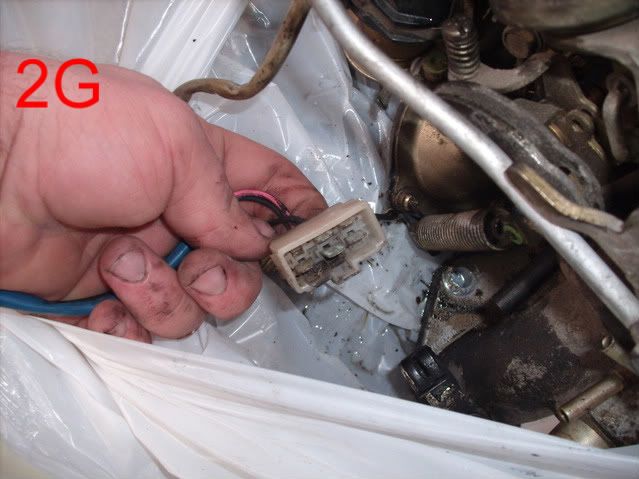
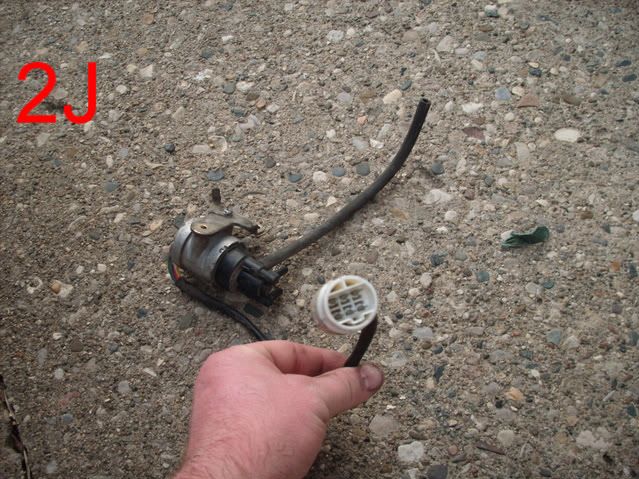
2G= This is the plug I was asking about with regards to 2A-2D.
2J= Same as 2G.
2I= This wire went directly to the alt. and to the DS of the carb. What is it, and is it necesary?
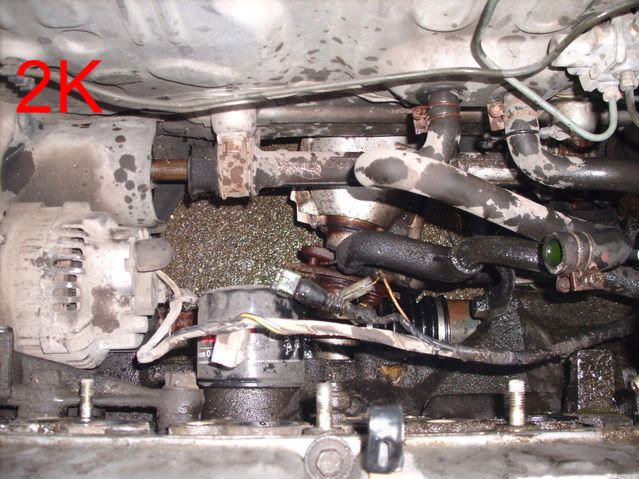
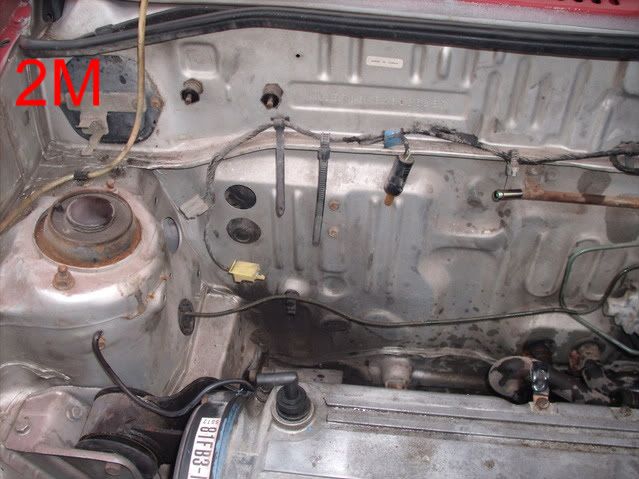
2K-2M= Progress, intake finally removed.
2N= All the various vacuum lines and wires removed from old setup. Still more in there probably, but it was looking like rain, so I packed everything up and came inside.
I know, a lot more questions, but I want to make sure I don't remove too much, and I remove everything I can. I did keep the map sensor, and I am looking into using the EGR port for my PCV. I am also going to get one of the VC breathers that a lot of you have.
Also, any thoughts, ideas, or opinions are welcome. It's a work in progress, and any information you can give me is greatly appreciated. Dan, I know you have already completed this so I'm sure I can count on you for expert advice. Thanks again everyone.Leave a comment:
-
Doy, take a look at the flange mounting for the EGR valve. I think I plugged one of the holes with a hex socket pipe plug. If it is there, take it out and blow air in the hole and see if the air is coming out the intake ports. If air is coming out the intake ports, then you should be able to hook up your PCV valve to that hole as described in the picture below. There is a plug in the exhaust port for the EGR valve on the face of the intake flange. Do not remove that one.
If you want to vent the crankcase to the atmosphere like I had it, you will need to remove the PCV valve and install an open type hose fitting with nothing inside it unlike the PCV valve which has a type of check valve inside it.Leave a comment:
Leave a comment: