Announcement

Collapse
No announcement yet.

Need Help Removing Oil Pressure Switch

Collapse
X
 
  • Filter
  • Time
  • Show
Clear All
new posts

  • Need Help Removing Oil Pressure Switch

    In the next few days I'll be installing a mechanical oil pressure gauge in place of the stock oil pressure switch on my 94 Aspire. Though I've never seen it, I was able to get my camera in position to take this picture of it.


    I'll have to do this along the side of a city street where I don't have permission to do this work. Since I'll have to put the front of the car on jack stands to get to the part, I want to be able to get the switch out and the gauge in as quickly as possible so as not to call attention to myself any longer than absolutely necessary.

    In order to do this it would help me to know in advance exactly what I'll have to deal with when I get under the car. Here are some questions.

    1. The electrical connector seems to have some release mechanism. It would be good if someone could tell me exactly what I have to push on or lift up to get it disconnected.

    2. I'm planning to use a crescent wrench to remove the switch. It is 10 inches long. Will I have room to use that wrench or will I need to buy a special socket to easily, and quickly, remove the switch? I've seen special sockets for this purpose on the Internet, hence the question. What size socket would that be?

    3. Is the switch likely to be extremely tight and difficult to break loose? Should I lift the car, spray it with PB Blaster and lower it to let it soak in, before lifting it again to break it loose?

    I know these questions must seem foolish to those of you who have garages, or car ports, or driveways, or yards, or some other private place to do your work. But to those without any of those, information like this could avoid having someone call the police and perhaps having to tow the car to somewhere else to finish the work. And where would that be? The whole prospect is too unpleasant even to imagine.
    John Gunn
    Coronado, CA

    Improving anything
    Improves everything. Copyright 2011 John Gunn

  • #2
    ok, squeeze the connector and then pull it off.
    the sensor will be cake to take off, but i recomend a 6pt 24?mm deep socket (i'll double check the size later today). if it comes down to it that you can't get the appropriate socket, a quick 1/4 turn with the cresent should get it loose enough to take it off by hand.

    the bugger is going to be getting the threads started for the gauge line, that's the hardest part really.
    Trees aren't kind to me...

    currently: 2 88Ls (Scrappy and Jersey), 88LX, 90L(Pepe), 91L, 91GL (Skippy) 93 GL Sport (the Mighty Favakk), 94 (Bruce) & 95 Aspire SEs, 97 Aspire (The Joker),
    94 Justy 4WD, 87 Fiero GT, plus 2 parts cars. That's my fleet.

    Comment


    • #3
      I guess maybe the Aspire is a lot different than the festie, but I have taken them off the festie from the top (no jackstands required). You can't see what you're doing, but you can do it buy feel.
      No festiva for me ATM...

      Comment


      • #4
        John, try removing whatever you can from the top end area to see if you can get to this from above,as htchbck suggested. If you can get to the oil filter and the alternator connections/bolts from the top, you should be able to get to the oil switch.

        Try taking out the alternator and brackets to see if that helps. I'm not familiar with Aspires either, so maybe this won't work.

        Karl
        '93GL "Prettystiva" ticking B3 and 5 speed, backup DD; full swaps in spring!
        '91L "AquaMutt" my '91L; B6 swap/5 speed & Aspire brakes, DD/work car
        '92L "Twinstiva" 5sp, salvage titled, waiting for repairs...
        '93GL "Luxstiva," '94 B6 engine & ATX; needs overhauled
        '89L "Muttstiva," now a storage bin, future trailer project

        Comment


        • #5
          if you can get under the car once on stands you can see it really easy, right next to the oil filter. I used a socket to take mine off too
          1993 GL 5 speed

          It's a MazdaFordnKia thing, and you will understand!

          Comment


          • #6
            Originally posted by FestYboy View Post
            ok, squeeze the connector and then pull it off.
            the sensor will be cake to take off, but i recomend a 6pt 24?mm deep socket (i'll double check the size later today). if it comes down to it that you can't get the appropriate socket, a quick 1/4 turn with the cresent should get it loose enough to take it off by hand.

            the bugger is going to be getting the threads started for the gauge line, that's the hardest part really.
            Greg installed an aftermarket oil pressure gauge on my car. He screwed a brass extension piece into the block, then used a brass t-fitting with one end screwed into the extension; another end had the stock oil pressure sensor screwed into it; and the third end went to the aftermarket gauge.

            I recently took them off to re-seal them with blue Loc-Tite on the threaded pieces, and an extra hose clamp on the hose, since I had some slow leaking there.

            Bear in mind that the female thread in the block is probably metric, and you will be converting to something else, uinless you have the appropriate metric adaptor. Greg just screwed the brass extension straight into the block, and there hasn't been any leaking at all at that point.

            He got the brass parts from Lowe's; they have a whole section of small brass fittings back where the bathroom stuff is.

            I'll try to get out to get a pic of what I am talking about, along with a description to point out what goes to what.
            90 Festy (Larry)--B6M (Matt D. modified B6 head), header, 5-speed, Capri XR2 front brakes, many other little mods
            09 Kia Rondo--a Festy on steroids!

            You can avoid reality, but you can't avoid the consequences of avoiding reality--Ayn Rand

            Disaster preparedness

            Tragedy and Hope.....Infowars.com.....The Drudge Report.....Founding Fathers.info

            Think for yourself.....question all authority.....re-evaluate everything you think you know. Red-pill yourself!

            Comment


            • #7
              Tom, what Greg did sounds good. Any way to get the size of the parts needed for that installation? I'm wanting a mechanical oil pressure gauge too.

              Here is one I'm looking at:


              It comes with 1/8" and 1/4" NPT fittings. So an adapter would need to match the thread in the block and a T-fitting to the 1/4" or 1/8" fitting. Seems pretty straightforward.

              Or maybe I'll get more adventurous with this triple gauge kit:


              Ah, just saw this adapter kit:


              I should be able to measure my spare B3 engine's threading at the oil pressure sensor easily. It's in the garage. Maybe this week, when I can move things around to get to it...

              Karl
              Last edited by Safety Guy; 06-20-2011, 02:28 PM.
              '93GL "Prettystiva" ticking B3 and 5 speed, backup DD; full swaps in spring!
              '91L "AquaMutt" my '91L; B6 swap/5 speed & Aspire brakes, DD/work car
              '92L "Twinstiva" 5sp, salvage titled, waiting for repairs...
              '93GL "Luxstiva," '94 B6 engine & ATX; needs overhauled
              '89L "Muttstiva," now a storage bin, future trailer project

              Comment


              • #8
                Originally posted by Safety Guy View Post
                Tom, what Greg did sounds good. Any way to get the size of the parts needed for that installation? I'm wanting a mechanical oil pressure gauge too.

                Here is one I'm looking at:


                It comes with 1/8" and 1/4" NPT fittings. So an adapter would need to match the thread in the block and a T-fitting to the 1/4" or 1/8" fitting. Seems pretty straightforward.

                Or maybe I'll get more adventurous with this triple gauge kit:


                Ah, just saw this adapter kit:


                I should be able to measure my spare B3 engine's threading at the oil pressure sensor easily. It's in the garage. Maybe this week, when I can move things around to get to it...

                Karl
                I'm thinking the oil pressure sender is M10 thread, but that's just a guess. I note that Jeg's sells a metric M10 to NPT 1/8" adaptor for $10. Part #105-2265. Page 118 of their current catalog. Phone # 800-345-4545.

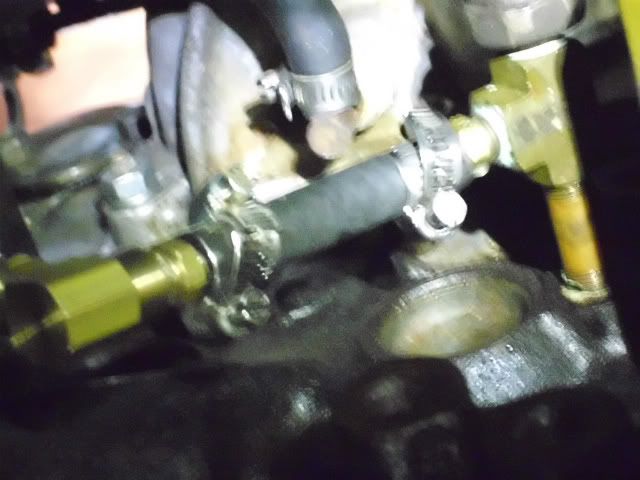
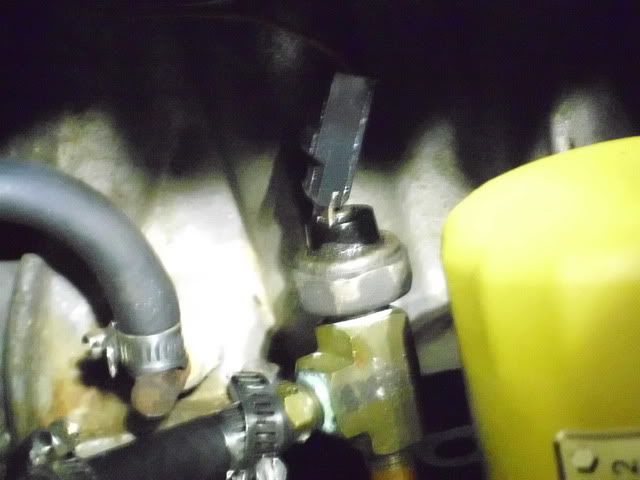
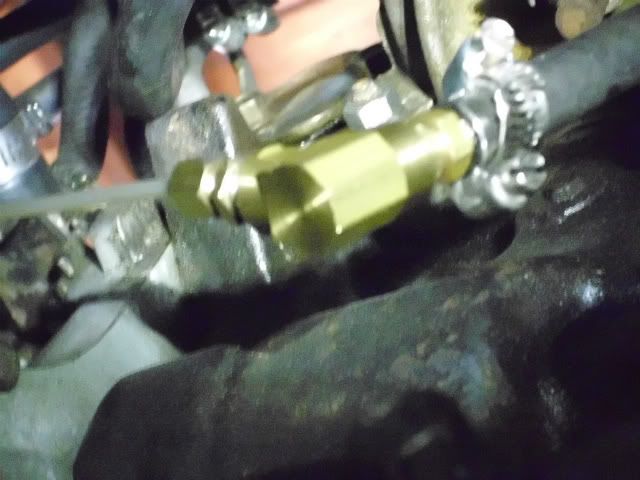
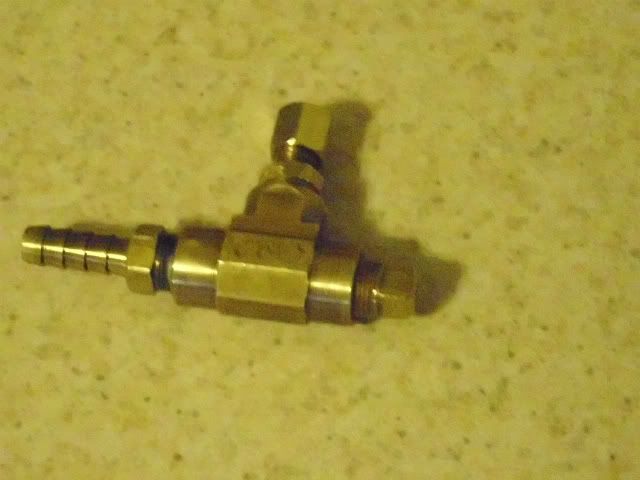
                Anyhoo, here's pics. NOTE: all fittings are 1/8" NPT. Apparently male threads are called MIP, and female threads are FIP, if you go to Lowe's to find this stuff. I used blue Loc-Tite on the threads, to prevent leaking, and two hose clamps on the lower part of the hose. I had been getting some slight oil leakage with the former setup.


                Sorry about the blurring. This pic shows the extension out of the block, the upper T, the hose connecting to the lower L, and the lower L. In fact, without the need for an oil line to the rear turbo, the lower L is not needed. Just screw the oil pressure adaptor into the lower part of the upper T. I only put in the lower L sinceI might re-turbo this car, and anyway I didn't want to screw around with the upper T, which does not leak oil.


                Detail of the upper T.


                Detail of the lower L. I just put this on yesterday. Greg had a T here too, since oil was going back to the rear turbo as well, but I took the turbo off for now. Needs rebuilding. Car is still quite peppy with the B6 over-timed to 14 BTDC and a cat-delete pipe. Running premium gas for safety.


                The lower T that I took off. Left, a barb for a hose. Top, the connection for the oil gauge. Right, a square-headed plug.


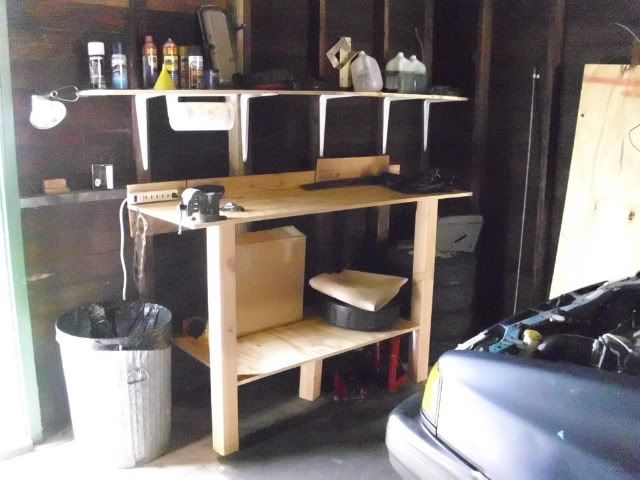
                Bonus pic: my garage workshop. About $100 in parts (free vise), and one hour in labor. OK, maybe two hours.


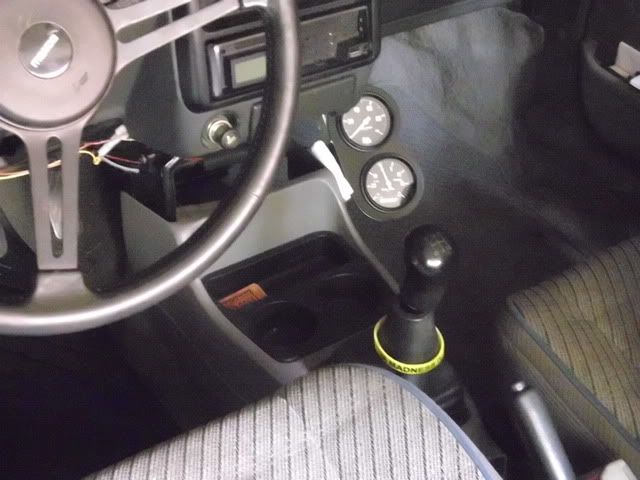
                For Greg. Relocated my gauges just for fun. Top is oil pressure, bottom is boost/vacuum. A simple straight bracket holds the gauge panel to the car. Screws into an existing center-console upper mount. Gauges are 2 5/8", green lighting. For now, folded paper towel dampens vibration.

                Escort console is screwed into existing lower mounting points for the stock Festy console. Now I need to figure out what to do with that gap....
                Last edited by TominMO; 06-20-2011, 03:38 PM.
                90 Festy (Larry)--B6M (Matt D. modified B6 head), header, 5-speed, Capri XR2 front brakes, many other little mods
                09 Kia Rondo--a Festy on steroids!

                You can avoid reality, but you can't avoid the consequences of avoiding reality--Ayn Rand

                Disaster preparedness

                Tragedy and Hope.....Infowars.com.....The Drudge Report.....Founding Fathers.info

                Think for yourself.....question all authority.....re-evaluate everything you think you know. Red-pill yourself!

                Comment


                • #9
                  Thanks for the pics Tom!

                  Karl
                  '93GL "Prettystiva" ticking B3 and 5 speed, backup DD; full swaps in spring!
                  '91L "AquaMutt" my '91L; B6 swap/5 speed & Aspire brakes, DD/work car
                  '92L "Twinstiva" 5sp, salvage titled, waiting for repairs...
                  '93GL "Luxstiva," '94 B6 engine & ATX; needs overhauled
                  '89L "Muttstiva," now a storage bin, future trailer project

                  Comment


                  • #10
                    Originally posted by Safety Guy View Post
                    Tom, what Greg did sounds good. Any way to get the size of the parts needed for that installation? I'm wanting a mechanical oil pressure gauge too.

                    Here is one I'm looking at:


                    It comes with 1/8" and 1/4" NPT fittings. So an adapter would need to match the thread in the block and a T-fitting to the 1/4" or 1/8" fitting. Seems pretty straightforward.

                    Or maybe I'll get more adventurous with this triple gauge kit:


                    Ah, just saw this adapter kit:

                    Buy Sunpro CP7573 Metric Adaptor Kit: Gauges - Amazon.com ✓ FREE DELIVERY possible on eligible purchases


                    I should be able to measure my spare B3 engine's threading at the oil pressure sensor easily. It's in the garage. Maybe this week, when I can move things around to get to it...

                    Karl
                    Thanks, Karl, for your good suggestions. I'll definitely take another look at getting to the switch from the top. Don't usually think about removing things to gain access. When I work on an engine I try to disturb unrelated parts as little as possible. Removing a lot of stuff that I probably haven't dealt with before is an open invitation to unexpected problems, a bolt that is too tight and not having enough room to use the only wrench of the correct size, so I end up having to use pliers and screw up the bolt head. Or trying to remove an electrical connector that I've never seen and can't see even as I struggle to get it off. If it doesn't involve too many parts I will definitely consider it. Can't visualize it from memory. Will have to look at it in good light.

                    Most of the metric to NPT adapters I've seen on the Internet come with copper washers to use in sealing them. I don't think those threads are tapered the way the NPT ones are. When I look at the picture I posted in my initial message in this thread, there is no washer for sealing so I would guess it to be a tapered thread.

                    Here is an album that clearly shows the use of a washer in installing a metric adapter. Check out the first three pictures to see what I'm talking about.

                    If your spare B3 engine has its oil pressure switch, you could take that with you to the hardware store and see which of the adapters it fits. You can tell if its tapered because it will start out very loose when you first insert it, but gradually get tighter as you screw it in.

                    Knowing the treads of the mounting hole is the single most important thing to know before being able to even think about replacing the switch with any thing other than an exact, direct fit part. I didn't even consider that in my original post. It sure helps to have you guys around to bounce things off of.
                    John Gunn
                    Coronado, CA

                    Improving anything
                    Improves everything. Copyright 2011 John Gunn

                    Comment


                    • #11
                      Originally posted by FestYboy View Post
                      ok, squeeze the connector and then pull it off.
                      the sensor will be cake to take off, but i recomend a 6pt 24?mm deep socket (i'll double check the size later today). if it comes down to it that you can't get the appropriate socket, a quick 1/4 turn with the cresent should get it loose enough to take it off by hand.

                      the bugger is going to be getting the threads started for the gauge line, that's the hardest part really.
                      Thanks for the quick response, FestYboy. It would be helpful to me to know the size of that socket if you can find that out.

                      I'm a little surprised that you have had trouble getting the switch initially threaded. From the look of it I would have thought it to be a tapered NPT fitting, which are extremely easy to get started since they are so loose before the taper sets in and it starts to seal.
                      John Gunn
                      Coronado, CA

                      Improving anything
                      Improves everything. Copyright 2011 John Gunn

                      Comment


                      • #12
                        Originally posted by htchbck View Post
                        I guess maybe the Aspire is a lot different than the festie, but I have taken them off the festie from the top (no jackstands required). You can't see what you're doing, but you can do it buy feel.
                        Thanks for the suggestion, htchbck. I'll definitely give that another look. That would remove most of the pressure I'm feeling about this otherwise simple job.
                        John Gunn
                        Coronado, CA

                        Improving anything
                        Improves everything. Copyright 2011 John Gunn

                        Comment


                        • #13
                          i guess that what i typed earlier implied that threading the gauge in was going to be difficult, it's not. sarcasm doesn't translate well through type. all i should have said was that if there was a hard part to the task at hand it was the insertion of the gauge fitting.

                          and BTW it should be 27mm
                          Trees aren't kind to me...

                          currently: 2 88Ls (Scrappy and Jersey), 88LX, 90L(Pepe), 91L, 91GL (Skippy) 93 GL Sport (the Mighty Favakk), 94 (Bruce) & 95 Aspire SEs, 97 Aspire (The Joker),
                          94 Justy 4WD, 87 Fiero GT, plus 2 parts cars. That's my fleet.

                          Comment


                          • #14
                            Originally posted by FestYboy View Post
                            i guess that what i typed earlier implied that threading the gauge in was going to be difficult, it's not. sarcasm doesn't translate well through type. all i should have said was that if there was a hard part to the task at hand it was the insertion of the gauge fitting.

                            and BTW it should be 27mm
                            Since I was looking for problems that might arise in the middle of doing this work, I completely missed the sarcasm.

                            Through the encouragement of htchbck and Safety Guy I decided to try again to see if I could get to the pressure switch from above. I was able to get to it with one hand, even though I couldn't see anything I was dealing with. I managed to get the connector off the switch and tried some of my sockets on it. Of the metric sockets, the 24 mm one came closest. That was the number you gave in your first post. Maybe the Festiva and Aspire are different, but I think the 24 mm 6 point deep socket is the one I'll need. The one I used to test for fit was not a deep socket and with the wrench attached would not go down far enough over the switch to reach the nut.

                            Thanks for you help.
                            John Gunn
                            Coronado, CA

                            Improving anything
                            Improves everything. Copyright 2011 John Gunn

                            Comment


                            • #15
                              Good News

                              I have some good news. Thanks to encouragement from htchbck and Safety Guy I went to my car and tried a bit harder to get to the switch from above. I managed to get to it from both sides of the engine, unfortunately with only one hand at a time and without ever actually seeing what I was touching.

                              In spite of those limitations, I was able to remove the connector. Not being able to see it, I couldn't tell if it had a locking mechanism that would have to be released to prevent breaking the connector. I looked around the engine to see if I could find another single wire connector that I could study for clues. I found one attached to the starter. Looking at that I saw that the locking mechanism was a small hole in the spade and a small raised round metal dot on the female connector. The plastic was there just to press the two connectors together so they wouldn't just fall apart. There was really no release to push or pull. I just gave a steady pull on the connector as I shifted it left and right. I felt it move so I kept pulling and eventually it came loose. I don't think I would have had the courage to pull that hard without seeing how the one on the starter worked.

                              Next I tried some of my sockets on the switch. It looks like a 24 mm, 6 point, deep socket is the proper one. If you look at the switch picture above, you can see that the corners of the hex nut are rounded off by design, so I'm not sure a 12 point socket would hold.

                              Going by feel alone, it didn't seem there would be enough room to use the 10 inch crescent wrench I had planned on using.

                              Also, I've read somewhere in my searching on the Internet that a Vice Grip should not be used because the switch is hollowed out and not very strong.

                              I even took the time to spray some PB Blaster on it. Not easy since I couldn't see, but I cut the red spray tube so I could stretch one finger to control the tip while, with another finger, I pressed the button. I think that worked.

                              The only thing holding me back, now, is the knowledge of the threads in the hole the switch is screwed into. My gauge has a 1/8" 27 NPT male connector attached to the end of its hose (from the picture of my switch that would be my guess for its thread too) and the kit comes with several adapters to other thread sizes. But I don't want to start the job without knowing I have what is needed to mount the gauge.

                              If no one here can come up with the answer I'll continue to search the Internet for clues and if all else fails ride my bike to the junk yard in hopes of finding an Aspire with an engine and a oil pressure switch. Help with this one last detail would be much appreciated.
                              John Gunn
                              Coronado, CA

                              Improving anything
                              Improves everything. Copyright 2011 John Gunn

                              Comment

                              Working...
                              X