Tweet
Tweet
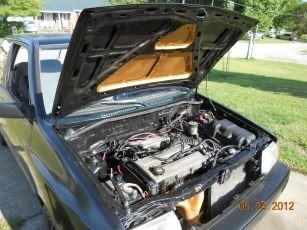
Well I finally got around to changing out my severely hemorrhaging front crank shaft seal. The engine was rebuilt 3 years ago but the OP says that it ran fine with no oil leak til about 2 or 3 weeks later. I recently bought it from him but the oil was slung all over the engine compartment in the last three years. He barely drove it for the last year and a half but the oil is just everywhere.
This was an extremely dirty job, cleaning off all the caked on oil and dirt. The descriptions will be above the following pictures.
I put a jack with a large block of wood underneath the oil pan to raise and lower the engine.
With engine supported, I first removed the two front trans to cross member mount. I then removed the two front cross member bolts and loosened the two rear cross member bolts so it just hung. This allows maximum engine movement to get to pulley removal.
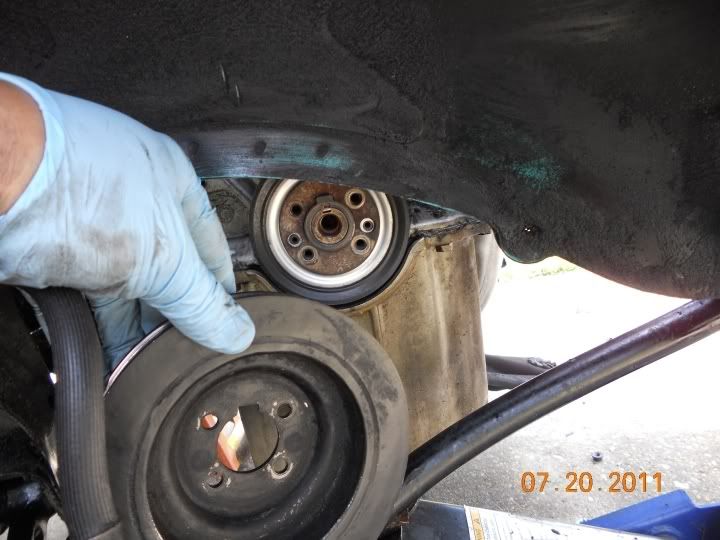
Remove the water pump pulley and alternator and pump belt should come right off. You'll have to loosen alternator in order to put it back on. Now remove the front engine mount on the passengers side. Remove upper timing belt cover. Lower engine til you can get a deep impact socket on the bolt. I used a 22mm for my "small nosed" pre Feb 1991 BP crank bolt. Remove crank pulley and all spacers and lay them upside down on top of each other so you'll remember how they went back on engine.
Now you'll have access to the middle and lower timing belt covers. They were a huge pain in the arse to reinstall, especially the middle cover due to the oil dip stick and timing belt idler pulley. Once covers are removed, put crank bolt back in and turn the engine til all three timing marks are aligned. Loosen the 14 mm t belt tensioner and 14 mm idler pulley. Remember how the spring is installed so you can do it later with out problems. Once tensioner and idler pulley are loosened, you can remove the t belt.
The rest of the write up will be with pictures:
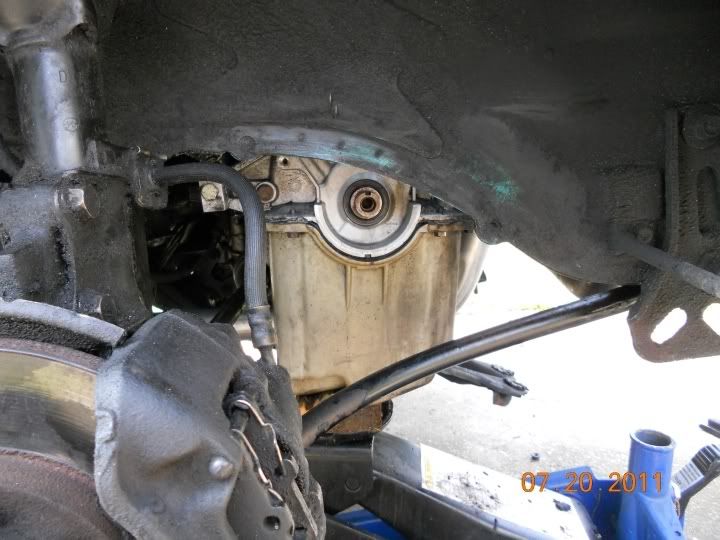
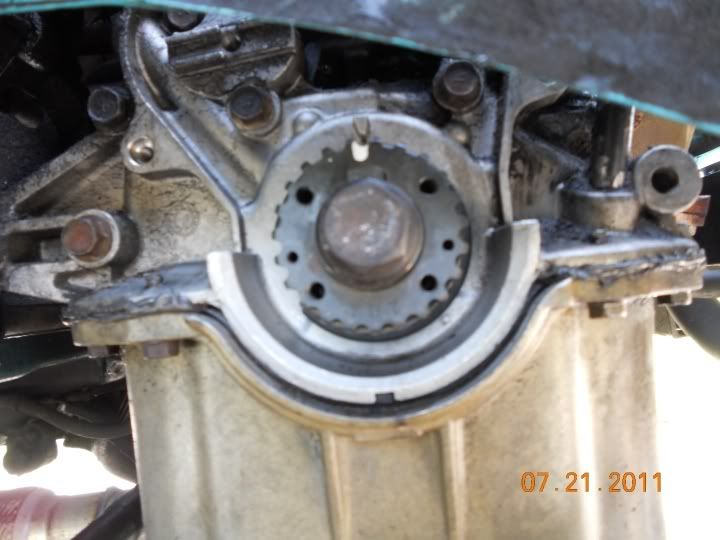
This is the timing gear all lined up with the timing mark on the aluminum front cover. Use white paint pen for easy visibility.
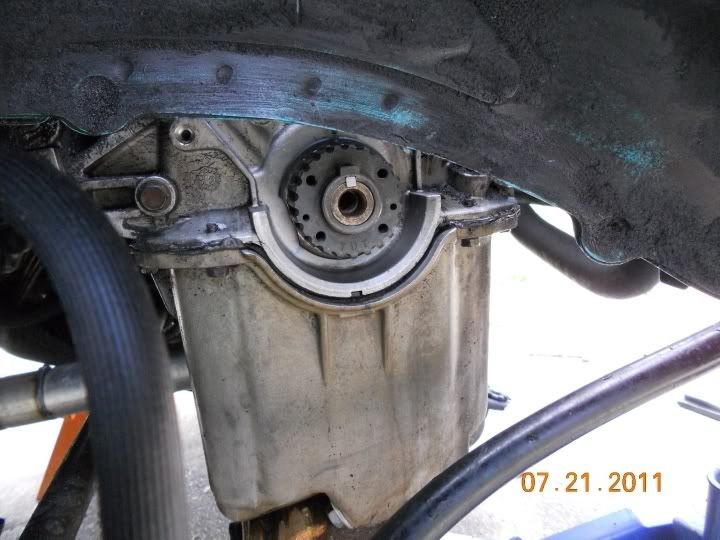
This is the old seal visible after the crank and timing gear and all spacers are removed.
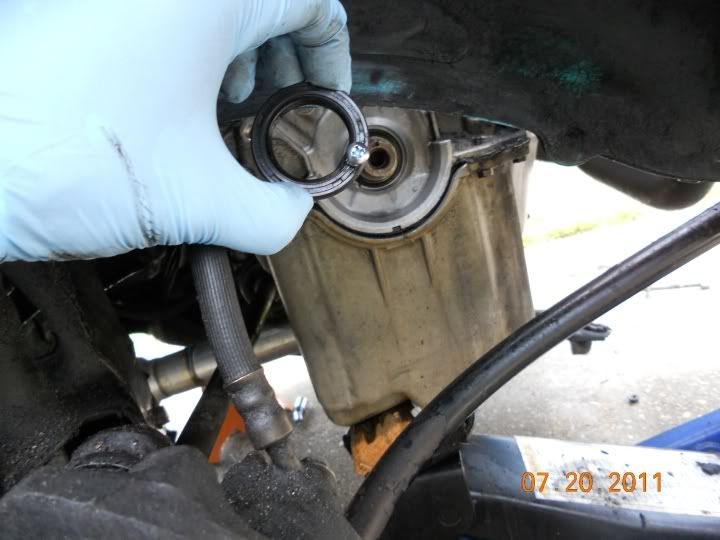
I used a tiny drill bit and carefully drilled a hole into the old seal just deep enough to get a few threads from a small sheet metal screw in. Then I removed by gently pulling with pliers. It came out fairly easily and I figured out why it was leaking. There was no spring in the seal so it must not have put any tension against the timing cover.
Lower timing mark aligned with white paint.
Upper timing marks on pulleys aligned with timing cover. I replaced the tensioner and idler because the idler pulley was dragging and noisy when spun by hand. They only come in a kit with a bunch of springs for $78. Match the proper spring to original spring. I locked the tensioner to its far left and then installed the idler pulley on against the timing belt. This seems to be the easiest way to do this. I literally checked all three timing marks 5 or 7 times before I released the tensioner and locked it down. Don't forget the stupid timing covers before you install the crank pulley, they were a nightmare.

I got a 1/2 inch longer key way because the original key was only a 1/2 inch long. I bought it from Lowes so I had to file it down to match the tapered groove on crankshaft. I used 5 minute Epoxy to keep the key in just for extra insurance. I had to reuse the old crank bolt because the Ford dealer discontinued making them. I used Red Loctite on the threads and reinstalled everything. I used an electric impact and guestimated about 125 ft/lbs which I think is recommended for "small nosed" cranks.
This was an extremely dirty job, cleaning off all the caked on oil and dirt. The descriptions will be above the following pictures.
I put a jack with a large block of wood underneath the oil pan to raise and lower the engine.
With engine supported, I first removed the two front trans to cross member mount. I then removed the two front cross member bolts and loosened the two rear cross member bolts so it just hung. This allows maximum engine movement to get to pulley removal.
Remove the water pump pulley and alternator and pump belt should come right off. You'll have to loosen alternator in order to put it back on. Now remove the front engine mount on the passengers side. Remove upper timing belt cover. Lower engine til you can get a deep impact socket on the bolt. I used a 22mm for my "small nosed" pre Feb 1991 BP crank bolt. Remove crank pulley and all spacers and lay them upside down on top of each other so you'll remember how they went back on engine.
Now you'll have access to the middle and lower timing belt covers. They were a huge pain in the arse to reinstall, especially the middle cover due to the oil dip stick and timing belt idler pulley. Once covers are removed, put crank bolt back in and turn the engine til all three timing marks are aligned. Loosen the 14 mm t belt tensioner and 14 mm idler pulley. Remember how the spring is installed so you can do it later with out problems. Once tensioner and idler pulley are loosened, you can remove the t belt.
The rest of the write up will be with pictures:
This is the timing gear all lined up with the timing mark on the aluminum front cover. Use white paint pen for easy visibility.
This is the old seal visible after the crank and timing gear and all spacers are removed.
I used a tiny drill bit and carefully drilled a hole into the old seal just deep enough to get a few threads from a small sheet metal screw in. Then I removed by gently pulling with pliers. It came out fairly easily and I figured out why it was leaking. There was no spring in the seal so it must not have put any tension against the timing cover.
Lower timing mark aligned with white paint.
Upper timing marks on pulleys aligned with timing cover. I replaced the tensioner and idler because the idler pulley was dragging and noisy when spun by hand. They only come in a kit with a bunch of springs for $78. Match the proper spring to original spring. I locked the tensioner to its far left and then installed the idler pulley on against the timing belt. This seems to be the easiest way to do this. I literally checked all three timing marks 5 or 7 times before I released the tensioner and locked it down. Don't forget the stupid timing covers before you install the crank pulley, they were a nightmare.
I got a 1/2 inch longer key way because the original key was only a 1/2 inch long. I bought it from Lowes so I had to file it down to match the tapered groove on crankshaft. I used 5 minute Epoxy to keep the key in just for extra insurance. I had to reuse the old crank bolt because the Ford dealer discontinued making them. I used Red Loctite on the threads and reinstalled everything. I used an electric impact and guestimated about 125 ft/lbs which I think is recommended for "small nosed" cranks.