Announcement

Collapse
No announcement yet.

Cut lower strut and lower bolt in half, now what?

Collapse
X
 
  • Filter
  • Time
  • Show
Clear All
new posts

  • Cut lower strut and lower bolt in half, now what?

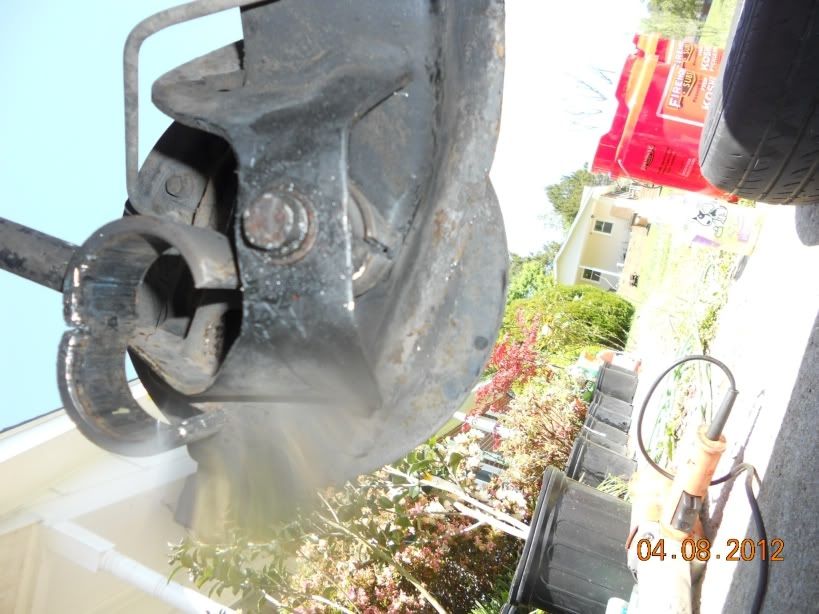
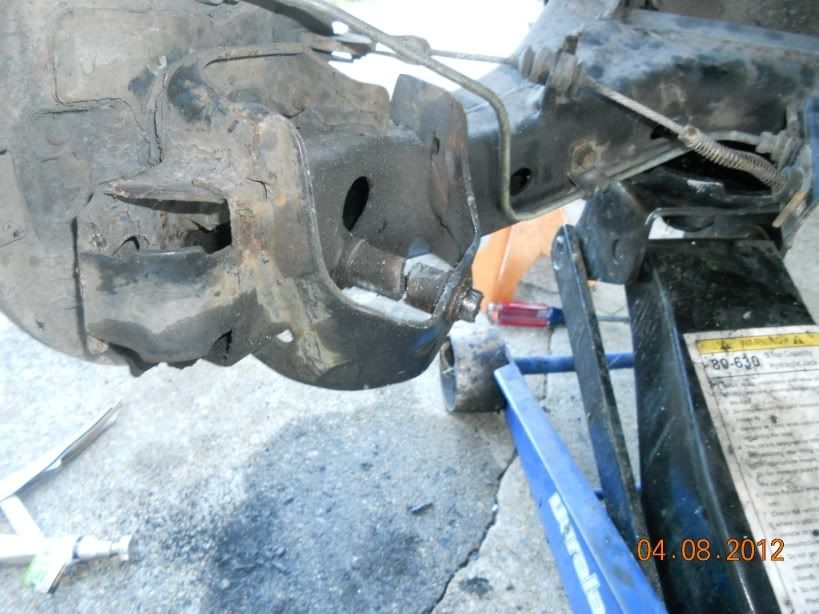
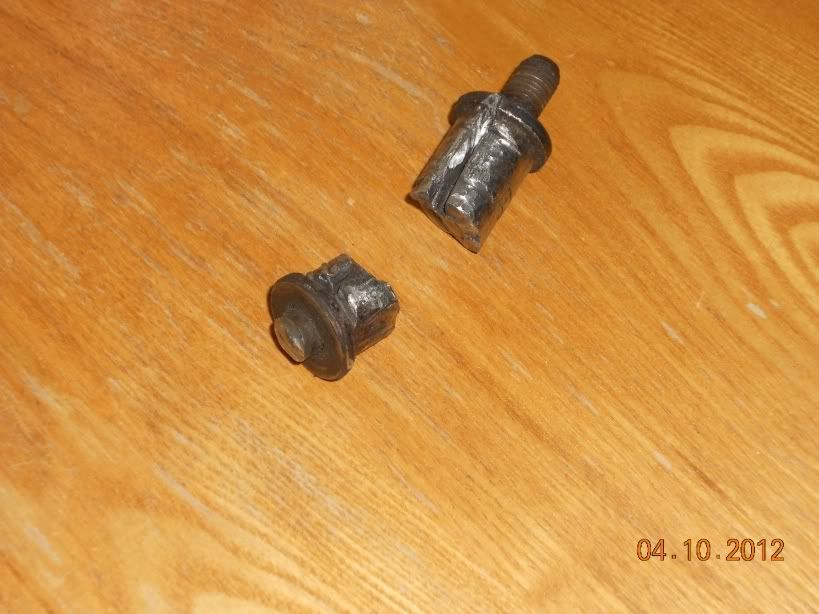
    Well, today I spent 6 hours cutting and trying to remove the frozen and stripped lower strut bolt. The strut was cut at bottom and top so I could pry apart the "c" shape. Now I have access to the frozen strut sleeve and lower bolt. Due to the limited room to cut, it took hours and many fiber cut off wheels and the bolt is in half. I attempted to cut the sleeve in half longitudinally but it is hard to do at the edges where the mounting brackets are.

    So, how does one go about removing the bolt and sleeve now that they're cut. I cut a slot into the stripped bolt head but it doesn't give enough grip to remove the bolt. Vise grips are not holding tight enough to remove them either. What has everybody else done to remove this?
    Semper Fi til I die!

    1993 Fescort GT 1.8 BP automatic Kia Rio front struts and cut springs Cut Front Festiva springs with Monroe Aspire struts in rear


  • #2
    Would it be redundant to say try some penetrating grease? Maybe that could help you loosen things after you've pretty much thrashed the surrounding steel.
    In love with a MadScientist!:thumbright:
    There's a fine line between breathtaking ingenuity and "That's the stupidest thing I've ever seen!"

    Comment


    • #3
      this is why you always assemble with anti-seize.

      I would say try some good liquid wrench penetrating oil (tested better than wd-40 and pb blaster) or try a 50-50 mix of atf and acetone, that works even better. soak it good for a while then get a punch and hammer it out. if that doesn't work there is always heat.
      89 Festiva L Carby 4 Speed... RIP. Evicted and Scrapped. I HATE MY FAMILY
      94 aspire 3 door Red -- Former BP, V6 KLDE swap underway! RIP... Rotted and Flooded out...
      2012 Mazda 2 Touring 5 Speed... It's Very, Very, Very green... Daily Driver
      1964 Barracuda 360 V8 Push Button 904 Auto, New Money Pit

      Facebook Me!

      Comment


      • #4
        You have my sympathy. This seemingly simple disassembly/installation guide to doing your own shocks and springs has confounded numerous DIYs. Just like you I was fit to be tied using ordinary tools in trying to get that rear strut bolt off/loose until a welder/mechanic friend stepped in with a set of torches. In very short order he 'blows' the strut right off the bolt and if the bolt breaks anyway he'll weld an oversize nut over the remaining stub in order to be able to turn it out. In loosening seized parts there does not appear to be a quick substitute for intense heat.

        However, now that you've been rudely introduced to the novelty of corrosion-seized parts obviously you'll grease anything and everything when it all goes back together.

        Comment


        • #5
          If you have access to a welder, get a nut that is large enough to fit over the bolt head and weld it fast to the stripped bolt head. You really should use an acetylene torch and heat the sleeve and the bolt red hot. If you do that, it should come out by putting a wrench on the big nut you welded onto the bolt. I always use a torch on the rear strut bolt and the front LCA bolt and I have never stripped a bolt head or broken the hidden nut loose from its location.
          You gonna race that thing?
          http://www.sdfcomputers.com/Festivaracing.htm

          Comment


          • #6
            Just in case you are not a welder with all the necessary equipment, I got mine apart with a sawsall and a long metal cutting blade or two. Don't run it too fast and use plenty of oil on the blade.

            Comment


            • #7
              Fire! Do not try this at home it doesn't work. Still couldn't remove the bolt. Sawzall
              1988 Ford Festiva "Sonic" BPT g25mr MS2 standalone ecu, FOTY '11, Best Beater FMV, Fan Favorite FMVI

              1989 Ford Mustang GT 5.slow

              1996 Ford F-150

              Comment


              • #8
                If and when you get that bolt out. without stripping the threads of the nut that is incorporated into the trailing arm, pour yourself a cold pint, or two. Even if the bolt breaks right at the trailing arm there are ways to get it out. You can try drilling it out with a smaller drill bit and often times the bolt threads will then release, or you can invest in an 'ezee-out' bit which is a tapered reverse-thread hard steel bit which screws in to a hole you've pre-drilled in the broken bolt. Really sock the penetrating oil to everything before you start and all the while you're working with this.
                Having gone through the exact same ordeal as you once (before discovering the value/beauty of a 'blue wrench' (torches)) I had to ponder what grade of new bolt to put back in. A high tensile (higher number stamped on the head) bolt is more difficult to bend, twist or strip (both the head, shank and threads) whereas a low grade bolt will at least better ensure the nut remains intact. I oil and grease everything before putting things back together so I opted for high grade bolts during reassembly.
                How anybody can design/engineer a seize-prone stupid vulcanized rubber encased metal sleeve within a shock absorber mount escapes me. It could just as easily been a bushing or other easier to get loose arrangement.

                Comment


                • #9
                  I used the bolt that connects the LCA to the frame. I think, but am not completely sure, that it has the same threading as the captured nut for the rear strut. If not, then either the nut or the bolt can be re-threaded with a tap or die respectively.

                  If you need a flare nut to replace the captured nut, you can use the one that holds the rear strut on at the top. Same caveat on re-threading. To get it in, I used a 17mm box wrench, held the nut in the wrench with a little grease, and inserted it from the rear of the rear beam.
                  Last edited by TominMO; 04-10-2012, 07:22 AM.
                  90 Festy (Larry)--B6M (Matt D. modified B6 head), header, 5-speed, Capri XR2 front brakes, many other little mods
                  09 Kia Rondo--a Festy on steroids!

                  You can avoid reality, but you can't avoid the consequences of avoiding reality--Ayn Rand

                  Disaster preparedness

                  Tragedy and Hope.....Infowars.com.....The Drudge Report.....Founding Fathers.info

                  Think for yourself.....question all authority.....re-evaluate everything you think you know. Red-pill yourself!

                  Comment


                  • #10
                    Thank you all for the helpful suggestions, they gave me hope that this bolt would die. After 10 or so fiber cutoff wheels and a tired and angry Dremel tool, I finally removed the bolt and strut bushing that pretty much became one. It is mind blowing how thick that bushing was.

                    After cutting the bolt/bushing in half or more like 66/34 split, vise grips and pipe wrench couldn't budge it. Since I started the job, I sprayed WD 40 and Freeze Off liberally on both sides. Thank God the right side budged without a fight after 3 days of soaking in lube. Left side, damage was done, bolt head was totally stripped so it had to be cut.

                    Cutting as big a longitudinal cut as I could with my Dremel tool, I decided to use a big chisel and hammer and smack it. It moved a little so I did it again but harder, this time I was sure it moved. I hit it one more time and it rotated again, so I grabbed my Vise grips and turned the inner bolt/bushing and it moved fairly easy, but then it jammed on the outer bolt/bushing. I cut the head and washer off the outer head and just hammered it out of the way. Then removed the inner half quite easily and the job was done, this time with antiseize on threads and bolt. The rear is pretty high still so I'm gonna have to cut some more coils to give it a better stance. I only cut 1.5 coils from the front Festy springs.

                    Strut cut in a "c" to remove it from control arm


                    This is the bolt/bushing cut in half with a Sawzall and Dremel


                    This is the bolt/bushing cut in half and with the longitudinal grooves cut for the hammer and chisel action, notice the thickness of the bushing

                    Semper Fi til I die!

                    1993 Fescort GT 1.8 BP automatic Kia Rio front struts and cut springs Cut Front Festiva springs with Monroe Aspire struts in rear


                    Comment


                    • #11
                      Millions of folks are going about their business all over the world totally unaware of the trials and tribulations of a Festy diehard. But there are exceptions! Some of us noticed.
                      Well done laddy. This, however, is part one of a 1000 in the 'enthusiastic apprentice' logbook of learning to make a B6T swap look easy.
                      I'm an old cat and don't even qualify for 50%, yet.
                      But ya gotta start somewhere.

                      Comment


                      • #12
                        Originally posted by Bert View Post
                        Millions of folks are going about their business all over the world totally unaware of the trials and tribulations of a Festy diehard. But there are exceptions! Some of us noticed.
                        Well done laddy. This, however, is part one of a 1000 in the 'enthusiastic apprentice' logbook of learning to make a B6T swap look easy.
                        I'm an old cat and don't even qualify for 50%, yet.
                        But ya gotta start somewhere.
                        Thank you Bert!
                        Semper Fi til I die!

                        1993 Fescort GT 1.8 BP automatic Kia Rio front struts and cut springs Cut Front Festiva springs with Monroe Aspire struts in rear


                        Comment

                        Working...
                        X