 Tweet
Tweet
i get a little crazy on detailing my show cars and do everything i can to clean deep into grooves and crevices and other hard to reach areas. (a total 180 from my house cleaning). one thing i wanted to eliminate was the hazy line of water scale crud that forms on the windshield at the edge of the trim molding.
i think that might be why they put a black border around window glass in newer cars as it tends to mask this. i also wanted to repaint the molding pieces and polish the paint in the channel all around the windshield. the only way to do this the right and easy way is to remove the molding. the trouble was figuring out how that is done. the shop manual isn't much help and there is no real instructions on how to use the tool they illustrate which isn't available anyway. luckily, we don't need no stinkin overpriced Rotunda tool.
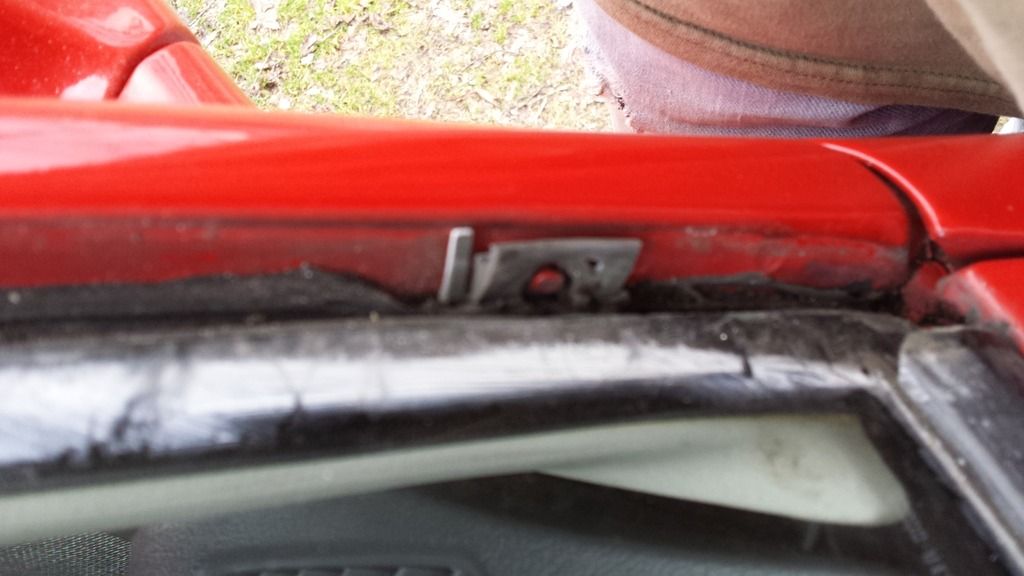
all the mold pcs. are held on with a clever little plastic clip that fits onto a peg that is tacked to the channel around the windshield. there are 4 on ea side and about 7 orn 8 top and bottom. you can pry up the inner edge of the mold a little to see where they are located. might need a flashlight. also you can usually see just barely the end of a holding tab that is part of the clip and visible between the outer edge of the mold and the car body. here is a pic of the peg the clip is attached to:
this is the clip as it is mounted on the peg. the little tab on the left of the clip in this pic is what you can usually see when the molding is installed to give you an idea where its at. when re-installing the molding, the clips are put back on all the pegs and the moldings are pressed down until they click onto the clips.
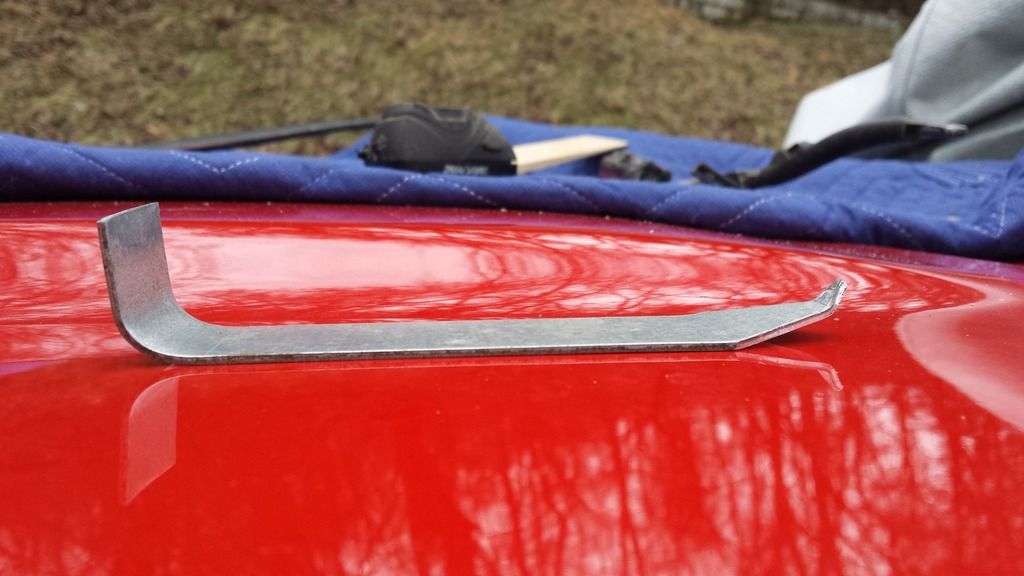
OK. now the part that makes me a genius. this is a piece of 16ga 1" wide band iron. mostly used for hanging ductwork but comes in real handy for a lot of other things. i just eyeballed where i would need the bends. not super critical. one end is cut to a point to catch and lift the clip just above the peg. the other bend is to give me a pivot point against the windshield to pop the clip off the peg. the 1" 90 degree bend will help lever up the molding since it might be a little stuck to the windshield gasket. patent pending. send $10 and self addressed stamped envelope for blueprints.
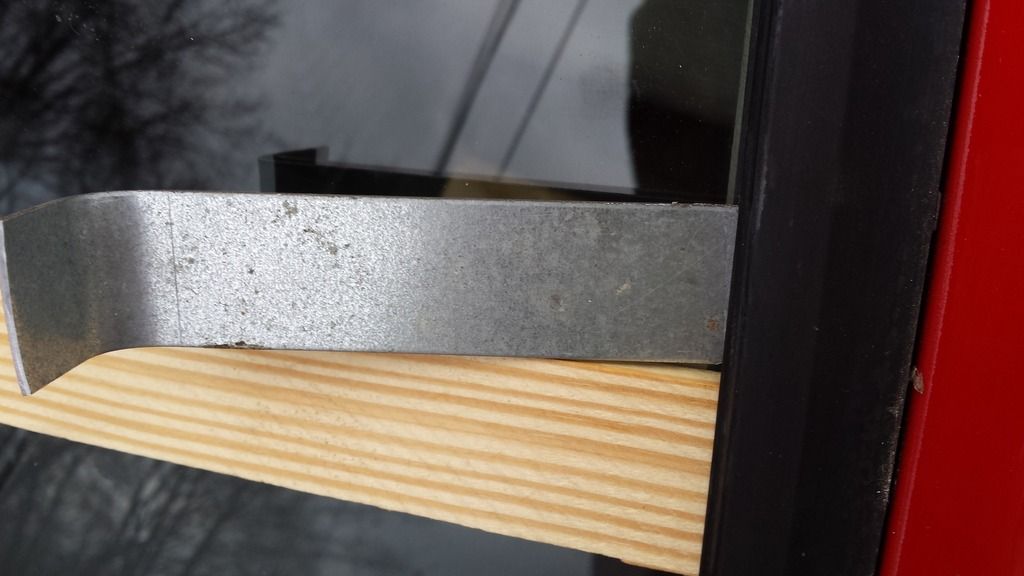
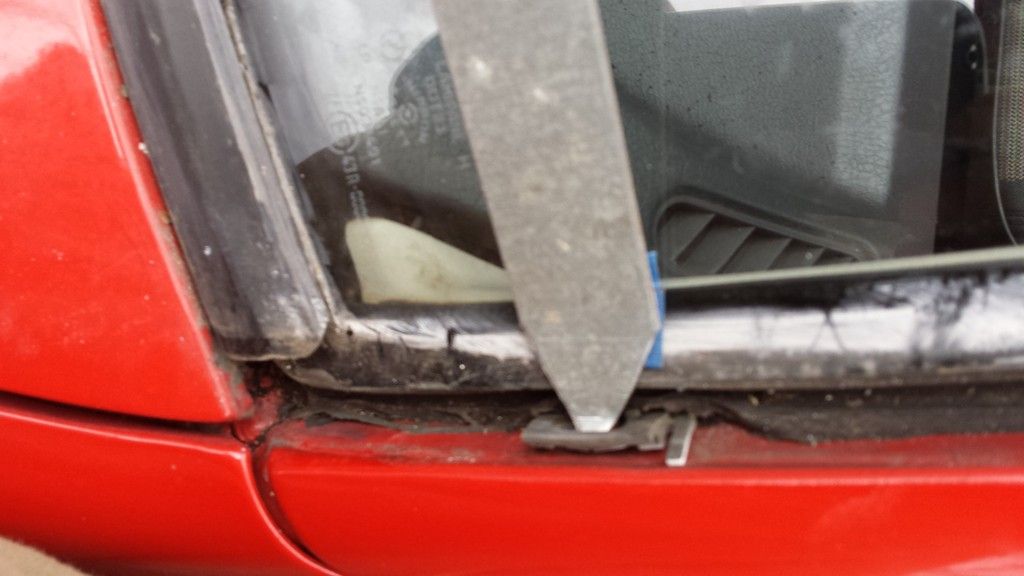
next 2 pics show how to use this complex tool. i used the thick end of a wood shim (more mensa thinking power) to hold the mold off the window and give some working room for the PATENTED tool. it's best if you can actually get your eye on the clip. you want to get the pointed end just above the peg and under a small edge that is molded into the clip. now just push the F3BZ E-Z BAR down and the clip should pop off the peg! if not, you might need to make the bends in the tool a little heavier to give you more leverage movement. the 2nd pic shows what you are trying to do assuming the molding has become invisible.
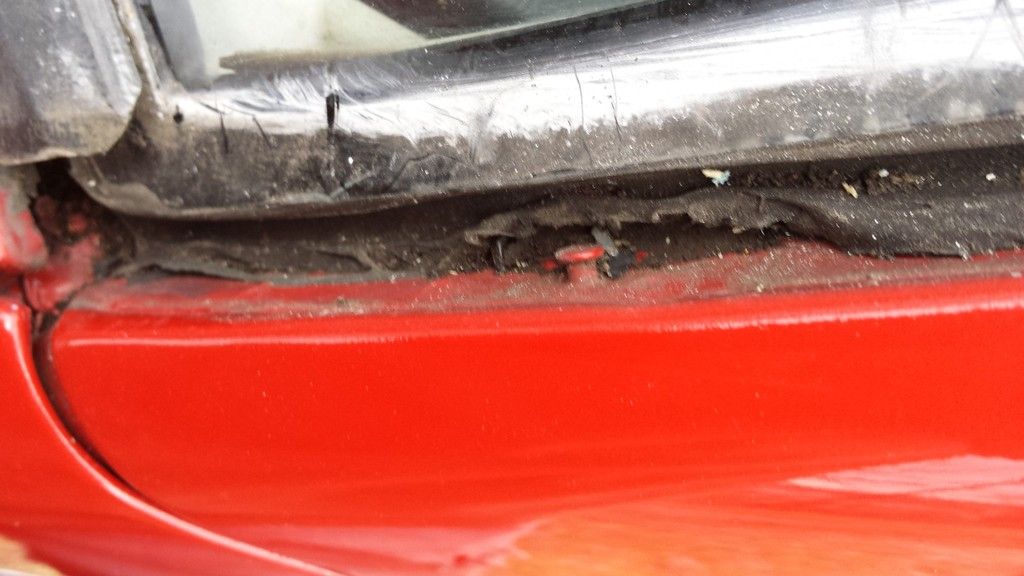
now you can do watcha gotta do. i'm going to paint the moldings, clean and paint the body channel and get rid of the creepin crud on the window. here is a final pic showing an area i cleaned (left of center) next to the dark crud line still to be attacked (thin line right of center). a green scouring pad and glass polish paste makes it like new again.

i think that might be why they put a black border around window glass in newer cars as it tends to mask this. i also wanted to repaint the molding pieces and polish the paint in the channel all around the windshield. the only way to do this the right and easy way is to remove the molding. the trouble was figuring out how that is done. the shop manual isn't much help and there is no real instructions on how to use the tool they illustrate which isn't available anyway. luckily, we don't need no stinkin overpriced Rotunda tool.
all the mold pcs. are held on with a clever little plastic clip that fits onto a peg that is tacked to the channel around the windshield. there are 4 on ea side and about 7 orn 8 top and bottom. you can pry up the inner edge of the mold a little to see where they are located. might need a flashlight. also you can usually see just barely the end of a holding tab that is part of the clip and visible between the outer edge of the mold and the car body. here is a pic of the peg the clip is attached to:

this is the clip as it is mounted on the peg. the little tab on the left of the clip in this pic is what you can usually see when the molding is installed to give you an idea where its at. when re-installing the molding, the clips are put back on all the pegs and the moldings are pressed down until they click onto the clips.

OK. now the part that makes me a genius. this is a piece of 16ga 1" wide band iron. mostly used for hanging ductwork but comes in real handy for a lot of other things. i just eyeballed where i would need the bends. not super critical. one end is cut to a point to catch and lift the clip just above the peg. the other bend is to give me a pivot point against the windshield to pop the clip off the peg. the 1" 90 degree bend will help lever up the molding since it might be a little stuck to the windshield gasket. patent pending. send $10 and self addressed stamped envelope for blueprints.

next 2 pics show how to use this complex tool. i used the thick end of a wood shim (more mensa thinking power) to hold the mold off the window and give some working room for the PATENTED tool. it's best if you can actually get your eye on the clip. you want to get the pointed end just above the peg and under a small edge that is molded into the clip. now just push the F3BZ E-Z BAR down and the clip should pop off the peg! if not, you might need to make the bends in the tool a little heavier to give you more leverage movement. the 2nd pic shows what you are trying to do assuming the molding has become invisible.


now you can do watcha gotta do. i'm going to paint the moldings, clean and paint the body channel and get rid of the creepin crud on the window. here is a final pic showing an area i cleaned (left of center) next to the dark crud line still to be attacked (thin line right of center). a green scouring pad and glass polish paste makes it like new again.


Comment