Skeeter update thread # 4.5!!
My last update thread is HERE. It ended with my B6 install. This update thread doesn’t have any major updates (i.e. engine/brake swaps) so I decided to call it 4.5! My next full-update thread should either involve re-building a 5spd trany or a full-susp job (coil overs).
And to those who are wondering, yes I’ve been working on my B6 write-up, I’ve just been way to busy w/ school and work to finish it yet!
In this thread:
I.New LCA’s and Energy susp sway bar bushings.
II.New floor mats.
I. New LCA’s
I had been hearing a strange clunking noise coming from the drivers front going up and down our nasty gravel road, and I hadn’t been able to find the cause. I put it on the lift at work, shook the wheel around, check all over in the engine bay for something loose, nothing. When I took it in to get inspected I asked the mech to check to BJ’s b/c I thought they were clunking, he said the seemed fine. Finally I got a deal on a pair of LCA’s from FMS on e-bay, and so I sat them on the shelf in the garage. Not long after I picked up a pair of swaybar bushings from Engergy Susp (part # 9.5158) and then as soon as school was over for the semester I replaced the LCA’s and the swaybar bushings…. The LCA’s were SHOT! I could move the ball on the drivers side up/down about ¼ “, it was almost popped out… Moral of the story: just b/c everything feels tight doesn’t mean it is! Seems like the only way to check the lower BJ on our cars is to put a prybar between the LCA and the hub and pry up and down to check for movement… you don’t want your BJ coming apart going down the road!!
Now for the pics:
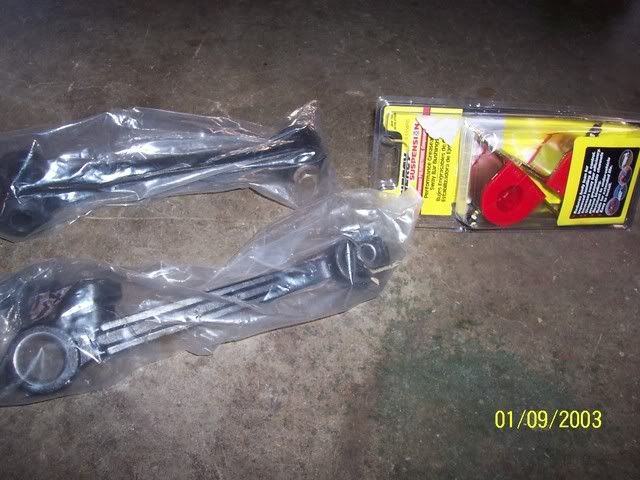
The new parts:
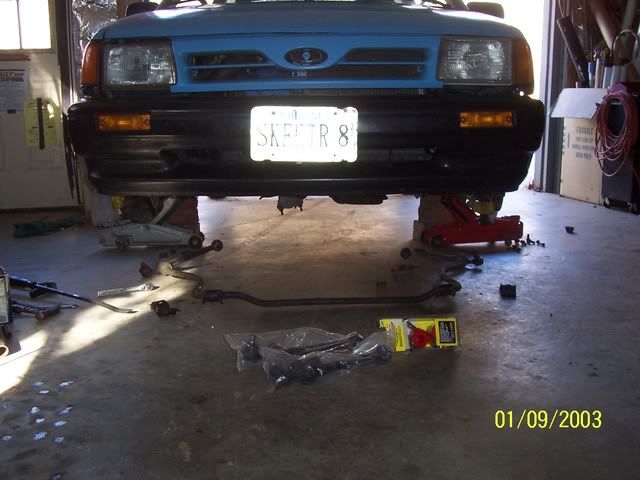
Old stuff dropped down. Removal was fairly easy, I first removed the BJ from the knuckle, then took off the inner bolt (I got lucky and they both came out pretty easily! I had been soaking them for more than a year with PB though!) and then removed the two brackets that held the swaybar in.
Next I assembled everything. Now i'm not sure if this was the smartest way to do it, because it ended up being a bit of a pain to install, but it worked! Getting the new LCA's on the swaybar ended up being fun! the new bushings were too large to even get the nut started, so I ended up using a few clamps and even then it took a while to get it together.
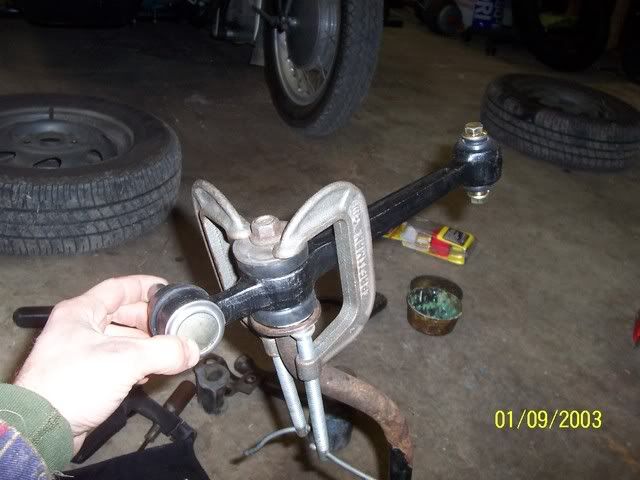
But I finally got them both on, greased up my new bushings, and it was ready to go back on the car.
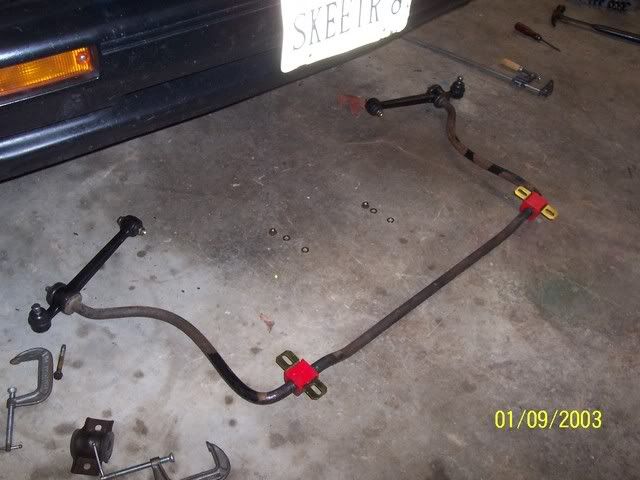
When re-installing I threaded the brackets on the new bushings on a little but left them loose, and then installed the inner bolt on the LCA and then the BJ back into the knuckle. Sounds easy, right?... wasn't so easy! getting the inner part of the LCA back into the frame was a PAIN, i'm not sure if I should have done it in a different order or if the new bushings made it a little harder but there was much struggling, and muttering, and some sore shoulders/back the next day. But finally all back together and on the ground! no more clunking, doesn't “dive” into the corners, and a little bit of road noise was gone!
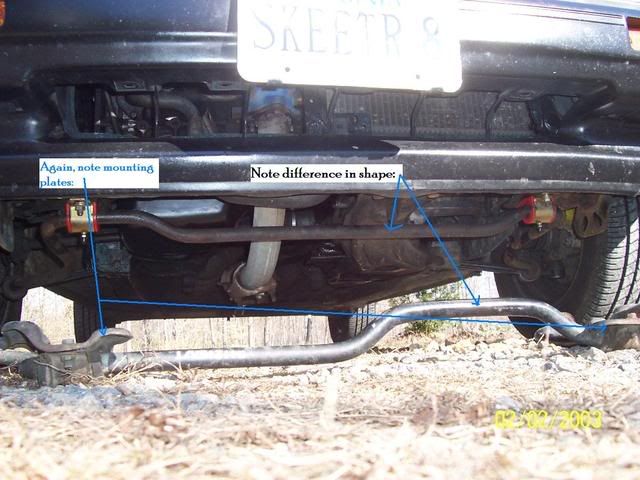
If you want info on using an aspire swaybar instead of the festiva swaybar check out THIS Thread.
II. Floor mats
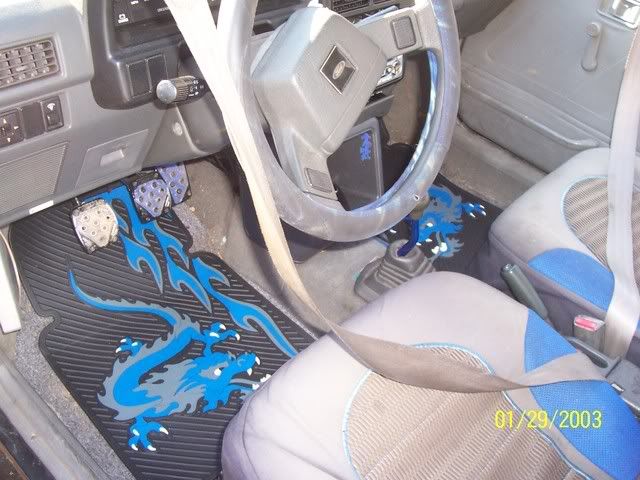
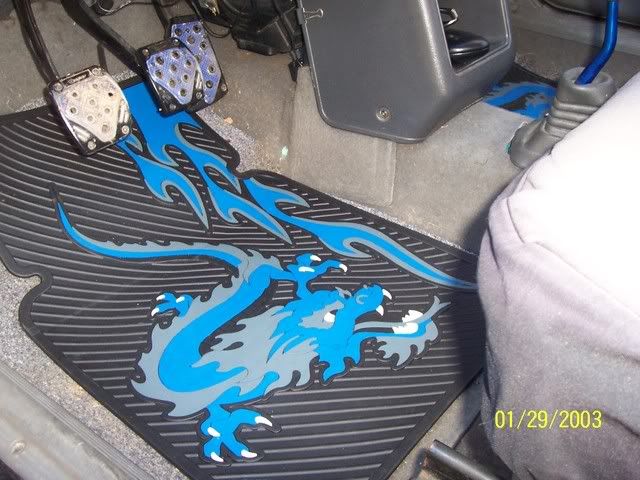
For Christmas my brother got me these mats! They add a little color to the car and match perfectly The day after I installed them, though, my dad drove the car and said the clutch pedal was sticking on the mats so he slid them down a little and it was fine then. Well apparently he never made it to WOT, because with them slid down that little bit they were right on level with the gas pedal! needless to say while passing some folks the next morning in 4th doing about 65 I started slowing down... or a tried to. took my foot off the gas and 75... 85... crap. luckily I just nudged it around with my foot and it came back up! lesson learned, be careful where your floor mats are.
Well thats all for now folks, time to work on my phys HW!
My last update thread is HERE. It ended with my B6 install. This update thread doesn’t have any major updates (i.e. engine/brake swaps) so I decided to call it 4.5! My next full-update thread should either involve re-building a 5spd trany or a full-susp job (coil overs).
And to those who are wondering, yes I’ve been working on my B6 write-up, I’ve just been way to busy w/ school and work to finish it yet!
In this thread:
I.New LCA’s and Energy susp sway bar bushings.
II.New floor mats.
I. New LCA’s
I had been hearing a strange clunking noise coming from the drivers front going up and down our nasty gravel road, and I hadn’t been able to find the cause. I put it on the lift at work, shook the wheel around, check all over in the engine bay for something loose, nothing. When I took it in to get inspected I asked the mech to check to BJ’s b/c I thought they were clunking, he said the seemed fine. Finally I got a deal on a pair of LCA’s from FMS on e-bay, and so I sat them on the shelf in the garage. Not long after I picked up a pair of swaybar bushings from Engergy Susp (part # 9.5158) and then as soon as school was over for the semester I replaced the LCA’s and the swaybar bushings…. The LCA’s were SHOT! I could move the ball on the drivers side up/down about ¼ “, it was almost popped out… Moral of the story: just b/c everything feels tight doesn’t mean it is! Seems like the only way to check the lower BJ on our cars is to put a prybar between the LCA and the hub and pry up and down to check for movement… you don’t want your BJ coming apart going down the road!!
Now for the pics:
The new parts:

Old stuff dropped down. Removal was fairly easy, I first removed the BJ from the knuckle, then took off the inner bolt (I got lucky and they both came out pretty easily! I had been soaking them for more than a year with PB though!) and then removed the two brackets that held the swaybar in.

Next I assembled everything. Now i'm not sure if this was the smartest way to do it, because it ended up being a bit of a pain to install, but it worked! Getting the new LCA's on the swaybar ended up being fun! the new bushings were too large to even get the nut started, so I ended up using a few clamps and even then it took a while to get it together.

But I finally got them both on, greased up my new bushings, and it was ready to go back on the car.

When re-installing I threaded the brackets on the new bushings on a little but left them loose, and then installed the inner bolt on the LCA and then the BJ back into the knuckle. Sounds easy, right?... wasn't so easy! getting the inner part of the LCA back into the frame was a PAIN, i'm not sure if I should have done it in a different order or if the new bushings made it a little harder but there was much struggling, and muttering, and some sore shoulders/back the next day. But finally all back together and on the ground! no more clunking, doesn't “dive” into the corners, and a little bit of road noise was gone!

If you want info on using an aspire swaybar instead of the festiva swaybar check out THIS Thread.
II. Floor mats
For Christmas my brother got me these mats! They add a little color to the car and match perfectly
 The day after I installed them, though, my dad drove the car and said the clutch pedal was sticking on the mats so he slid them down a little and it was fine then. Well apparently he never made it to WOT, because with them slid down that little bit they were right on level with the gas pedal! needless to say while passing some folks the next morning in 4th doing about 65 I started slowing down... or a tried to. took my foot off the gas and 75... 85... crap. luckily I just nudged it around with my foot and it came back up! lesson learned, be careful where your floor mats are.

Well thats all for now folks, time to work on my phys HW!



Comment