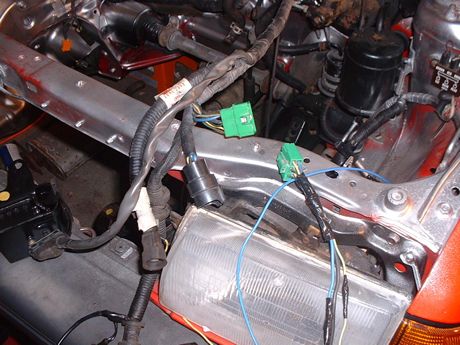
The previous column wiring hooks up to the engine compartment wiring by using Harness Connector C-135 which is present on the B6T Capri harness. C-135 is a green connector with 6 terminals and is found near the Main Relay harness connector. You will need the other mating half of the C-135 connector from the Capri which normally stays with the donor car as it is part of the front body harness (just snip from the car, leaving as much wire as you can to allow splicing).

The only three wires from C-135 you need to worry about are the fat black with white stripe, the thin yellow with blue stripe, and the fat solid blue ones. The rest you can cut off and tape up. The fat blue wire will go to the main 12v constant wire. Locate the Festiva's fusible link box, note the main white wire coming out of the main connection, this wire goes down to a connector with a rubber cover under the radiator overflow bottle. remove the bottle to see the connector. I spliced in the blue wire here. you could I suppose wire this to the connector as it comes from the battery but I wanted to utilize the fusible link, after all it is there for a reason. Then locate the old Festiva coil connection, and cut the connector off the end. Then splice the black wire with white stripe to the corresponding wire on the festiva harness. then do the same with the yellow with blue stripe. Note here that earlier I made a jumper wire to connect the two tach test connectors. This connection makes the jumper wire redundant so you need not use that any more. Once these connections are made you can simply plug in the C-135 to the B6T harness and you should be good to go.
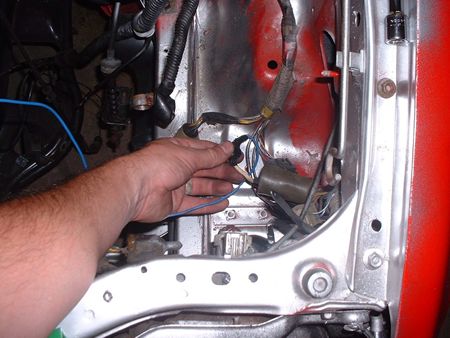
This pic shows the wire at the connector that you splice the fat blue wire into. (note that you need to remove the radiator overflow bottle to see this.
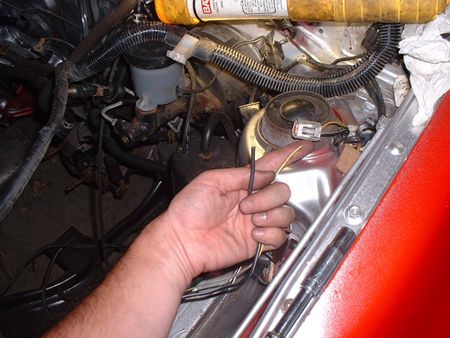
This shows the two coil wires that you splice into the corresponding Festiva harness wires.
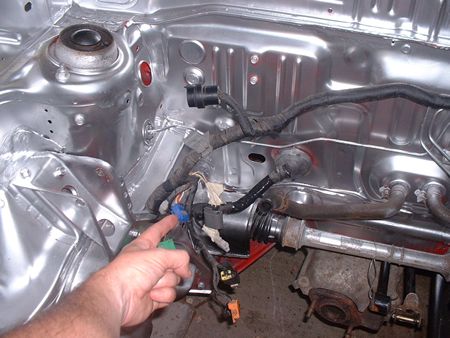
About the rest of the wiring: the Festy oil pressure wire connects right up to the B6T sending unit on the back of the motor, yellow wire with red stripe. Also the alternator connections plug right into the B6T alternator if you have an early injected Festiva, later models 93 or so you will have to splice in the B6T connectors or use a Festiva alternator. The B6T electrical load control unit (one of two relays next to the ecu the other is the fuel control relay) is not used and the wires that would go to this are not used either. They are red with black stripe black with yellow stripe yellow. Also wires on the connector that are not used: blue with green stripe, yellow with green stripe, white with green stripe, red, white with blue stripe, light green. Also in this pic I'm pointing to a blue connector that has the a/c controls that are not needed on the B6T harness
Here are the unneeded a/c control relays, before they go onto Ebay!!!
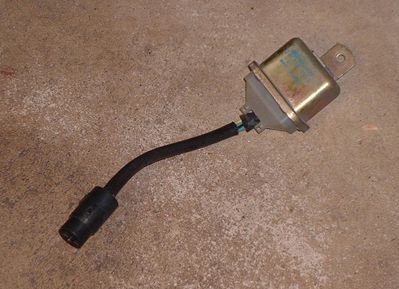
This is a pic of one of the two important relays you need from the Capri engine compartment. This is the main electric relay for the B6T engine control harness. Don't leave it behind! Also don't forget to snag the knock control box.
Author: Chris Rummel
Chris's B6T Swap Pg 21 - Chris's B6T Swap Pg 23
Copyright © 2003 Ford Festiva Com- All Rights Reserved
(Except Text and images courtesy of Chris Rummel)