Announcement

Collapse
No announcement yet.

Remote Start with Keyless Entry Install How-To

Collapse
X
 
  • Filter
  • Time
  • Show
Clear All
new posts

  • #16
    Alright, to start. Get a kit, read the instructions. Twice. Download them right after you buy the kit. There's a test on Thursday.

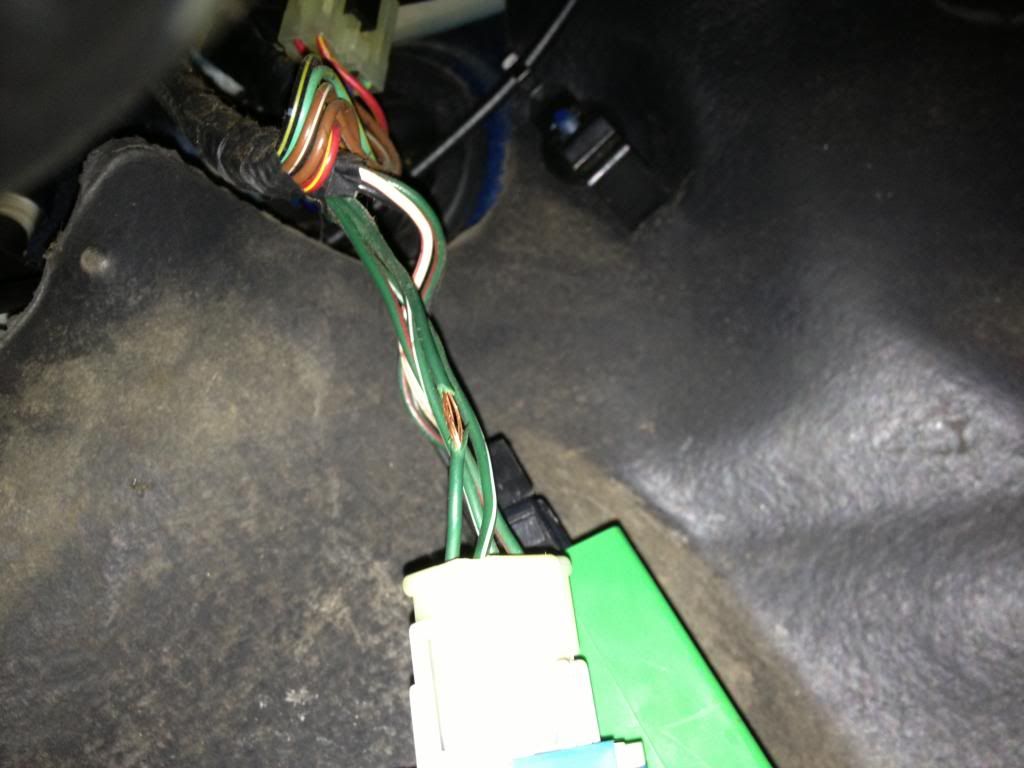
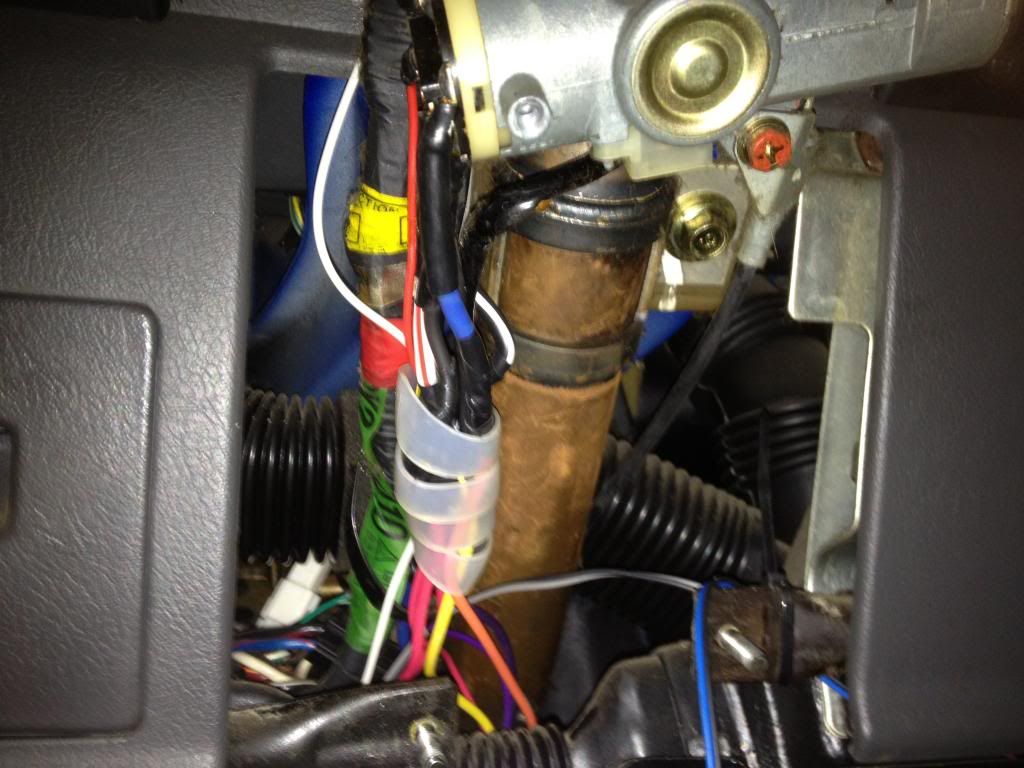
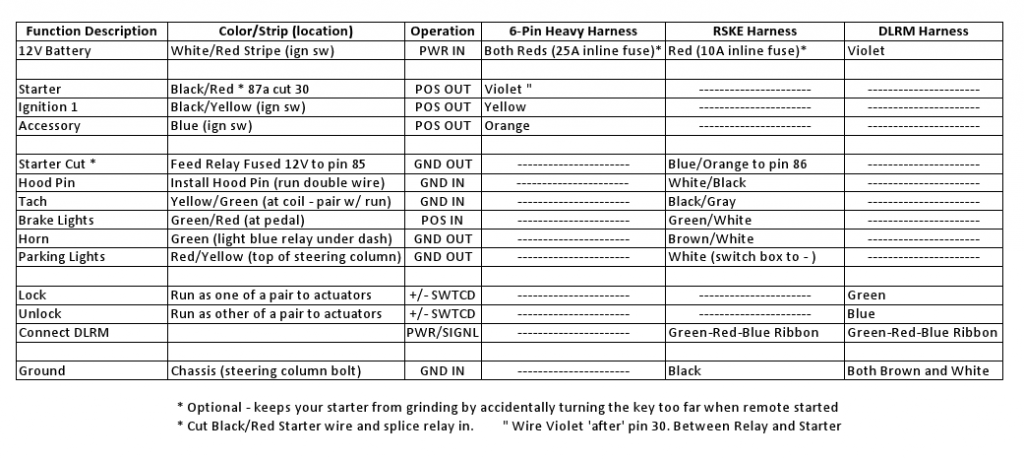
    Find your car's wiring harness... www.the12volt.com had been a good source of information in the past, but their Festiva wiring color codes were off for my '93. Take a look at the site if you have an Aspire or other model.

    Here's what I've come to find in my '93 Festiva GL Auto:
    -Zack
    Blue '93 GL Auto: White 13" 5 Point Wheels, Full LED Conversion, and an 8" Sub

    Comment


    • #17
      Hint:for the accessories wire, I went straight to the blower moter. If that helps any. The parking light wire is tucked away pretty good along the drivers kick panel.

      The auto festies are crazy easy to wire for remote start. No theft to bypass. Good luck

      Comment


      • #18
        Remote Start with Keyless Entry Install How-To

        Thanks, it's all done. I have a second accessory wire from the RSKE module which I might hook up to the blower motor. It currently doesn't run the HVAC until I put the key in to run. There must be another accessory circuit I'm missing from the ignition but it starts as it should! I mainly wanted to warm up the engine and trans before I get in to speed off to work/class.

        Still working on the write up but the project is complete.
        -Zack
        Blue '93 GL Auto: White 13" 5 Point Wheels, Full LED Conversion, and an 8" Sub

        Comment


        • #19
          I started from the furthest points from the RSKE (remote start keyless entry) module as I could. That meant the hood pin and coil connections.

          Here, you can see I installed the hood pin in the driver's side front corner.


          With speaker wire left over from buying some 6x9s eons ago, I ran one wire to the hood pin and the other to the coil.

          To make the connection to the coil, find the Yellow/Green wire and pull back the tape a few inches. Give the wire some slack so you can work on it.


          Strip 1/2" of insulation off the wire, carefully, with a utility knife. Don't cut the copper wires, we're just splicing into the signal.


          Stick the tip of the utility knife in the middle of the strands of copper and twist a quarter turn each way. You'll open up a hole to receive the new wire.


          Strip the end of the new wire about 3/4" and thread through the hole. Twist it around to make a strong mechanical connection.


          Solder...


          Tape it up to make it weather proof and pretty.
          -Zack
          Blue '93 GL Auto: White 13" 5 Point Wheels, Full LED Conversion, and an 8" Sub

          Comment


          • #20
            Those are the only two underhood connections, I ran the wire through the firewall the same way my amp's power line is run... Through the plug where the AC lines to the condenser would run.
            -Zack
            Blue '93 GL Auto: White 13" 5 Point Wheels, Full LED Conversion, and an 8" Sub

            Comment


            • #21
              Again, working from the outside in, I chose to wire up the horn output, parking light output and brake input.

              The horn relay is light blue, up under the left side of the dash. You can pull it gently towards the passenger's side to let it hang down.


              On the solid Green wire: shave insulation, open hole, thread wire, twist, and solder...


              The G40RS required me to program the module to switch from trunk pop to horn output. I don't have a trunk, what do I care? Programming instructions come with the module or are available online.

              Also, I had to open the module to switch the parking light output from +12V at 10A to GND at -500mA. This means the RSKE module will provide a ground (instead of your switch) to the relay that powers the running lights. Instructions are included in the kit. It's the black jumper tab above the relay on the bottom right. Switch from + to -.


              The easiest way I've found to wire into the parking lights is at the top of the steering column. The switch runs three TINY wires to a white connector clipped into the back of the switch assembly. The Red/Yellow wire is for parking lights.

              Strip, open, thread, twist, solder, tape...


              Reinstall connector to the back of the switch assembly.
              -Zack
              Blue '93 GL Auto: White 13" 5 Point Wheels, Full LED Conversion, and an 8" Sub

              Comment


              • #22
                Then, unfortunately, my phone died. I don't have pictures of the brake input connection, but it's a two wire T connector. It looks much like the fuel pump test connector by the brake booster in the engine compartment. Unplug the BOO switch (bahaha, brake on off) and splice into the Green/Red wire. It's difficult to get at, but the plugs for the ignition wires can be pushed out of the way a bit. If you look in from where the brackets were, it's possible to get half an eye on what you're doing.
                -Zack
                Blue '93 GL Auto: White 13" 5 Point Wheels, Full LED Conversion, and an 8" Sub

                Comment


                • #23
                  Here we can see the ignition harness. The white plastic cable organizer holds the high amperage wires running to the switch.


                  Unwind it to access the wires. Splice into them much like the coil wire, except these have heavier insulation and take a bit more patience to avoid cutting the wire.

                  You'll notice I used the White/Red +12V battery connection to power everything. Each line running from this splice has an inline fuse and the current totals much less than what the wire can handle.
                  If you know better, tap into power at your discretion.


                  The cable organizer neatly wraps around all the work.


                  Strip the ground wires about 1 1/2" and wrap them around a stud below the steering column before you reinstall the brackets.

                  With everything hanging from under the dashboard like two octopi had a spaghetti fight, double check that all of your connections are made and well insulated. With happy thoughts, give the remote a go!
                  -Zack
                  Blue '93 GL Auto: White 13" 5 Point Wheels, Full LED Conversion, and an 8" Sub

                  Comment


                  • #24
                    If all goes well, you can use tape and zip ties to manage the wires into small bundles. Loop a zip tie through a mounting hole in the RSKE module and slip it over a relay hanger up inside the dash. Zip it tight and make sure it won't fall down for a long time.
                    -Zack
                    Blue '93 GL Auto: White 13" 5 Point Wheels, Full LED Conversion, and an 8" Sub

                    Comment


                    • #25
                      Originally posted by crazyrog17 View Post
                      Thanks, it's all done. I have a second accessory wire from the RSKE module which I might hook up to the blower motor. It currently doesn't run the HVAC until I put the key in to run. There must be another accessory circuit I'm missing from the ignition but it starts as it should! I mainly wanted to warm up the engine and trans before I get in to speed off to work/class.

                      Still working on the write up but the project is complete.
                      Great write up! Thanks for taking the time to do this thread. I would have saved me a lot of time! See people, automatics aren't all that bad! :-D
                      I just moved the accessory wire the the blower for the hvac attempt, don't really need the radio until I'm in the car anyway.
                      I may install a long range system later on and will definitely use this thread to help me with the electric locks this spring

                      Comment


                      • #26
                        ^I don't understand why they can't just have a relay to close the CSS circuit so you can just leave it in neutral when you park it and not have to do the song and dance with a manual. Or you could just hardwire the CSS closed and use the auto model?
                        Any difference that makes no difference is no difference.

                        Old Blue- New Tricks
                        91 Festiva FSM PDF - Dropbox

                        Comment


                        • #27
                          The time and procedure required to setup the remote start is a joke if you wanted to use it often.
                          My car is currently 6 feet from my door so I can just go out and start it on cold mornings, but I'd prefer not to.
                          ~Austin
                          Red 88 L (Ocho)

                          Comment


                          • #28
                            Remote Start with Keyless Entry Install How-To

                            Originally posted by sketchman View Post
                            ^I don't understand why they can't just have a relay to close the CSS circuit so you can just leave it in neutral when you park it and not have to do the song and dance with a manual. Or you could just hardwire the CSS closed and use the auto model?
                            There is far too great a danger to improperly install remote start on a manual trans. Sometimes dropping the remote can trigger a start command, let alone being accidentally pressed in your pocket.
                            -Zack
                            Blue '93 GL Auto: White 13" 5 Point Wheels, Full LED Conversion, and an 8" Sub

                            Comment


                            • #29
                              ^Which could be fixed by something as simple as a kill switch activated by the shifter being in any other position than neutral. Which to a switch is just forward or backward on the shifter rod. I would probably just use the auto one on a manual car. I'm thinking about it just for the lock poppers. Stock Festiva locks always have annoyed me at least a little. Some are a real pain.
                              Any difference that makes no difference is no difference.

                              Old Blue- New Tricks
                              91 Festiva FSM PDF - Dropbox

                              Comment


                              • #30
                                I still have a blinking LED with my Viper kit which I would like to intall. It means the car is armed. I saw the new Volkswagen at Yorkdale mall on Friday and it had a single blinking LED where the door pull would be on the driver's side only. I like that. It's cooler than on the dash. Too bad the Festiva door pulls are oblong in shape. Does your kit include an LED too?

                                Comment

                                Working...
                                X