The block vent is below the oil filter and towards the front of the block ( front meaning timing pulley side).
The return is in the oil pan on the b6t only. Both these ports are plugged with rubber caps from the factory. I don't have any really detailed pictures of the separator I made for tweak, but I'll look to see if I've got any of where it's mounted.
-
I made these out of 1018 mild steel, but a 1 3/8 long half inch spacer from an industrial supply or hardware store will work. If you can't find the exact length that you want, you can stack washers to make up the difference. My spacers are actually 1 1/4" long and I used 1/8" thick washers to make up the difference. Transmission bolts work to hold the spaced mount bracket securely to the block.Last edited by Advancedynamix; 03-10-2015, 01:42 PM.Leave a comment:
-
Heed this Tech Note!:ia:Originally posted by Advancedynamix View Post
This is what it looks like when you fail to torque and loc-tite the crank bolt.
https://groups.yahoo.com/neo/groups/...hotoFilter=ALL
Not sure if this link will work for everyone.Last edited by 1990new; 03-10-2015, 12:32 PM.Leave a comment:
-
A bit of advice; when buying any used engine, especially from a salvage yard, it is a good idea to pull the cylinder head off the engine and inspect the bores of the engine. These DOHC1.6 engines suffer from 3 problems that could make your build a lot more expensive if you don't take this advice. These failures can lead to corrosion of the cylinder walls, which requires machine work and new pistons to correct.
1. Coolant leakage: The intake manifold can leak coolant from the bypass coolant passages into the intake runners through a bad manifold gasket. This is most common on the Capri/323 engines. The gasket design was updated for the Miata and is now a pressed steel gasket, rather than a fiber one.
2. Overheating/head gasket failures: All engines are prone to this, but miata 1.6 and 1.8 engines as especially prone. The cooling system is poorly routed on the miata and this causes overheating and damage. The over heating most commonly effects cylinders 3 and 4.
3. Corrosion: If the engine has been run for long periods of time with straight water in the engine, rather than a coolant mix, then the coolant passages will corrode and can cause severe leaks, which often leak into the cylinders and rust them. This is commonly seen on track cars or very poorly maintained street cars.
These engines are very durable and will last a long time when maintained properly. They aren't the least bit fragile, and will take a lot of abuse, but coolant leaks will destroy them, so keep an eye on that with any engine you purchase.Leave a comment:
-
The heads are all the same, with the same ports, and passages. The intake manifolds are different. The Capri/323 gt/gtx intake manifold has 2 coolant outlets. The one between cyl. 1 and 2 goes to the idle valve and throttle body, and the other (between cyl. 2 and 3) goes to the heater core. These are bypass outlets in that they bypass the thermostat. The Miata intake manifold only has 1 outlet, which goes to the throttle body/idle valve. The heater bypass on the miata comes out where the thermostat on the capri/323/mx3 is the back (drivers left in transverse location) of the head.Originally posted by bhearts View Post
I'm not positive what the mx3 intake manifold looks like, because I have never had one off. There is also another very rare GTX intake manifold that has a removable plenum. It is a JDM part. The coolant flows out the same way on this manifold as it does the standard USDM part.Last edited by Advancedynamix; 03-10-2015, 08:35 AM.Leave a comment:
-
So all the engines exit coolant through the intake flange at the same spot?Leave a comment:
-
Yes, I'll check to see what thickness is needed. I know AZGTX has used washers to space the idler/adjuster out.Originally posted by fastivaca View Post
No, the timing belt can be serviced in the car. The timing cover goes on an off with this type of mount mod. It is easier to get the lower pulley off with the engine lowered, but that is because I used an mx3 ribbed belt setup. With a Festiva or aspire lower pulley it would be the same as servicing the B3. I wanted the best factory balancer I could find and I wanted a ribbed belt.Originally posted by 350freak View Post
They squirt a straight stream. They don't spray.Originally posted by bhearts View PostLeave a comment:
-
very beautiful build but will you have to pull the engine to change the timing belt lol jkLeave a comment:
-
Is it safe to assume that the same spacer method could be used for the A/C idler pulley bracket the other side of the block?Leave a comment:
-
Here is an example of the 1 3/8" spacers needed to fit the Festiva engine mount on with the 16v head.
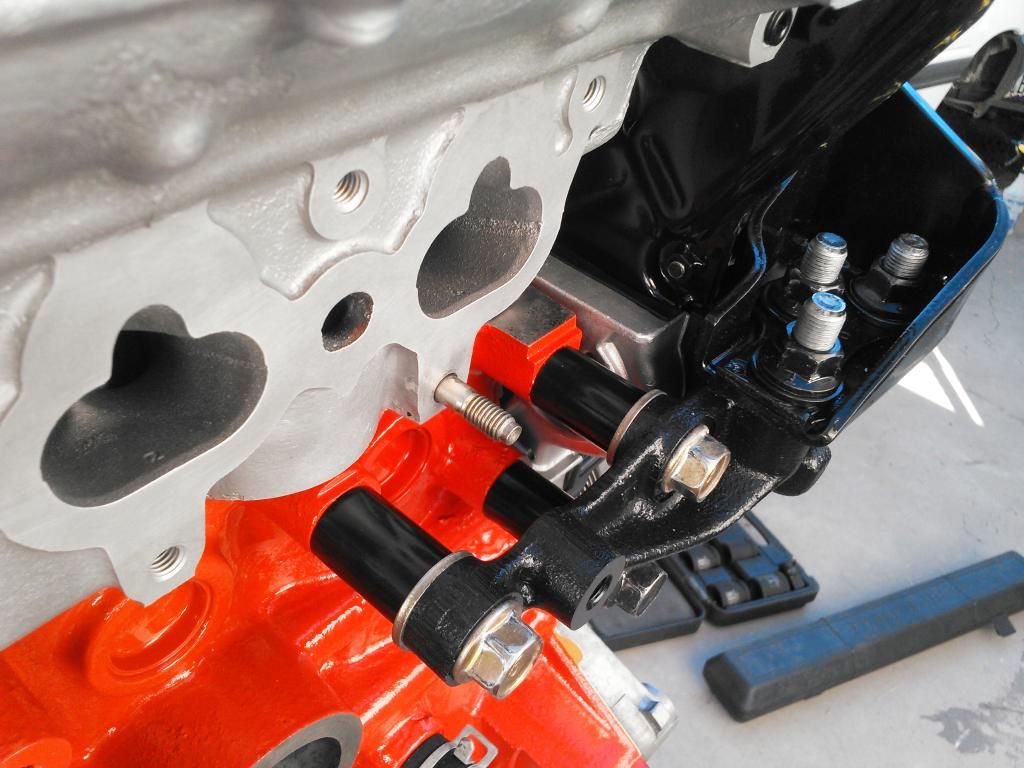
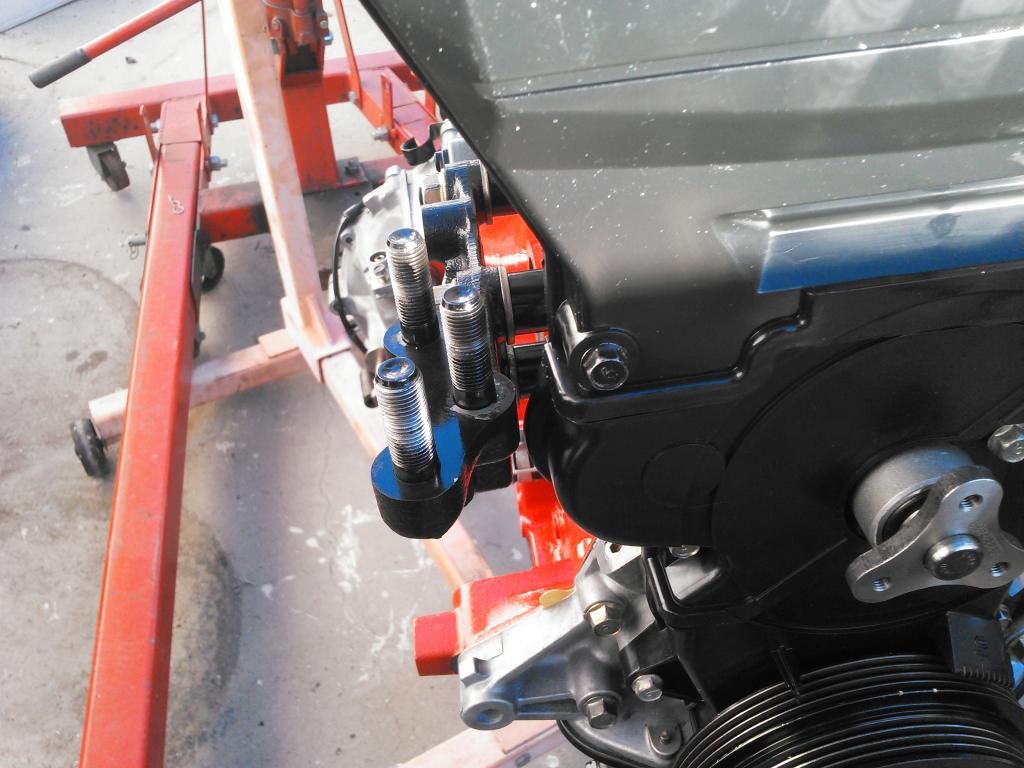
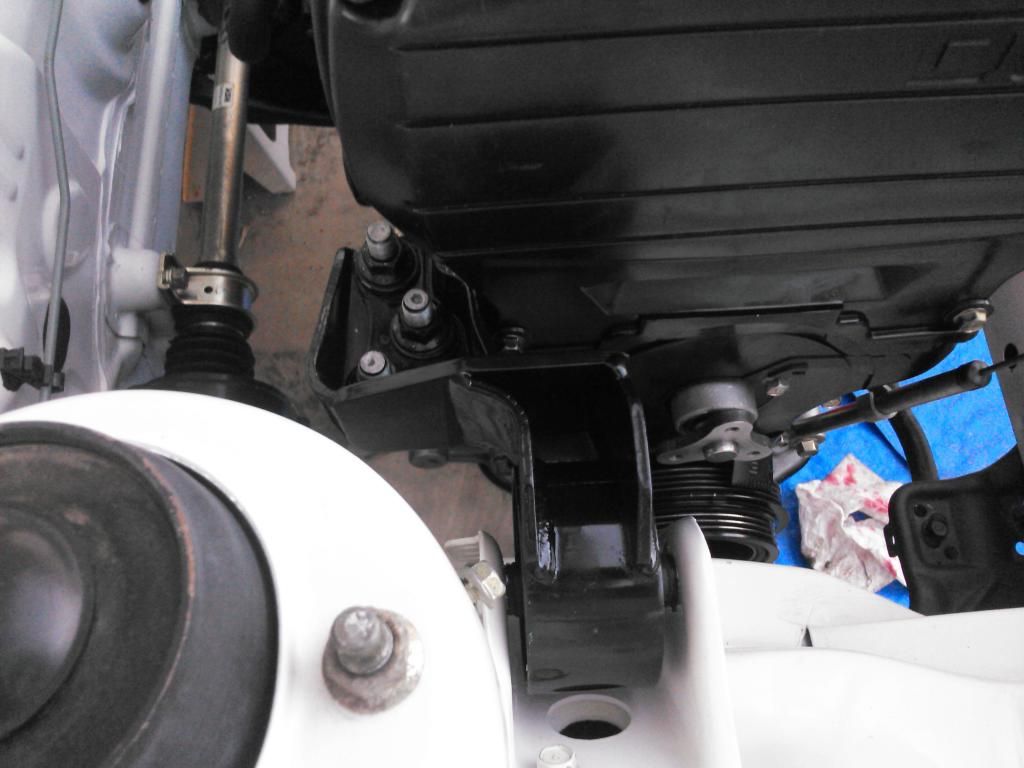
I cut the stock Festiva mount in half and welded in piece of steel to space the mount 1 3/8". I also made this mount lower the engine 3/8" for more hood clearance. This allows stock Festiva transmission mounts, and the crossmember can be lowered with 1/2" fender washers to lower the tranny side of the engine. With this setup, you can use the stock Festiva intake pipe and air box.
There are other ways to do this without cutting and welding the mount. This is just the easiest way for me to do it. There are factory Mazda mounts that can be used, and there is a slotting technique.
NOTE: When moving the engine forward (I.e. to use a large transmission) the factory mount can be left uncut. The transmission mounts can be made to move the tranny forward the same amount as the spacers between the block and engine mount. This same technique is used to mount a BP engine as well, but the holes in the mounts must be slotted for the longer block.Last edited by Advancedynamix; 03-09-2015, 11:00 AM.Leave a comment:


Leave a comment: