Yes, I just picked up my sleeves from the machine shop, all that's left to do is shorten the barrel part a bit, which I was about to do right now, but my camera's battery is dead, so I'll take pictures in an hour or so.
Announcement
Collapse
No announcement yet.
Torsion beam bushing measurements
Collapse
X
-
Updates?1992 white L, Bp, American racing 13's, stock trans.
1991 White L, BP/F5MR, protege header, full aspire swap with gr2's, seats, and sway bar, 15" konig's, short throw, escort console.
1991 blue L, 5 speed.
1988 red L-plus-all stock.
Comment
-
You've got to realize that what you plan to do is also complicated. Don't forget that in the bushing set, the polyurethane bushings are pressed in the outer sleeve, so getting them out without damaging them is a hassle. The reason I machined my own inner sleeve is because none of the ones offered by polyperformance perfectly matched the Festiva stock rear bolt. And by the way, having the sleeve made wasn't expensive; it took the machinist only 30 minutes.Originally posted by rollertoaster View PostI'm gonna order 2 of the complete bushing sets. Then just discard the outer sleeves and shorten the inners, trim the poly barrels and call it done. Seems like it would be less work and cheaper that way than to have to machine my own inners from scratch
Sent from my iPhone using TapatalkThe left lane? Are you crazy!!! I never drive in the left lane...It's full of freaks driving the wrong way and charging right at you!!!
Comment
-
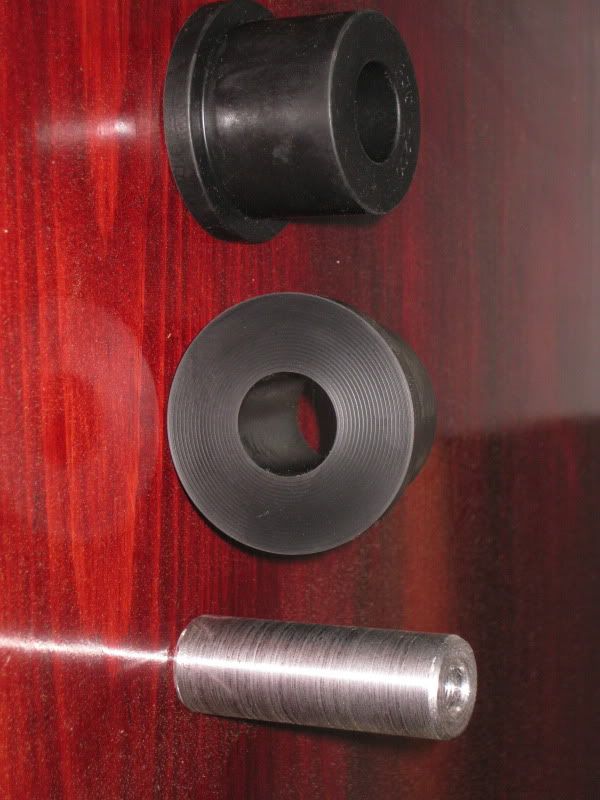
Ok, so here are the parts:
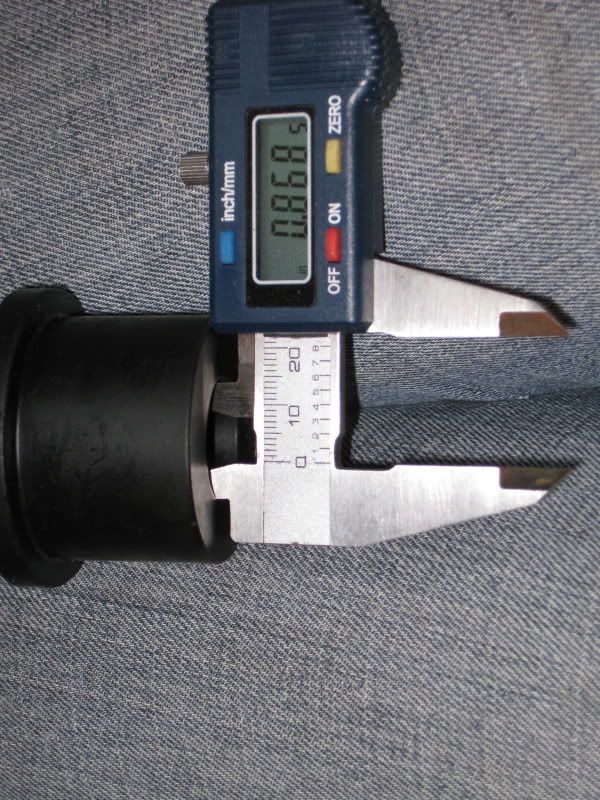
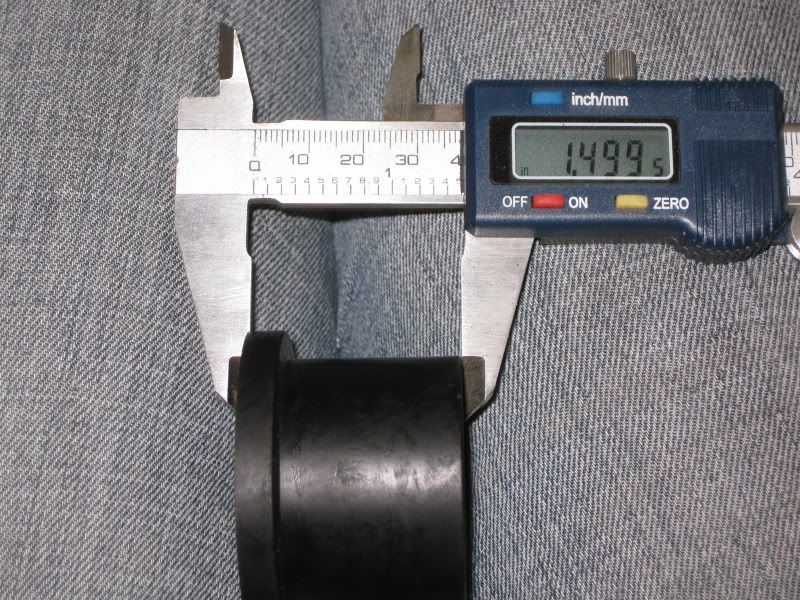
And the dimensions:

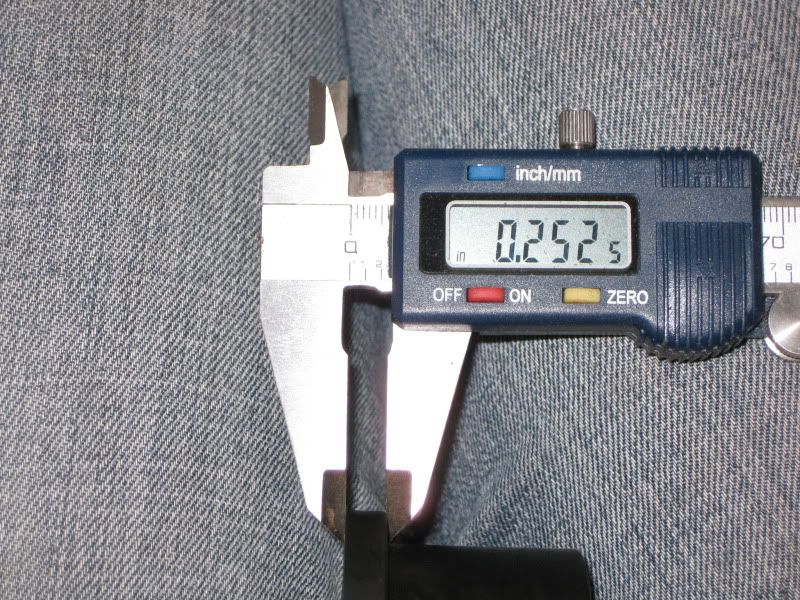
Custom-made sleeve

Shortened bushing half
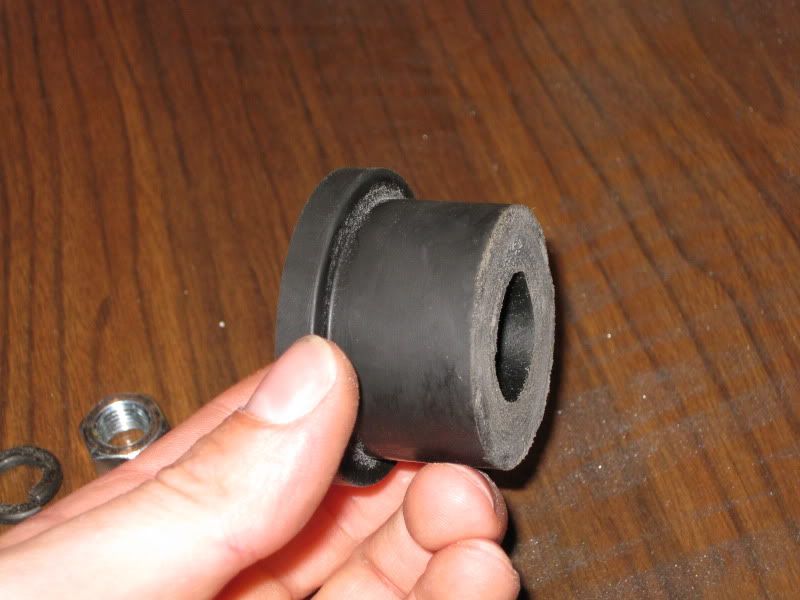
Test fit

I should have them installed by early july, so I'll give you news then!!! Cheers!!!The left lane? Are you crazy!!! I never drive in the left lane...It's full of freaks driving the wrong way and charging right at you!!!

Comment
-
Actually the poly bushings are not pressed into the sleeve. They make those sleeves so you can weld them into stuff, the even sell weld on brackets for them. so you can just pull everything apart, weld, then reassemble.
I can do the machining myself but if I do it from scratch then I have to buy a length of cromoly and that will just add to the cost. It's only $24 to get everything I need from one vendor and not have to pay shipping twice.
I'm glad it worked out good for you. Did it mess with your alignment at all? It shouldn't but you never know. I'm going to also pick up a set of alignment shims for when I do my aspire swap and install the bushings on my aspire beam.
Sent from my iPhone using Tapatalk
Comment
-
More info on the measurements, material, and cost of that sleeve please! As well, could I trouble you to measure the exact length when cut? I have a few ideas on where to get them pre-fab and cheap... so as much detail as possible would be great. Thanks bro... looks fantastic! Last edited by Aaronbrook37; 07-05-2011, 05:14 PM.1988 Chevy Sprint Turbo 997cc
Comment
-
Wouldn't it make sense also to bore out the stock bolt size so that an off-the-shelf sleeve could be used in conjunction with a high grade bolt?Originally posted by Pocket_Rocket View PostYou've got to realize that what you plan to do is also complicated. Don't forget that in the bushing set, the polyurethane bushings are pressed in the outer sleeve, so getting them out without damaging them is a hassle. The reason I machined my own inner sleeve is because none of the ones offered by polyperformance perfectly matched the Festiva stock rear bolt. And by the way, having the sleeve made wasn't expensive; it took the machinist only 30 minutes.1988 Chevy Sprint Turbo 997cc
Comment
-
The sleeve width should be 63mm outside dia 22.4mm
Inside dia 12mm.
The halves are 63/2 so about 26mm per side will leave a little room for grease in the center. I also added some aluminum shims 3mm thick to keep the bushings from walking side to side.
As far as cost goes I commandeered my friends lathe and stole his metal.

Sent from my iPhone using Tapatalk
Comment
-
I'm still trying to get a hold of my mechanic to have them installed because I don't have a press. As soon as they're fitted and everything works, I'll give the official measurements. As for the sleeve, I tried searching on the web for off-the-shelf to no avail, so that's why I had them machined. But yes, one could also drill out the holes from the brackets, but you would have to make sure they'd still line up as the stock ones.Originally posted by Aaronbrook37 View PostMore info on the measurements, material, and cost of that sleeve please! As well, could I trouble you to measure the exact length when cut? I have a few ideas on where to get them pre-fab and cheap... so as much detail as possible would be great. Thanks bro... looks fantastic! The left lane? Are you crazy!!! I never drive in the left lane...It's full of freaks driving the wrong way and charging right at you!!!

Comment
-
Ok, time for an update! My mechanic couldn't be bothered for that kind of job, so I bit the bullet and did it myself. Everything went smoothly; sprayed PB Blaster on all the bolts everyday for almost a week prior to doing this (first time using PB Blaster, that thing is awesome!!!) and decided to give a go to press the bushings in with a big C-clamp, which worked well. I took a few pictures to aswer the questions some of you may have asked. For starters, here's why I didn't reuse the stock bolts; as you can see, one of them was getting thinner due to rust, and both were getting notched where they sit on the brackets:
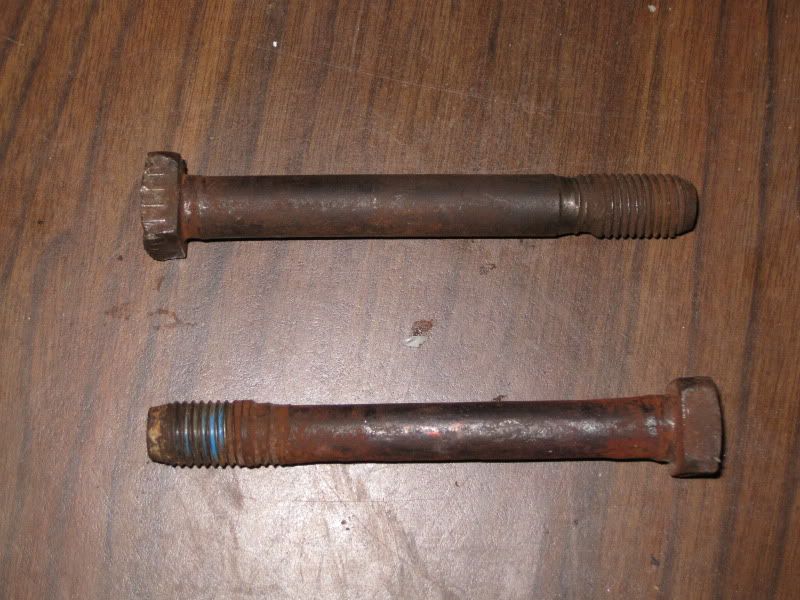

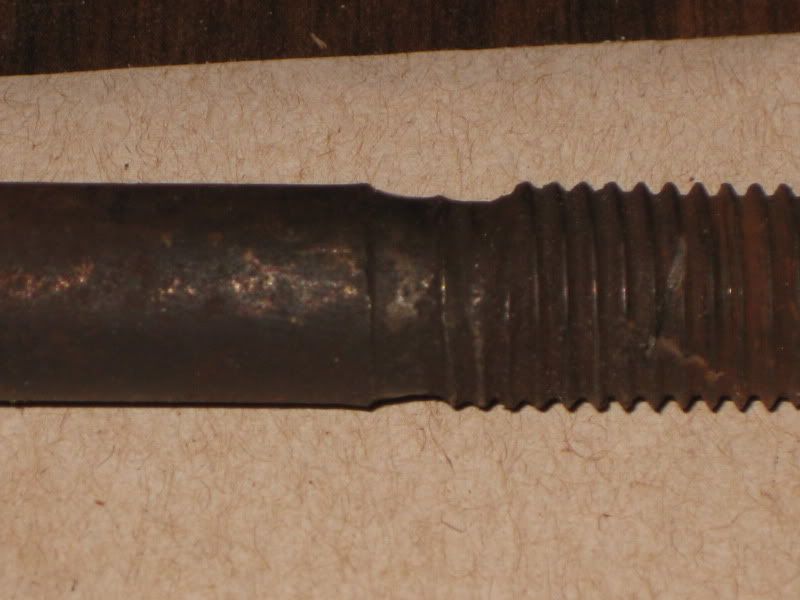
And the other thing: I didn't reuse the stock sleeves for two reasons. First they were totally rusted and paper-thin (gotta love canadian winters ) and second, they are not cylindrical as you may think; they have a hump on them, so the rubber must have been molded around them
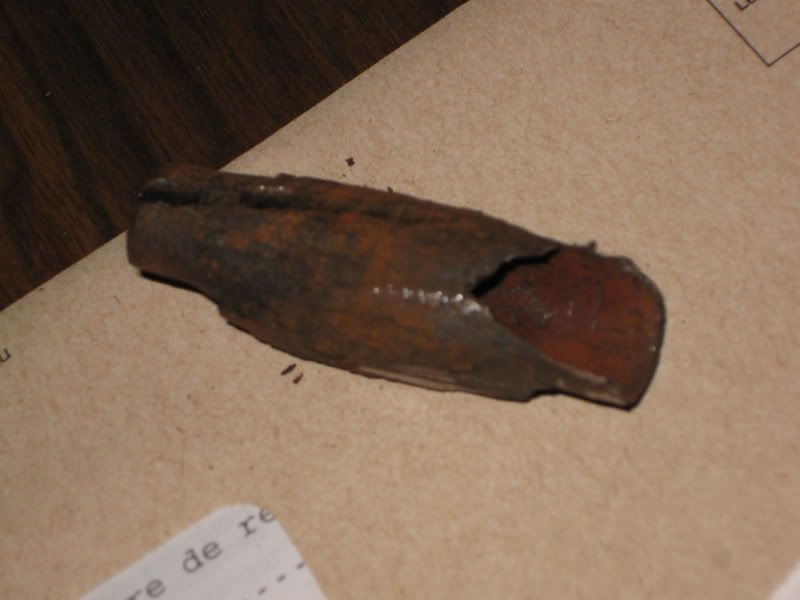
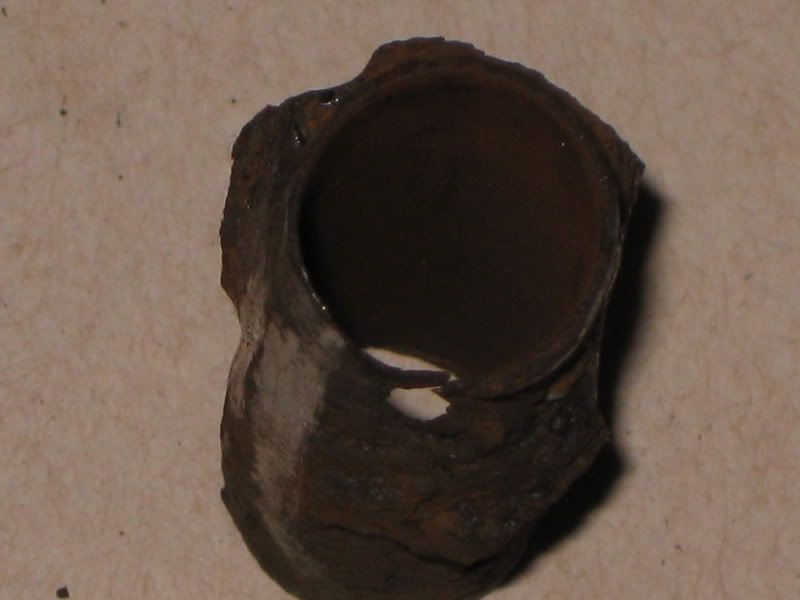
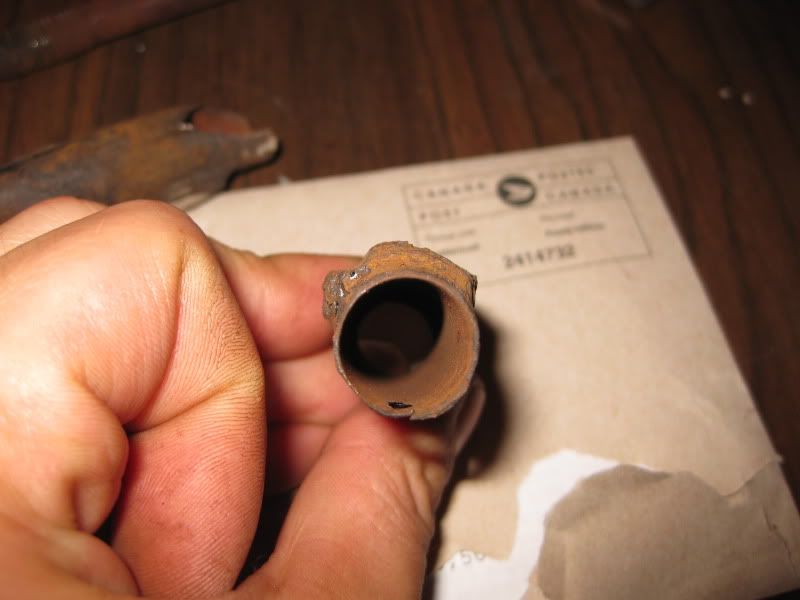
As for results, they are very nice. Yes, you can feel every crack in the tarmac, but they won't rattle your fillings out. The rear beam feels planted and also feels like it works like it's supposed to. No problem with rear alignment or "crabbing" either. I'd take that over rubber bushings any day. Oh and Aaron, I cut the barrel part on my bushings down to an inch, but you could go a hair under that to keep a bit of play, because if my brackets had an extra coat of paint, the bushings would have rubbed!!! For the rest of the dimensions, see my previous posts, there's also a part number and a link to the company's website, which has all the specs you could ever want.The left lane? Are you crazy!!! I never drive in the left lane...It's full of freaks driving the wrong way and charging right at you!!!

Comment
-
This is good news. I just bought a set of these bushings and now can't wait to install them. :smile:Originally posted by Pocket_Rocket View PostAs for results, they are very nice. Yes, you can feel every crack in the tarmac, but they won't rattle your fillings out. The rear beam feels planted and also feels like it works like it's supposed to. No problem with rear alignment or "crabbing" either. I'd take that over rubber bushings any day.Festiva: Because even my dog can build a Honda.
---------------------------------------------------------------------------

'90 L. B8ME/Kia Rio 5 speed. Rio/Aspire suspension swap. :-D
'81 Mustang. Inline 6, Automatic.
'95 Eagle Summit Wagon. 4G64 Powered.
Comment
-
Pocket Rocket the Postman... he always delivers! Nicely done good sir. I'm going to be ordering myself a "kit" at some point soon once I can come up with a sleeve solution. Thanks a lot for all of your help... my Festiva should be 4/4 polyurethane bushings pretty soon now thanks to your forerunner tech here! An inch sounds good - play for grease is a good thing as RT mentioned above. Cheers!Originally posted by Pocket_Rocket View PostAs for results, they are very nice. Yes, you can feel every crack in the tarmac, but they won't rattle your fillings out. The rear beam feels planted and also feels like it works like it's supposed to. No problem with rear alignment or "crabbing" either. I'd take that over rubber bushings any day. Oh and Aaron, I cut the barrel part on my bushings down to an inch, but you could go a hair under that to keep a bit of play, because if my brackets had an extra coat of paint, the bushings would have rubbed!!! For the rest of the dimensions, see my previous posts, there's also a part number and a link to the company's website, which has all the specs you could ever want.1988 Chevy Sprint Turbo 997cc
Comment
-
Well, the extra play is actually for expansion; since the hole is like 1.75 inch and the bushing 1.77 in diameter, that extra material will need a place to go once you press it in. Otherwise, from the tips I've read from other poly bushing companies, you do not grease them in the pressed areas, only on the part that'll move. Since the pivot is in the sleeve, no part of the bushing is supposed to move, so no need for grease!The left lane? Are you crazy!!! I never drive in the left lane...It's full of freaks driving the wrong way and charging right at you!!!

Comment
Comment