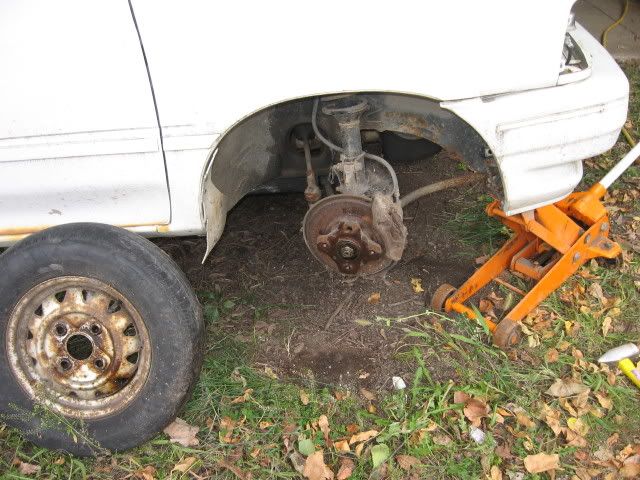
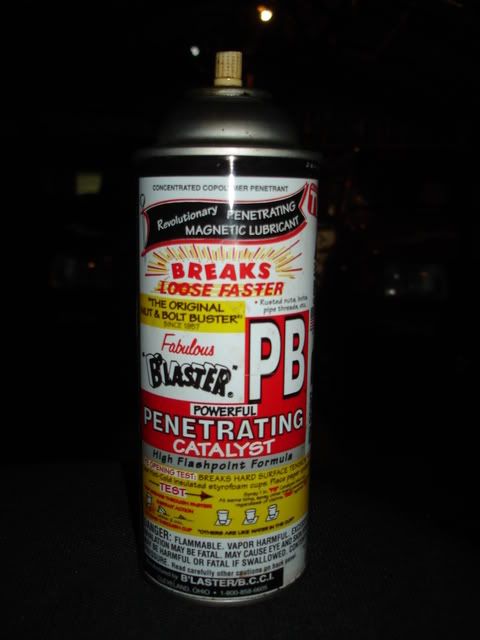
I bought the white '90 this summer and it had new bearings put in all the way around before it died. So my mission today was to swap those halfshafts, rotors and all, over to Levistiva. So I needed to disassemble two cars, swap, and reassemble. It sucked working on gravel. Woulda been great to have 2 jacks. Was awesome that I had 6 jackstands. Only real troubles I had were 2 lower ball joints were a pain in my hello and I broke 3 bolts removing one strut and ball joint. Had to apply some heat on the broken bolts on the strut, but I flippin' prevailed! Anyways, shot a bunch of photos to maybe help someone in the future.
Here goes!
First thing I did today was go and rent a slide hammer from Autozone and later I went and got a balljoint separater(sp?).
This is what Festiva Alley looked like in front of the Festiva Funny Factory. The white one is the parts car. The maroon Lx is in the way.
[img] [img]
[img]
[img] [img]
[img]
Backed the blue one back to the fence. Pushed the maroon Lx up against it.
[img] [img]
[img]
Parallel parked Levistiva.
[img] [img]
[img]
Had to take a shot of the mug Packrat427 gave me at the Ozark Meet. Levistiva is pimpin' the gear!
[img] [img]
[img]
14mm 6 sided socket driven by a 1/2" drive ratchet.
[img] [img]
[img]
Of course, the last person to install the tires, torqued them to about 200 ft. lbs.
NOTE: 69 ft lb. 69, easy number for most ppl to remember.
HELPFUL HINT: Top half of jack makes for good leverage.
[img] [img]
[img]
Some of the tools I used. Cheap impact with my new 6 hp 30 gallon Craftsman air compressor I purchase for $100 at a garage sale.
[img] [img]
[img]
[img] [img]
[img]
Little magnetic bowl for storing nuts and bolts. I think having 2 of them would make things easier at times. In this case, one at each car, but I made it work.....no leftovers at the end of the day.
[img] [img]
[img]
Removed tire after taking Packrat's jack advice of jacking up on the tie down bracket. I did put a jackstand underneath the framerail, for safety and so I could use the jack on the same wheel, but opposite car.
[img] [img]
[img]
C-clamp to compress brake pad for easy removal of brake caliper.
[img] [img]
[img]
Screwdriver points to show how pads have loosened for caliper removal.
[img] [img]
[img]
12mm to remove two bolts holding caliper.
[img] [img]
[img]
[img] [img]
[img]
Tie rod removal requires a 17mm I believe and side cutters. Remove cotter pin with side cutters. Removed tie rod end nut, then put the nut back on and tighten until flush with the end of the tie rod end bolt. Then I tapped it until loose, removed nut, and removed tie rod end. Doing it this way just helps keep from mucking up the threads.
[img] [img]
[img]
[img] [img]
[img]
[img] [img]
[img]
[img] [img]
[img]
[img] [img]
[img]
Next I removed the 2 bolts holding the strut. The lil' impact wasn't strong enough for one of the nuts, so I broke out the jack handle, again. Awesome little tool.
[img] [img]
[img]
[img] [img]
[img]
[img] [img]
[img]
Kind of a lame pic of removing the lower balljoint bolt. It was a 14mm I believe.
[img] [img]
[img]
Right in the middle of my project, FedEx comes bearing gifts.
[img] [img]
[img]
Headlights and carbed distributor for the Lx...just in case! Thanks getnpsi!!
[img] [img]
[img]
Back to the task at hand. I jacked up on the outer assembly and tapped down on the balljoint and it dropped right out. On others, I had to use the pickle fork or the ball joint separater.
[img] [img]
[img]
Ball joint separated.
[img] [img]
[img]
Here is a pic of after I removed the halfshaft with the slide hammer. I just used two lugbolts to hold it on and then slid the hammer a few times and it just plopped out. ElCamino1 even suggested that if you were without the slidehammer, take a 2x4 chunk of wood and cut it into a wedge. HAmmer the wedge between the case and the halfshaft and then tap on the halfshaft to pop it out.
[img] [img]
[img]
Had to move to Levistiva and repeat the same process.
[img] [img]
[img]
This is the old one from Levistiva getting ready to go back into the parts car so I can at least move that car around.
[img] [img]
[img]
Assembly is just the reverse order. The halfshafts go in real easy. I kinda kicked them in and then push, pulled, tugged the hell out of them to make sure they wouldn't pull out.
The one thing I do is put antiseize on every thing. Not only the threads on a bolt, but, also, the bolts themselves. Especially like bolts that go through metal sleeves...ie lower balljoint bolts, strut bolts, strut shock bolts in the rear and lugbolts...you get the point.
[img] [img]
[img]
To test the job, I went to a large parking lot, first, and did circles, left and right. Then I went on 35 mph streets and then the interstate. Guess all is good because I'm here to tell you how my day went and to maybe give somebody some help.
Here goes!
First thing I did today was go and rent a slide hammer from Autozone and later I went and got a balljoint separater(sp?).
This is what Festiva Alley looked like in front of the Festiva Funny Factory. The white one is the parts car. The maroon Lx is in the way.
[img]
 [img]
[img][img]
 [img]
[img]Backed the blue one back to the fence. Pushed the maroon Lx up against it.
[img]
 [img]
[img]Parallel parked Levistiva.
[img]
 [img]
[img]Had to take a shot of the mug Packrat427 gave me at the Ozark Meet. Levistiva is pimpin' the gear!
[img]
 [img]
[img]14mm 6 sided socket driven by a 1/2" drive ratchet.
[img]
 [img]
[img]Of course, the last person to install the tires, torqued them to about 200 ft. lbs.
NOTE: 69 ft lb. 69, easy number for most ppl to remember.
HELPFUL HINT: Top half of jack makes for good leverage.
[img]
 [img]
[img]Some of the tools I used. Cheap impact with my new 6 hp 30 gallon Craftsman air compressor I purchase for $100 at a garage sale.
[img]
 [img]
[img][img]
 [img]
[img]Little magnetic bowl for storing nuts and bolts. I think having 2 of them would make things easier at times. In this case, one at each car, but I made it work.....no leftovers at the end of the day.
[img]
 [img]
[img]Removed tire after taking Packrat's jack advice of jacking up on the tie down bracket. I did put a jackstand underneath the framerail, for safety and so I could use the jack on the same wheel, but opposite car.
[img]
 [img]
[img]C-clamp to compress brake pad for easy removal of brake caliper.
[img]
 [img]
[img]Screwdriver points to show how pads have loosened for caliper removal.
[img]
 [img]
[img]12mm to remove two bolts holding caliper.
[img]
 [img]
[img][img]
 [img]
[img]Tie rod removal requires a 17mm I believe and side cutters. Remove cotter pin with side cutters. Removed tie rod end nut, then put the nut back on and tighten until flush with the end of the tie rod end bolt. Then I tapped it until loose, removed nut, and removed tie rod end. Doing it this way just helps keep from mucking up the threads.
[img]
 [img]
[img][img]
 [img]
[img][img]
 [img]
[img][img]
 [img]
[img][img]
 [img]
[img]Next I removed the 2 bolts holding the strut. The lil' impact wasn't strong enough for one of the nuts, so I broke out the jack handle, again. Awesome little tool.
[img]
 [img]
[img][img]
 [img]
[img][img]
 [img]
[img]Kind of a lame pic of removing the lower balljoint bolt. It was a 14mm I believe.
[img]
 [img]
[img]Right in the middle of my project, FedEx comes bearing gifts.
[img]
 [img]
[img]Headlights and carbed distributor for the Lx...just in case! Thanks getnpsi!!
[img]
 [img]
[img]Back to the task at hand. I jacked up on the outer assembly and tapped down on the balljoint and it dropped right out. On others, I had to use the pickle fork or the ball joint separater.
[img]
 [img]
[img]Ball joint separated.
[img]
 [img]
[img]Here is a pic of after I removed the halfshaft with the slide hammer. I just used two lugbolts to hold it on and then slid the hammer a few times and it just plopped out. ElCamino1 even suggested that if you were without the slidehammer, take a 2x4 chunk of wood and cut it into a wedge. HAmmer the wedge between the case and the halfshaft and then tap on the halfshaft to pop it out.
[img]
 [img]
[img]Had to move to Levistiva and repeat the same process.
[img]
 [img]
[img]This is the old one from Levistiva getting ready to go back into the parts car so I can at least move that car around.
[img]
 [img]
[img]Assembly is just the reverse order. The halfshafts go in real easy. I kinda kicked them in and then push, pulled, tugged the hell out of them to make sure they wouldn't pull out.
The one thing I do is put antiseize on every thing. Not only the threads on a bolt, but, also, the bolts themselves. Especially like bolts that go through metal sleeves...ie lower balljoint bolts, strut bolts, strut shock bolts in the rear and lugbolts...you get the point.
[img]
 [img]
[img]To test the job, I went to a large parking lot, first, and did circles, left and right. Then I went on 35 mph streets and then the interstate. Guess all is good because I'm here to tell you how my day went and to maybe give somebody some help.


Comment