Announcement

Collapse
No announcement yet.

Steering Knuckle Rebuild

Collapse
X
 
  • Filter
  • Time
  • Show
Clear All
new posts

  • Steering Knuckle Rebuild

    I originally posted this in the "what have you done today" thread but decide to create a unique thread in this the Repair Help Forum.

    Almost finished my first steering knuckle rebuild. With the help of the excellent instructions on the forum, it wasn't all that difficult.


    Hope someone who has had this problem before can help me. I probably should have pulled out the rope that I used to push in
    the rear grease seal before I tightened the nut so much when pressing in the bearing. But too late now.

    Can someone tell me the easiest way to get the rope out now?


    Tried my best to get the rope out but ended up breaking it off. So I decide to just leave it there and let it melt.
    The Polypropylene rope melts at 150 degrees so it should be out of there pretty quick one the wheel gets rolling.

  • #2
    lol, that's why I only did it that way one time, and you don't know for sure if it even pressed in right! Best way is to install both outter races, drop in the outter bearing and press the seal in, then (using old inner races with a slit cut in the side) put the knuckle on the hub shaft and press the outter bearing on.. pretty not hard after you do it that way the first time!
    2008 Kia Rio- new beater
    1987 F-150- revived and CLEAN!!!
    1987 Suzuki Dual Sport- fun beater bike
    1993 Festiva- Fiona, DD
    1997 Aspire- Peaspire, Refurb'd, sold
    1997 Aspire- Babyspire, DD
    1994 Aspire - Project Kiazord
    1994 Aspire- Crustyspire, RIP


    "If it moves, grease it, if it don't, paint it, and if it ain't broke don't fix it!"

    Comment


    • #3
      Originally posted by zoom zoom View Post
      lol, that's why I only did it that way one time, and you don't know for sure if it even pressed in right! Best way is to install both outter races, drop in the outter bearing and press the seal in, then (using old inner races with a slit cut in the side) put the knuckle on the hub shaft and press the outter bearing on.. pretty not hard after you do it that way the first time!
      Thanks. I'm doing the second one tomorrow and I will definitely use that method.

      Today I made a tool to press the hub out of the knuckle...will be cleaner than pounding it out.


      Regarding the rope...comparing the hub position to another intact knuckles, it appears to be pressed in the same depth.
      I put the knuckle in a vise, mounted a wheel on it and spun it until it loosened up pretty good, so l'm going to
      leave the rope in there and let the polypropylene melt when it get up over 150 degrees.. Will give me a little extra grease seal.
      Last edited by 1990new; 09-02-2013, 06:51 PM.

      Comment


      • #4
        Yea sorry I can't help you with the rope situation, mine came out but I had to really REALLY pull on it. I even had to wrap it around a 4lb sledge and slam it a few times.
        2008 Kia Rio- new beater
        1987 F-150- revived and CLEAN!!!
        1987 Suzuki Dual Sport- fun beater bike
        1993 Festiva- Fiona, DD
        1997 Aspire- Peaspire, Refurb'd, sold
        1997 Aspire- Babyspire, DD
        1994 Aspire - Project Kiazord
        1994 Aspire- Crustyspire, RIP


        "If it moves, grease it, if it don't, paint it, and if it ain't broke don't fix it!"

        Comment


        • #5
          The next time I do a set of Capri knuckles I will take pictures and post the process.
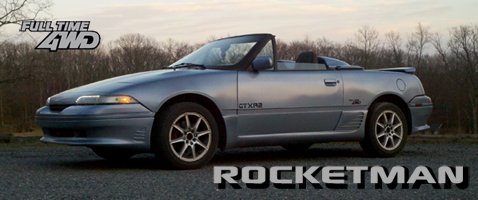
          1991 Mercury Capri XR2 "GTXR2" BPT Swapped AWD Conversion

          Rocketchips!
          High Flow B3/B6/BP VAF Adapters for sale!
          Bolt-on Weber Carb Adapters!

          Comment


          • #6
            Great ... Would be nice to have pictures of the entire process. A video posted on YouTube would be even better.

            Comment


            • #7
              Use thinner rope?
              Some photos at http://www.photobucket.com/Festiva-frontwheel
              Last edited by WmWatt; 09-03-2013, 12:08 PM.
              Original owner of silver grey carburetted 1989 Festiva. 105k km as of June 2006. 140k km as of June 2021.

              Comment


              • #8
                I am still trying to figure out why the rope was used in the first place.

                I did a picture tutorial, I was going to link it, but my recent "organizing" of my photobucket albums broke all the links to the pics. I am going to rebuild the Aspire knuckles this weekend for Smedly's BP swapped car, Bite Me, and can take a bunch of pics.

                Arty and I had GenevaDirt take video of us, mostly Arty, doing the rebuild with no special tools at all last Madness. I don't know where the video is. I can say, I find it easiest to knock the hubs apart with a hammer, even compared to trying to get the hub to sit right in a press.
                Contact me for information about Festiva Madness!
                Remember, FestYboy is inflatable , and Scitzz means crazy, YO!
                "Like I'm going to suggest we do the job right." ~Fecomatter May 28 2016.

                Comment


                • #9
                  I thought of the rope thing on my own, probably others did too. I took the photos above showing how it didnt' work for me. Later I just put the seal in and put the wheel together without using a rope.
                  Original owner of silver grey carburetted 1989 Festiva. 105k km as of June 2006. 140k km as of June 2021.

                  Comment


                  • #10
                    Originally posted by WmWatt View Post
                    I thought of the rope thing on my own, probably others did too. I took the photos above showing how it didnt' work for me. Later I just put the seal in and put the wheel together without using a rope.
                    Went back and looked at your link to the picture in your post this afternoon and saw where you noted in the picture caption that this was a questionable method. I should have paid more attention to the captions. With mine having the dust shield on, it was even more questionable. You have though of some ingenious way of getting this done. I would never have tackled the job you did on those rusty knuckles. Amazing the way they turned out.

                    I got my second one apart this afternoon and may put it back together tomorrow (not using the rope method).
                    I'm still just going to leave the piece of rope in the first one and let it melt out. After several spins it's turning pretty well now.

                    The bearing are still good on all four of my Festivas. I'm just rebuilding these two knuckles that had bad bearings for the future. I have two additional knuckles with used but still good bearings in them on the shelf also and two addition sets of bearings and seals for future rebuilds. After this rebuild, I'm set for
                    a long time.

                    Comment


                    • #11
                      Originally posted by scitzz View Post
                      I am still trying to figure out why the rope was used in the first place.

                      I did a picture tutorial, I was going to link it, but my recent "organizing" of my photobucket albums broke all the links to the pics. I am going to rebuild the Aspire knuckles this weekend for Smedly's BP swapped car, Bite Me, and can take a bunch of pics.

                      Arty and I had GenevaDirt take video of us, mostly Arty, doing the rebuild with no special tools at all last Madness. I don't know where the video is. I can say, I find it easiest to knock the hubs apart with a hammer, even compared to trying to get the hub to sit right in a press.

                      Note my reply to WmWatt... I should have paid closer attention in the first place.
                      Hope all goes well with Smedly's knuckle rebuilds...and lots of pictures would be nice. If you do a little write up too and give me permission to post, I'll post it along with the picture on my festivacentral.blogspot.com.
                      I put a write up on this subject by festyboy there earlier. It shows up in Google searches frequently.
                      Last edited by 1990new; 09-03-2013, 05:10 PM.

                      Comment


                      • #12
                        I had a bad wheel bearing and took both front hubs and all new bearings and seals to a mechanic and paid him to change them thought he was going to press them out but he just beat them out and in. I put them back on my car and it sounds like the passenger side is grinding,it was real hard to turn the wheel,i think I am going have to have it redone, anyone have the same issue? sorry not trying to jack the thread just really have to get my festiva back on the rd thanks

                        Comment


                        • #13
                          Originally posted by blueoval View Post
                          I had a bad wheel bearing and took both front hubs and all new bearings and seals to a mechanic and paid him to change them thought he was going to press them out but he just beat them out and in. I put them back on my car and it sounds like the passenger side is grinding,it was real hard to turn the wheel,i think I am going have to have it redone, anyone have the same issue? sorry not trying to jack the thread just really have to get my festiva back on the rd thanks
                          If he missed putting the spacer in there, your done.

                          Smedleys will go well, I just need to get over there, did another set for a friend of hers a week or so ago. Done maybe 8 or 9 sets, with only one failure. I think I pressed them together too tight. Redid it and rode approximately 120K until I did the aspire swap a few months ago.
                          Contact me for information about Festiva Madness!
                          Remember, FestYboy is inflatable , and Scitzz means crazy, YO!
                          "Like I'm going to suggest we do the job right." ~Fecomatter May 28 2016.

                          Comment


                          • #14
                            Second rebuild (without rope).

                            Ok... It was much easier the second time. I put all the tools I made in one toolbox drawer so it will be even easier next time.

                            Inserting the outer bearing in the knuckle and then pressing in the outer seal first made it much easier.
                            Press in inner and outer races, bolt on the rotor, press the hub thru the outer bearing already in the knuckle, put the spacer on, drop in the inner bearing and press it on, press in the inner seal. Easy as pie.

                            I put an original Festiva freshly turned rotor on this one. (Had two turned but one went below thickness spec.)
                            Just cleaned this knuckle up and didn't paint it either.
                            The rotor on the first one I rebuilt was like new.

                            Last edited by 1990new; 09-04-2013, 03:51 PM.

                            Comment


                            • #15
                              Very good!
                              Contact me for information about Festiva Madness!
                              Remember, FestYboy is inflatable , and Scitzz means crazy, YO!
                              "Like I'm going to suggest we do the job right." ~Fecomatter May 28 2016.

                              Comment

                              Working...
                              X