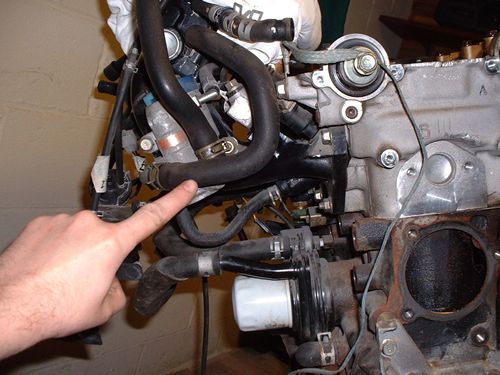

Once the old mount is out of the way, the new mount goes in the exact same three holes that the old one used on the back of the motor. For proper fitment, you reuse two of the three original mounting bolts, and shorten one of the two outer bolts for the third mounting hole. you also need to shorten the IAC hose I'm pointing to in this shot, to clear the mounting studs. After that you need to put the top alternator bracket on the outside of the mount instead of the inside, to mount it. Also the alternator bracket brace will not fit now, so you can either fab a new one to fit, or do what I'm going to do and just go without it. The alternator bracket is 3/16inch thick and very stout, so I doubt it is really needed. then finally you will need a slightly longer then stock alternator belt. I used a Gates #7350xl.

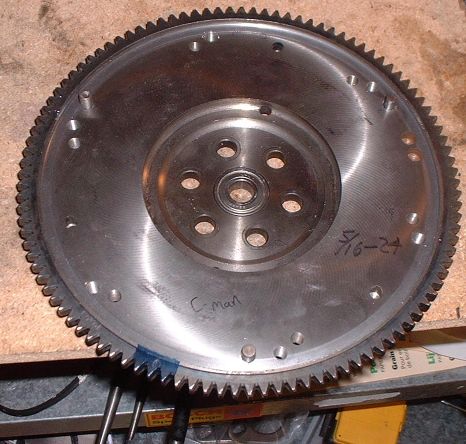
This is a shot of the flywheel. I had FMS machine this to fit the Suzuki Swift pressure plate and clutch that I got from ACT. Note, that the surface has been machined flat, no rise not only is this easier for a shop to do, but the ACT clutch is designed for no rise, this is a question that I had before I had it done, so I hope this answers yours.

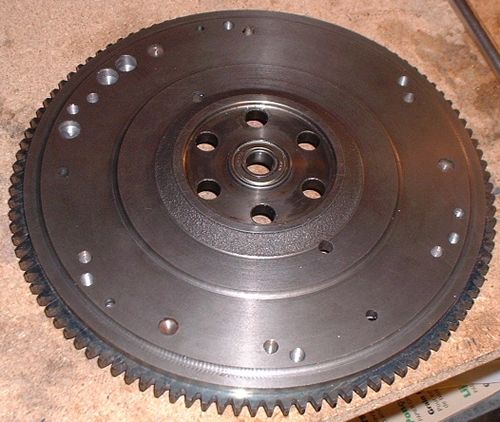
This shows the back of the flywheel. In addition to matching the pp, I had FMS lighten the flywheel and then balance the whole deal. The stock flywheel was 18lbs, the flywheel now weighs 12lbs, and the whole assembly is less then 18lbs with pp and clutch. I also replaced the pilot bearing with a new unit. The motor should rev quite nicely considering the stock B6T flywheel was 22lbs without a clutch on it.
Author: Chris Rummel
Chris's B6T Swap Pg 9 - Chris's B6T Swap Pg 11
Copyright © 2003 Ford Festiva Com- All Rights Reserved
(Except Text and images courtesy of Chris Rummel)