
-
Did some work on the dash FINALLY. The weather here has been atrocious.
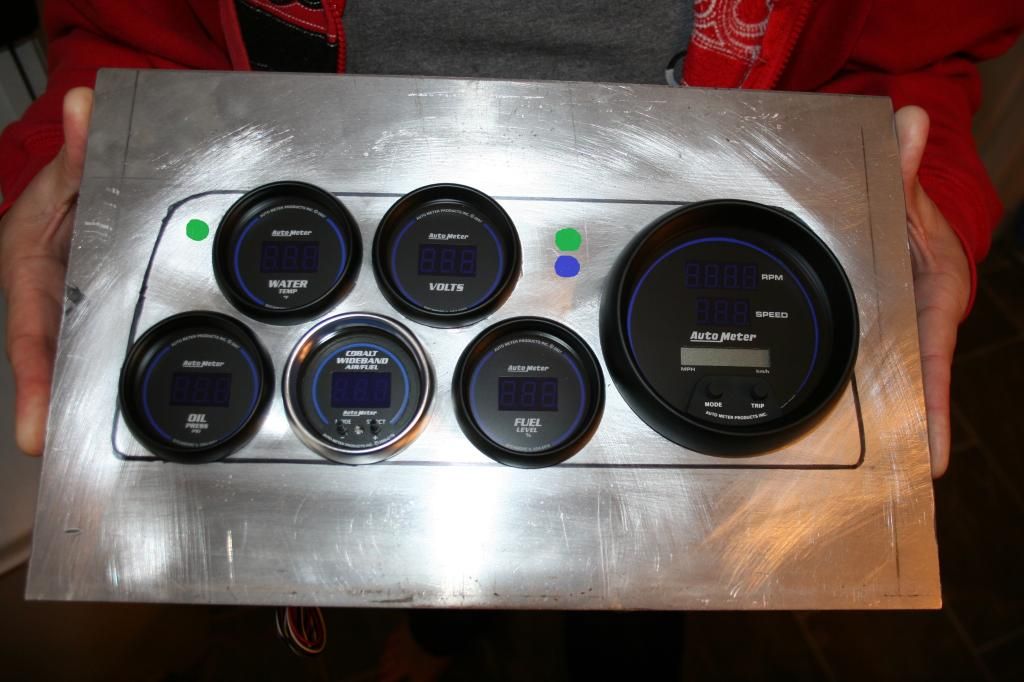
Made this piece out of aluminum. It is roughed in at this point and the gauges fit in really nicely. It will end up powder-coated in the same color as the dash (darker grey). I am still trying to find an old non-tach cluster so I can get it mounted into the dash. Anyone have something? Tach, non-tach, working, or not I don't care. I just need all the tabs in place to mount it to the dash itself. The cheaper the better. lol

I do plan on painting the wideband trim ring. Since it isn't from the "Cobalt Digital" line-up the ring is different. The speedo combo is perfect for my set-up. If this wasn't a combo set there would have been no way I coulda mounted all of these into the dash. Took hours and hours of searching different brands that had everything I needed. Go figure AutoMeter was it. I looked into aftermarket clusters form several companies. Dakota Digital was almost purchased. Their complete cluster was really nice but was about an inch too tal and woulda looked funny in the dash no matter how I finished it. With this set-up I will only have to do minimal trimming of the cluster outer trim ring to fit over all of the gauges. I think it will look sweet

I have a set of led indicator lights on the way. They will go into these positions or close to here anyway. "They are bright enough to see but not overpowering so as to blind you at night" is what the vendor told me. We'll have to wait and see.
I also did a great deal of work on the shift boot. It will go directly onto the floor without a console. I hope to have it finished within the next day or two. Using a Lokar boot and retainer.Leave a comment:
-
I think those plates will start you out at -2 degrees camber and zero toe depending on the ride height. You can use them along with moog shims to fine tune.
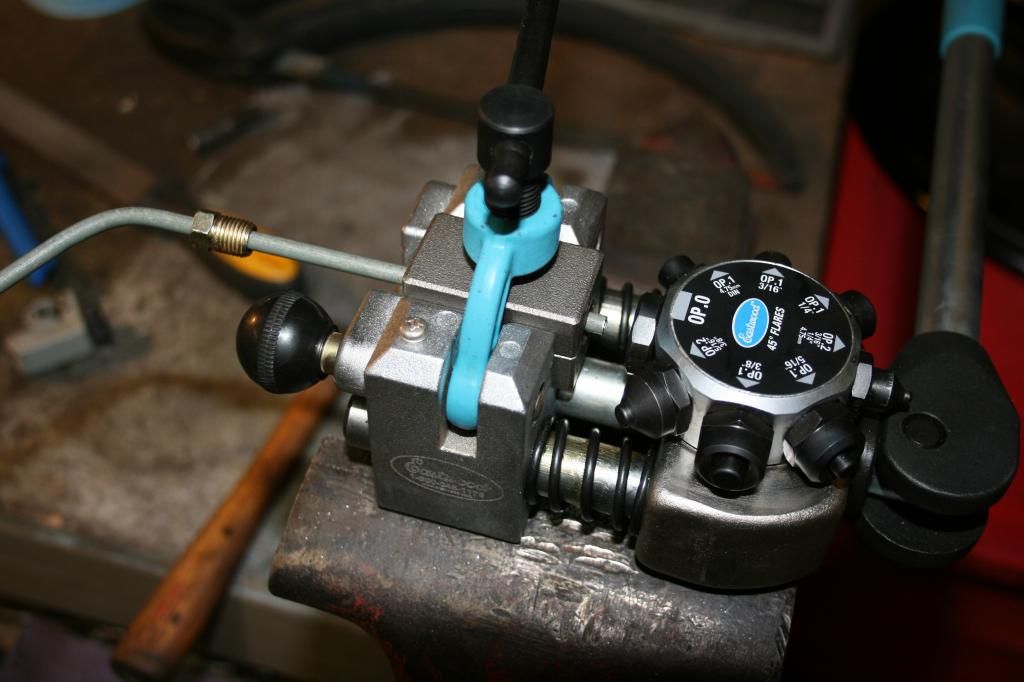
That's an awesome brake line gizmo! I have a nice flare set and bender, but it I want one of those too! #toolenvy lolLeave a comment:
-
Stainless tubing
I also recommend a rubber cap over the bleeder screws (I got mine from the junkyard) plus a set of -3 teflon lined braided stainless flex hose (just like the kind alpaccino has in the current Festiva of the month contest).
I likey your Eastwood tool.Last edited by bravekozak; 01-25-2015, 12:29 AM.Leave a comment:
-
Ok. It's been a few weeks since I updated. I have done a lot of things and have a crapload of pics. Here are some right now. I will try and get some of the other things uploaded tomorrow.
This is a blue faced clock. It will match perfectly with the digital gauges I will be gettin' in the next few weeks. I am planning on getting them all to fit into the stock location so I won't have any gauges standing out like a sore thumb in my interior. Tach, speedo, oil pressure, water temp, voltage, fuel, and Wide-band.

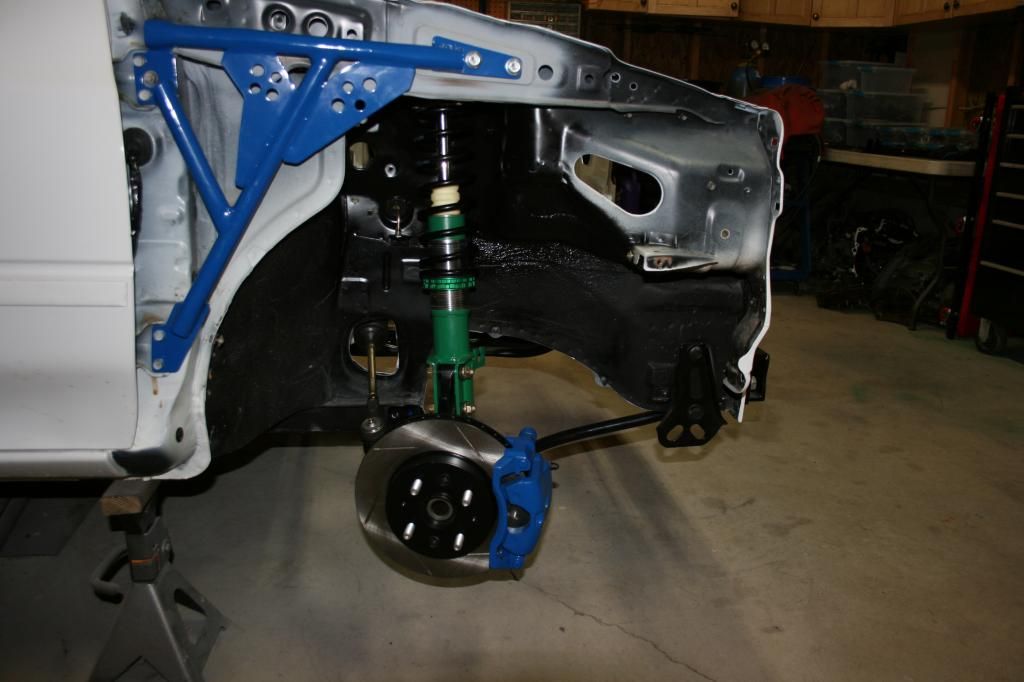
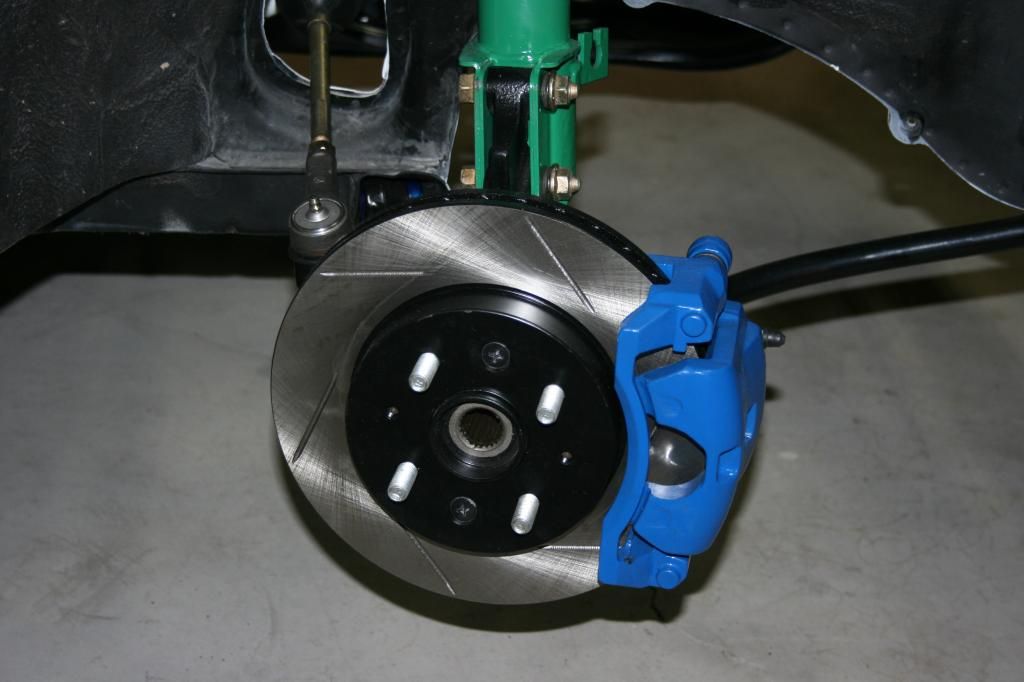
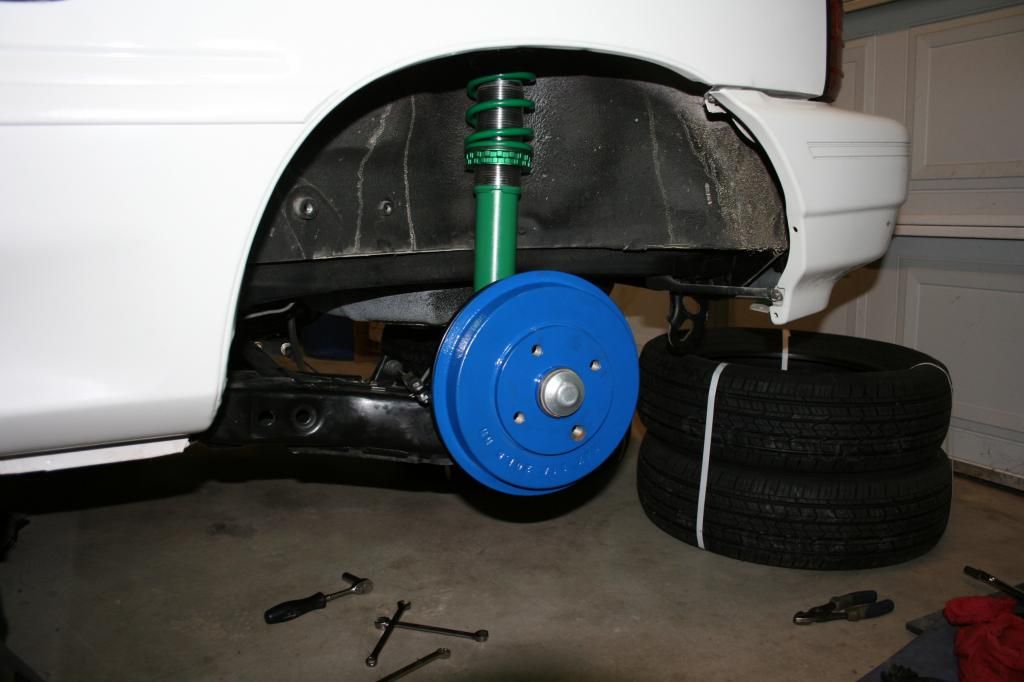
'05 Rio calipers, knuckles, and rotors. Moog control arms with Super Pro control arm to chassis bushings. Super Pro sway bar to chassis bushings and Moog Control arm to sway bar bushings.
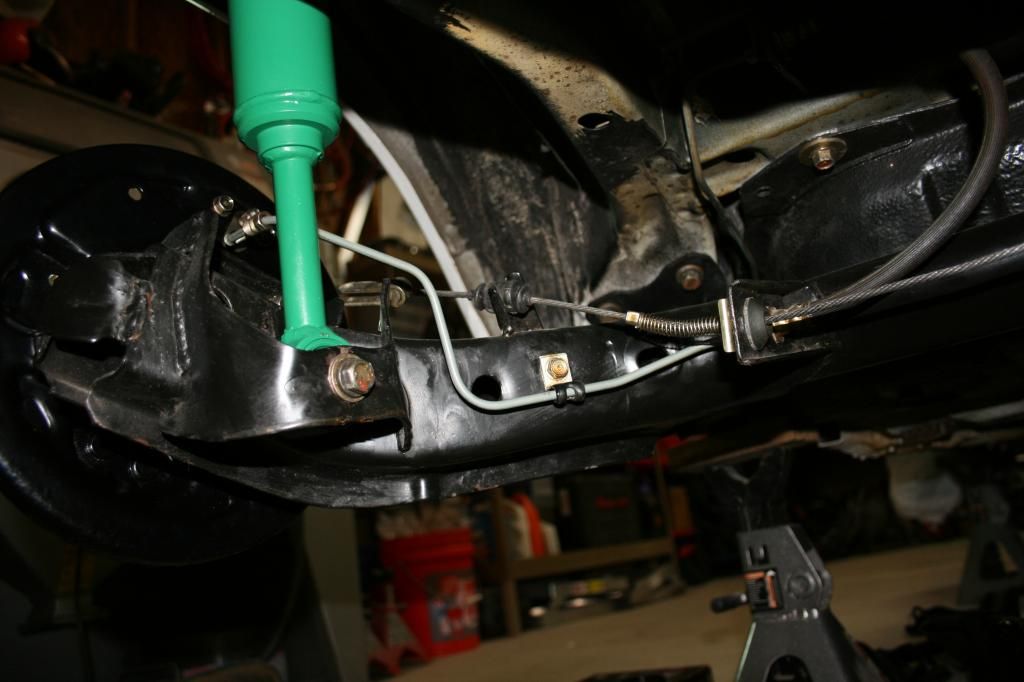
These are 99-02 VW beetle rear strut bump stops. Charlie advised me to cut them top and bottom to give me about 2" between the top of the bump-stop to the bottom of the spring top-hat area. These are pictured uncut.

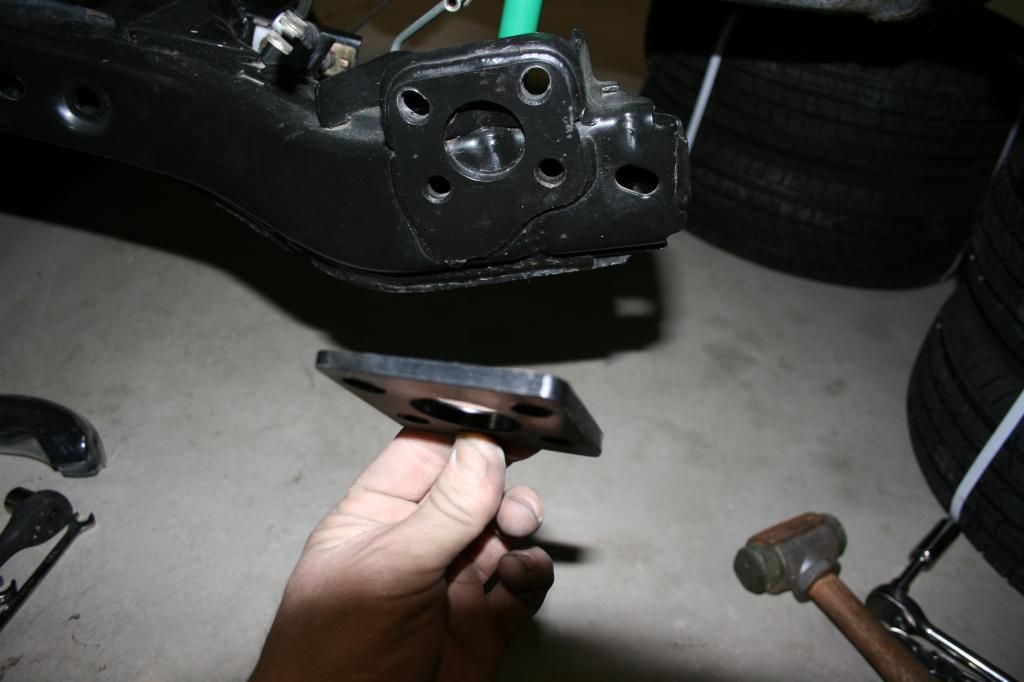
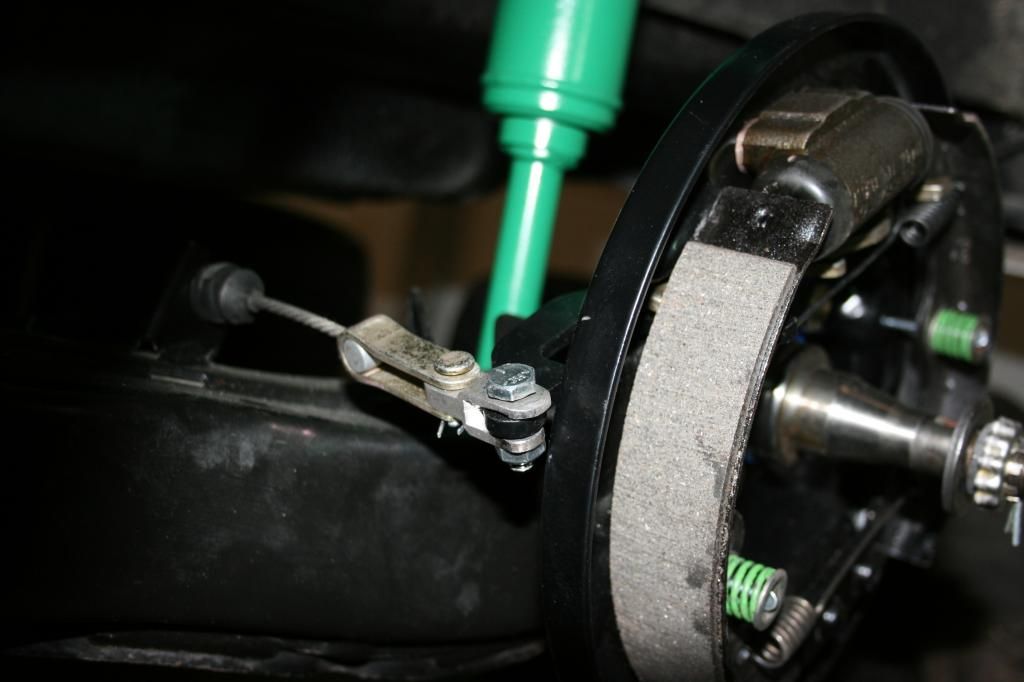
This is an old set of Charlies rear camber/toe blocks. I modified them to fit the Aspire rear brake set-up with the Festiva beam. As you can see the top 2 holes needed elongated a bit to fit. Approximately 1/8".
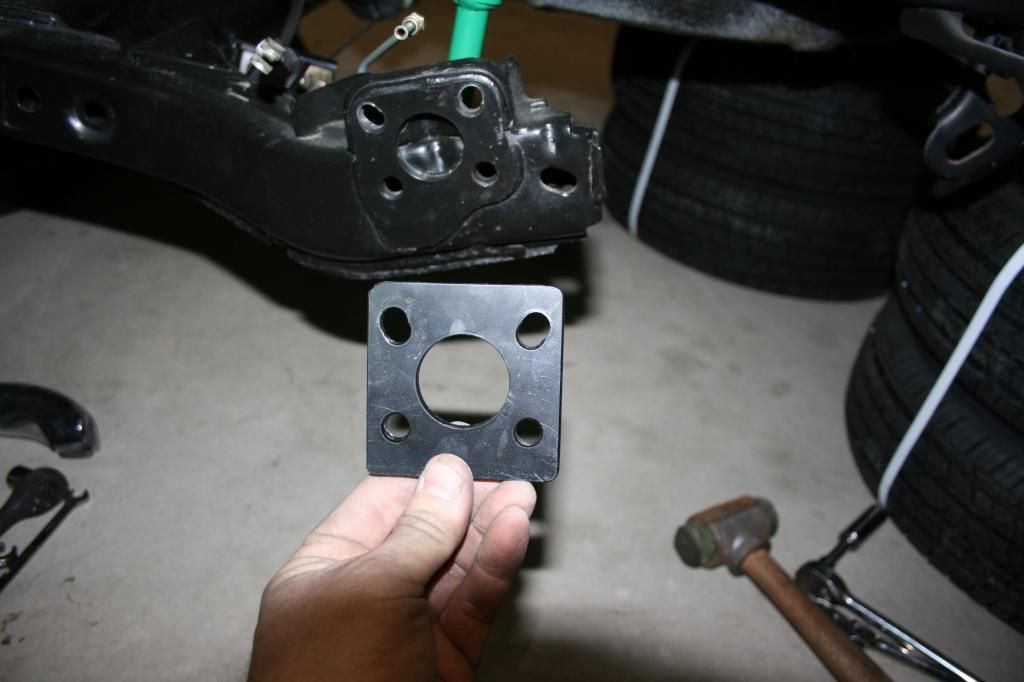
Can't remember exactly the specifics. I hope Charlie can chime in and say whet the Toe and camber specs are. Guessing in the neighborhood of 1.5* ea.

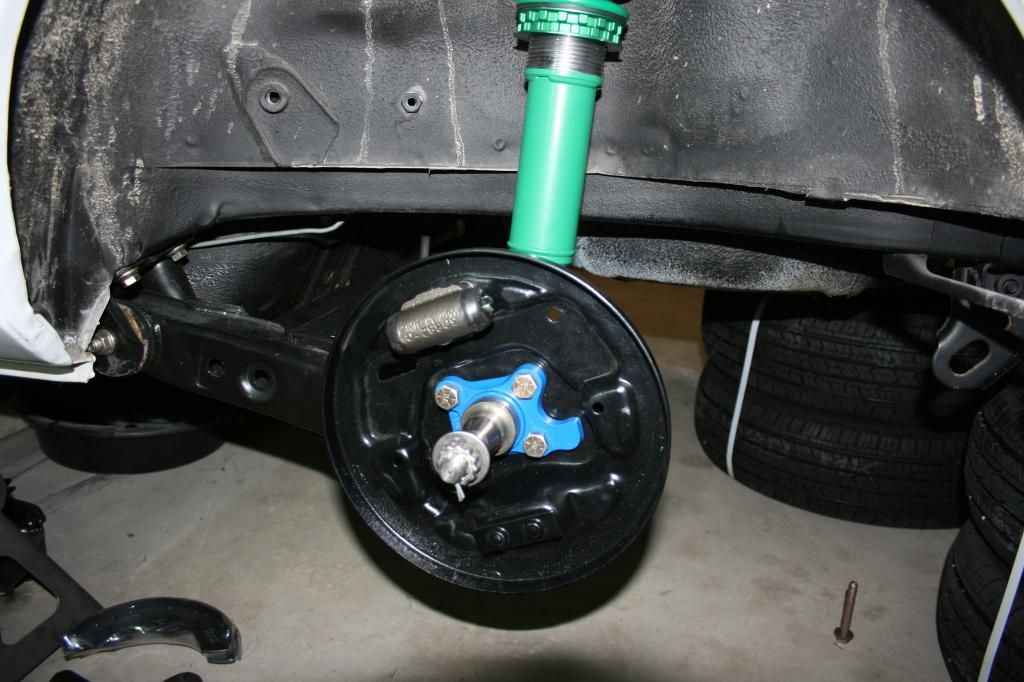
With the camber/toe plate installed the Festiva eBrake cable is no longer longer enough to reach the mechanism.
So I installed these nifty little extensions, also from Charlie. I had to modify them a bit to fit the Aspire stuff but they now fit perfectly and without binding at all.
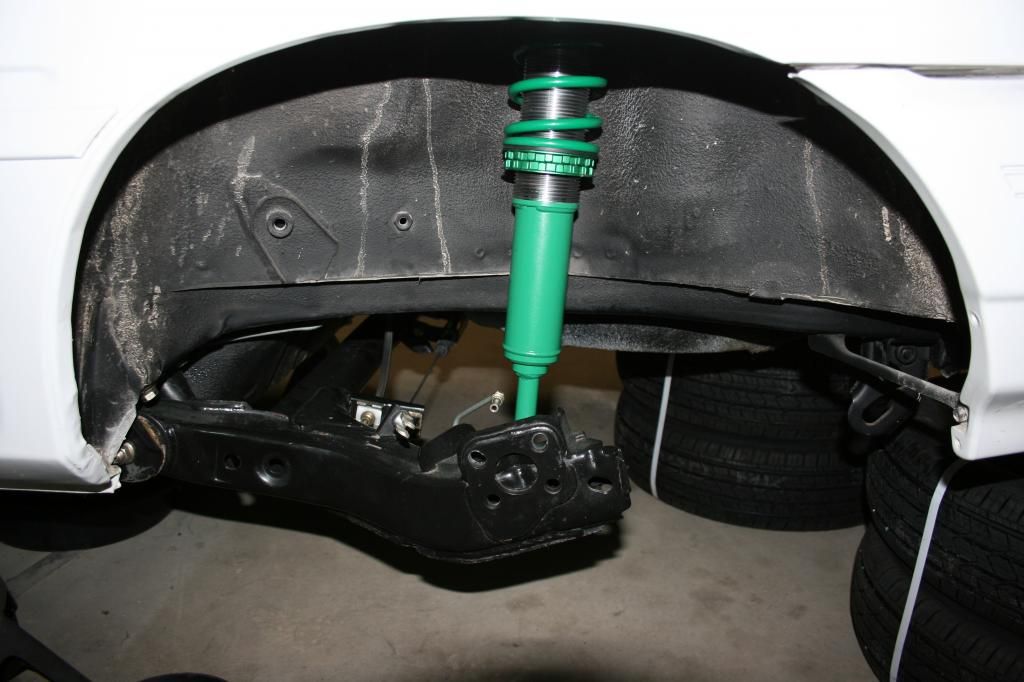
I held the wheel/tire combo up to see where I sit clearance wise. I have approximately 2" between the top of the tire and the fender well. Charlie recommended 1" of static sag. That will allow a nice lowered stance with plenty of suspension travel. I also have studs for the Aspire drums but they are not yet installed.
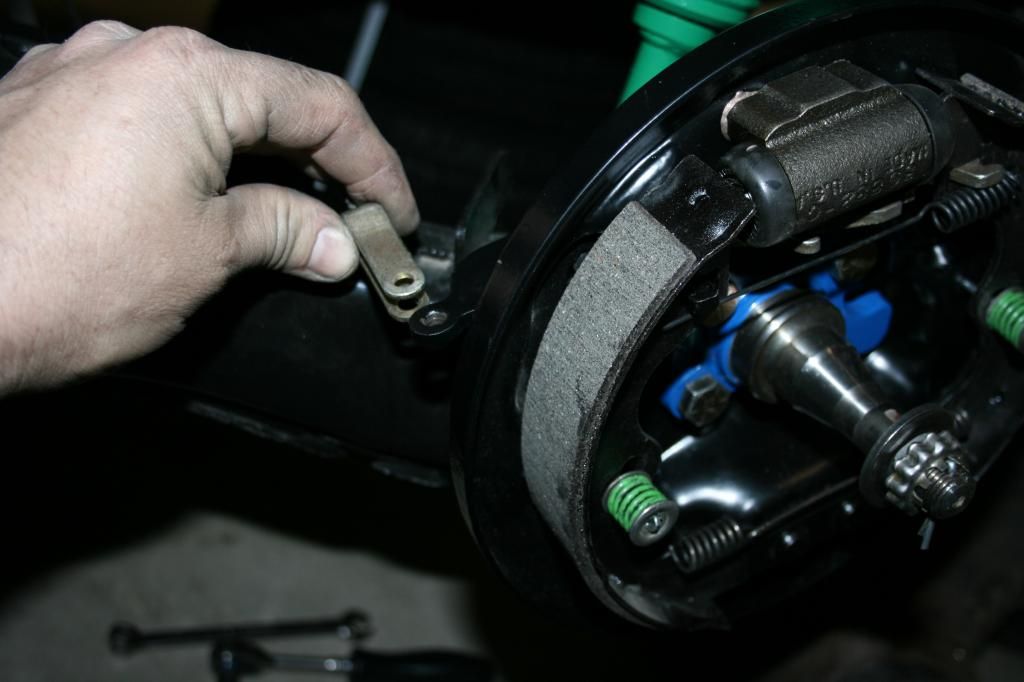
I had to modify the rear brake lines to fit the higher Aspire Brake cylinders. Easy-peasy with this nice brake-line tool. Thanks to Matt (Zoom Zoom) for spending the 2 extra hours with me figuring out how to use it last summer. LOL Now it is one of my favorite tools.
 Last edited by Gomez; 01-24-2015, 10:26 PM.
Leave a comment:
-
So correct about how ever single part can be modified. Great work, and keep them updates coming!Leave a comment:
-
Lower radiator modified to fit in the engine bay better. Plus now It will be a simple 90* bend to fit the coolant bypass tube perfectly.


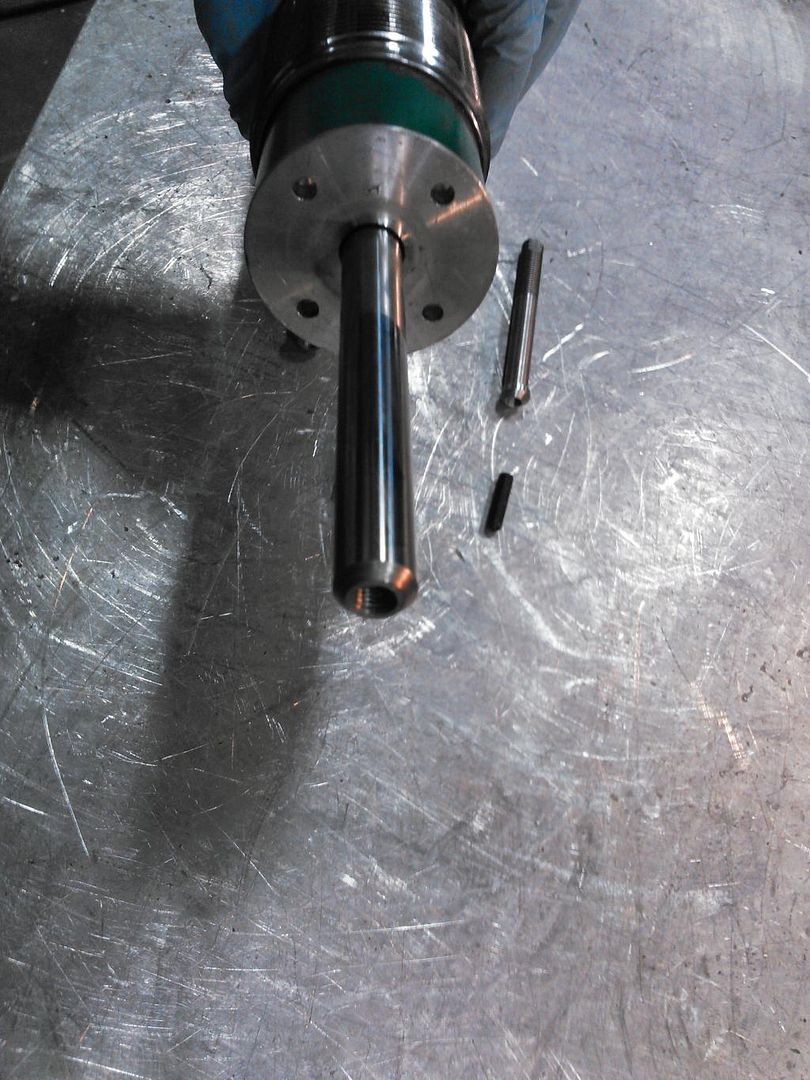
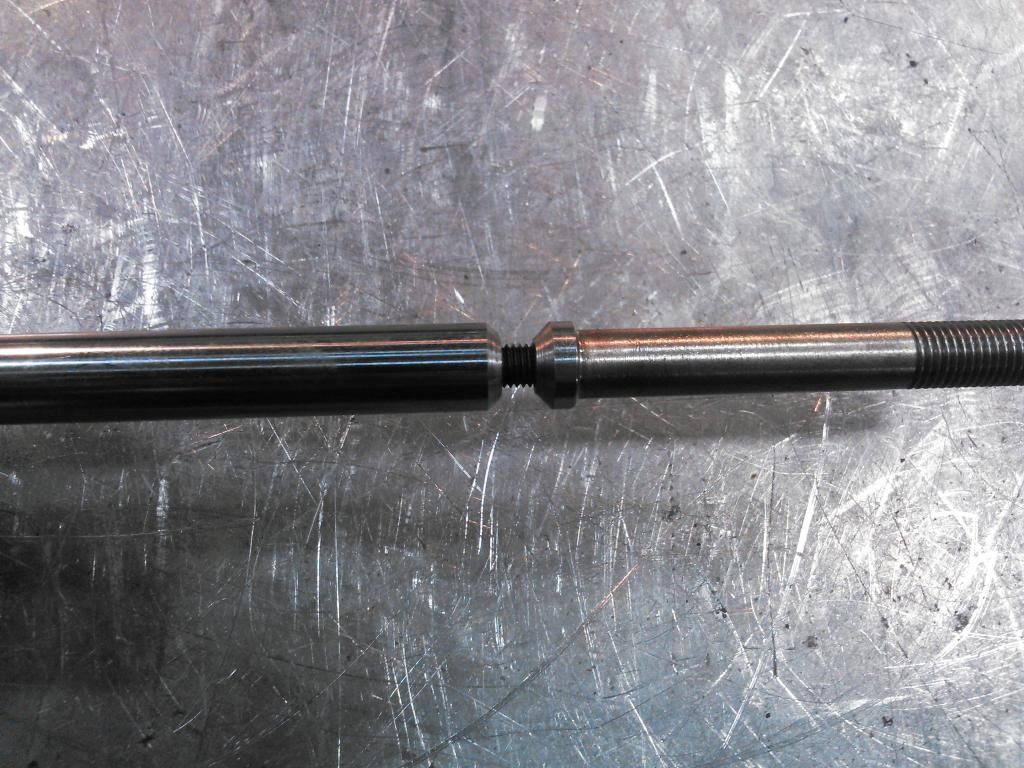
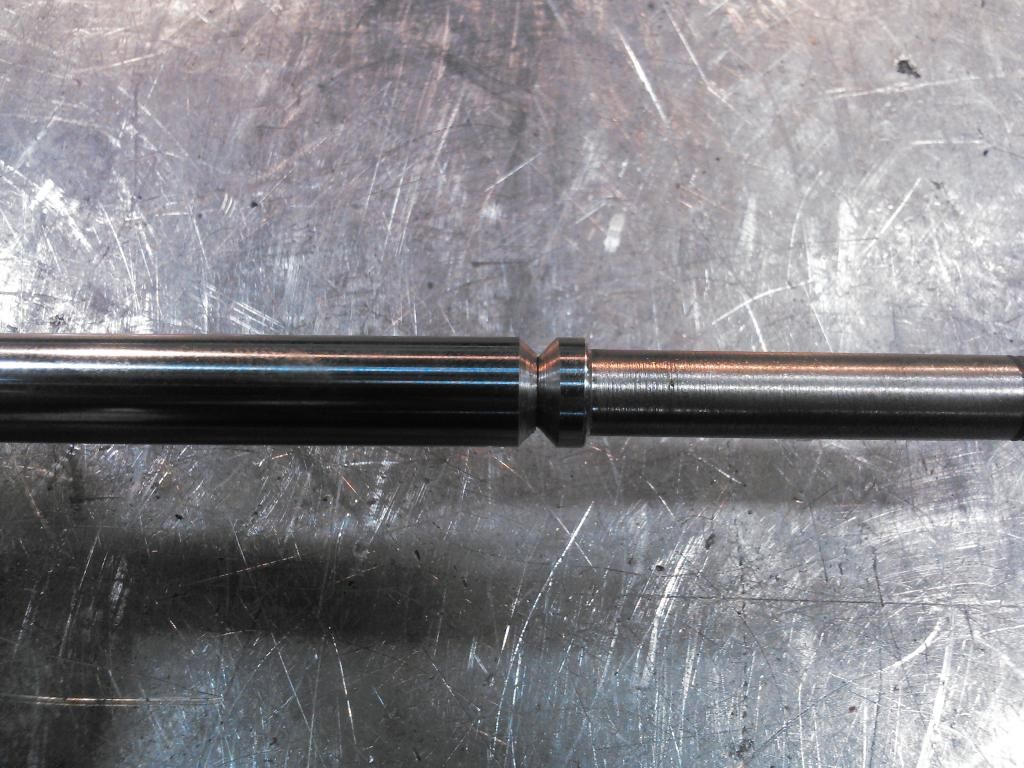
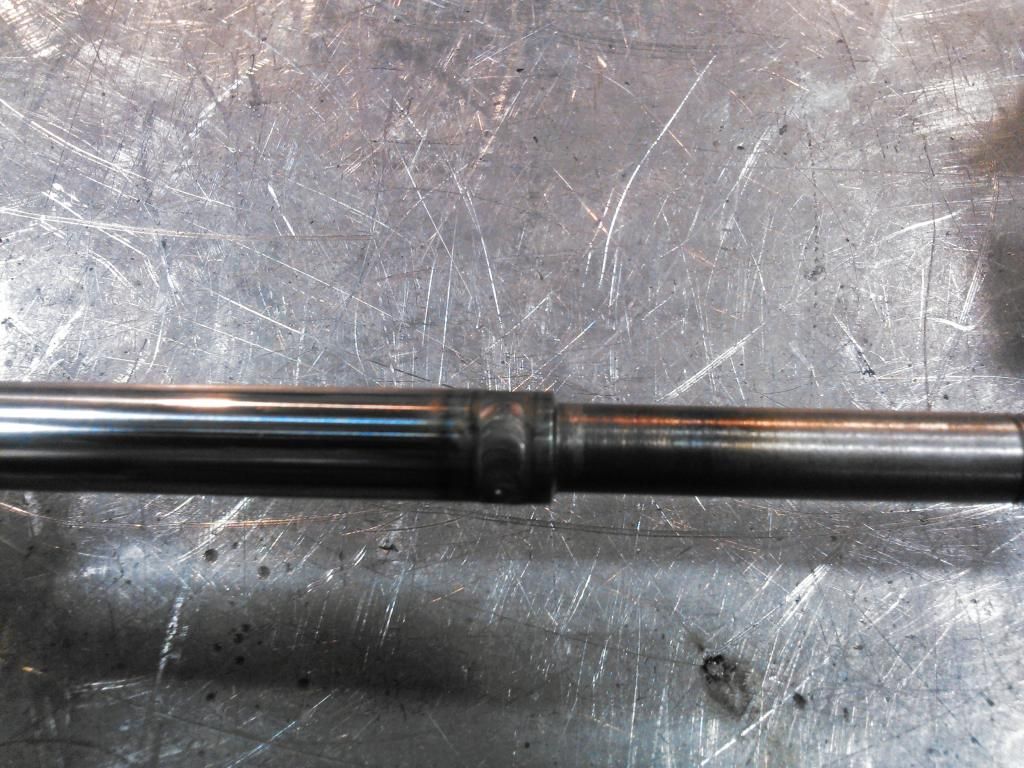
This my rear shock mod in progress. Wow does Charlie do awesome work. He said he shortened them by about 1" and said to set it up with about 1" of static sag. These 2 alone compared to what the stock Festive sags will be incredible. Not to mention the re-valving he recommended me to get done with Tein. I am so pumped to be getting it back on the ground soon. With a bit of extensive questioning to him and responses from Charlie, I have tires ordered. My rims will be getting powdercoated within the next 2 weeks. I am starting to lose sleep from the excitement.
Before I go back to work next week I hope to get the interior back in. At least the carpet and seats mounted. Then work on clutch pedal assy and steering column. It's amazing how much you can mod each and every part of a car when you are trying to customize every aspect of it. SOOOOO much of it goes unseen and unappreciated by everyone but the owner.

Leave a comment:
-
Bryant, amazing work buddy! Your shocks are done and will ship after the holiday. You're going to love the way this car hooks up with that front end mod and great suspension. I know it's hard to keep motivated while doing so much at once, but trust me, it's worth it. The first Festiva I ever drove was Tweak with a B6t, coilovers Capri brakes and the front support mod. The car took a year to build and I had never driven it at all. I started it up, drove it for a week and headed to FMV with it. Wouldn't have done it any other way. It looks like you have a good chance at making madness this year. If this car is going, count me in and sign me up for a ride!Originally posted by Gomez View PostLast edited by Advancedynamix; 12-30-2014, 12:15 PM.Leave a comment:
-
^ That's why I let my cousin do them. She is currently working at JPM Coachworks in Atlanta. They do a lot of high end exotic stuff. She is new in the business but is getting better by the day. She didn't do 100% perfect but I am happy with them for sure.Leave a comment:
-
Wow nice job blending the seats in with the original seat covers. Look great.Leave a comment:


Leave a comment: