-
It's good to have all the little fussy things taken care of. That makes the big steps go quick. This build is way over the top. I'm excited to see this car at Madness.Last edited by Advancedynamix; 04-17-2015, 10:39 PM. -
Been a while since I updated. I have still been doing lots of things on the car. Interior is back in. Door panels are finally done. Seats are finally done. Horn is mounted (Stebel Nautilus compact). I will start all the wiring within the next couple weeks at the latest. I know it will take a while but kinda saving that for last.
Things to finish for the car to be done.
1. fix the one single quarter sized dent on the entire car. I should be able to get it done by one of them "paintless-dent-repair" guys
2. Fabricate the amp rack and sub-woofer enclosure. I already have all of the components. Doing fiberglass inside each of the rear cargo sides to keep it slim and the trunk useable. All components are Rockford Fosgate. 1-8" P3 slim sub and 1-5 1/4" Power series coax in each door. PBR 300x2 boosted rail amp for the fronts and a PBR 500x1 for the sub. Both amps will see a 4 ohm load so the will be very efficient. Each speaker will be overpowered a tiny bit to help keep distortion to a minimum. I'll be right around the 400 watt range. Alpine deck. Plain and simple, the way I have always liked my tunes. Given my experience with audio installs this one should be quite impressive for a 3 speaker getup. Not overly loud. Just nice for some quality relaxing time in my car
3. Mock up my own custom "hidden" hitch. It will be a removable "Quick-Release" set-up for those non towing days. The hitch install may wait til next winter to get done. Just depends on whether I am in the mood to get into it this year. Kinda tired of all the Fabbing I have been doing for this car. This is the least of my worries for now.
4. Paint and mount the wing and swoopies.
5. Finish the BP midshaft mount. I am making my own in the same fashion as what the factory did. I am not so keen on using an adapter so I am making one from scratch. I will probably be making a couple or 4 extras to sell if I am 100% happy with how it turns out. Having a hard time finding someone to do some very simple machine work. If there is anyone here that may be interested in helping please PM me and we can discuss it. Thank you,
6. assemble the tranny. I am waiting shipment of my 3rd 4th and 5th gear sets from MFactory along with the diff. Paid for, just a waiting game now. lol
7. Install engine. It will come to me dyno'd, tuned, wired and ready to rip. All I will have to do is rewire the MSII harness to length and drop it into the car and wire the gauges. All mounts are done and waiting. Basically a plug-and-play engine build.
Believe it or not, that is all I have left to do. I know it seems like a big list but anyone that has built a car understands. This list was probably WELL over a hundred items long to begin with. If all goes according to plan I will have about 2 months to do #7 so I can make the trip to Madness.Leave a comment:
-
You have the patients of Job to do all that fussy work! the results look GREAT!Leave a comment:
-
I had wondered if it was done before. This was the only way I figured I could get all 7 gauges into the stock location plus keep it from looking like an afterthought. Guess I'm in good company
Leave a comment:
-
Not trying to take anything away from Bryant's build but here's another custom instrument cluster built by PhoenixSHO

Leave a comment:
-
Thanks guys. Interfacing is easy. Each gauge us hardwired to its respective sender. The fuel gauge learns the resistance of the sender in the car. Tach is sent from the ecu. Mine is MSII. My speedometer will get it's signal from a gps sender. Oil comes with its own sender and so on with the rest of them. The turn signal and high beam indicators are 12v led's that wire directly to the existing wiring. Nothing is wired yet. I was just anxious to see it in the car. Lol
I have only seen the outside of the shogun cars. I'll look them up this evening if Time Warner would get their act together and get my Internet back on. Ugh!!!!Leave a comment:
-
This is over the top, above and beyond the call of duty, ridiculously awesome!!! Any plans on marketing this plate (without gauges), or other gauge-hole arrangements desired by potential purchasers?Originally posted by Gomez View Post
How is the interfacing handled, as to proper sensor ranges/accurate readouts for speedo/tach, and the auxiliary gauges?Last edited by TominMO; 03-16-2015, 02:04 PM.Leave a comment:
-
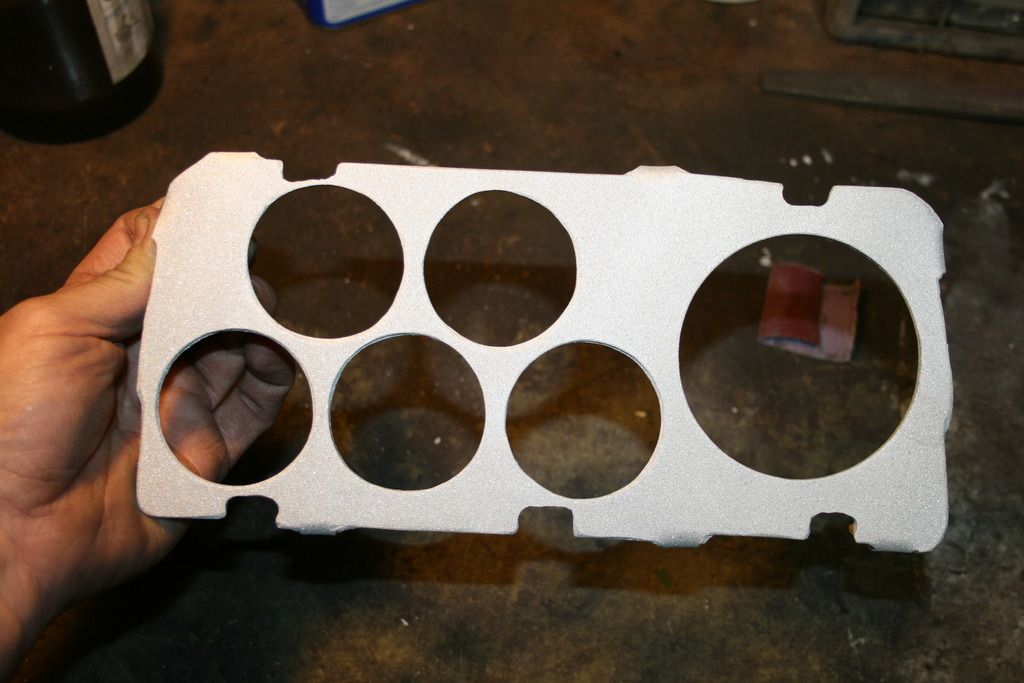
1/8" aluminum blasted and ready for powdercoat
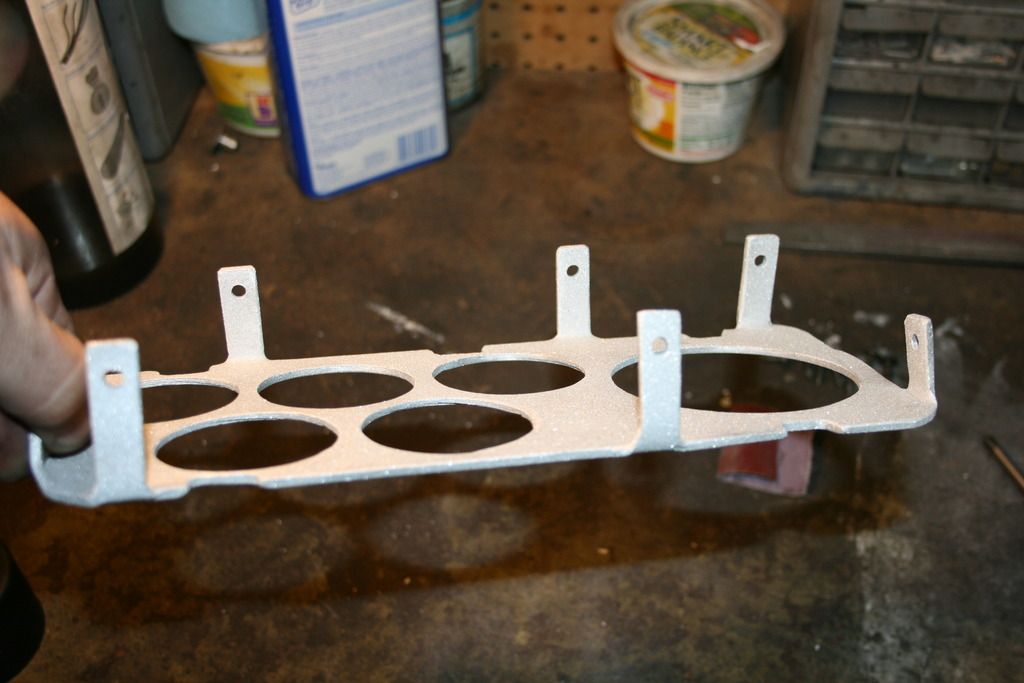
Tabs for mounting to the old cluster
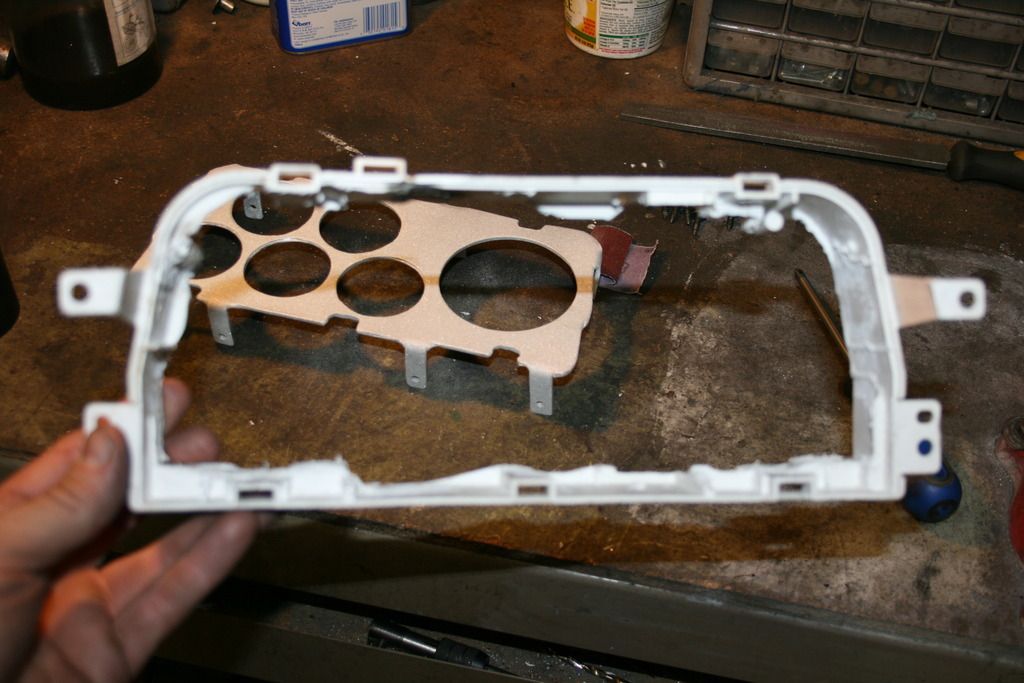
Stock cluster with ALL of the guts removed
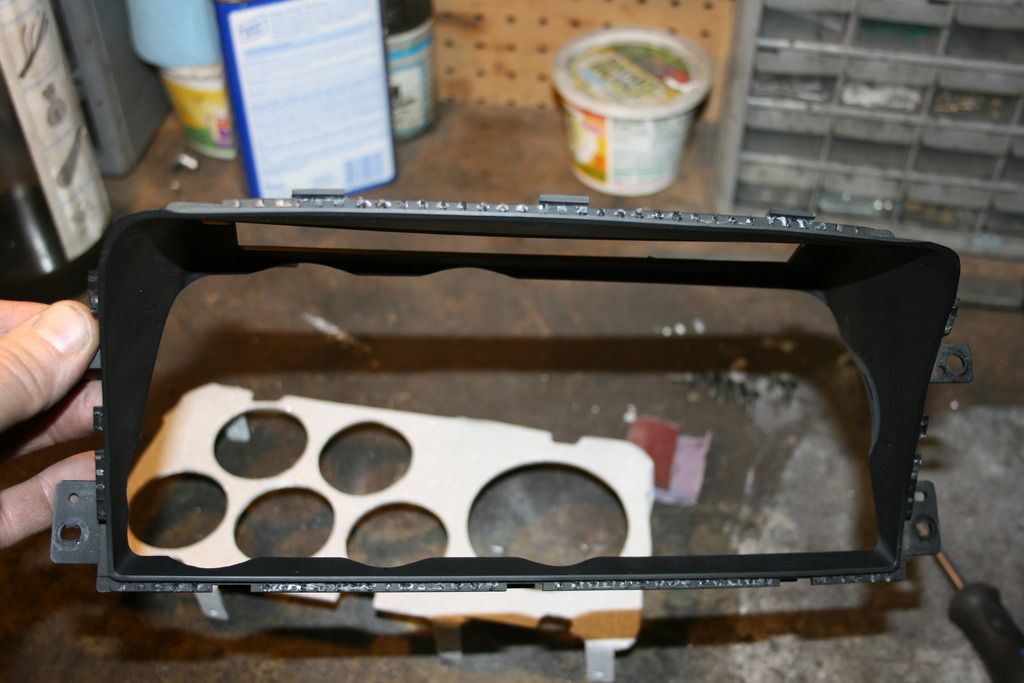
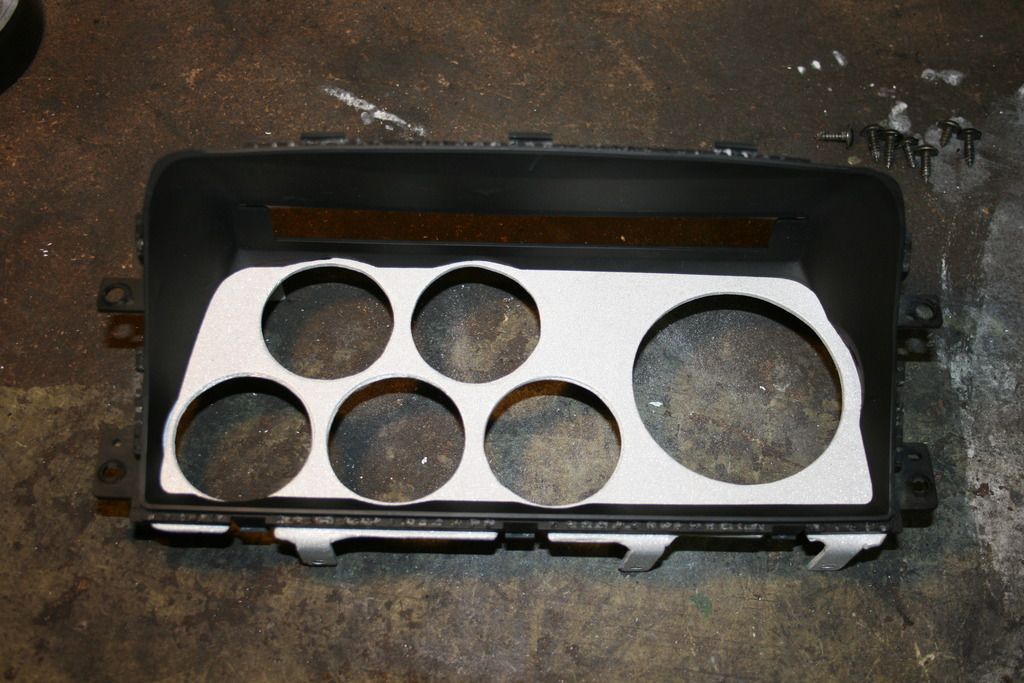
just a quick coat of satin paint. The powdercoat will fill-in the roughness from blasting. I am thinking I will go with a flat black to keep glare down. I have a set of 12 volt led indicator lights. L & R turns and high beams. They will go on the outside of the 2 top gauges. No power yet though.

Leave a comment:
-
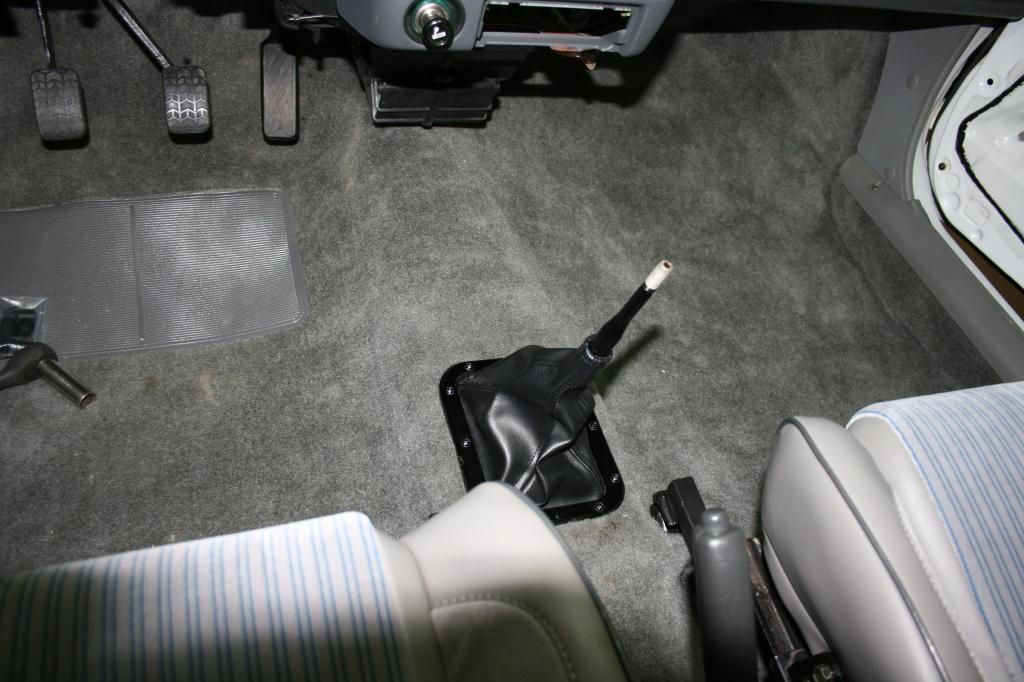
I got the shift boot done. Had to make a trim ring for the underneath of the carpet. Using machine screws I was able to cinch the outer ring and the inner together with the boot sandwiched in between them. It is solid and looks better in person than the pics. The shifter itself is shortened by 1 3/4" up top and lengthened by about 1/2" to 5/8" or so on the bottom. Can't remember.

Leave a comment:
-
Looks great Bryant. I've got a non tach cluster that you can have for free. The only catch is you will need to remove it from my parts car.Leave a comment:


Leave a comment: