 Tweet
Tweet
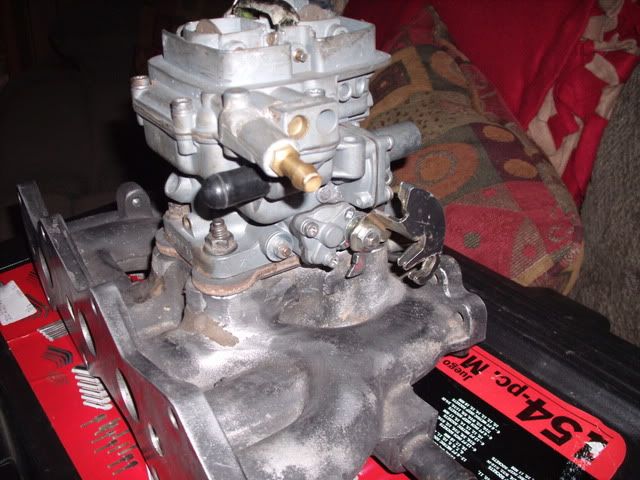
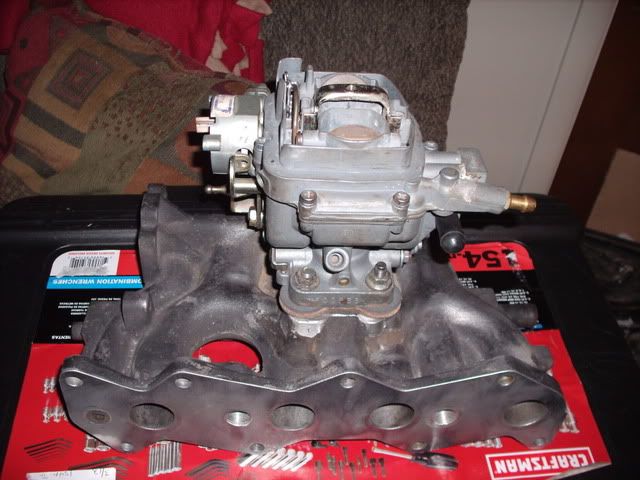
Installing a Weber style carb. with a modded intake with no pcv connection...
I know, there is already a thread or two, or 12... Probably already answered, but I am really baffled on this!
I am stupid / a newbie when it comes to carbs / vacuum lines. I know, and I'm sorry to put you through all this. In the posts I read, it says to just remove all the hoses except the disty vac lines and obviously the fuel line. Well, I can't imagine removing THIS many! I mean I don't know where they go, or what they do, or how to remove them or anything. I am sure someone else out there will need / appreciate all the information you guys / gals can give me as well. I have included some pictures pointing out what is in question. Pretty much everything vacuum or fuel related looking... Please be as detailed as possible. Please don't just say, "Yes, you can cut that off." Please tell me what it goes to, and the method of removing it as to not cause any issues. This thing has been broken down for too long, and I am finally able to tinker with it a little.
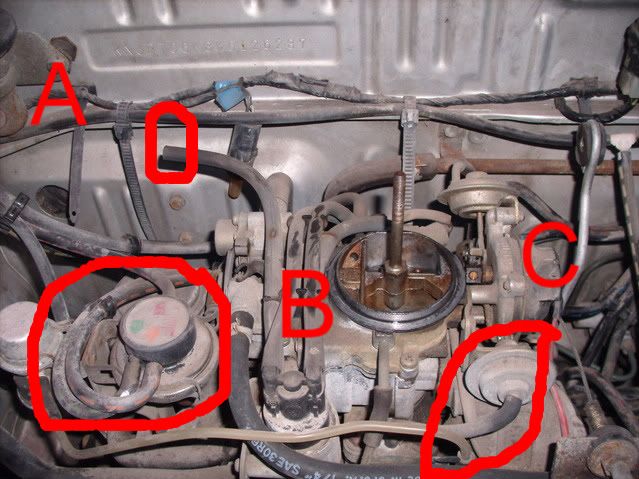
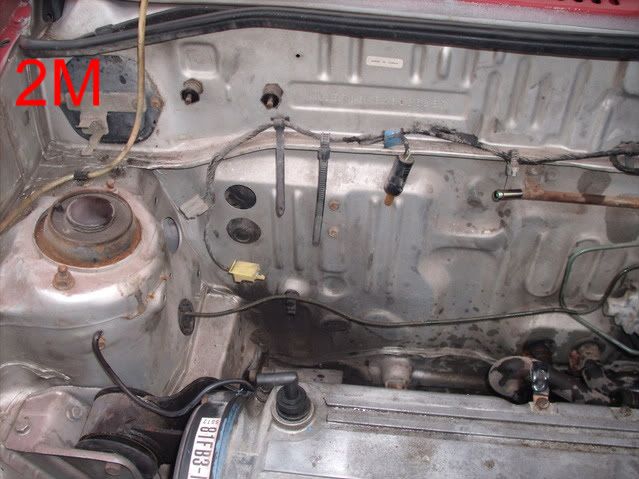
A= vacuum line going to air cleaner / breather... Not using the same breather, so I don't figure I will even need to worry about transferring this to the new carb.
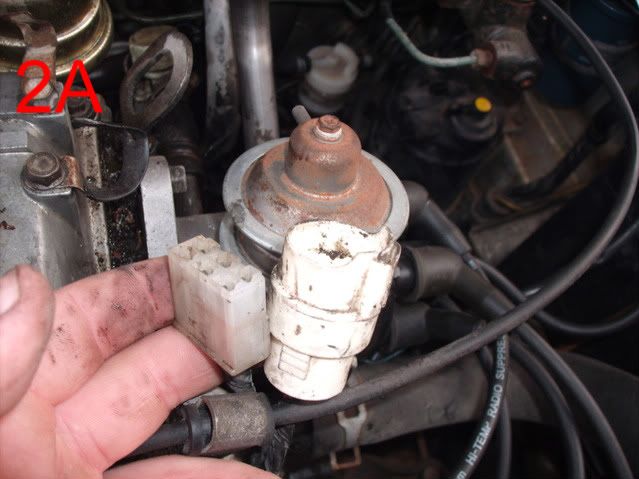
B=What in the heck is this, and do I need to keep it? If I can get rid of it, where do the lines go, and what do I do with them or what they connect to?
Just under the letter B, same questions.
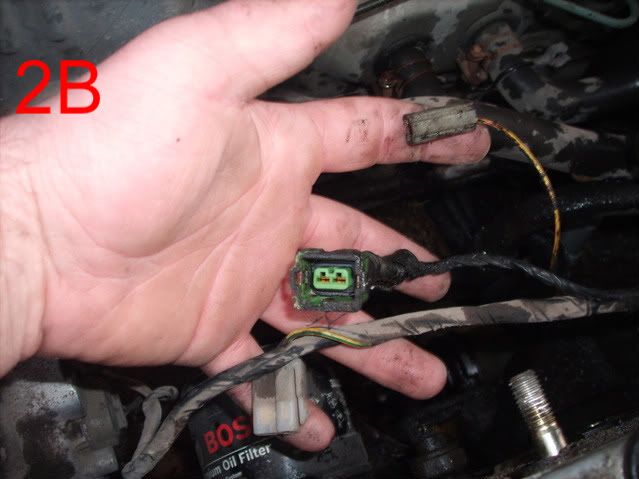
C=Same as B.
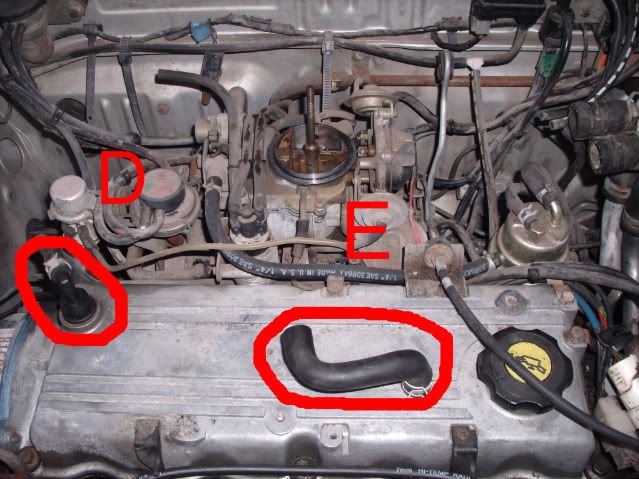
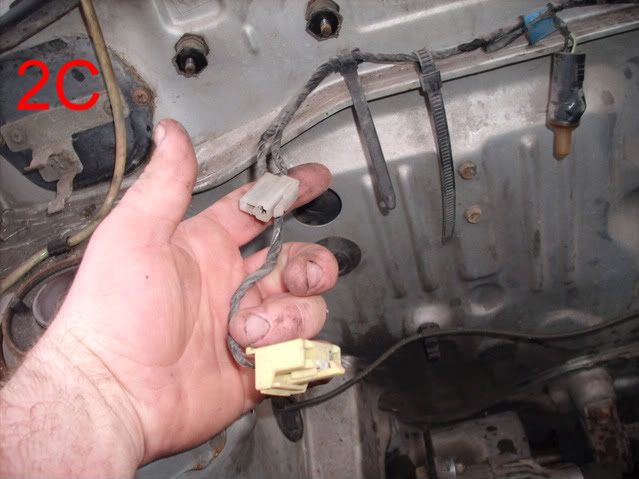
D=PCV valve, I know that, but I am going to run without it. What did everyone else do to this step?
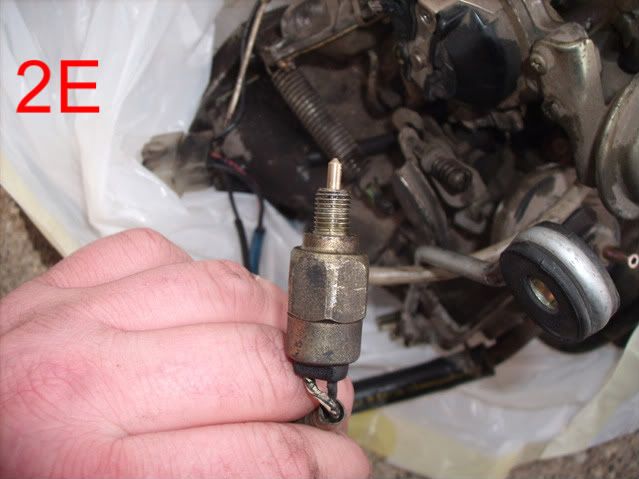
E=Tube that went to breather I'm not using. I have seen some pics on here that a few of you guys have put on with some kind of filter looking thing in that hole. What is it, where do I get one, how expensive... etc... With that, would I still need something for the PCV, or would I just plug the hole?
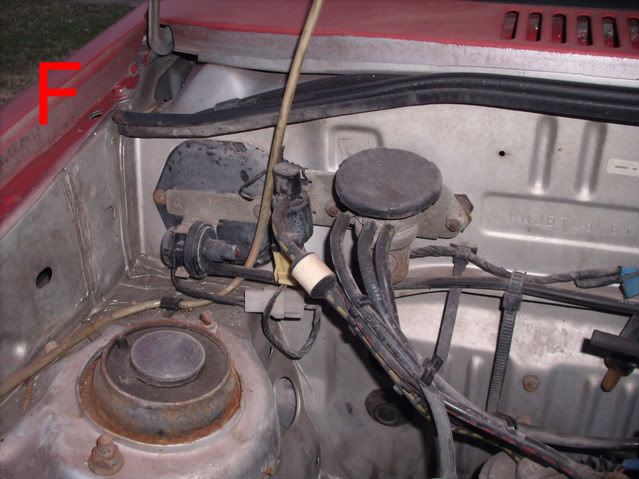
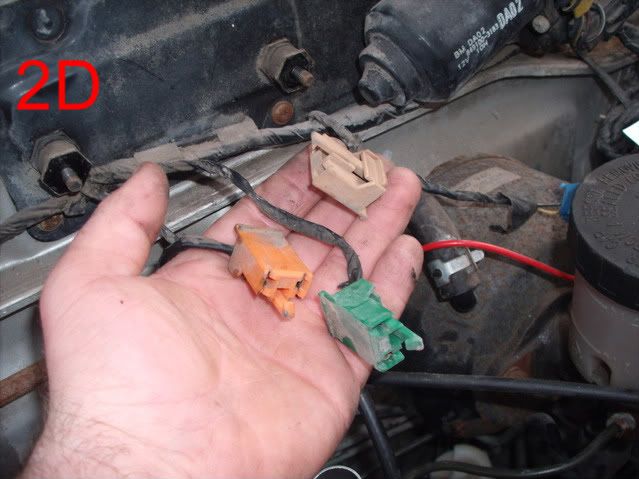
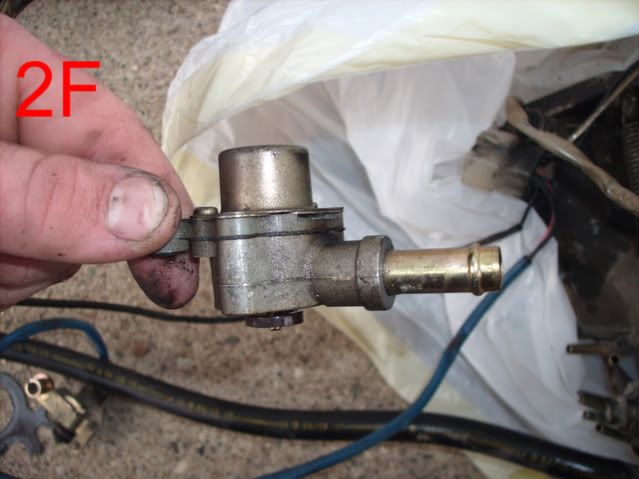
F=The whole picture is F. What is all this, and can I remove it?
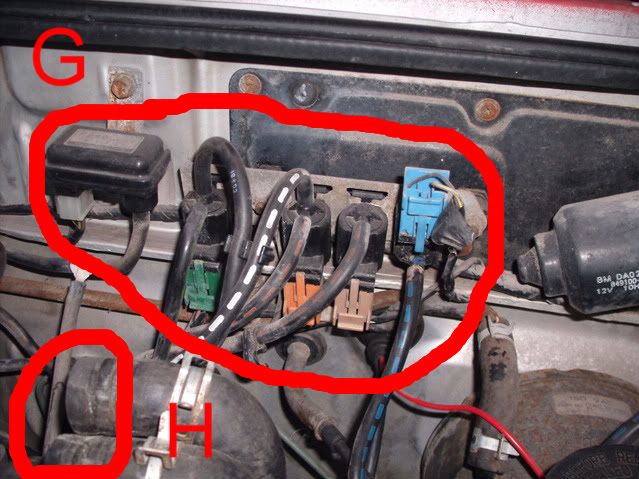
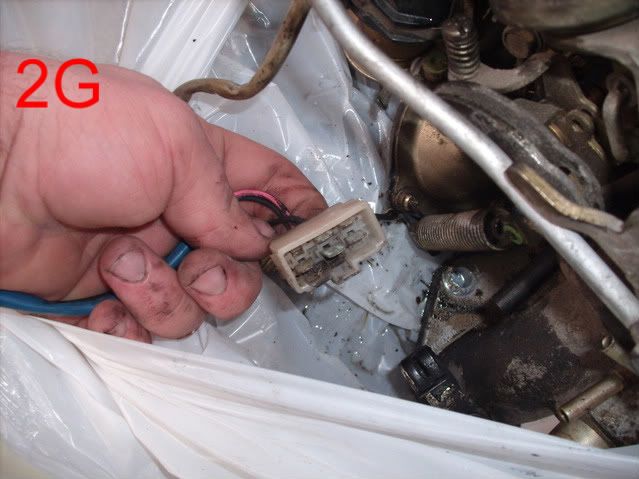
G=Same as F.
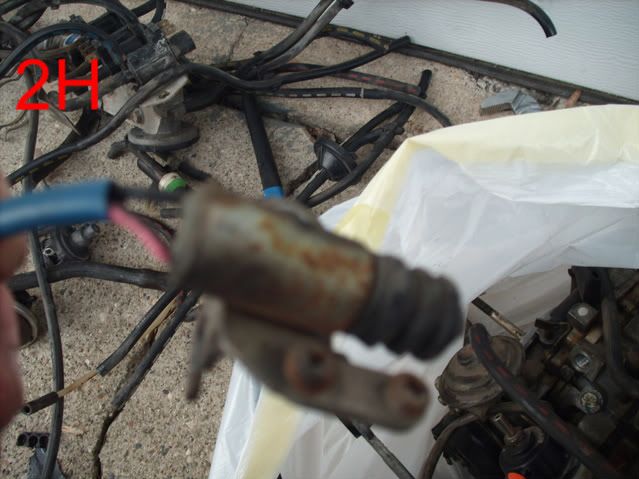
H=These went into the thing(?) on the side of the old breather. Do I need these? Can I remove them, where do they go, do I plug them off, etc...?
Also, how much play should be in the throttle cable? I can remove it from the arm quite easily without moving the arm or applying much pressure to the cable. Should it be adjusted? If so, how should I do this, and how tight should it be?
Edit: Sorry about the size of the pictures, on photobucket it said resized, but some are still larger than others.
I know, there is already a thread or two, or 12... Probably already answered, but I am really baffled on this!
I am stupid / a newbie when it comes to carbs / vacuum lines. I know, and I'm sorry to put you through all this. In the posts I read, it says to just remove all the hoses except the disty vac lines and obviously the fuel line. Well, I can't imagine removing THIS many! I mean I don't know where they go, or what they do, or how to remove them or anything. I am sure someone else out there will need / appreciate all the information you guys / gals can give me as well. I have included some pictures pointing out what is in question. Pretty much everything vacuum or fuel related looking...
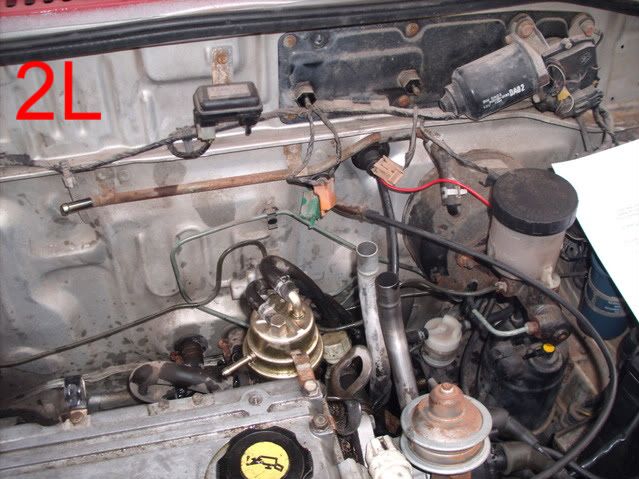
Please be as detailed as possible. Please don't just say, "Yes, you can cut that off." Please tell me what it goes to, and the method of removing it as to not cause any issues. This thing has been broken down for too long, and I am finally able to tinker with it a little.A= vacuum line going to air cleaner / breather... Not using the same breather, so I don't figure I will even need to worry about transferring this to the new carb.
B=What in the heck is this, and do I need to keep it? If I can get rid of it, where do the lines go, and what do I do with them or what they connect to?
Just under the letter B, same questions.
C=Same as B.
D=PCV valve, I know that, but I am going to run without it. What did everyone else do to this step?
E=Tube that went to breather I'm not using. I have seen some pics on here that a few of you guys have put on with some kind of filter looking thing in that hole. What is it, where do I get one, how expensive... etc... With that, would I still need something for the PCV, or would I just plug the hole?
F=The whole picture is F. What is all this, and can I remove it?
G=Same as F.
H=These went into the thing(?) on the side of the old breather. Do I need these? Can I remove them, where do they go, do I plug them off, etc...?
Also, how much play should be in the throttle cable? I can remove it from the arm quite easily without moving the arm or applying much pressure to the cable. Should it be adjusted? If so, how should I do this, and how tight should it be?
Edit: Sorry about the size of the pictures, on photobucket it said resized, but some are still larger than others.


Comment