Today I took a spare fuse block to see how easy it would be to get the terminals out. The single terminals were a piece of cake. There is one double socket and three triple socket connectors. I could not get any of them out.
Is there a special extractor for fuse blocks? Or am I just going to have to buy three cheap terminal extractor sets and make my own special tool by drilling and mounting three tines the same exact distance apart?
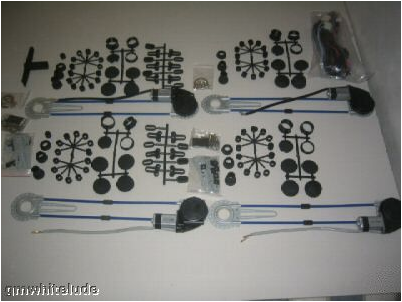
I am practising to swap in a Kia Pride fuse block.
It has the extra circuits for power windows, power locks and power antenna.
-
I installed a set like this in one of my Festivas too. Didn't grab it from EBay though. It worked really well, except for when the one plastic gear stripped out because it wasn't tightened down properly. I stuck some plastic weld stuff that got rock hard in the stripped plastic piece and that's the last I ever had to touch it.Originally posted by crazyrog17 View Post
I stuck the power window buttons right over top of where the crank hole was and it covered it fine. Wasn't quite OEM looking... But it worked fine.Leave a comment:
-
Germany
The hole spacing on side windows of the German Prides is the same as ours. That is where I got the replacement motor.
I don't know where Freshtiva got his Power Window kit, but I think it's from the United Kingdom. The switches are on the door handles.Last edited by bravekozak; 12-28-2010, 09:07 PM.Leave a comment:
-
tweeter covers
I have decided to put some tweeter covers over the window crank holes. Should I get the Acura, Kia, or Firebird tweeter covers?
I had to punch the hole in the drivers door panel to 1-1/4" for the larger power window switch connector to pass through on that side. I have a set of Mazda RX-7 speaker covers. I installed the plastic door speaker retainers and screws in anticipation of future installation. I may not be able to afford them if gas is going up 60% in the next year.
Someday I may be able to afford some black leather door panels.
The best thing about Festivas is the door panels are dead flat. You could almost cut them out of some nice heavy plastic and toss the warped fiberboard panels. Tweeter and speaker covers with nothing in behind!Last edited by bravekozak; 12-28-2010, 05:22 PM.Leave a comment:
-
schematic needed
Since the Pride power window controls in the door handles came from England, they were meant to have the master control switch for both windows on the right hand handle.
Since I swapped the master control to the left hand side, when you pull up on the L/H control lever, power goes to the tan wire to the other side. Obvoiusly, I will have to release a few terminals and reposition them in the connector. I politely asked Kia U.K. for a schematic for the power windows, and Vijay says he doesn't deal with overseas inquiries. I politely told him that Kia North America told me to contact the United Kingdom since Prides were not sold over here. I am waiting for his response.Leave a comment:
-
Installed the LH power window winder yesterday. Tested O.K. both up and down. Now to remove the dash to join the connectors underneath both sides of the dash. I will be using the split loom to contain the wires. In my opinion its too much trouble to wrap the wires in electrical tape.Leave a comment:
-
hole punch
Used a couple of hole punches on some blue striped door panels. I am now ready for the long arm rests. I just noticed that the connector for the power mirror is the same (7 pins) as the connector for the drivers side power window. Just waiting for the drivers power regulator to come from Germany. Mirko got a large number of additional parts off the Kia Pride he was parting out.Last edited by bravekozak; 10-21-2010, 05:05 PM.Leave a comment:
-
correct
I believe power seat belts were only available in the U.S.
All the door latches were wired so that the belts would cycle when the door was opened or closed. You would have to maintain this wiring if you were doing a power window install stateside. I prefer manual belts, that's why I cut my tracks and am going with power locks, instead.Leave a comment:
-
I'm assuming it's just a switch to sense if the door is latched for the power seatbelts.
I was dumbfounded by my girlfriend's 323 on how it knew the doors were open if I was pressing the door jamb switch and the belts weren't moving. I figured the switch must be in the latch then.Leave a comment:
-
almost
The small connector was for the power mirror. I am installing power locks at the same time. The stock Festiva door latch has an empty hole on the tab closest in. That is where I want the rod to go. I would prefer the bottom hole. I will have to move the other rod up a half an inch. I searched under "Mazda lock actuator" to find that the wire colours were red and green of the same gauge. I did not think it was for the unused connector on the latch mechanism. Those wires are red/green stripe and green/orange stripe.
I am not sure, what's under the rubber on top of the latch. A magnet? Is it supposed to sense if the door is ajar? Does anyone know the answer?Last edited by bravekozak; 10-02-2010, 07:41 PM.Leave a comment:
-
solved
The kia power window wiring harness has two wires for power door locks. It is identified by a red and a green two wire connector. Therefore, I have changed my mind and will not be installing the Ford power door lock kit. Instead, I will install Mazda Protege or 929 power actuators and use a single Kia power window switch ("L" for locks) to control the locks. This will take up my last dash switch plate position, beside the power antenna switch. This will avoid cutting holes in the door panels. I have purchased colour-coded bulk AWG wire on the Bay + Eastern Beaver connectors to complete the install.
I still have to decide what to put in the one inch holes where the door handles use to be. Maybe some plastic pipe caps and paint them grey?Last edited by bravekozak; 10-02-2010, 09:06 AM.Leave a comment:
-
You better have a thread full of pics of this whole process! Can never have too much of a good thing.Leave a comment:
Leave a comment: