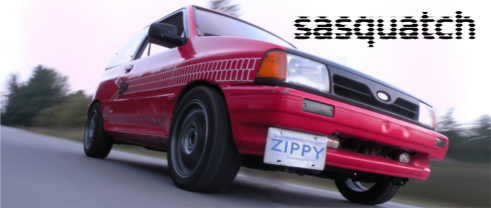
Announcement

Collapse
No announcement yet.

Aaron's Festiva Build Thread

Collapse
X
 
  • Filter
  • Time
  • Show
Clear All
new posts

  • #16
    festiva

    you have done an outstanding job cleaning that baby up! congrats
    Never Hire a Boy to do a Man's Job!!

    Comment


    • #17
      Originally posted by eurotiva View Post
      I'm kinda partial to solid colors, mine used to have black bumpers.
      I'm gonna try and track down one of our photoshop wizards and see what's what. That's the best way to do it I think.

      Originally posted by kumalaba View Post
      you have done an outstanding job cleaning that baby up! congrats
      Thank you, sir/madam. My next exterior plans are to get an early grill (I'm not doing the modified one, just the early stock one to get rid of the "Ford nose", adding Sasquatch's side moldings, and then paint... and lowering next year - if you consider that exterior. The car sits far too high... my Aspire springs are giving me a hair of positive camber. Might throw on some Miata Daisy wheels as well, because I really love the weight and conservative styling. Aggressive wheels don't really do it for me on these cars.

      I might get a new hood... mine's starting to rust up a bit. I'd like to do some very stealthy hood venting - you'll find an example in the aero thread by Sasquatch about the diffusers. I need to re-do my driver's headlight, as you can see it's fairly foggy. My decal is also starting to deteriorate, so it's time for it to disappear. Sad to see it go, but whatever. I'm going to try and work with Freshtiva in the near future to get a custom set of decals that match my new pinstriping, because I think he makes them... That way, I can have a cool red/white/black scheme.

      Essentially, I'm shooting for an early style "L" exterior - smoothies, early grill, non-matching bumpers, no spoiler. I want it to look all original, but still have enough little trinkets here and there to look like a unique and attractive car.
      Last edited by Aaronbrook37; 08-11-2010, 09:24 PM.
      1988 Chevy Sprint Turbo 997cc

      Comment


      • #18
        Today I got the oil changed and I "cleaned" my climate control a little bit. All three of my control switches/cables were sticky, and I was successful in cleaning and lubricating two of them. My top selector (aka where the air blows) is still a lot firmer than I would like, but I'll get around to that later.

        I'm going to be heading out next week to visit Sasquatch, and we've got a few goodies here and there planned. I don't really have much else left to do other than routine washing and cleaning, so the next update will probably be from Sasquatch country!
        1988 Chevy Sprint Turbo 997cc

        Comment


        • #19
          Nice clean up. As stated above the bumpers look great!
          The H.A.M.B.
          http://www.jalopyjournal.com

          Comment


          • #20
            1988 Chevy Sprint Turbo 997cc

            Comment


            • #21
              Originally posted by Aaronbrook37 View Post
              I think the bumper paint would be an unusual yet cool looking two-tone, but I dunno... plus that way I don't have to steal Fred's idea. Unique is never a bad thing!
              I don't mind if you do what I was doing on my old festiva! If you like that look, go for it That car never got finished anyway sadly so you'd be the only one here with that paint scheme.
              -93' L BP swap/e-series, coilovers, RIO front swap, redrilled festy drums, Miata 14" 7 spokes.
              -88' Mazda 323 SE, work in progress..
              -85' Nissan Sentra 5 spd.

              Comment


              • #22
                One of the last remaining issues I wanted to address with the performance of my Festiva was chassis stiffness. Though I had the Aspire swap since I bought the thing, it just wasn't grounded well enough, and there was far too much body roll. Granted, it does sit high... but I wa looking for other solutions to these problems. Picked up some wide side moldings, so I'll get them all installed pretty soon once I match them up to my bumpers and such.

                So headed off to visit the great people/wisdom of Sasquatch Racing yesterday. Needing a few small trinkets here and there, we hit up a handful of local junkyards. Saw in total roughly a dozen Festivas and a half-dozen Aspires. Got a total score on a 26mm Swaybar off one of the auto ones. Scoreeee... fit like a glove, as expected. This was the first of three (four) major suspension upgrades that we worked on, and we did some sea-sickening swerve-based testing to evaluate the car's new-found traction, grip, and roll characteristics after each upgrade. I didn't include any intentional pictures of it because we didn't put in any fancy bushings or anything... you've all seen them before. I loved the front swaybar - it made a serious difference, perhaps the strongest of the major suspension tech from yesterday's work.

                Our next pursuit was to emulate a Leapin Racing mod... the legendary threaded rod rear swaybar. This applies to all Festiva AND Aspire rear beams.


                At a shop local to Sasquatch's house, we found a place that sold 5/8" threaded rod in 10ft lengths, so we simply cut it in half to get it home. You'll also need 4 nuts, or 5 if you're paranoid like me. Obviously, wrenches and a hacksaw are going to be needed. The cut is made at 4 Feet 1/2 Inch.


                Do a mock up with the rear end jacked up and you'll see what you need to do. 10' is almost perfect in terms of length - for both of our cars! We were pretty excited to say the least. The only actual muscle-work you need to do is to get the passenger-side brake bracket out of the way, since it impedes the install.


                There's less clearance than there is without the rod (obviously) but it seems to fit without too much trouble. For anyone who avoided rear spacers by using Aspire struts or cutting perches, you may need to test this to be sure. Mike will let us know how his fits. This made a fantastic difference in terms of turn-in as well as rear stability. It's not too strong to mess with the function of the beam, but really enhances it's rigidity. Highly recommended for both Festiva and Aspire rear beams, both for daily drivers and especially for autocross/racing/etc. Shouldn't cost you more than $15-20 for everything to do a single car.


                Our third major suspension tech project was to tackle the question of lower tie bars - some may know these as control arm beams. We didn't have a large enough supply of steel (not to mention the time needed for design) to work out details for a front upper strut bar, so we tried the front lower instead haha.

                We picked up this 1" steel pipe, picked after evaluation by our beefyometer - aka trying to bend it. It was of a decent thickness, and is certainly superior to the sorts of stuff I see others using - hand-bendable electrical conduit comes to mind. The thing that makes this design difficult is that the fronts of the frame rails (aka where the control arm bolt goes in) are not completely flat, so hammering out (pun intended) the mounting ends requires a little more precision/testing. To simultaneously bend/reinforce the pipe, we welded some slice-cut and bent portions of the pipe. AKA cutting out a pizza-shaped portion and bent it upwards. I'll post up the measurements later, or maybe Mike will... I don't remember them 100%.


                Test fitting... note the extra-long ends.

                Use a medium/big hammer (of the BFH variety) to hammer it down. Trim endplates with a hacksaw and paint to your satisfaction!


                I'll let Mike post up our ideas for rear upper strut bar, it's quite ingenious. Let me know if you have any questions about any of these awesome projects. The car handles like a completely different car now, and it's totally awesome!

                This message is brought to you in part by Sasquatch Racing, Leapin Racing, and Aarosport.
                1988 Chevy Sprint Turbo 997cc

                Comment


                • #23
                  Lookin good!!


                  -Scott
                  Aqua 93 L
                  Razor Red 09 F-150 XLT
                  White 06 Ford Escape XLT

                  Comment


                  • #24
                    Nice mods, good pics, and descriptive.

                    Thanks for sharing.

                    As a note, I have seen (skimsucka's car) the front lower control bar with 90 degree steel at the frame (welded to the bar) to help with the flat issue.
                    -Greg
                    Euro-bprt...WORLDS FASTEST FESTIVA !!! 11.78@115.9
                    BP, G trans, Megasquirt/ 550cc inj. t3/t3 (tbird) Garrett, REAR TURBO!!!! AND AC!!!!
                    Redneck Engineer
                    FOTY - '09
                    5x Festiva Madness Attendee...FM 3,4,5,6,8
                    http://www.youtube.com/watch?v=LpCZ7...9Pwqw-oe8s2OYQ
                    http://www.youtube.com/watch?v=vU_eX...9Pwqw-oe8s2OYQ

                    Comment


                    • #25
                      Finished up the side moldings today. Thanks for the comments, guys - I really appreciate getting feedback on my work/writing.


                      This is what I started with.


                      I highly recommend doing this with a box cutter and lots of Goo-Gone spray. I suppose sandpaper might work as well, but only after you go over it with the box cutter.


                      I consulted my 1990 Brochure for installation tips to no avail. (Kidding ) Fortunately they had lots of great pictures I used for reference.


                      However, there was a problem. My bumpers were beautiful, and my side moldings were not! Make note of the band-aid covering my stitches/battle-scars from yesterday. Safety first!


                      Mask.


                      Bomb.


                      Bomb 5 more times.

                      After bombing is dry enough to work with, ensure that both the car and the moldings are free of debris, dirt, and grime. De-grease with Simple Green, and wipe both clean in preparation for installation. This will help make the install so much easier.


                      Molding repair tape.


                      After.
                      1988 Chevy Sprint Turbo 997cc

                      Comment


                      • #26
                        Wash, dry, paint clean, polish, wax. Quick detail on plastic/rubber/glass/wheels/tires. Here's a little photoshoot from today's Festivaties. I rotated the pictures in Photobucket... it's a little slow processing though, so sorry for the neck pain in advance.


                        What's next? Dome-light update tonight - before and after shots in the dark. Cluster didn't make it time, so I won't be able to install that until December/April. Also working on getting some Skeeter-style coilovers from a fellow user in BC. I'll be putting the order in for my complete hub/brake/suspension rebuild on Rockauto fairly soon. I'm on the lookout for an early grill as well. Once all that's done, then Sasquatch and I are going to start hunting for a B8/F5 to transplant early next summer!

                        PS Greg - can you shoot me a link to the picture of skim's control arm brace?
                        Last edited by Aaronbrook37; 08-20-2010, 07:04 PM.
                        1988 Chevy Sprint Turbo 997cc

                        Comment


                        • #27
                          Looks good! I like the side molding with the Red stripe in it.
                          '90 LX

                          Comment


                          • #28
                            looks great make sure you remember what wires go to what wires in the light and post that up... i think i have mine wired wrong lol... i just left it alone cause i got board with it lol....


                            Mike, AKA the sasquatch
                            1990 LX, bp+T/g25mr, 9psi dynoed at 194HP, turbonetics t3/to4e 57trim, haltech E6X standalone, 550cc injectors, turbosmart wastegate, synapse BOV, walbro 255 fuel pump, aeromotive FPR, AEM wideband, 3 inch exhaust, huge FMIC, 9LB flywheel, 6 puck clutch and way more parts that im forgetting i installed lol...

                            Comment


                            • #29
                              Originally posted by sasquatch View Post
                              looks great make sure you remember what wires go to what wires in the light and post that up... i think i have mine wired wrong lol... i just left it alone cause i got board with it lol....
                              I didn't put the Escort one in lol... just an LED dome light. It replaces the OEM bulb with an adapter that is wired to 25 LEDs in a little square. Fits really easily under the stock plastic shell. Sorry for the terrible pictures, I didn't have my camera with me. I'll try and get one with a real camera soon! The difference is dramatic... the entire car is lit up in bright white now, when before half of the interior was a faded 90s yellow. I really like this mod a lot! Got it off Ebay from one of those Chinese import companies that is based out of the USA. The unit itself is Japanese though, I can tell by the hiragana/katakana.

                              For anyone who thinks their OEM dome light doesn't work, try lubricating and cleaning the door sensors. They're the little plastic nibs at the bottom back end of the front doors. Shoot some silicone lubricant or WD-40 into them, and after letting it soak, work it into the sensor. This fixed my dome light on both "DOOR" and "ON" modes. If you aren't interested in the Escort one, you can do this mod for about the same price.

                              Tools:
                              Flashlight
                              Hand
                              Small Flathead (Optional)

                              Materials:
                              LED Domelight


                              Last edited by Aaronbrook37; 08-21-2010, 12:01 AM.
                              1988 Chevy Sprint Turbo 997cc

                              Comment


                              • #30
                                This is a fairly anemic update, but being that I'm 5000KM/3000MI away, I can't really do things any differently. I have received my gauge cluster from Germany as well as Bazzy's coilover setup to go with my already-installed KYBs: 8" 175lb and 150lb springs with aluminum sleeves. They were purchased from a sprint car racing company that I don't remember... but when I did check them out, they looked seriously legit.

                                I'm not really looking to go super low, and since I have 8" springs, I may likely keep the car raised up a little more than most people with coil-overs. I have a little concern about spring shortness, but I think it'll work out fine. Skeeter seemed to do okay with 8" rears, so I'll just keep the front up a little higher. My top priority is killing body-roll and improving handling without totally destroying shock life and ride quality. With all of the suspension upgrades that have been made already (Aspire RTB, FSB, RSB, FCAB) things are pretty good, and short of upper strut bars and bushings, this is the final step in the handling puzzle.

                                I've asked my family to shoot me some pictures, so we'll see if they can come through and show off the goods!
                                1988 Chevy Sprint Turbo 997cc

                                Comment

                                Working...
                                X