Announcement

Collapse
No announcement yet.

How Do You Change Spark Plugs?

Collapse
X
 
  • Filter
  • Time
  • Show
Clear All
new posts

  • How Do You Change Spark Plugs?

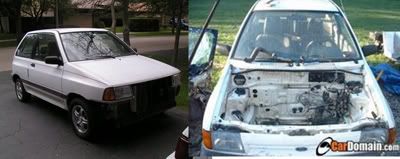
    In the next couple of days I'll be doing one of my favorite tasks in service to my Festiva/Aspire, changing the spark plugs. To me it is the purest pleasure since they are critical to the proper running of the engine, they are easy to get to, don't require a lot of cleaning, and once well done don't have to be touched for another 30,000 miles.

    It was during the changing of plugs in my Festiva that I discovered what I call my Zen mode. That's where I am so engrossed in what I'm doing that I become completely unaware of time. I go from one task to the next without ever asking what time it is and when I'm done I couldn't begin to tell you how long it took or what time it might be at the moment you asked.

    I've worked out a procedure I like to follow, even though it changes from time to time. But rather than tell you what I do, I'd be more interested in having everybody who wants to, tell exactly what steps they go through to change plugs in their own Festiva/Aspire. Let's say this is to be done on a pleasant, mild, sunny day, when you have no other pressures on your time that might cause you to compromise your standards and skip any steps along the way. Of course, you are free to say or not say whatever you choose, but here are a couple of things that I, for one, would find of interest.
    1. What plugs do you prefer? Are there any you choose to avoid?
    2. How careful are you in gapping the plugs? Can you recommend a special gapper you like above all others? Do you trust the gap as it comes from the box?
    3. Do you loosen the plugs before blowing with compressed air, as I've seen advised? For those without air, would spraying with Brake Kleen be sufficient?
    4. How do you clean the threads in the hole? Do you chase the threads with something? What do you use for that? What kind of round brush would you use for cleaning? Nylon, brass, or steel?
    5. Do you apply anything to the threads of the spark plugs before installing them? What? Anti-sieze compound?
    6. Do you torque the plugs down? What kind of wrench do you prefer and what torque value would you use? Or do you just go by feel?
    7. Would you take this time to remove the wires and clean them? And maybe look in the cap and clean that up?
    8. Do you bother applying dielectric grease to the boots? On the insulation? How much do you use?


    As I said these are some things that would interest me. But if there are things you do that aren't on this list, those things would probably interest me even more. I may ask some questions along the way and at the very end reveal what I do in my Zen mode.
    John Gunn
    Coronado, CA

    Improving anything
    Improves everything. Copyright 2011 John Gunn

  • #2
    1 at a time, haha thats like the light bulb joke. anyways i would use any standard copper plug with the b3, ngk's are nice and cheap, its not worth the money for platinum of 4 prong plugs ect, just a standard plug. Buy a gapper from your local mcautoparts, nothing special looks like a coin that has a ramped up edge, just slide the plug to the desired gap, im not sure what stock gap is .044? if you go to autozone they can give you the oem specs or someone on here should know. if you want to spray some air, do it while the old plugs are in in while the old plugs are in, i never do, it could actually loosen some stuff up that may possibly fall down the cylinder when you pull the plugs out. There should be no reason to clean the threads, plugs go in and plugs come out, there not exposed to the elements so the threads should be fine, if you have a stubborn plug, you can buy a tap but really shouldnt be needed. the head is only aluminum so you want to be carefule when threading plugs/ or even a tap, its easy to cross thread or strip out. Use permetex antisieze light coated on threads. use an extension and use only your hand to start threading, snug them by hand with a extension and give maybe a 1/2 turn with ratchet, drive 1000 miles and check to make sure there still nice and snug. Are the wire orginal? do they look all beat up? any breaks in the insulation? if yes to any of those questions i would advise to change them, if you want to clean them just use soap warm water, dont use break clean! this could dry out the rubber/silicone insulation. you might as well change the cap and rotor while your at it. this just my .02
    Last edited by Hot_Wheels; 07-06-2011, 07:46 PM.

    Comment


    • #3
      Simply 1 at a time. Never check gap. Torque as tight as I feel will hold it. Leave them in for as long as I own the car (I have never had a car long enough to change the plugs after I change them for the first time). I have owned 2 new cars that I made it 60k with each. I pulled the plugs once in each and they looked great. Approx 22-23 used cars since I was 16 and this is my process and probably will be until I keep a used car longer than plug life.
      -Bryant

      Comment


      • #4
        Hold the spark plug and spin the car.

        Does this work for you Hot Wheels?


        I am the original

        Comment


        • #5
          I'll try to answer in the correct order
          • I like Autolite, Motorcraft, NGK. I use copper core plugs but I have used platinums although some say they require more voltage from the coil to fire them.

          • I'm quite careful in gapping and usually gap at the small end of the spec so the electrodes will stay in spec as they erode. I.E. - The spec for an EFI B3 is .039-.043 so I typically gap to .039. I use the standard round gapper you can buy for a buck at the counter of about any auto parts store. I NEVER trust the gap straight out of the box. You never know if someone has dropped them. I've seen them with zero gap out of the box

          • I don't loosen the plugs before blowing off any dust around the head area. I typically don't blow them off though. I figure it's best to leave that stuff at rest instead of stirring it up. I definitely wouldn't if I planned to wash them down with solvent because I think there would be a (very) small risk of it getting past the threads and into the cylinders. If the engine is dirty enough to require cleaning around the plug holes I usually pressure wash it while the engine is cold, but I'm kinda picky (some say OCD) about engine bay cleanliness... so that's just personal preference.

          • I don't clean the hole unless there's an issue with getting the old plug out easily. Running a tap in the hole is a worst case scenario for me because it drops aluminum shavings into the cylinder. If I do HAVE to clean the plug hole I try to use something softer than the aluminum so it would be nylon or brass if I want to get aggressive. Usually a fresh coat of anti-seize will allow the new plug to screw in easily without cleaning the threads in the head

          • I ALWAYS apply anti-seize to the threads, especially in engines with aluminum cylinder heads.

          • I normally use a torque wrench (Craftsman Digi-Torque) but I will tighten by feel if in a rush. I use the torque spec in the book (can't remember it off the top of my head). I torque EVERYTHING though (even valve cover bolts) because I have a tendency to really crank down on stuff and I've found that I can keep myself in check by using a torque wrench on every fastener. It's easier than drilling and tapping a broken off bolt in my case

          • I inspect/replace the wires, cap, and rotor as needed and usually all at the same time since they typically all have the same amount of milage on them. You can clean them if they are just dirty but are in good shape as far as quality

          • Personally, I never use the dielectric grease and I've never had an issue without it. But that's just been my personal experience. Others may feel differently


          One BIG thing to remember is to never remove the plugs from an aluminum head when it's hot. ALWAYS wait until it's cool to the touch. Aluminum gets soft when it's hot and you risk stripping threads when you remove plugs from a hot aluminum head. Especially if there's no anti-seize applied to them during the previous insulation.
          If a hammer doesn't fix it you have an electrical problem


          WWZD
          Zulu Ministries

          Comment


          • #6
            Zan wrote:

            "One BIG thing to remember is to never remove the plugs from an aluminum head when it's hot. ALWAYS wait until it's cool to the touch. Aluminum gets soft when it's hot and you risk stripping threads when you remove plugs from a hot aluminum head. Especially if there's no anti-seize applied to them during the previous insulation."

            I never would have thought of this. On the other hand, I usually let the engine cool before messing with any engine work simply to keep my hands from getting burned!

            I like to spray the plug area out with carb or brake cleaner, then follow up with canned air to blow away any loose residue. I always check plug gap and I prefer to use the wire gapper. I also like Zan's idea of gapping to the smallest value so it will corrode to spec and last longer close to spec. I'll do that from now on instead of just doing .041.

            I have a dedicated hand wrench for the plugs, but I really feel like I should begin using a torque wrench to try for more consistency.

            One thing I'd like to do I read about in some car mag a long time ago:

            *When installing plugs, mark the electrode orientation and tighten all the plugs at the same position in each cylinder to promote more consistency.* What do ya'll make of this?

            I also use a bit of anti-seize upon installation. When I first got Twinstiva it took me over two weeks of carefully working on the plugs she came with to get them out. Lots of PB Blaster and "a little force at a time" did it. So IIRC, anti-seize is mandatory!

            Good thread, John. Good to see different views and methods of an otherwise "simple" auto maintenance task.

            Karl
            Last edited by Safety Guy; 07-07-2011, 06:47 AM.
            '93GL "Prettystiva" ticking B3 and 5 speed, backup DD; full swaps in spring!
            '91L "AquaMutt" my '91L; B6 swap/5 speed & Aspire brakes, DD/work car
            '92L "Twinstiva" 5sp, salvage titled, waiting for repairs...
            '93GL "Luxstiva," '94 B6 engine & ATX; needs overhauled
            '89L "Muttstiva," now a storage bin, future trailer project

            Comment


            • #7
              - The air cleaner makes it hard to get at #1 on the carburetted model but over the years I've got used to taking it out.

              - don't overtighten the plugs, just snug.

              - a socket set comes with a deep spark plug socket (13/16?)

              - do them one at a time add leave the wires on the distributor end

              - check the wire is all the way on. if loose pull back the rubber end (sparying with WD-40 eases slipping it up the wire) and crimp the end tighter

              - a vibrating needle on a vacuum guage means the engine is missing. I check a couple times a year and clean the wires and sparkplugs when it does. or when I notice the engine running with a syncopated rythm.
              Original owner of silver grey carburetted 1989 Festiva. 105k km as of June 2006. 140k km as of June 2021.

              Comment


              • #8
                All excellent advice from everybody. It is not an understatement to advise using anti-seize compound on the threads. Dissimilar metals (steel plug/aluminum head) promote galvanic action. I had real problems getting the plugs out of an untouched 100k B3 engine 2 years ago. Even if you don't plan on changing them, unscrew the plugs every 50000k just to ensure they don't freeze. Bottled air or a fine nozzle on a vacuum helps me to clean the recesses before I start removing the plugs. If they don't turn in easily (by hand; using only socket and extension) back them out and try again. Never 'horse' threaded stuff into anything aluminum.

                Comment


                • #9
                  Safty guy posted a quote from a magazine that read, when installing plugs, mark the electrode orientation and tighten all the plugs in the same position in each cylinder to promote more consistency. what do you make of this? it is called indexing the plugs and you will need a variety of plug washers to make this work. Mark the plug with a magic marker on the porcelain where the electrode is mated to the plug, now you can see where the electrode is facing when it's installed in the engine. for better milage [ maybe 1 mpg ] install plug so that the open end of the plug is facing up, for performance install plug facing down so not to blow out the spark.
                  An idea can turn to dust or magic, depending on the talent that rubs against it.

                  Comment


                  • #10
                    Originally posted by Safety Guy View Post
                    One thing I'd like to do I read about in some car mag a long time ago:

                    *When installing plugs, mark the electrode orientation and tighten all the plugs at the same position in each cylinder to promote more consistency.* What do ya'll make of this?

                    That is what is referred to as indexing the spark plugs. I have done it in kart racing to get the engine to burn at optimum. They say when the fuel is introduced into the cylinder it will get a more direct fire if it is facing the electrode. I had index washers that all had different thickness's to acheive it with plugs torqued correctly.

                    I personally don't think you would stand much to gain on a street engine, but hey I would like to see someone try it to see if any or little results are found. All of my racing engines ran on Methanol so no real comparison.
                    91 Festiva GL "Scrat"
                    82 Honda Goldwing GL1100i
                    85 BMW 535is "Brunhild"

                    Comment


                    • #11
                      Best advice I can give... take out any pieces of tubing first and make sure the spark plugs aren't small enough to fall into the cylinder.
                      No festiva for me ATM...

                      Comment


                      • #12
                        Make sure when using antiseize not to get any on the electrode.
                        1963 Fairlane - future NSS drag car
                        1965 Mustang Coupe - A-code car, restoring for/with my son
                        1973 F100 longbed - only 22k original miles, 360/auto, disk, PS/PB dealer in dash A/C
                        1996 Sonoma X-cab - son's DD
                        2002 Grand Prix - daughter's DD
                        2003 Sport Trac - 180k, 130k on replaced motor with new timing chains - F/S soon.
                        2005 Accord - wife's DD
                        2008 Mountaineer - step daughter's DD
                        2015 F150 SCrew - DD

                        Comment


                        • #13
                          Speaking of indexing plugs: Anyone else seen where people are gutting back the ground strap? Seems to me that it would reduce plug life vs the small amount of unshrouding it does. Kinda looks like a homemade version of a Bosch Platinum +4

                          If a hammer doesn't fix it you have an electrical problem


                          WWZD
                          Zulu Ministries

                          Comment


                          • #14
                            Drag engines, yeah, I've seen it.

                            for our cars, plain is best, and I'm like you, gap to the minimum.
                            1963 Fairlane - future NSS drag car
                            1965 Mustang Coupe - A-code car, restoring for/with my son
                            1973 F100 longbed - only 22k original miles, 360/auto, disk, PS/PB dealer in dash A/C
                            1996 Sonoma X-cab - son's DD
                            2002 Grand Prix - daughter's DD
                            2003 Sport Trac - 180k, 130k on replaced motor with new timing chains - F/S soon.
                            2005 Accord - wife's DD
                            2008 Mountaineer - step daughter's DD
                            2015 F150 SCrew - DD

                            Comment


                            • #15
                              Originally posted by Zanzer View Post
                              Speaking of indexing plugs: Anyone else seen where people are gutting back the ground strap? Seems to me that it would reduce plug life vs the small amount of unshrouding it does. Kinda looks like a homemade version of a Bosch Platinum +4

                              Yep, thats when you come up on the age old issue of "how fast do you want it to go" vs "how long do you want it to last".
                              No festiva for me ATM...

                              Comment

                              Working...
                              X