Originally posted by mikemounlio
View Post
Announcement
Collapse
No announcement yet.
Ultimate Street suspension guide
Collapse
This is a sticky topic.
X
X
-
Good write up Mike, how did the top of the new aluminum Hat mate with new upper Rio Mount (Bearing)?
-
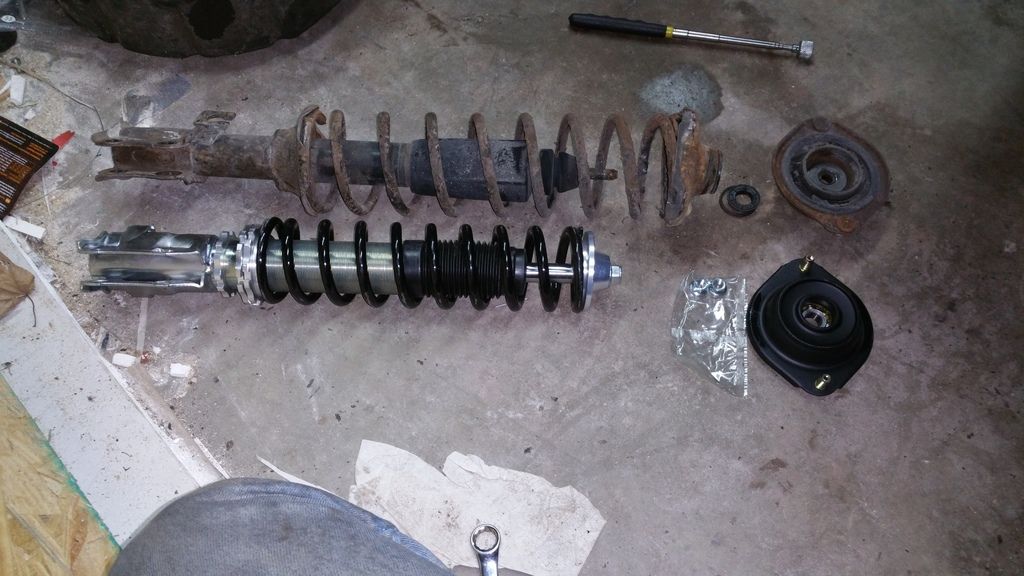
Yes! The top hat was used as a top hat. I used the front coilovers as they came (aside from springs and hole mods). Top hat fit nicely over the rod. The rod fit nicely into the strut mount.
Leave a comment:
-
-
Yeah I have found things on Amazon that were cheaper than rock auto believe it or not. And I have found things on Amazon that weren't even on rock auto haha.Originally posted by mikemounlio View PostThat is a great deal. I need to look on amazon more often. I always forget about it. I normaly have such good luck on ebay tho. The top hats have been the only thing in the last 6 years that have been an issue for me.
Leave a comment:
-
That is a great deal. I need to look on amazon more often. I always forget about it. I normaly have such good luck on ebay tho. The top hats have been the only thing in the last 6 years that have been an issue for me.
Leave a comment:
-
I got my Rio top hats on Amazon. Got super luck and only paid $7.50 each with prime shipping. I bought 4. Two for the coilovers and 2 spares.
Leave a comment:
-
Great writeup. I love the use of using the rear spring perch as the spring top isolator.Last edited by Advancedynamix; 12-28-2015, 12:31 PM.
Leave a comment:
-
It looks like summit springs are 50$ each-100$ for the pair. I got them from southwest speed for 39.98$ each. 79$ a pair.
- Likes 1
Leave a comment:
-
I think summit racing springs are around $50 and are more or less the same.
Leave a comment:
-
ULTIMATE STREET SUSPENSION
(2X) 12" 120 LB. SPRING SOUTHWESTSPEED.COM $79.98
(2X) 10" 105 LB. SPRING SOUTHWESTSPEED.COM $79.98
COIL SLEEVE KIT SOUTHWESTSPEED.COM $32.99
MK2 COILOVERS HOTTUNING EBAY $200.00
(2X) RIO TOP HAT EBAY $34.53
VW BUMP STOPS EBAY $11.01
REAR STRUTS SHOCKWAREHOUSE.COM $75.09
TOTAL $513.58Last edited by w4rkry; 09-04-2017, 07:51 PM.
Leave a comment:
-
As a post note: The stock rubber isolator that we trimmed down will go back in its original place. The spring keaper that came in the strut kit will under the stock rubber part. I will grab a picture of the rear and post it here once its light out.
If you have questions plaese ask. Good luck guys.
A quick review of how this setup drives:
Its amazing. I went around a few blocks here in town and 28mph straight 90° turns with ease. Thats on the stock tires. Off ramps are now crazy fun rather then hair raising. its must better for daily driving. Bumps are still there but the car does not get lose over them. The ride is firm but not harsh. Its well worth the money even for a stock daily driver. 75mph down the road with curves no longer worries me. I have not hit wind yet but i would guess it does not get blown around as easy.
Leave a comment:
-
14. Install the DIY Coilover. I installed the top 1st. Push it up into the mount in the rear. Put the stock rubber on and then the metal cap. Screw on one of the 2 nuts that came with the strut. Install the lower strut mount bolt. Im not sure on the TQ numbers here. If you want them you will need to look them up.
14. Install tire.
15. Lower the car off the jack stand.
16. Check the strut rod nut. Then add the second locking nut.
17. Reinstall interior if you wish to have it.
18. Bouncer the car to settle it.
19. Repeat the above for the other side. Left and right side should be the exact same.
20. Double check all nuts and bolts.
REAR IS DONE
Leave a comment:

Leave a comment: