Announcement

Collapse
No announcement yet.

Icetiva 3 race car build

Collapse
X
 
  • Filter
  • Time
  • Show
Clear All
new posts

  • Icedawg
    replied
    Flywheel

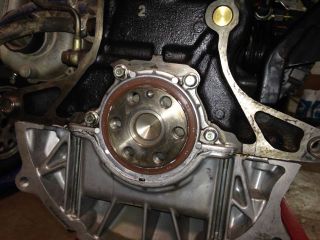
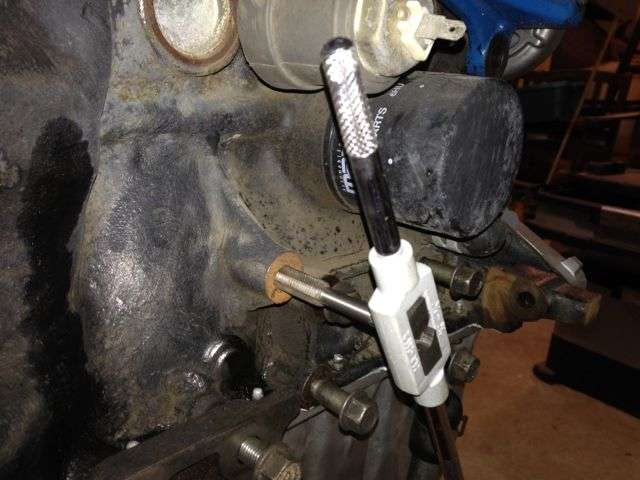
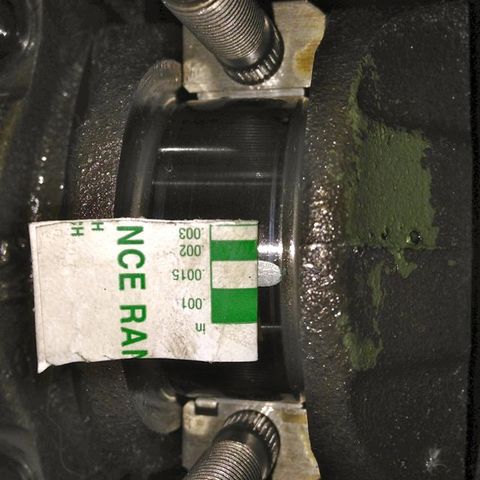
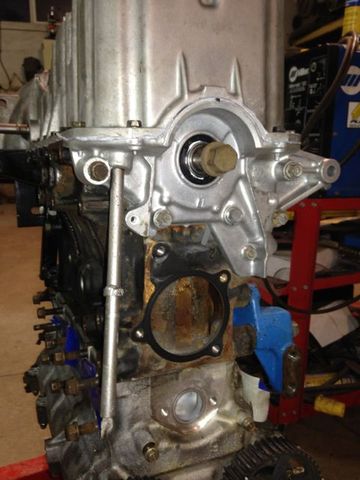
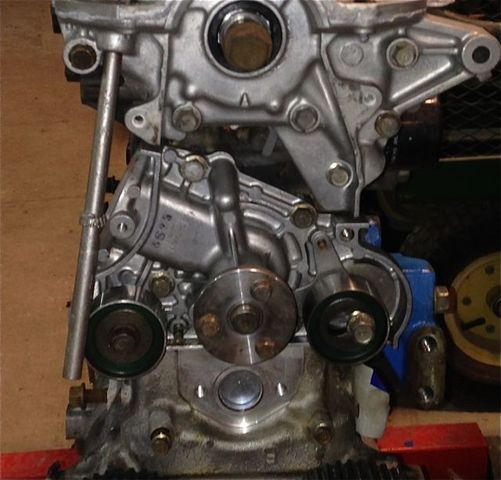
    Weekend 11, Finishing off the engine with a new rear main seal from Mazda,

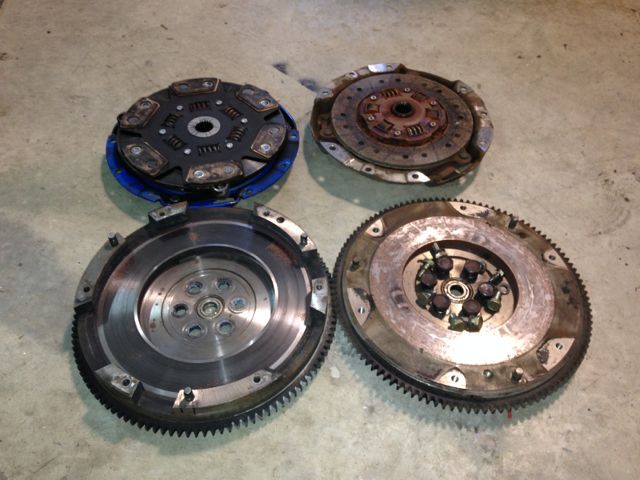
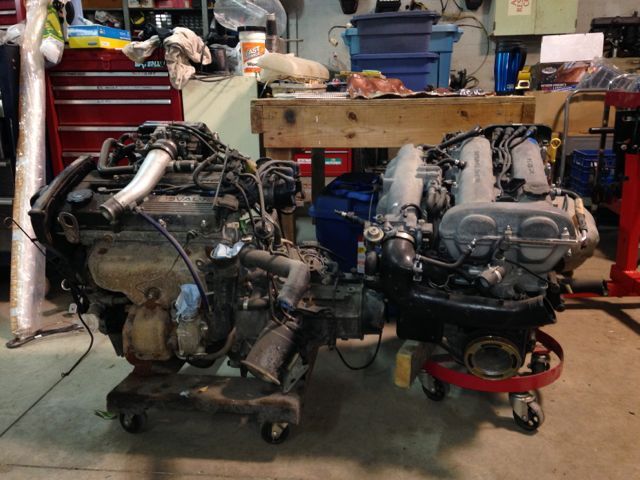
    Then the flywheel. The Miata fly on the right is a bit lighter, but I have a nice upgraded clutch on the left for the B6T flywheel, and a fresh grind on that flywheel. The clutch is an ebay F1 company high performance kit.

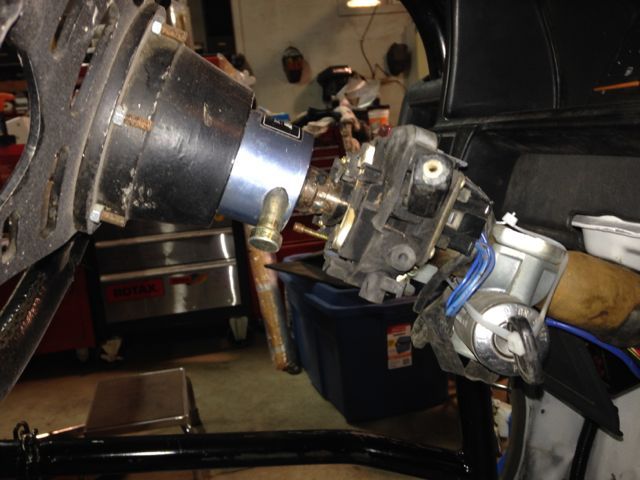
    Turbo is a VJ14/11 hybrid

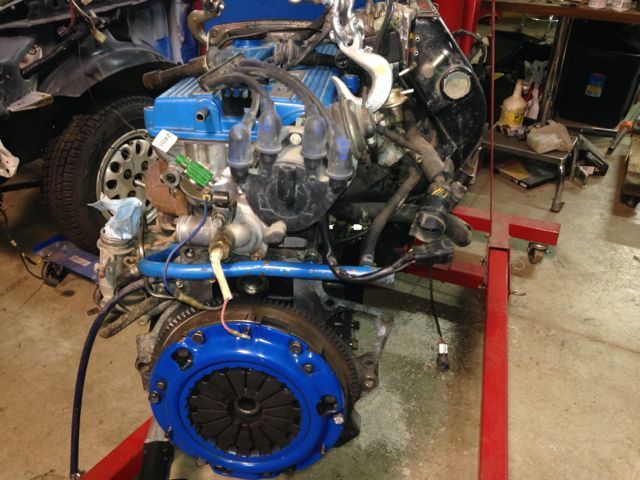
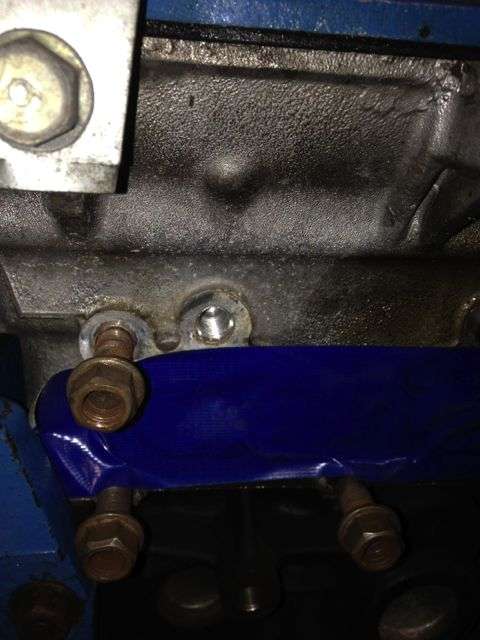
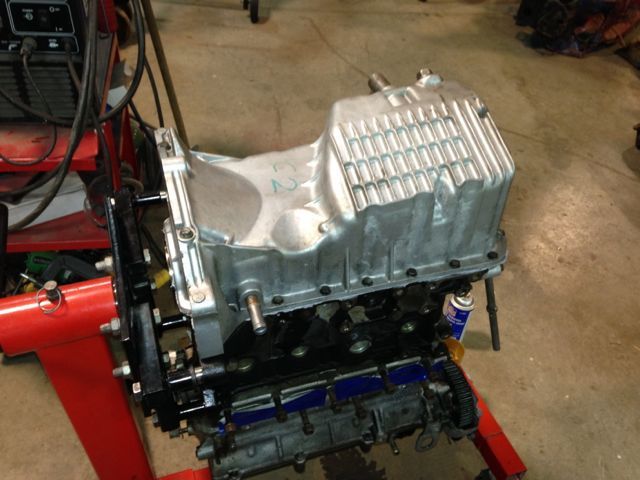
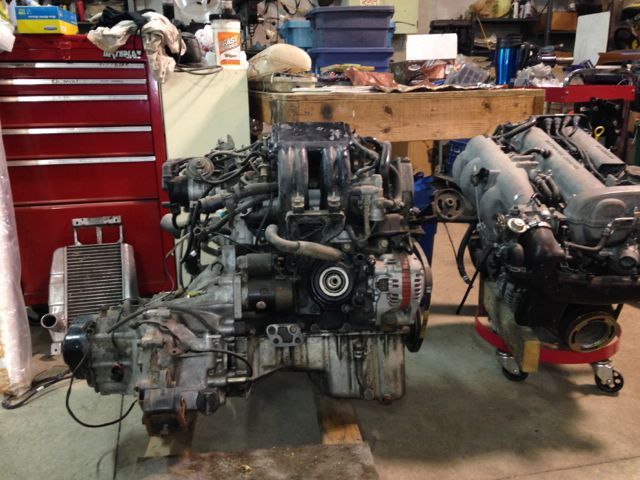
    There are so many B6T pieces now on the Miata block that are from the B6T it is clear I could not have made this fit into the Festiva easily without a full long block B6T as a donor. Or a whole lot of real fab work, not the simple swap and minor fab that has taken me long enough to do.
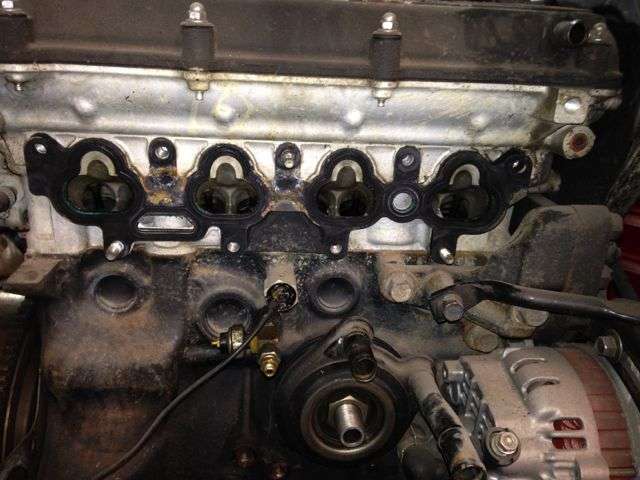
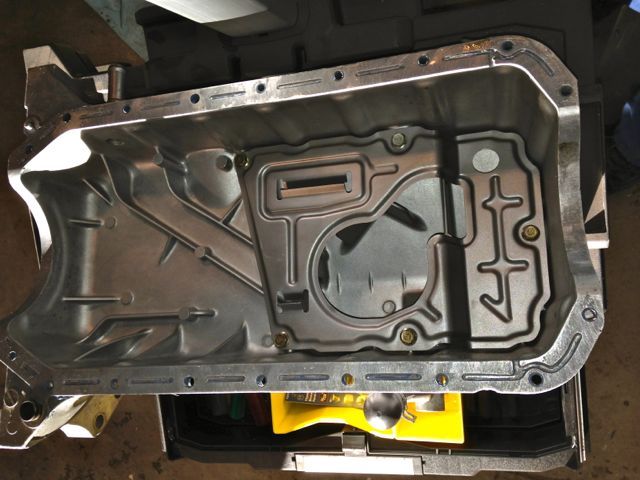
    Oil pump, oil pan, intake and exhaust manifolds, turbo of course, distributor, water pump to rad outlet fitting, metal coolant return tubing, coolant return fitting for turbo, engine to rad outlet fitting, turbo bracket mount, front engine mount bracket, interface plate between engine and tranny, knock sensor, crank belt pulley, top of front engine cover and cam backing plate, and valve cover. Probably other stuff too.
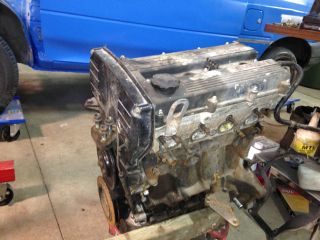
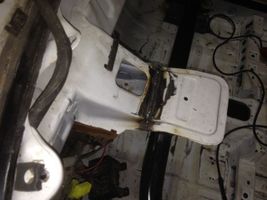
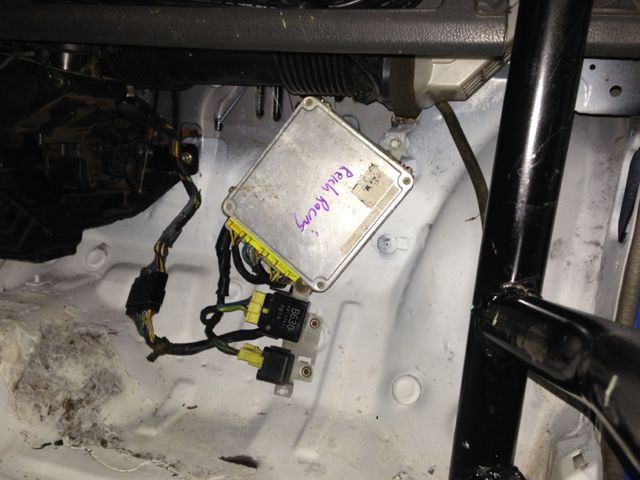
    Here is what is left of the B6T donor

    Leave a comment:


  • Icedawg
    replied
    Originally posted by Larry Hampton View Post
    I'd be tempted to use some 1"x1/8" strap steel bolted to those old thermostat holes to hold that freeze plug in.
    Actually I got a block off plate and gasket made to block the port off, but it was too thick to fit behind the engine mount bracket, so to keep going on the project I decided to just go with what is supposed to be a tried and true technology. After all, the rest of the block is full of holes plugged with freeze plugs. Hopefully it will work out. In principle it should.
    Last edited by Icedawg; 02-06-2014, 11:32 PM.

    Leave a comment:


  • Larry Hampton
    replied
    I'd be tempted to use some 1"x1/8" strap steel bolted to those old thermostat holes to hold that freeze plug in.

    Looks good though.

    Leave a comment:


  • Icedawg
    replied
    Engine coming together

    The Miata does not use all of the same threaded holes on the block as the B6T for mounting brackets, and the ones that weren't in use were really crudded up. So thread chasing them all was required.

    The Miata exhaust has two fewer studs than the B6T exhaust manifold, but the threaded holes are still in the Miata head, covered over by the exhaust mani, ready for inserting fresh studs - now I just have to find a source for them. M10 x 1.25 about 1 7/8 inches long

    And a great result! That's the Miata intake manifold gasket sitting over top the intake gasket on the B6T head, and it's a perfect match, just like I was told it would be! Great stuff.

    I wanted to use the Miata valve cover, 'cause I like the tubular look it has, but it is too tall to fit the B6T intake and throttle body assembly, it does not have holes to mount the B6T throttle cable assembly, and the PCV valve outlet and the other crankcase head outlet are in the wrong spots. The outlets might have been adapted, but the size makes it all a no go for the Miata valve cover. So on went the B6T valve cover and cam gear engine front cover.

    That Miata block is really starting to look like a B6T now!

    Leave a comment:


  • Icedawg
    replied
    Putting the engine back together

    Weekend 10, yikes.
    Took the oil pan and oil pump off to swap on the B6T pan, and oil pump. The pump was seriously cleaned up, and the gear drives measured to be well in spec. The pan swap is needed to mate to the G25mr tranny, and fit the exhaust & downpipe. The oil pump is swapped to get a dip stick, since the Miata puts the stick through the pan, not the pump, unlike the B6T.

    While the pan was off I checked some of the bearings, which came in at the top end of spec for new bearings at about 1.5 to 1.8 thou. (1 to 1.7 for new with 3 as absolute max for used)

    A lot of scrubbing and cleaning went into this pan, to get rid of the steel bearing bits from when the previous engine using this pan seized.

    And on the block

    I found my almost new water pump, so decided to swap out the Miata pump that is almost 25 years old.

    New pump in place

    And a 30 mm freeze plug pounded into place and sealed with Permatex Aviation form-a-gasket, as recommended by at least 3 youtube install videos

    Leave a comment:


  • festyfreak39
    replied
    glad its all working out Jed, the blockoff plate in the front can just be a piece of 1/4 inch thick aluminum with some gasket maker and a gasket. Just whatever scrap bits you have laying around.

    I hate frost plugs, they always come out.

    Leave a comment:


  • Icedawg
    replied
    Engine work

    Sunday on Weekend 9 I started stripping down to the engine blocks to start the parts swap. First, everything came off the Miata engine.

    There was notable corrosion down in the spark plug wells, so a lot of PB Blaster is sitting in the wells now, waiting a day or so before I attempt to remove the plugs.
    Inside the valve cover the engine head looks really clean, with almost no coloration at all, so it looks like a well maintained block. The crank rotates by hand and makes puffing sounds out the exhaust ports. The oil pan when removed had a thin sludgy coating and some golden brown oil in it. The coating easily wiped away.

    The front engine-radiator connection in the front of the head has to be blocked off, and to get at it the cam gears have to come off too, as does the valve cover on a Miata, unlike on the B6T.

    With the connector removed a 30 mm hole is revealed. I am going to try a freeze plug to block it, although I hear it is possible to buy a block off plate.

    The tranny, and the exhaust manifold/turbo came off of the B6T, but nothing new there, so no pic. But good news, the exhaust manifold gasket from both heads is an exact match, just like has been reported here before. Always good to see it for yourself though!
    And the port on the Miata water pump matches with the pump connector cover plate for the B6T, so swapping the coolant lines is going to be straight forward.

    Leave a comment:


  • Icedawg
    replied
    Drive Train

    Weekend 9, its finally time to start work on the drive train.
    It was a B6T build in the red race car, but that engine overheated, lost the head gasket, and maybe warped the head, when the rad was cracked after a roll-and-go out on the track. So a Miata engine from a JDM importer will replace the block and head. Then all the B6T parts and controls will go on, oil pan, oil pump, intake and exhaust manifolds, and all the adaptations that will be needed.
    The transmission is a G25mr, cable actuated, in which third gear was recently replaced, as well as the synchros.
    The engines: both are short nose cranks, the B6T a 1989 from a 323 GT, the Miata from a 1990.

    The transmission, a G25mr

    The driver's door was taken from the blue race car, to avoid painting it, but when I peeled the old vinyl numbers off it took a lot of the blue paint with it, so it was back to rattle can painting again. The door fits in the chassis though, good news again after the roof was re-installed.

    Leave a comment:


  • Icedawg
    replied
    ^ Thanks. This car is going together from scratch obviously, 
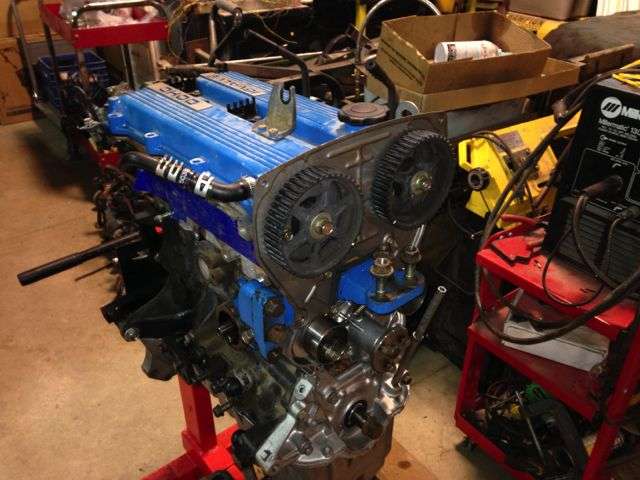
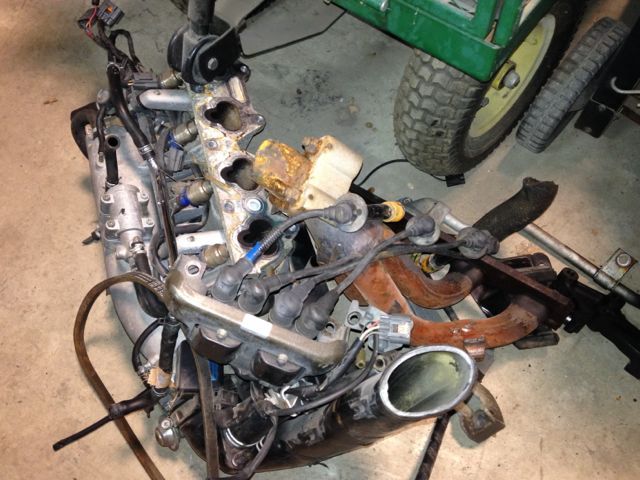
, but it is built out of lots of past race cars, so the tidy bits come from a long past and legacy of race cars.

    Leave a comment:


  • Advancedynamix
    replied
    Nice work! Tidy race car for sure!

    Leave a comment:


  • Icedawg
    replied
    Fit after welding

    We took the roof off and put it back on. It was a breath holding moment when the door went on, to see if it actually fit still. And it did, htd

    I was not quite so lucky with the rear hatch. It fits, but the latch hits the striker plate catch by a hair. For now the plate is removed and the hatch sits in place, looks fine and opens and closes well. The striker plate mount point actually looks bent up a bit, so maybe persuading it to recess down will work, or maybe it or the catch can be repositioned enough, the bolt holes that hold the hatch to the hinges could be oval-ed out a bit to raise it. I could just delete the door catch, since it also has to be strapped on to meet the ice race car prep rules.
    Also, when I repositioned the steering column mount and it was welded back in place I did not pay much attention to getting it exactly the same length. So the upper mount flanges on the column had to be oval-ed out, and trimmed a bit to get the bolts to line up. No big deal, just a bit of time lost.

    Leave a comment:


  • Icedawg
    replied
    Body and Windows

    Weekend 8: When you take all the parts off a car, it sure takes a long time to put them all back on! The spare door, plexiglass side windows, rear bumper, tailights, steering column with removable wheel, instrument cluster and 323 GT wiring harness all went on.

    The side window glass was deleted and replaced with 1/16 inch plexiglass. I have a plexi-pane for the hatch, but the glass is not removed yet.

    The door window is secured at the bottom with small aluminum brackets. The interior of the door was re-painted to match the floor.

    The cluster, steering column and removable wheel in place.


    The Reich racing ECU was wired into the 323 harness and mated to the Festi harness. The mount is a bit simple, but worked in the past.

    An extended cable for battery relocation to the passenger seat area was run.

    Then the 323 GT harness was put through a 2.5 inch hole cut in the fire wall, and the battery cable and sensor leads were run through two plugs already in the fire wall on the passenger side.

    Leave a comment:


  • Icedawg
    replied
    Gauges

    A weeknight evening was spent plumbing and wiring in the gauges. (For anyone counting the chassis painting above was weekend 7)
    Tac (medium cost Princess Auto) and boost gauge (Autometer, in nice Autometer side mount casing) side by side where I can quickly see both, rotated so that redline is near vertical, and I might rotate the boost gauge so max boost is near vertical too, making it quicker to assess while matting it at the limit. (Instrument cluster will go back in when the wiring is all done, but it is nice to have that hole to work through.)

    Broadband Air/Fuel ratio (AEM), water temp (electric send, cheap Princess Auto) and oil pressure (mechanical send, really cheap Princess Auto), in a Princess Auto bracket

    And the somewhat tamed wiring ratsnest behind the gauges for power and sends. The little white connector block provides a bus for ground and power, making it all a bit tidier, and a wire clamp ties down the excess cable from the AEM gauge that I was too superstitious to cut shorter. (The green wire, and white teflon towards the right are from tac and boost and still need to be fed in to the engine bay, so they will get tidied up.)
    Last edited by Icedawg; 01-18-2014, 11:51 AM.

    Leave a comment:


  • Icedawg
    replied
    ^^^ They were nice "fun decals" once, but time and the elements wore them out badly, and getting them off was time consuming. I borrowed a great 4 inch diam 3M rubber eraser wheel, put it on a drill and ground away, using up about 4 Li battery charges on the drill! It took off the vinyl but left the glue. For that I used paint remover and lots of elbow grease, then sanding, and it took all three. There might be a better product for the glue removal, like goo-be-gone, but I used what I could borrow, as it was stored on the shelf in H's shop.

    Leave a comment:


  • SiliconSoul
    replied
    Not sure about the handwarmers... I think if you leave enough slack in the wires to allow full turns and run it in the center you should be golden.

    Congrats on the prep for painting... those stickers must have been a friggin' nightmare to get off. Looking great!

    Leave a comment:

Working...
X