Originally posted by Gomez
View Post
Announcement
Collapse
No announcement yet.
Gomez's ULTIMATE build thread Lots of pics
Collapse
X
-
So....what's the point of a redesigned radiator support? Nice work. Love the pix and the detailed discussions.88L - 'Twistiva' - 'The Fusion of Man and Machine'
88LX - 'Laztiza' - Future Resurrection Project
91L - 'Mistiva' - My Daughter's DD
93L - 'Vextiva' - Airport Car
-
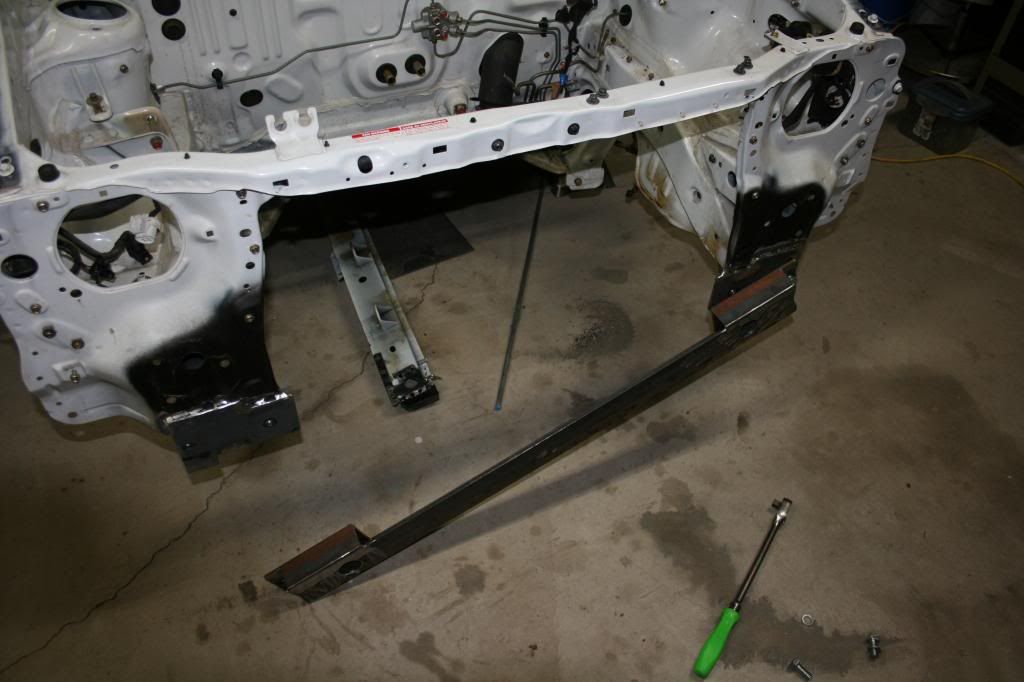
Several reasons. Based on Advancedynamix's R&D, much strengthened front end for better handling and the ability to move the radiator forward. Rad forward allows moving the engine forward allowing more power to be put to the ground during all conditions through better traction.
After getting the stock support off it became obvious to me the need for more strength and/or a stiffer front end.
It is also removable for easier engine removal/work etc. plus more room for intercooler. Got a couple ideas on that one already.-Bryant
Comment
-
Gomez, here's what you need. I've heard it called a couple of different things... a step drill, a christmas tree bit
 Ian
Ian
Calgary AB, Canada
93 L B6T: June 2016 FOTM
59 Austin Healey "Bugeye" Sprite
"It's infinitely better to fail with courage than to sit idle with fear...." Chip Gaines (pg 167 of Capital Gaines, Smart Things I Learned Doing Stupid Stuff)
Link to the "Road Trip Starting Points" page of my Econobox Café blog
Comment
-
As much as I hate to say it out loud and jinx myself, the HF kobalt bits are doing pretty good for me so far. You'll need a 1/2" drill tho lol.. I got mine for like $60---80 after a 4 year warranty at lowes.Last edited by zoom zoom; 04-08-2014, 04:46 AM.2008 Kia Rio- new beater
1987 F-150- revived and CLEAN!!!
1987 Suzuki Dual Sport- fun beater bike
1993 Festiva- Fiona, DD
1997 Aspire- Peaspire, Refurb'd, sold
1997 Aspire- Babyspire, DD
1994 Aspire - Project Kiazord
1994 Aspire- Crustyspire, RIP

"If it moves, grease it, if it don't, paint it, and if it ain't broke don't fix it!"
Comment
-
I have to go through just over a 1/2" of material so a step bit won't work. I already have them. I also have to be able to drill a hole into the final piece of angle in a couple spots to be able to fit a 22mm socket into it. HOPEFULLY I will be able to update pics tonight.-Bryant
Comment
-
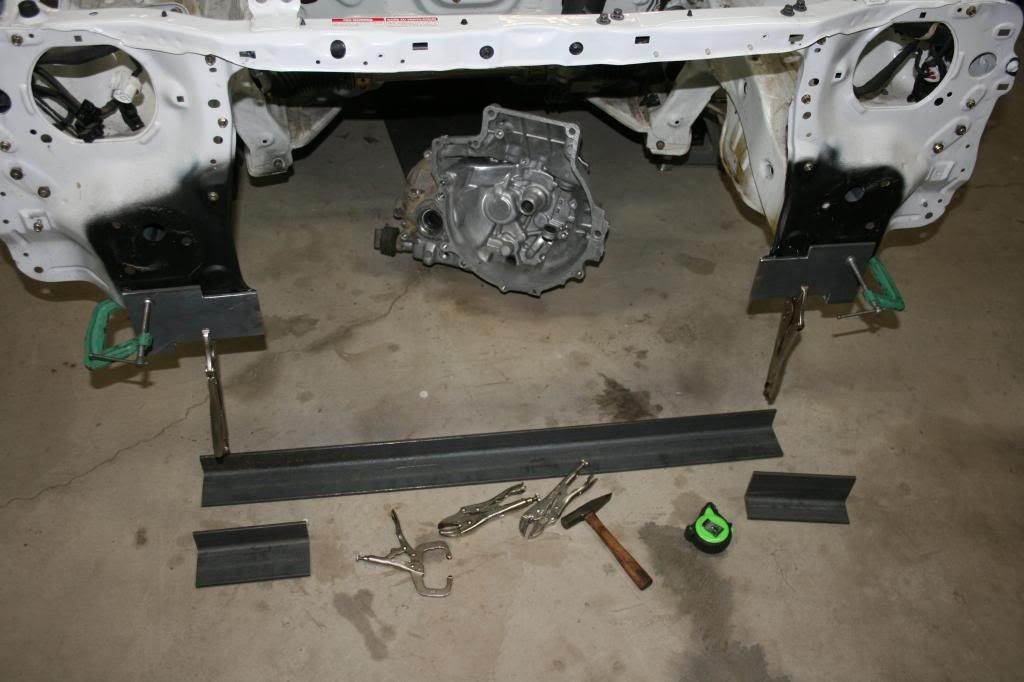
Getting ready to weld.
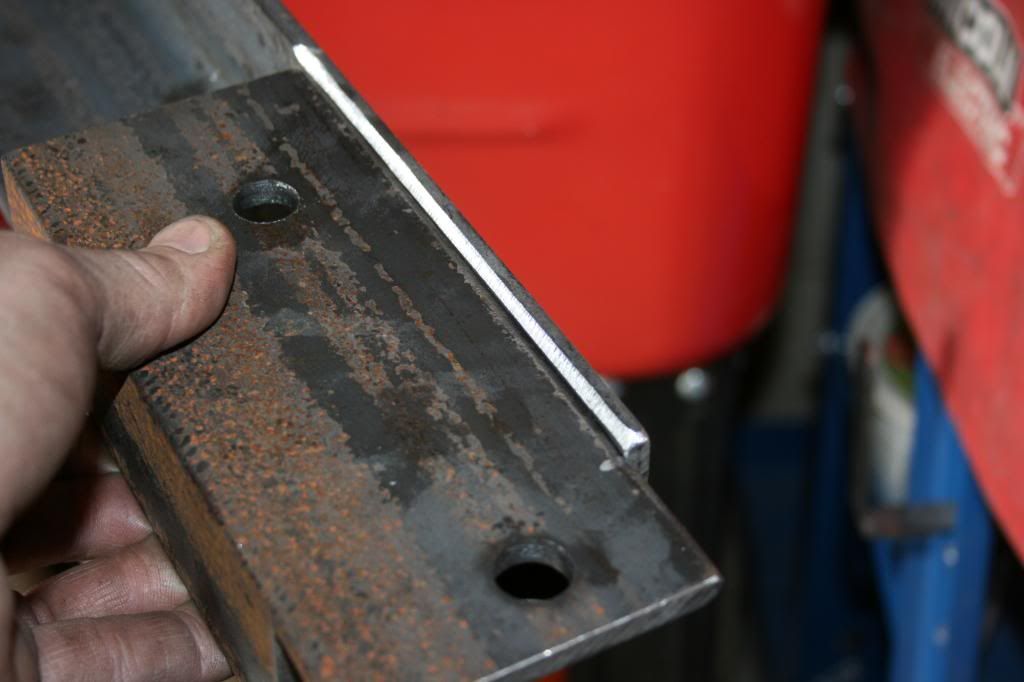

Spotted to hold for a bit
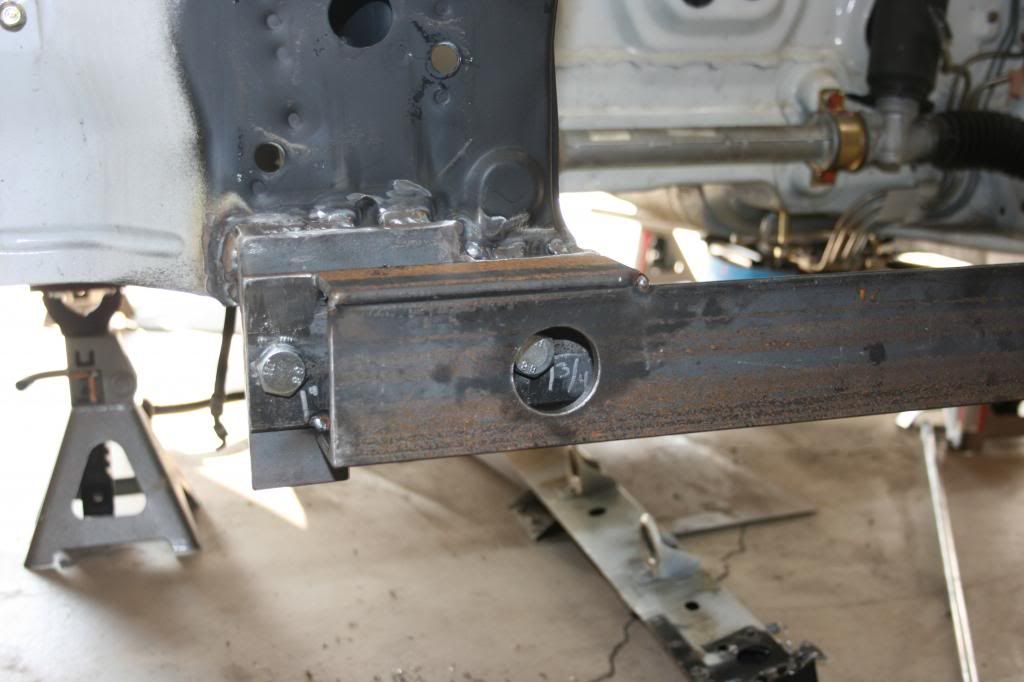
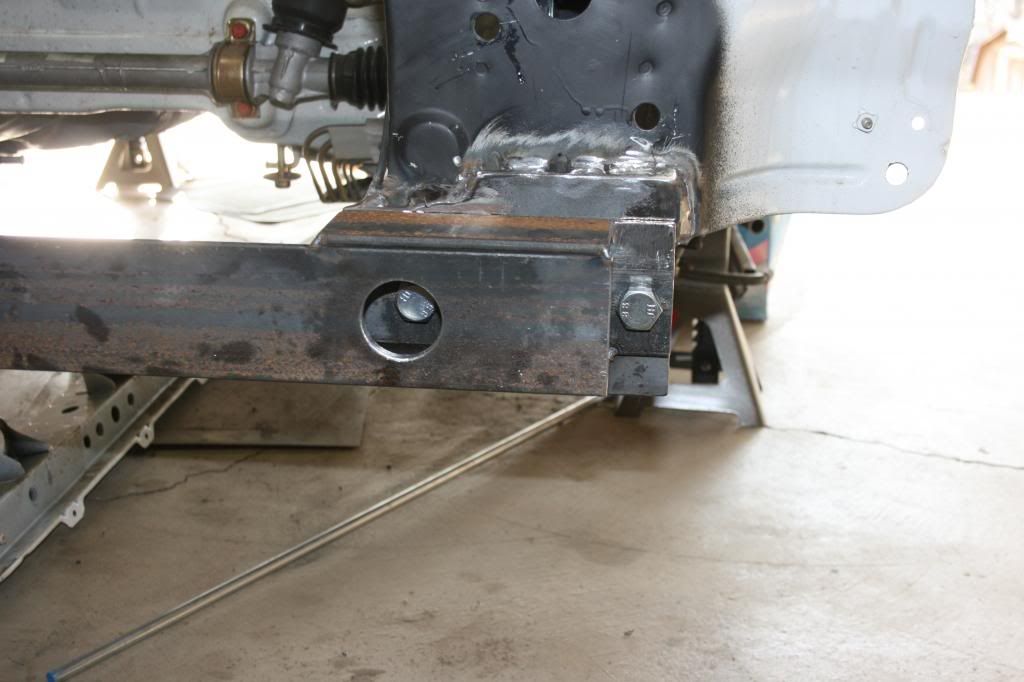

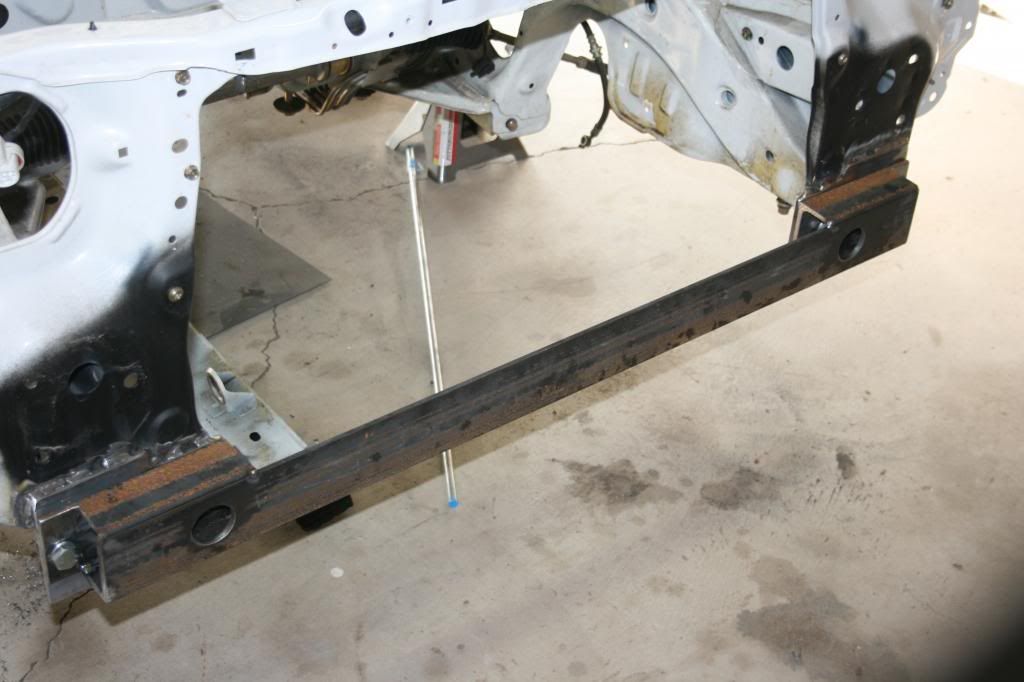
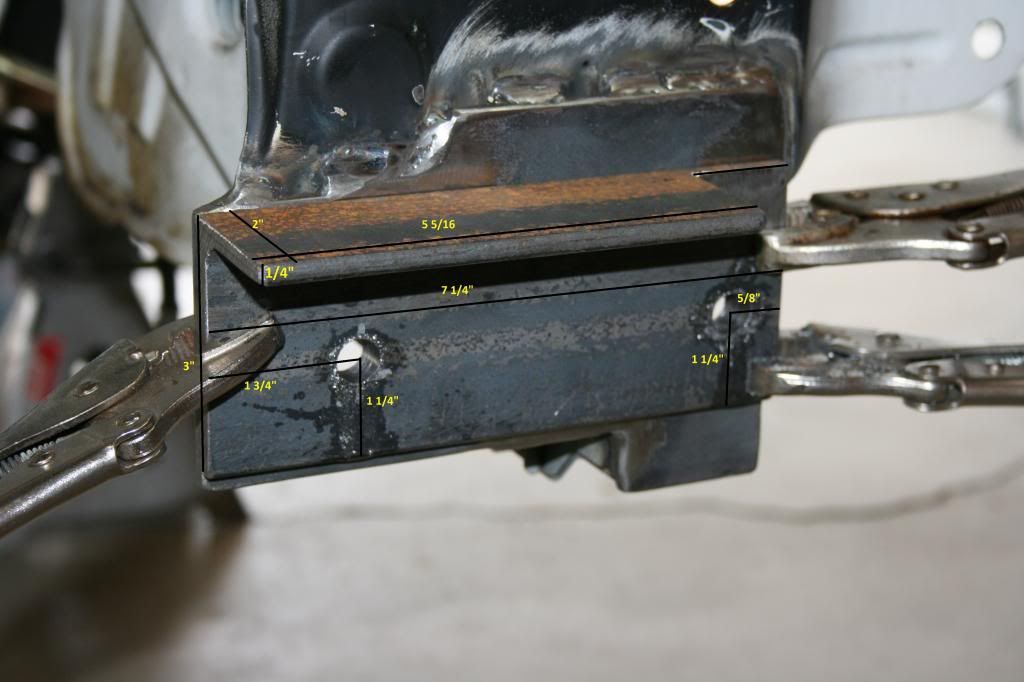
Welded and with loose fit to show removability.


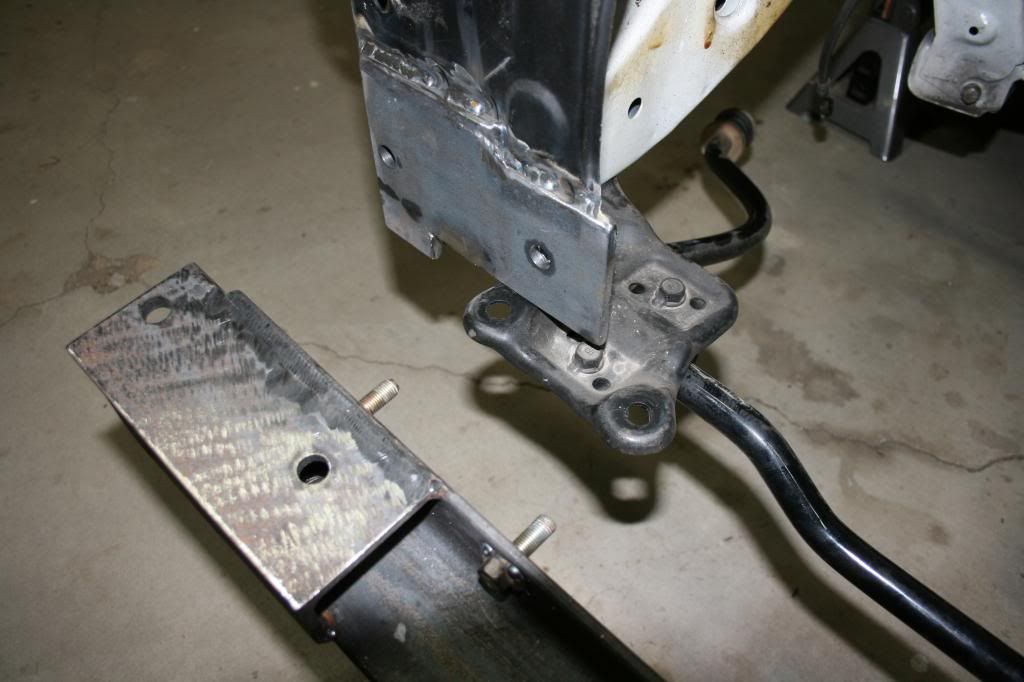
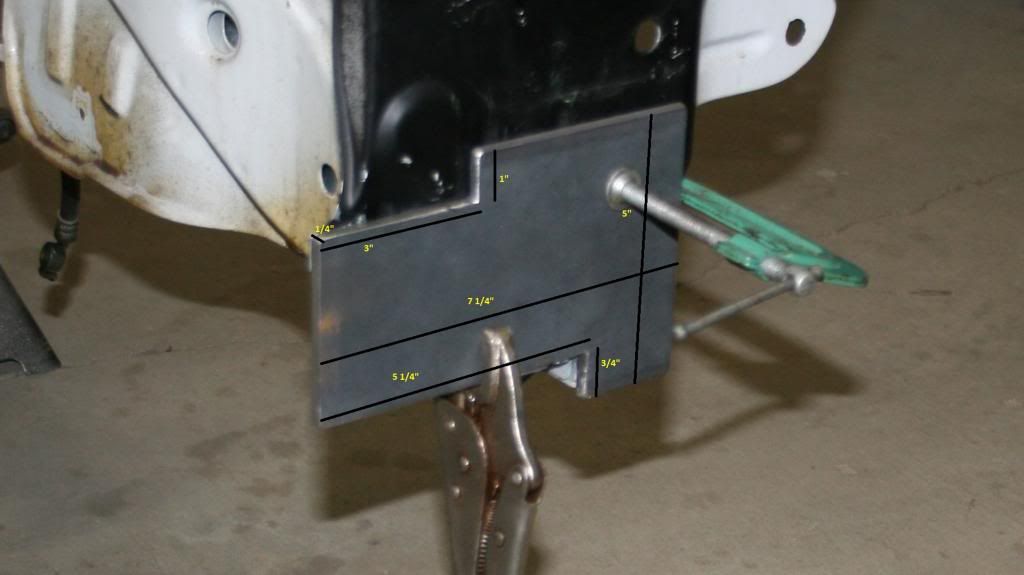
Sway bar bracket bolts drilled in and welded on.
Final fitment is good.
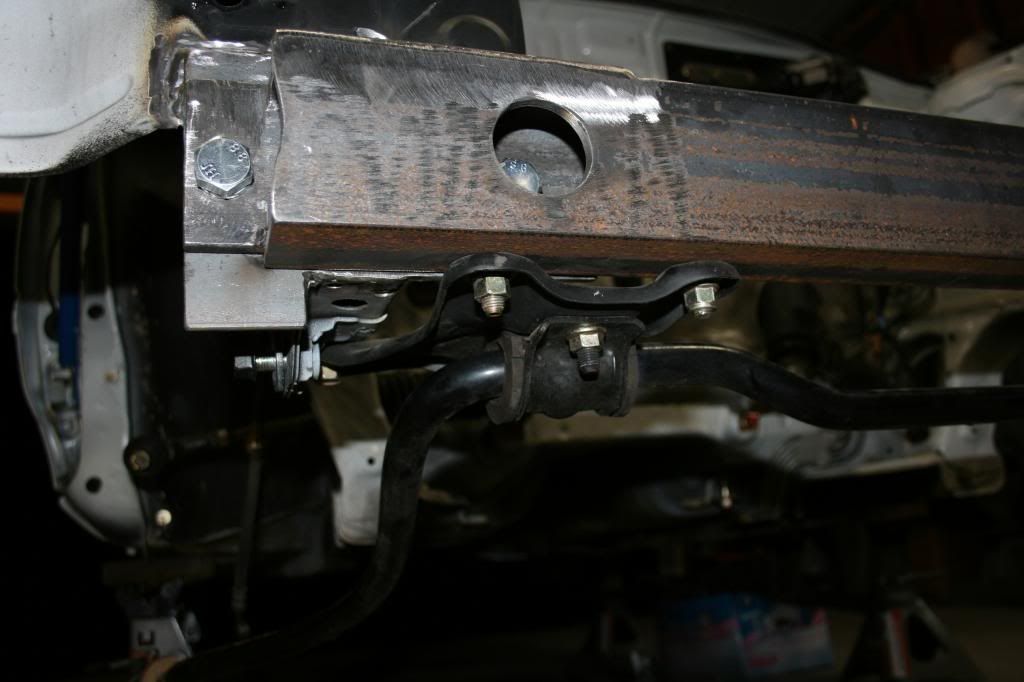

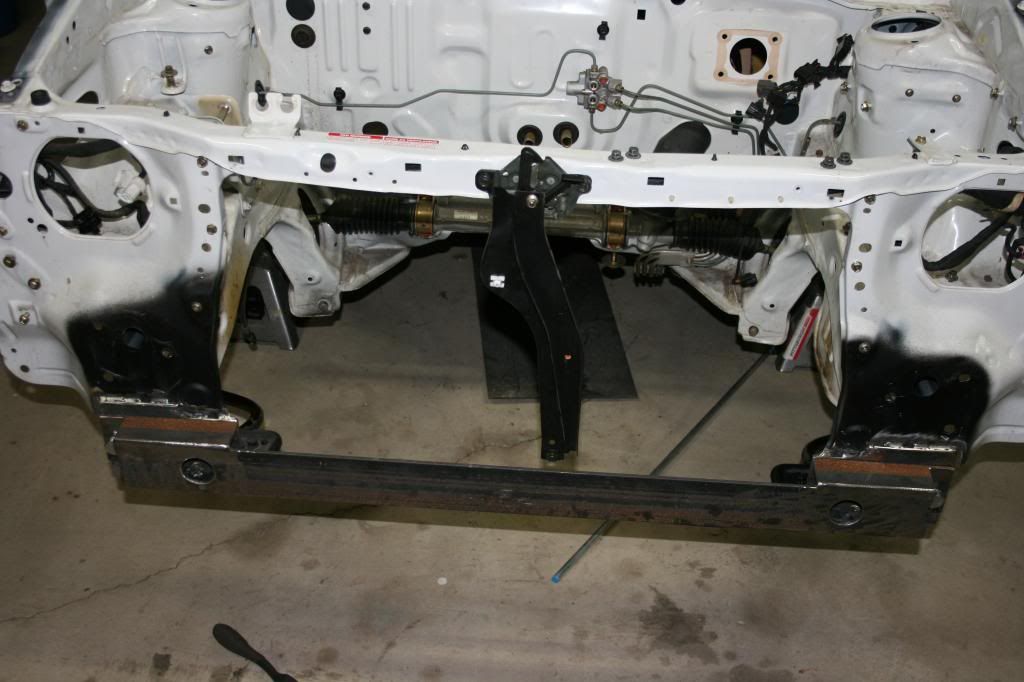
Now All I need to do is get my radiator and intercooler, fit them and I'm good to go. Well almost. Still need to affix the upper rad support bracket to the lower support. Spacing is near exact as I can tell from the upper support bracket to the lower. should be as simple as can be to do that. Also needs the bumper cover plate with the 5 holes in it for the bottom of the cover. Easy stuff. The hardest part is done.
Once everything is mounted I will blast it and powder coat for a nice satin black finish and paint the rest of the engine bay as well. The only hard part of the rest of the build will be the engine mounts. I want them to look either as factory as possible OR as aftermarket as possible. Nothing in between will be accepted. Sometime this summer will be that project.Last edited by Gomez; 04-08-2014, 10:12 PM.-Bryant
Comment
-
Very nice man!! How thick is that angle iron? 1/4"?
1988 323 Station Wagon - KLG4 swapped
1988 323 GT - B6T Powered
2008 Ford Escape - Rollover Survivor
1990 Festiva - First Ever Completed KLZE swap (SOLD)
If no one from the future stops you from doing it, how bad of a decision can it really be?
Comment


Comment